Page 148 of 356

Downloaded from www.Manualslib.com manuals search engine Comfort Controls & Audio Systems
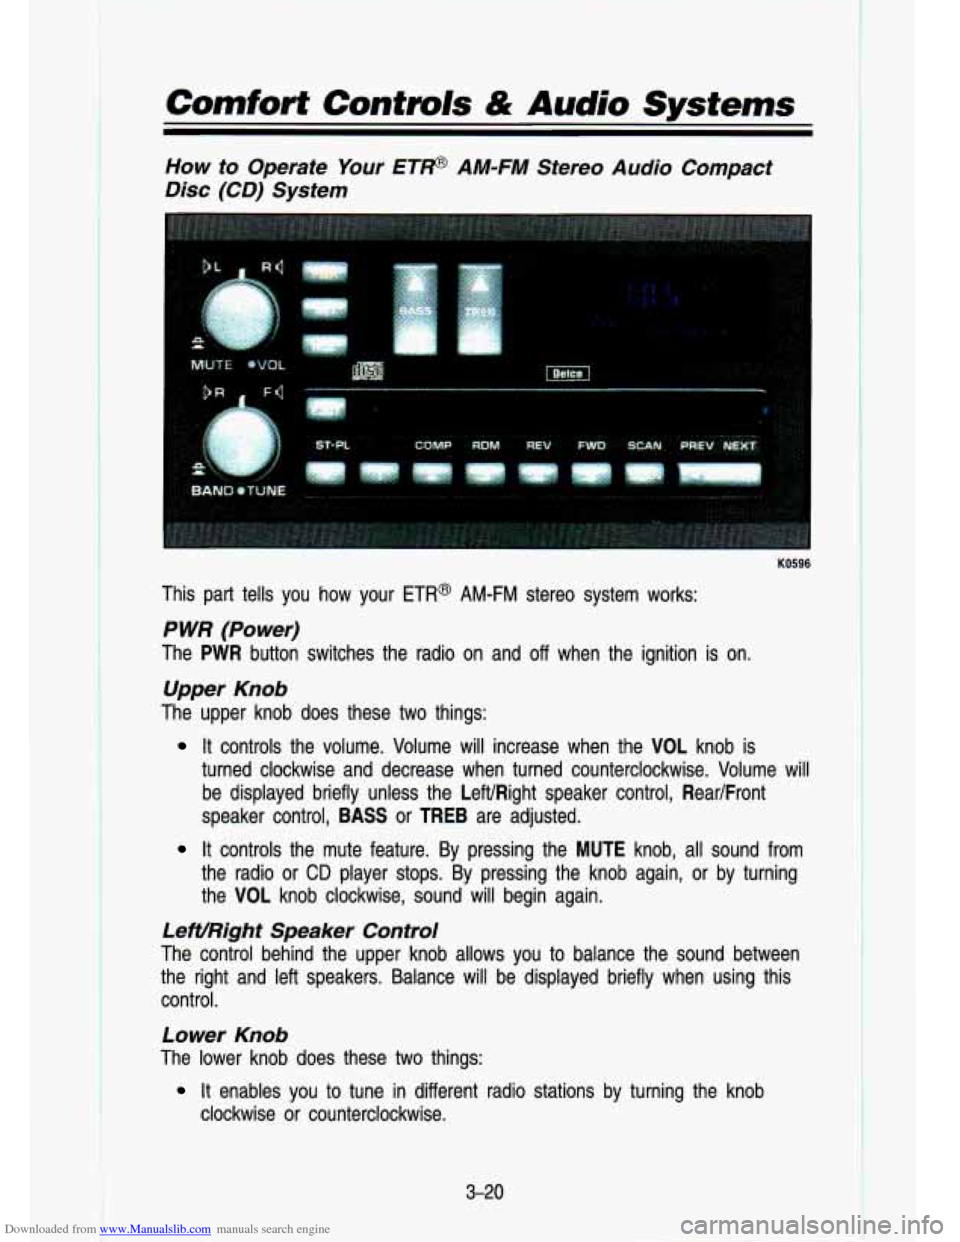
How to Operate Your ETP AM-FM Stereo Audio Compact
Disc (CD) System
KO596
This part tells you how your ETR@ AM-FM stereo system works:
P WR (Power)
The PWR button switches the radio on and off when the ignition is on.
Upper Knob
The upper knob does these two things:
It controls the volume. Volume will increase when the VOL knob\
is
turned clockwise and decrease when turned counterclockwise. Volum\
e will
be displayed briefly unless the LeWRight speaker control, Rear/Front
speaker control,
BASS or TREB are adjusted.
It controls the mute feature. By pressing the MUTE knob, all sound from
the radio or
CD player stops. By pressing the knob again, or by turning
the VOL knob clockwise, sound will begin again.
LeWRight Speaker Control
The control behind the upper knob allows you to balance the s\
ound between
the right and left speakers. Balance will be displayed briefly \
when using this
control.
Lower Knob
The lower knob does these two things:
clockwise or counterclockwise.
It enables you to tune in different radio stations by turning the knob
3-20
Page 149 of 356

Downloaded from www.Manualslib.com manuals search engine It enables you to alternate between AM and FM stations by pressing the
BAND knob. Your selection will be briefly displayed.
RearIFront Speaker Control
The control behind the lower knob fades the sound between your\
front and
rear speakers. Fade levels
will be briefly displayed.
SEEK
Pressing the SEEK b button will cause the receiver to seek the next higher
station and stop.
Pressing the
4 SEEK button will cause the receiver to seek the next lower
station and stop.
SCAN
When you press SCAN, the radio will go to the next station and pause, and
will keep scanning until you press SCAN again.
SC will be displayed when
using this control.
Pushbuttons
The five pushbuttons let you return to favorite stations. They are also used
when you play a disc. (See “To Play
A Compact Disc”.)
To set the pushbuttons for up to ten favorite stations (5 AM and 5 FM):
Tune in the desired station.
* Push the SET button. (SET is displayed briefly.)
Within 5 seconds, push one of the five pushbuttons to store the station.
Whenever you press that button, the preset station will return.\
Clock
To set the clock, just:
Press the SET pushbutton. The radio may be on or off.
Within 5 seconds, press and hold either SEEK b to increase the min-
utes or
4 SEEK to decrease the minutes until the correct minute
appears on the display.
Press and hold SCAN until the correct hour appears on the dis\
play.
3-2 1
RCL
Press the RCL button to alternate between time and radio station on the
display. RCL may be pressed when the ignition is
off to see the time.
Page 173 of 356

Downloaded from www.Manualslib.com manuals search engine car suddenly pulls out from nowhere, or a child darts out from between
parked cars and stops right in front of you. You can avoid these problems by
braking-if you can stop in time. But sometimes you can’t; there isn’t room.
That’s the time for evasive action-steering around the proble\
m.
Your vehicle can perform very well in emergencies like these. First apply your
brakes, but not enough to lock your front wheels.
It is better to remove as much speed as you can from a possible collision.
Then steer around the problem, to the left or right depending on the space
available.
KO444
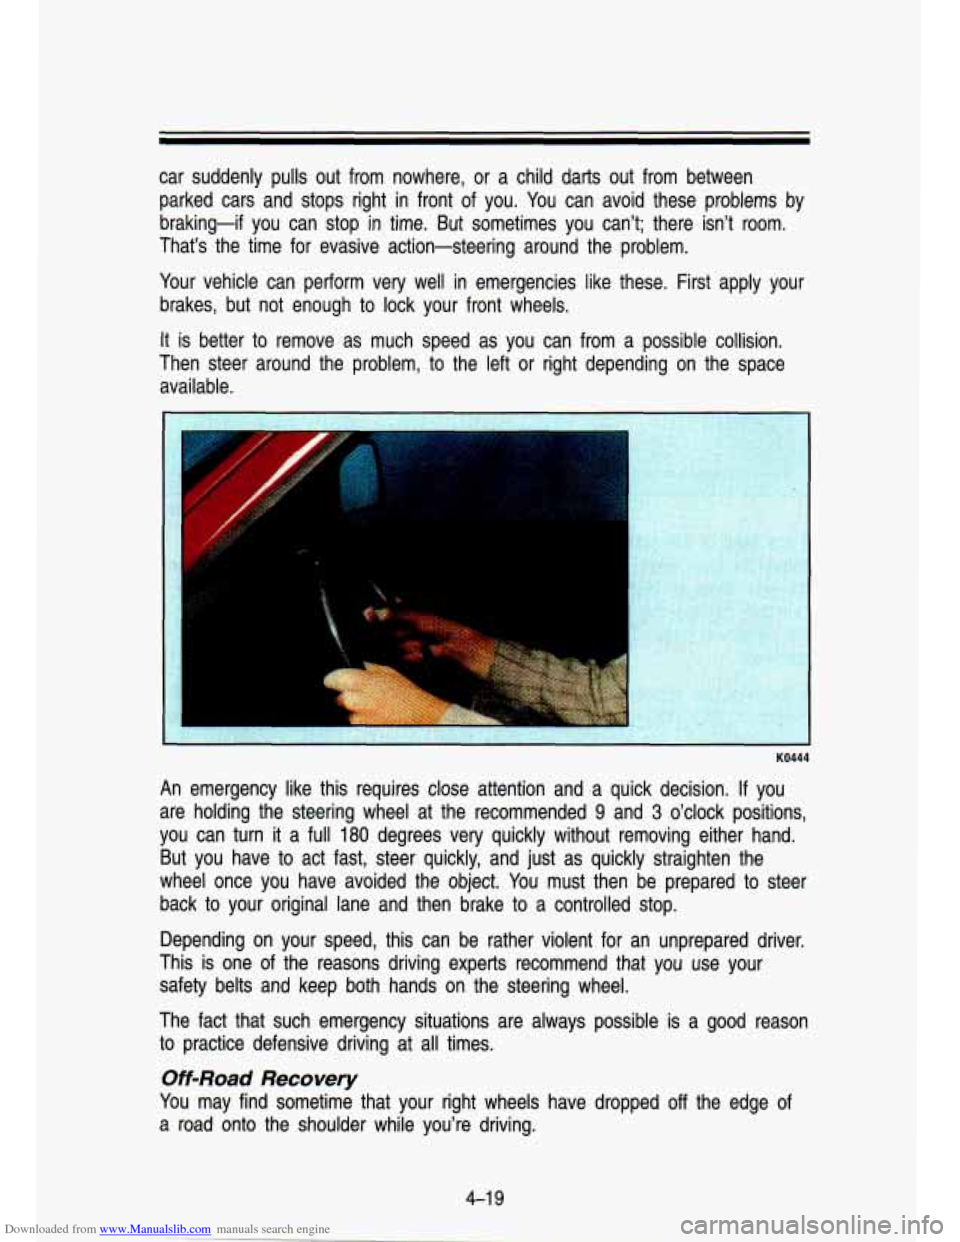
An emergency like this requires close attention and a quick de\
cision. If you
are holding the steering wheel at the recommended
9 and 3 o’clock positions,
you can turn
it a full 180 degrees very quickly without removing either hand.
But you have to act fast, steer quickly, and just as quickly straighten the
wheel once you have avoided the object. You must then be prepared to steer
back to your original lane and then brake
to a controlled stop.
Depending on your speed, this can be rather violent for an un\
prepared driver.
This is one
of the reasons driving experts recommend that you use your
safety belts and keep both hands on the steering wheel.
The fact that such emergency situations are always possible
is a good reason
to practice defensive driving at
all times.
Off-Road Recovery
You may find sometime that your right wheels have dropped off the edge of
a road onto the shoulder while you’re driving.
Page 182 of 356

Downloaded from www.Manualslib.com manuals search engine Your Driving and the Road
Attach a flag to the vehicle to make you more visible to approaching
traffic on trails or hills.
Sound the horn as you approach the top of hill to let opposing traffic
know you’re there.
Use your headlights even during the day. They make you more v\
isible to
oncoming traffic.
* Drivilng to the top (crest) of a hill at full speed can cause an
I accident. There could be a drop-off, embankment, cliff, or even
another vehicle. You could be seriously injured or killed.
As you near
the
top of a hill, slow down and stay alert. I
Q: What should I do if my vehicle stalls, or is about to stall, and I can’t
make
it up the hill?
A: If this happens, there are some things you should do, and there are some
things you must not
do. First, here’s what you should do:
Push the brake pedal to stop the vehicle and keep it from rolling
backwards. Also, apply the parking brake.
If your engine is still running, shift the transmission into rever\
se, release
the parking brake, and slowly back down the hill in reverse.
If your engine has stopped running, you’ll need to restart it. With the
brake pedal depressed and the parking brake still applied, shift the
transmission
to P (Park) (or, shift to N (Neutral) if your vehicle has a
manual transmission) and restart the engine. Then, shift
to R (Reverse),
release the parking brake, and slowly back down the hill in reverse.
As you are backing down the hill, put your left hand on the \
steering
wheel at the
12 o’clock position. This way, you’ll be able to tell if your
wheels are straight or turned
to the left or right as you back down.
Here are some things you must not
do if you stall, or are about to stall,
when going up a hill.
Never attempt to prevent a stall by shifting into N (Neutral) (or
depressing the clutch,
if you have a manual transmission) to “rev-up” the
engine and regain forward momentum. This won’t work. Your vehicle will
roll backwards very quickly and you could go out of control.
4-28
I
Page 237 of 356
Downloaded from www.Manualslib.com manuals search engine Changing the Tire
Start with the jack, wheel wrench and wheel blocks. Rotate the jackhandle clockwise (to the right). That, will ra\
ise the jack lift head
a little.
F
F
I
KO503
Before you start, block the front and rear of the tire farthest away from the
one being changed. Then put your spare tire near the flat tire.
5-2 1
Page 240 of 356
Downloaded from www.Manualslib.com manuals search engine Problems on the Road
KO751
Raise the vehicle by rotating the jackhandle clockwise. Raise the vehicle far
enough off--hke.-ground
so there is enough. room for the spare tire to fit.
d
PO1 71
Remove all the wheel nuts and take off the flat tire.
5-24
Page 242 of 356
Downloaded from www.Manualslib.com manuals search engine Problems on the Road
Put on the spare tire.
KO755
Replace the wheel nuts with the rounded end of the nuts toward the wheel.
Tighten each nut by hand until the wheel is held against the \
hub.
. ,~ , ._ i . , 9,; ;. - , .
KO757
Lower the vehicle by rotating the jackhandle counterclockwise. L\
ower the jack
completely.
Page 243 of 356

Downloaded from www.Manualslib.com manuals search engine 1
I
KO758
Tighten the wheel nuts firmly in a criss-cross sequence as shown. Remove
the wheel blocks.
A
Incorrect wheel nuts or improperly tightened wheel nuts can cause
the wheel to become loose and even come
off. This could lead to
an accident. Be sure to use the correct wheel nuts. If you have to
replace them, be sure
to get the right kind.
Stop somewhere as soon as you can and have the nuts tightened
with
a torque wrench to 95 ft. Ibs. (1 30 N.m ).
Storing The Tire in The Underbody Carrier
Put the tire on the ground at the rear of the vehicle, with the valve stem
pointed down and to the rear.
Pull the retaining bar through the wheel. Put the chisel end
of the wheel
wrench, on an angle, through the hole in the rear bumper and into the hoist
shaft. Turn the wheel wrench clockwise until the tire is raised against the
underside of the vehicle.
You will hear two “clicks” when the tire is secure,
but pull on the tire to
make sure.
5-27