Page 297 of 386

Service & Appearance Care
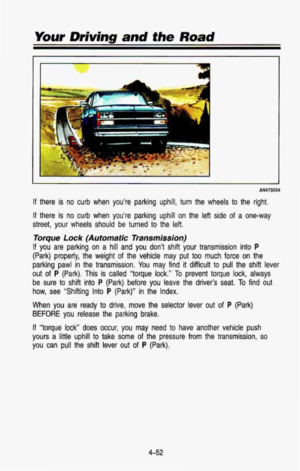
Brake Master Cylinder
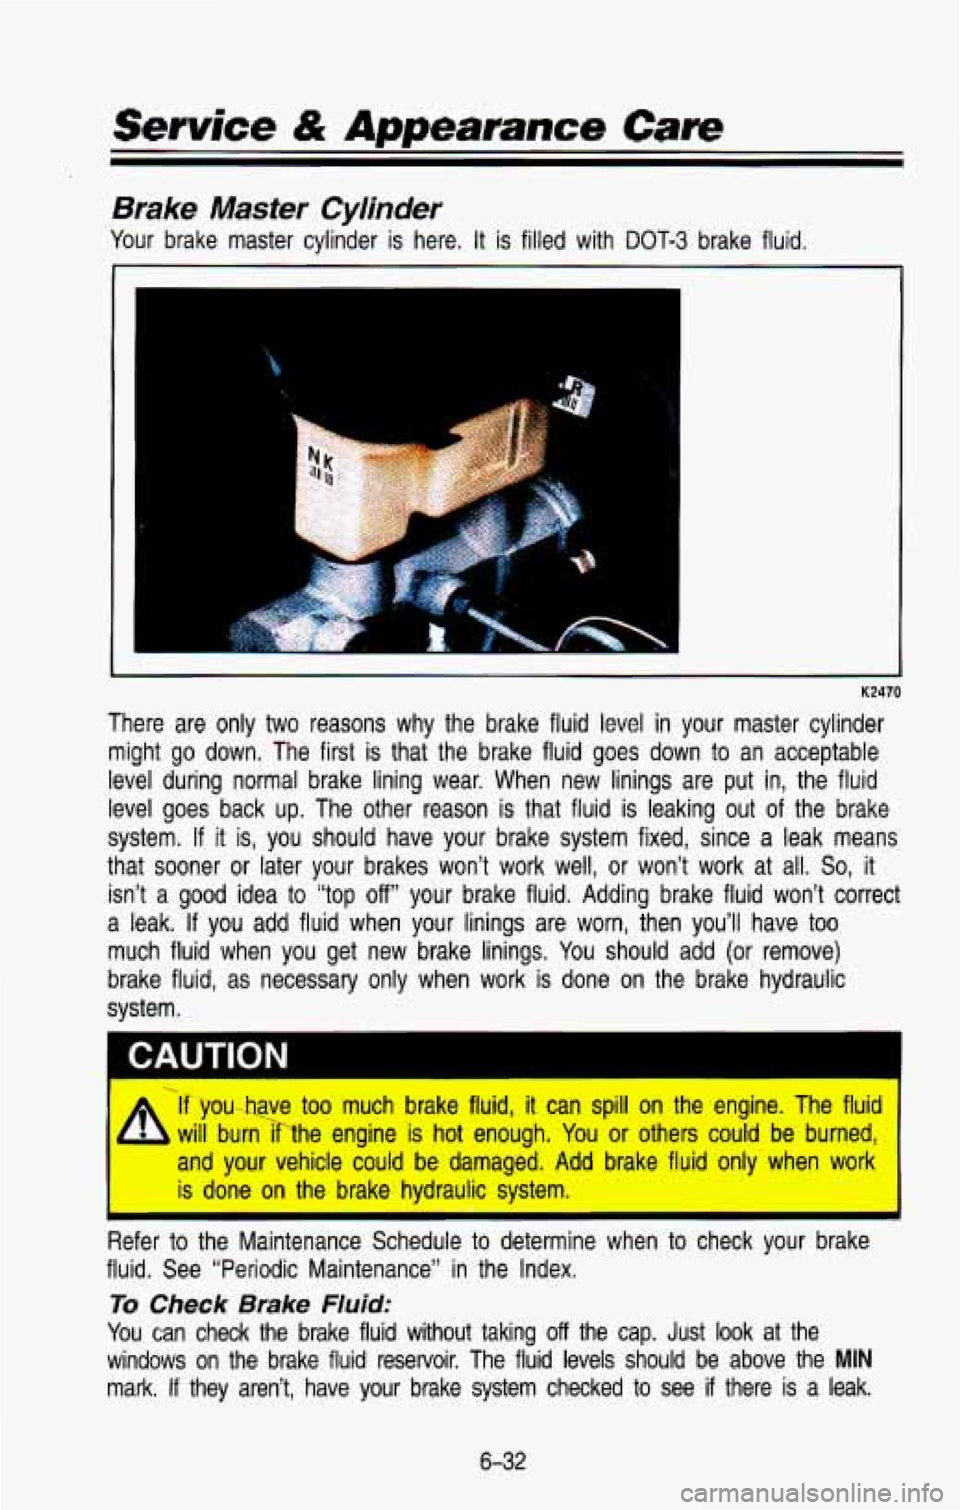
Your brake master cylinder is here. It is filled with DOT-3 brake fluid.
P
K2470
There are only two reasons why the brake fluid level in your master cylinder
might go down. The first is that the brake fluid goes down to an acceptable
level during normal brake lining wear. When new linings are put in, the fluid
level goes back up. The other reason is that fluid is leaking out of the brake
system.
If it is, you should have your brake system fixed, since a leak means
that sooner or later your brakes won’t work well, or won’\
t work at all.
So, it
isn’t a good idea to “top
off your brake fluid. Adding brake fluid won’t correct
a leak.
If you add fluid when your linings are worn, then you’ll have \
too
much fluid when you get new brake linings. You should add (or remove)
brake fluid, as necessary only when work is done on the brake hydraulic
system.
.
4 If you---have too much brake fluid, it can spill on the engine. The fluid
will burnhhe engine is hot enough. You or others could be burned,
and your vehicle could be damaged. Add brake fluid only when \
work
is done on the brake hydraulic system.
Refer to the Maintenance Schedule to determine when to check your brake
fluid. See “Periodic Maintenance” in the Index,
To Check Brake Fluid:
You can check the brake fluid without taking off the cap. Just look at the
windows on the brake fluid reservoir. The fluid levels should \
be above the
MIN
mark. If they aren’t, have your brake system checked to see if there is a leak.
6-32
Page 298 of 386

After work is done on the brake hydraulic system, make sure t\
he levels are
above
MIN and below the top of each window.
What To Add:
When you do need brake fluid, use only DOT-3 brake fluid-such \
as Delco
Supreme 11
@ (GM Part No. 1052535). Use new brake fluid from a sealed
container only.
NOTICE
DOT-5 silicone brake fluid can damage your vehicle. Don’t use it.
Don’t let someone put in the wrong kind of fluid. For example, just a
few drops
of mineral-based oil, such as engine oil, in your brake
-]stem can damaae brake svstem parts
so badlv that 1 fll have to
be replaced.
Brake fluid can damage paint, so be careful nor IO spit1 Drake fluid on
your vehicle.
Hydro-Boost Brake System (Hydraulic Pump)
The power steering pump is also used as the Hydro-boost pump. \
Refer to “Power Steering System” in this section when checking flui\
d level
or adding fluid.
Replacing Brake System Parts
The braking system on a modern vehicle is complex. Its many parts have to
be of top quality and work well together
if the vehicle is to have really good
braking. Vehicles we design and test have top-quality
GM brake parts in
them, as your vehicle does when
it is new. When you replace parts of your
braking system-for example, when your brake linings wear down and you
have to have new ones put in-be sure you get new genuine
GM
replacement parts. If you don’t, your brakes may no longer work properly. For
example,
if someone puts in brake linings that are wrong for your vehicle, the
balance between your front and rear brakes can change, for the\
worse. The
braking performance you’ve come to expect can change in many other ways
if someone puts in the wrong replacement brake parts.
6-33
Page 299 of 386

Service & Appearance Care
Front Suspension and Steering Linkage
Your maintenance schedule will tell you how often to lubricate the fittings. See
“Recommended Fluids and Lubricants” in the Index for the \
proper lubricant to
use.
Front Wheel Bearings
Your vehicle has front wheel bearings that must be cleaned and repa\
cked.
Your maintenance schedule will
tell you how often this must be done.
Front Shock Absorbers
The front shock absorbers of your vehicle do many things. They help the
vehicle ride smoothly and also control the travel of the suspension system.
When the shock absorbers are serviced, any replacement shock ab\
sorbers must be the same as the original equipment shock absorbers in \
both
extended length and strength.
Wheel Nut Torque
For vehicles with dual wheels, when the vehicle, wheel or fast\
eners are new,
have the torque set at the first
100, 1,000 and 6,000 miles (160, 1600 and
9600 km). Use the torque specified in the appropriate Specification \
Chart later
in this section.
Single Belt Accessory Drive
If your new vehicle uses a serpentine belt, it is lighter, and more durable
than systems with several belts.
The belt runs over or around the pulleys on the engine.
A tensioner is used
to keep the belt tight at all times. The tensioner also makes replacing the
belt easier. If you need
to replace the belt, be sure to get the correct
replacement belt. Your dealership or parts supplier can help you with this.
The Accessory Drive Belt Routing label on your vehicle will sh\
ow you how to route the belt your vehicle uses.
6-34
Page 300 of 386

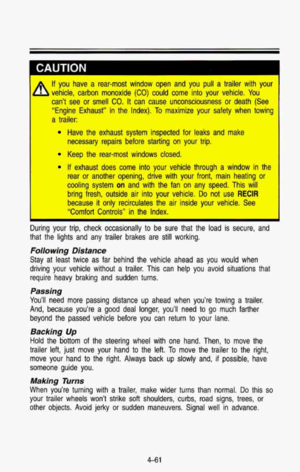
Windshield Wiper Blade lnserfs
J
PO232
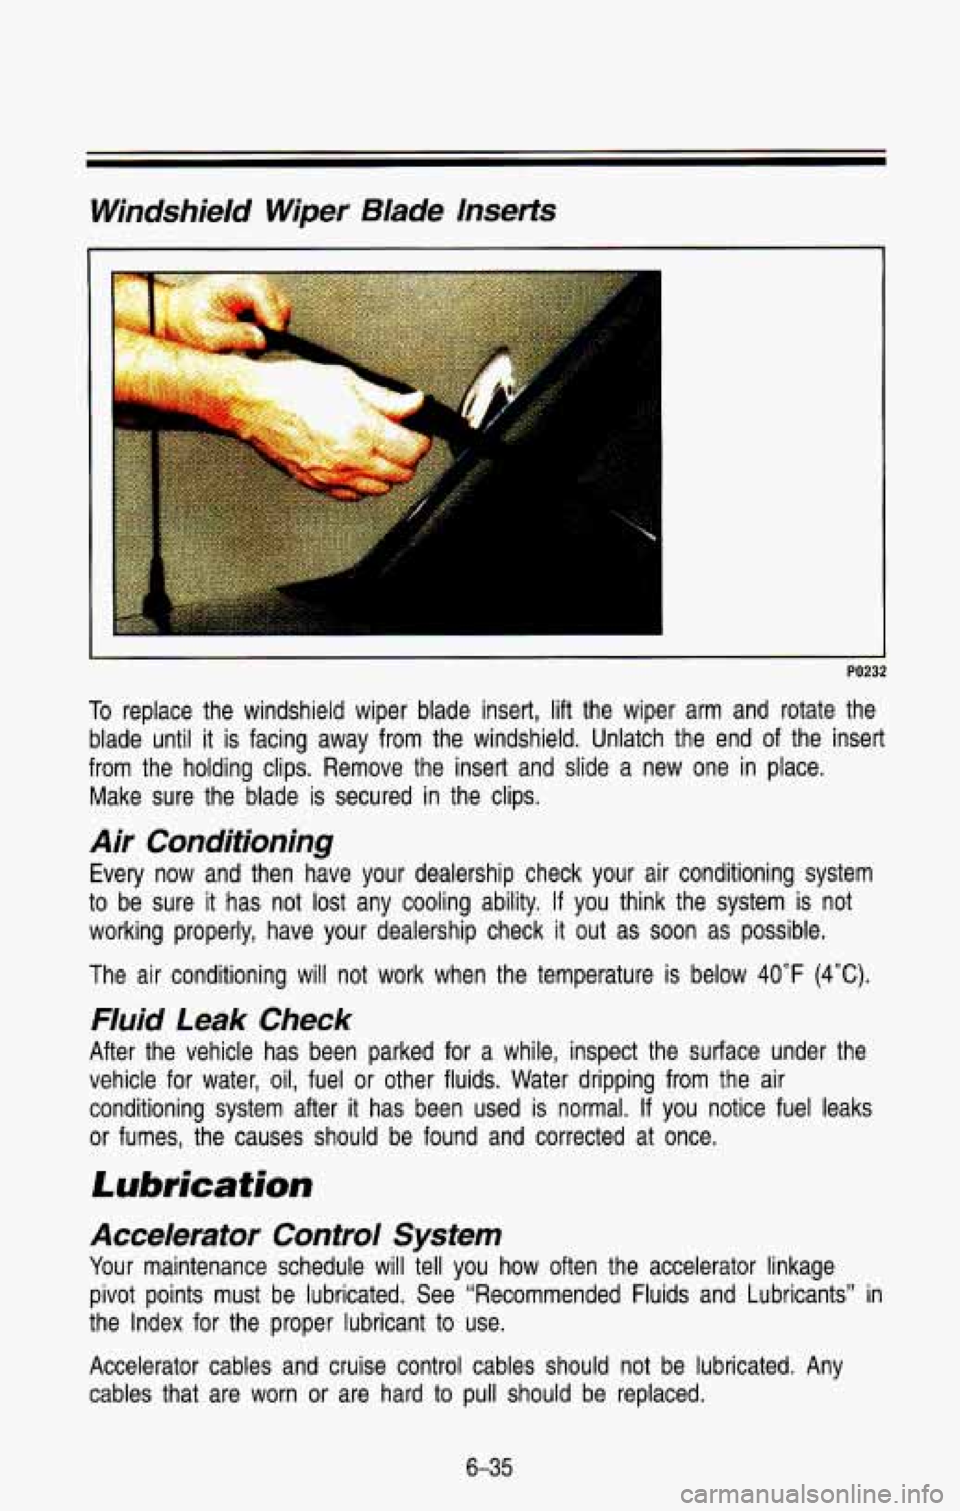
To replace the windshield wiper blade insert, lift the wiper arm and rotate the
blade until
it is facing away from the windshield. Unlatch the end of the insert
from the holding clips. Remove the insert and slide a new one in place,
Make sure the blade
is secured in the clips.
Air Conditioning
Every now and then have your dealership check your air conditioning system
to be sure it has not lost any cooling ability,
If you think the system is not
working properly, have your dealership check
it out as soon as possible.
The air conditioning will not work when the temperature is below
40°F (4°C).
Fluid Leak Check
After the vehicle has been parked for a while, inspect the su\
rface under the
vehicle for water, oil, fuel or other fluids. Water dripping from the air
conditioning system after
it has been used is normal. If you notice fuel leaks
or fumes, the causes should be found and corrected at once.
Lubrication
Accelerator Control System
Your maintenance schedule will tell you how often the accelerator linkage
pivot points must be lubricated. See “Recommended Fluids and Lubric\
ants”
in
the Index for the proper lubricant to use.
Accelerator cables and cruise control cables should not be lubr\
icated. Any
cables that are worn or are hard to pull
should be replaced.
6-35
Page 301 of 386

Service & Appearance Care
Hood Laiches and Hood Hinge
Your maintenance schedule will tell you how often to lubricate the hood latch
and hood hinge assembly. See “Recommended Fluids and Lubrican\
ts” in the
Index for the proper lubricant to use.
Propeller Shaft Slip Splines
See your maintenance schedule to find out how often the slip \
splines must
be lubricated, See “Recommended Fluids and Lubricants” in the Index for the
proper lubricant to use.
Constant Velocity Joints
See your maintenance schedule to find out how often the consta\
nt velocity
joints must be lubricated. See “Recommended Fluids and Lubricants”\
in the
Index for the proper lubricant to use.
Body
Normal use of your vehicle will cause metal to metal wear at some points on
the cab and body
if they are not lubricated.
For exposed surfaces, such as door checks, door lock bolts, lo\
ck striker
plates, dovetail bumper wedges, etc., a thin film of engine oil should be
applied.
The seat adjusters and seat track should be lubricated with ch\
assis grease, Door weather strips and rubber hood bumpers should be lightly \
coated with a
rubber lubricant.
Never use too much of any lubricant and be sure to wipe up any extra
lubricant when you are finished.
Your maintenance schedule will tell you how often to lubricate these items.
See “Recommended Fluids and Lubricants” in the Index
for the proper
lubricant to use.
Lock Cylinders
To be sure your locks operate properly, they must be lubricated, Your
vehicle’s maintenance schedule will tell you how often
to lubricate them. See
“Recommended Fluids and Lubricants”
in the Index for the proper lubricant to
use.
You should not use penetrating oils because they could wash out the factory
installed lubricant and cause the lock to bind. De-icers which contain alcohol
could also wash away the lubricant,
so be sure to lubricate the lock after
using a de-icer
of this type.
6-36
Page 302 of 386

Tailgate Handle
The tailgate handle pivot points on your vehicle should be lubricated to keep
it working smoothly.
Your maintenance schedule will tell you how often to lubricate the handle.
See “Recommended Fluids and Lubricants”
in the Index for the proper
lubricant
to use.
Efectricaf System
Battery
Every new GM vehicle has
add water
to one of these,
a Delco Freedom@ battery.
the original battery’s label.
Vehicle Storage
If you’re not going to drive a Delco Freedom@ battery. You never have
to
When it’s time for a new battery, we recommend
Get one that has the catalog number shown on
your vehicle for 25 days or more, take off the
black, negative
(-) cable from the battery. This will help keep your battery
from running down.
--
CAUTION
1 Batteries have acid that can burn you and gas that can explode. You I
, - , can be badly hurt if you aren’t careful. See “Jump Starting” in the
Index
for tips on working around a battery without getting hurt.
on'^ your dealer to learn how to prepare your vehicle for longer periods.
Bulb Rep/acement
Before you replace any bulbs, be sure that all the lights are off and the
engine isn’t running.
6-37
Page 303 of 386
P
Service & Appearance Care
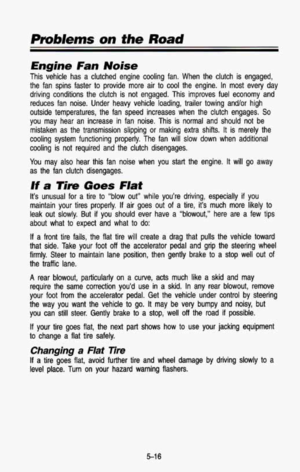
Sealed Beam Headlights
-.
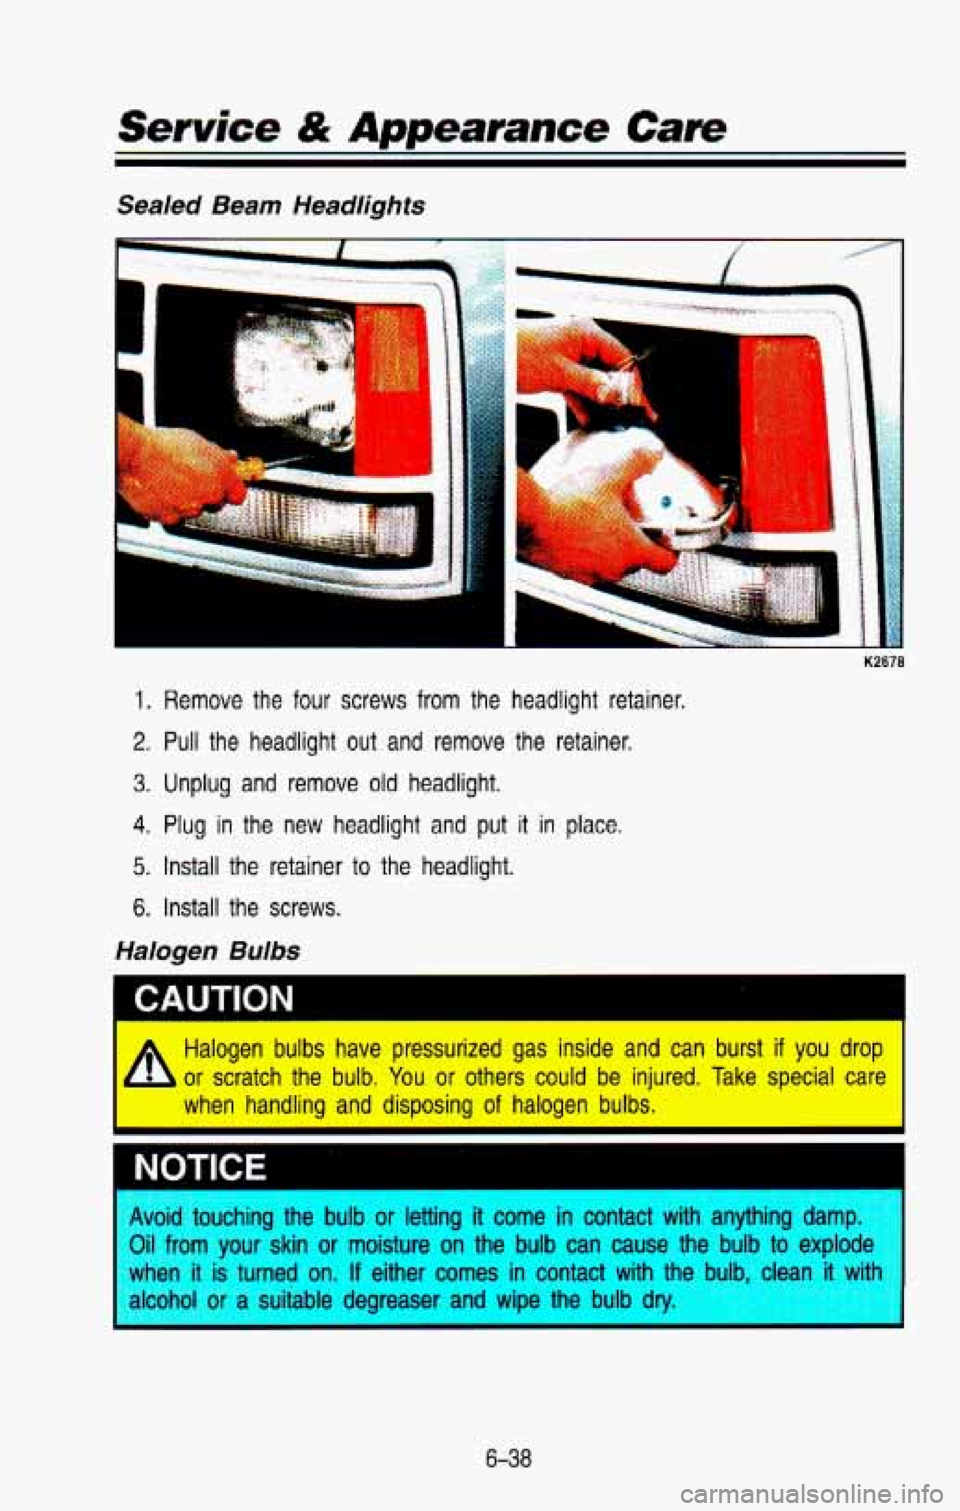
1. Remove the four screws from the headlight retainer.
2. Pull the headlight out and remove the retainer.
3. Unplug and remove old headlight.
4. Plug in the new headlight and put it in place.
5. Install the retainer to the headlight.
6. Install the screws.
Halogen Bulbs
Halogen bulbs have pressurized gas inside and can burst if you drop
or scratch the bulb.
You or others could be injured. Take special car€
when handling and disposing
of halogen bulbs.
CAUTION I
NOTICE I
Avoid touching the bulb or letting it come in contact with anything da.. .~-
Oil from your skin or moisture on the bulb can cause the bulb to explode
when
it is turned on. If either comes in contact with the bulb. clean it v
alcohol or suitable deareaser and wiDe the bulb dry.
6-38
Page 304 of 386
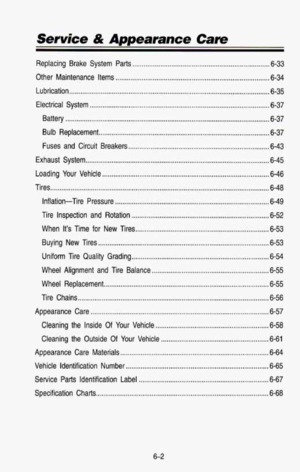
Composite Headlights
1
PO2
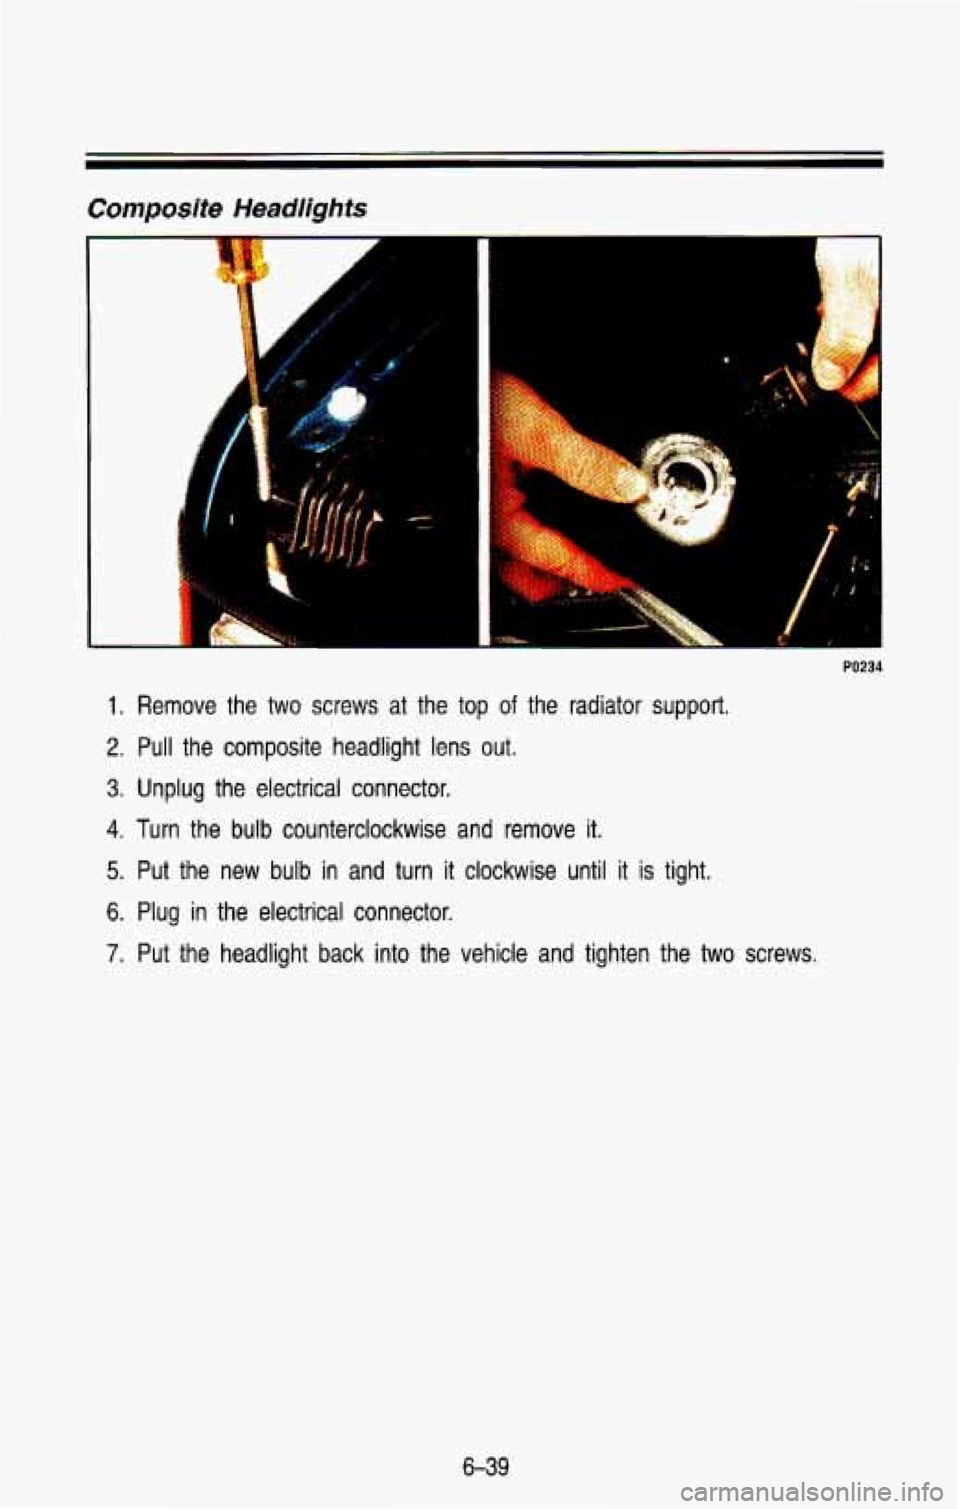
1. Remove the two screws at the top of the radiator support.
2. Pull the composite headlight lens out.
3. Unplug the electrical connector.
4. Turn the bulb counterclockwise and remove it.
5. Put the new bulb in and turn it clockwise until it is tight.
6. Plug in the electrical connector.
7. Put the headlight back into the vehicle and tighten the two screws.
6-39