1993 CHEVROLET ASTRO PASSENGER service
[x] Cancel search: servicePage 277 of 345

Downloaded from www.Manualslib.com manuals search engine The Maintenance Schedule will tell you how often to lubricate these items.
See “Recommended Fluids and Lubricants” in the Index for the proper
lubricant to use.
Lock Cylinders
To be sure your locks operate properly, they must be lubricated. \
The
Maintenance Schedule will tell you how often to lubricate them. See
“Recommended Fluids and Lubricants” in the Index for the \
proper lubricant to use.
You should not use penetrating oils because they could wash out th\
e factory
installed lubricant and cause the lock to bind. De-icers which \
contain alcohol
could also wash away the lubricant,
so be sure to lubricate the lock after
using a de-icer
of this type.
Exhaust System
To help prevent damage to your exhaust system, do not continue to drive
your vehicle
if you notice:
Engine misfiring
Loss of performance
Other unusual operating conditions
Have your engine and exhaust system serviced regularly.
Three- Way Catalytic Converter
Your vehicle’s three-way catalytic converter is designed to reduce the
pollutants in your vehicle’s exhaust. Use only unleaded fuel in your vehicle.
If
you use leaded fuel, you could damage your three-way catalytic \
converter,
and other emission control components.
Malfunction Indicator Lamp (SERVICE ENGINE SOON light)
The Malfunction Indicator Lamp (SERVICE ENGINE SOONlight) on y\
our instrument panel lets you know when your emission system needs \
service.
The light will come on briefly when you start your engine to let you know
that the system is working.
If it does not come on when you start your
engine, or
if it comes on and stays on while you’re driving, your system \
may
need service. Your vehicle should still be driveable, but you should have your
system serviced right away.
6-41
Page 278 of 345

Downloaded from www.Manualslib.com manuals search engine Service & Appearance Care
Loading Your Vehicle
K3651
The Certificationrrire label is found on the rear edge of the driver’s door. The
label shows the size of your original tires and the inflation pressures needed
to obtain the gross vehicle weight capacity of your vehicle. This is called the
GVWR (Gross Vehicle Weight Rating). The GVWR includes the weight of the
vehicle, all occupants, fuel and cargo.
The Certificationflire label also tells you the maximum weights for the front
and rear axles, called Gross Axle Weight Rating (GAWR).
To find out the
actual loads on your front and rear axles, you need
to go to a weigh station
and weigh your vehicle. Your dealer can help you with this. Be sure
to
spread out your load equally on both sides of the centerline.
Never exceed the GVWR for your vehicle, or the Gross Axle Wei\
ght Rating
(GAWR) for either the front or rear axle.
And,
if you do have a heavy load, you should spread it out.
Do not load your vehicle any heavier than the GVWR or the
- maximum front and rear GAWRs. If you do, parts on your vehicle
can break, or
it can change the way your vehicle handles. These
could cause you
to lose control. Also, overloading can shorten the
life
of your vehicle. I
6-42
Page 283 of 345
Downloaded from www.Manualslib.com manuals search engine Tire Inspection and Rotation
To make your tires last longer, have them inspected and rotated a\
t the
mileages recommended in the Maintenance Schedule. See “Scheduled
Maintenance Services” in the Index.
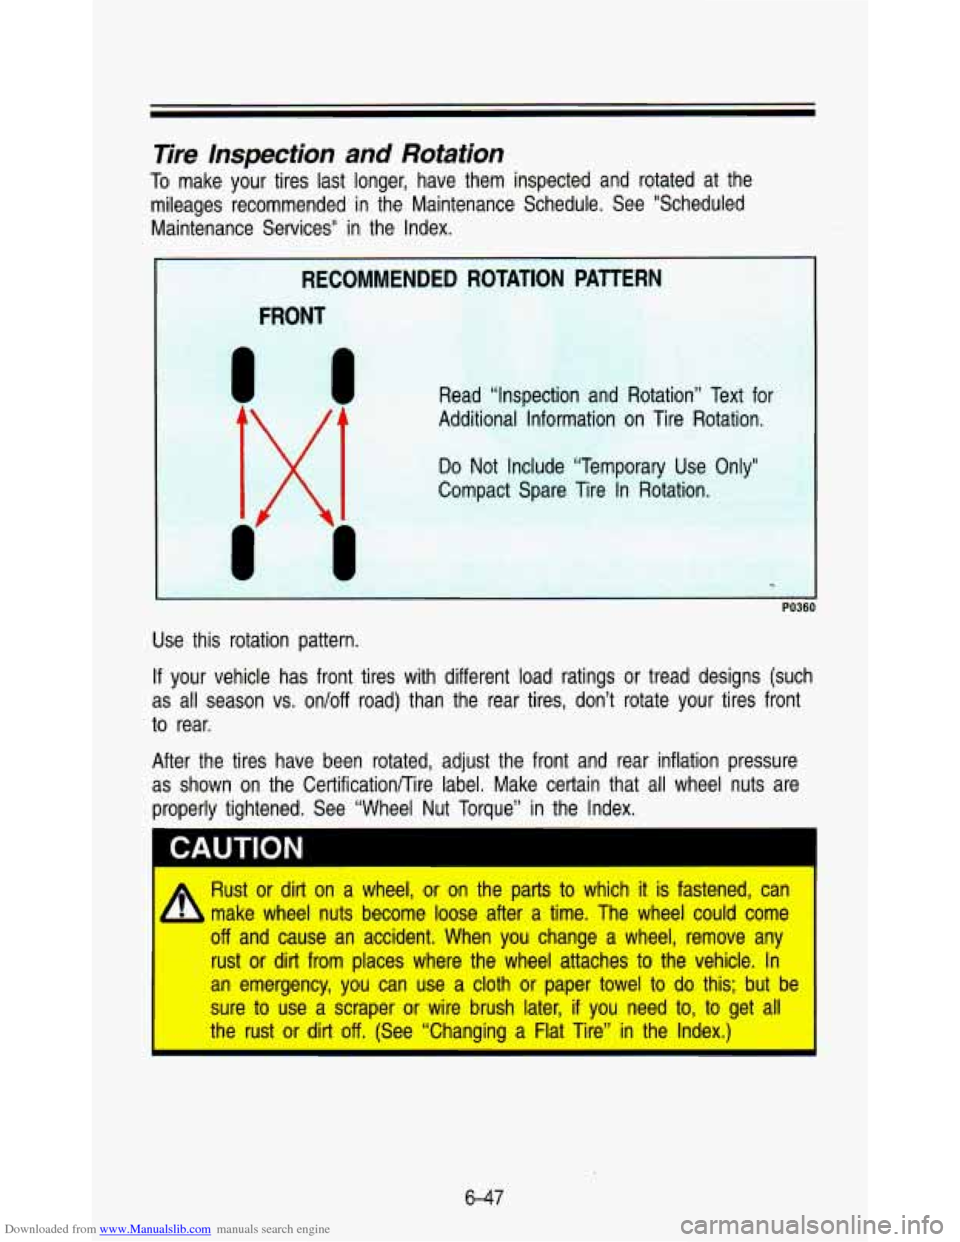
Use this rotation pattern.
If your vehicle has front tires with different load ratings or tread designs (such
as all season vs. on/off road) than the rear tires, don’t \
rotate your tires front
to rear.
After the tires have been rotated, adjust the front and rear inflation pressure
as shown on the CertificationRire label. Make certain that all wheel nuts are
properly tightened. See “Wheel Nut Torque” in the Index.
CAUTION I
Rust or dirt on a wheel, or on the parts to which it is fastened, can
make wheel nuts become loose after a time. The wheel could come
.. off and cause an accident. When you change a wheel, remove an\
y
- - .-..-rust. -o,r dit-.from places where the wheel attaches to the vehicle. In
an emergency, you can use a cloth or paper towel to
do this; but be
sure
to use a scraper or wire brush later, if you need to, to get all
the rust or dirt off. (See “Changing a Flat Tire” in the Index.)
I
6-47
Page 284 of 345
Downloaded from www.Manualslib.com manuals search engine Sewice & Appearance Cam
When lt3 Time for New Tires
K1656
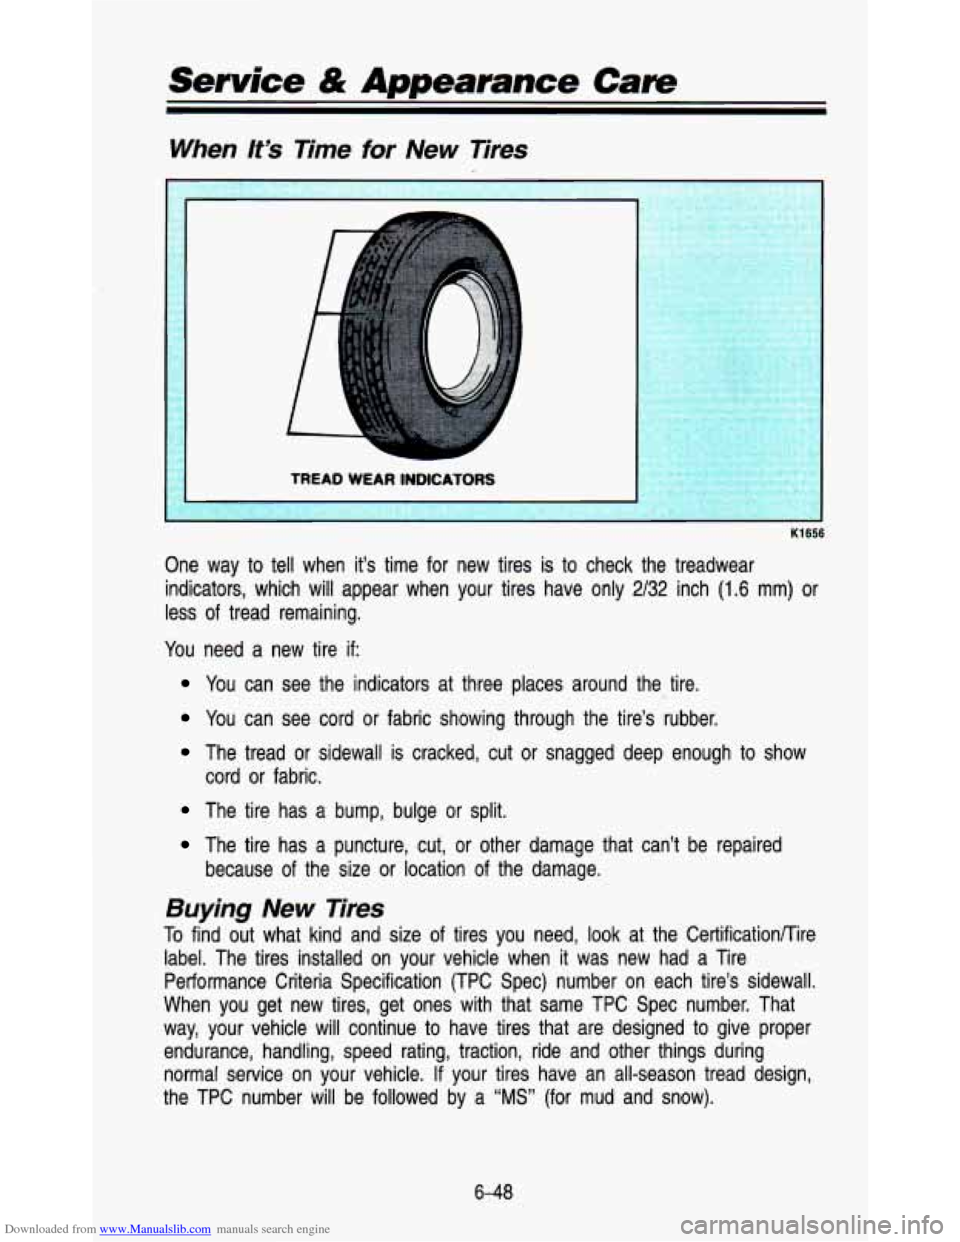
One way to tell when it’s time for new tires is to check the treadwear
indicators, which will appear when your tires have only
2/32 inch (1.6 mm) or
less of tread remaining.
You need a new tire
if:
You can see the indicators at three places around the tire.
You can see cord or fabric showing through the tire’s rubber.
The tread or sidewall is cracked, cut or snagged deep enough to show
The tire has a bump, bulge or split.
cord
or fabric.
The tire has a puncture, cut, or other damage that can’t be repaired
because of the size or location of the damage.
Buying New Tires
To find out what kind and size of tires you need, look at the CertificationRire
label. The tires installed on your vehicle when
it was new had a Tire
Performance Criteria Specification (TPC Spec) number on each t\
ire’s sidewall.
When you get new tires, get ones with that same TPC Spec num\
ber. That
way, your vehicle will continue to have tires that are designed to give proper
endurance, handling, speed rating, traction, ride and other thin\
gs during normal service on your vehicle. If your tires have an all-season tread design,
the
TPC number will be followed by a “MS” (for mud and snow).
6-48
Page 285 of 345
Downloaded from www.Manualslib.com manuals search engine If you ever replace your tires with those not having a TPC Spec \
number,
make sure they are the same size, load range, speed rating an\
d construction
type (bias, bias-belted
or radial) as your original tires.
A
Mixing tires could cause you to lose control while driving. If you mix
tires
of different sizes or types (like radial and bias-belted tires) the
vehicle may not handle properly, and you could have a crash. Be
sure
to use the same size and type tires on all wheels. I
It’s all right to drive with your compact spare, though. It was developed for
limited use on your vehicle.
Uniform Tire Quality Grading
The following information relates to the system developed by the United
States National Highway Traffic Safety Administration which grade\
s tires by
treadwear, traction and temperature performance. (This applies o\
nly
to
vehicles sold in the United States.)
Treadwear
The treadwear grade is a comparative rating based on the wear \
rate of the
tire when tested under controlled conditions on a specified governmen\
t test
course.
For example, a tire graded 150 would wear one and a half (142)
times as well on the government course as a tire graded 100. The relative
performance of tires depends upon the actual conditions
of their use,
however, and may depart significantly from the norm due to var\
iations in
driving habits, service practices and differences in road charac\
teristics and
climate.
Traction-A, B, C
The traction grades, from highest to lowest are: A, B, and C. They represent
the tire’s ability
to stop on wet pavement as measured under controlled
conditions on specified government test surfaces of asphalt and \
concrete.
A
tire marked C may have poor traction performance.
Warning: The traction grade assigned
to this tire is based on braking
(straight-ahead) traction tests and does not include cornering \
(turning) traction.
Temperatur+A, B, C
The temperature grades are A (the highest), B, and C, representing the tire’s
resistance
to the generation of heat and its ability to dissipate heat when
tested under controlled conditions on a specified indoor laborat\
ory test wheel. Sustained high temperature can cause the material of the tire
to degenerate
and reduce tire life, and excessive temperature can lead
to sudden tire
6-49
Page 292 of 345
Downloaded from www.Manualslib.com manuals search engine Service & Appearance Care
Glass
Glass should be cleaned often. GM Glass Cleaner (GM Part No. 1050427) or
a liquid household glass cleaner will remove normal tobacco smo\
ke and dust
films.
Don’t use abrasive cleaners on glass, because they may cause\
scratches.
Avoid placing decals on the inside rear window, since they may\
have to be
scraped
off later.
If abrasive cleaners are used on the inside of the rear window, \
an electric
defogger element may be damaged. Any temporary license should n\
ot be
attached across the defogger grid.
Cleaning the Outside of fhe Windshield, Backglass and Wiper
Blades
If the windshield is not clear after using the windshield washer, or if the wiper
blade chatters when running, wax or other material may be on the blade or
windshield.
Clean the outside of the windshield with GM Windshield Cleaner, Bon-Ami
Powder@
(GM Part No. 1050011). The windshield is clean if beads do not
form when you rinse it with water.
Clean the blade by wiping vigorously with a cloth soaked in full strength
windshield washer solvent. Then rinse the blade with water.
Wiper blades should be checked on a regular basis and replaced\
when worn.
Cleaning the Outside of Your Vehicle
The paint finish on your vehicle provides beauty, depth of color, gloss
retention and durability.
Washing Your Vehicle
The best way to preserve your vehicle’s finish is to keep it clean by washing
it often with lukewarm
or cold water.
Don’t wash your vehicle in the direct rays of the sun. Don’t use strong soaps
or chemical detergents. Use liquid hand, dish or car washing (non\
-detergent)
soaps. Don’t use cleaning agents that contain acid
or abrasives. All cleaning
agents should be flushed promptly and not allowed to dry on t\
he surface,
or
they could stain. Dry the finish with a soft, clean chamois or a 100% cotton
towel
to avoid surface scratches and water spotting.
High pressure vehicle washes may cause water
to enter your vehicle.
Finish Care
Occasional waxing or mild polishing of your vehicle may be necessary to
remove residue from the paint finish. You can get
GM approved cleaning
products from your dealer. (See “Appearance Care and Materia\
ls” in the Index.)
6-56
Page 294 of 345
Downloaded from www.Manualslib.com manuals search engine Service & Appearance Cam
Finish Damage
Any stone chips, fractures or deep scratches in the finish should be repaired
right away. Bare metal will corrode quickly and may develop in\
to a major
repair expense.
Minor chips and scratches can be repaired with touch-up materia\
ls available
from your dealer
or other service outlets. Larger areas of finish damage can
be corrected in your dealer's body and paint shop.
Underbody Maintenance
Chemicals used for ice and snow removal and dust control can \
collect on the
underbody.
If these are not removed, accelerated corrosion (rust) can occur \
on the underbody parts such as fuel lines, frame, floor pan, \
and exhaust
system even though they have corrosion protection.
At least every spring, flush these materials from the underbody\
with plain
water. Clean any areas where mud and other debris can collect.\
Dirt packed
in closed areas of the frame should be loosened before being flus\
hed. Your
dealer
or an underbody vehicle washing system can do this for you.
Fiberglass Springs
I NOTICE
Don't use corrosive or acidic cleaning agents, engine degreasers, aluminum
cleaning agents
or 0'' r hars' solven' . ' an fiberglass springs; t' r'll
damage the springs.
Chemical Paint Spotting
Some weather and atmospheric conditions can create a chemical f\
allout.
Airborne pollutants fall upon and attack painted surfaces on yo\
ur vehicle. This
damage can take
two forms: blotchy, ringlet-shaped discolorations, and small
irregular dark spots etched into the paint surface.
Although no defect in the paint job caused this, General Motor\
s
will repair, at
no charge
to the owner, the surfaces of new vehicles damaged by this fallou\
t
condition within
12 months or 12,000 miles (20 000 km) of purchase,
whichever comes first.
6-58
Page 296 of 345
Downloaded from www.Manualslib.com manuals search engine Vehicle Identification Number (VIN)
-. .
KO641
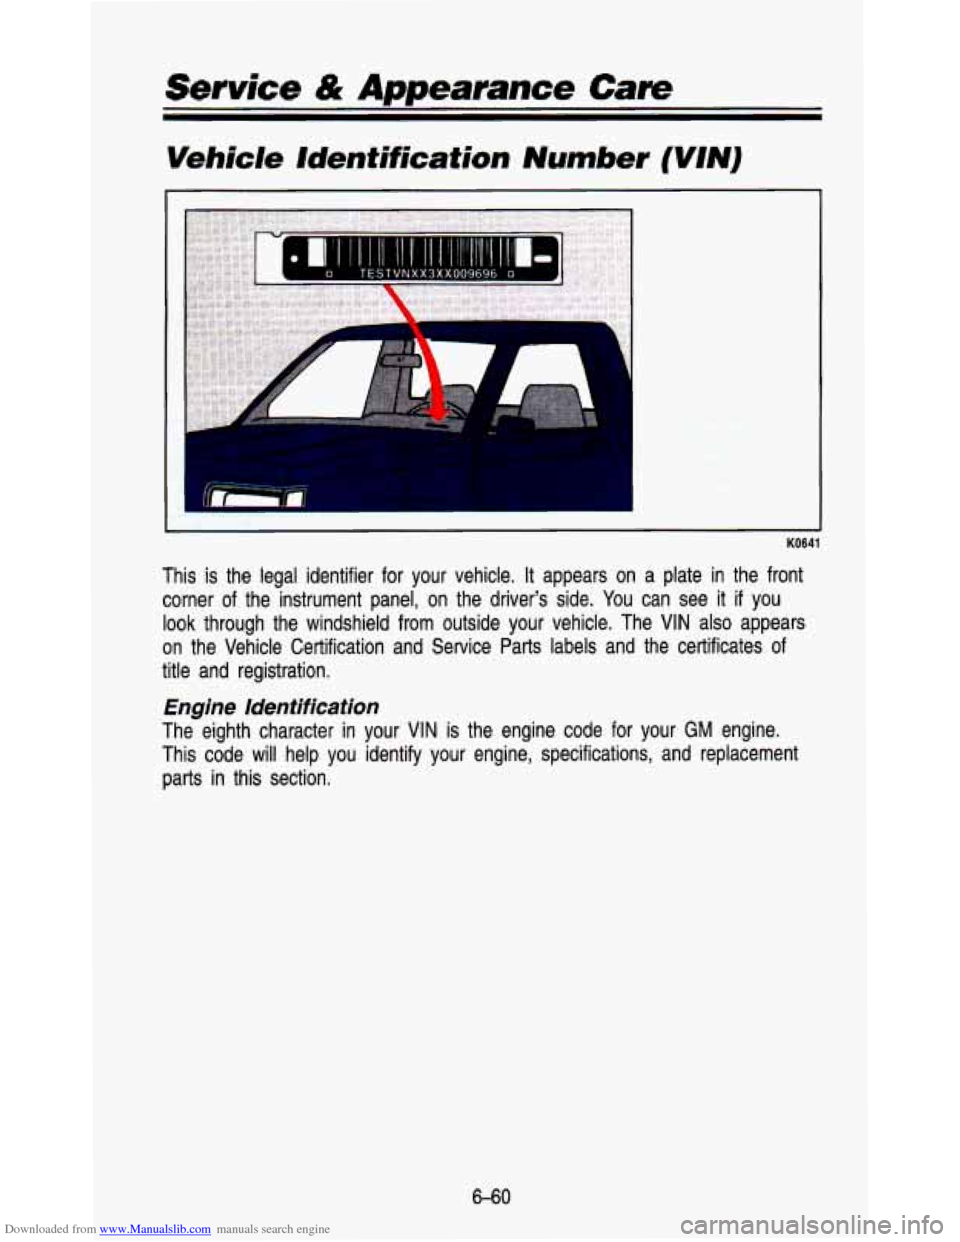
This is the legal identifier for your vehicle. It appears on a plate in the front
corner of the instrument panel, on the driver's side.
You can see it if you
look through the windshield from outside your vehicle. The VIN also \
appears
on the Vehicle Certification and Service Parts labels and the certificates of
title and registration.
Engine Identification
The eighth character in your VIN is the engine code for your GM engine.
This code will help you identify your engine, specifications, a\
nd replacement
parts in this section.
6-60