Page 258 of 345
Downloaded from www.Manualslib.com manuals search engine Service & Appearance Care
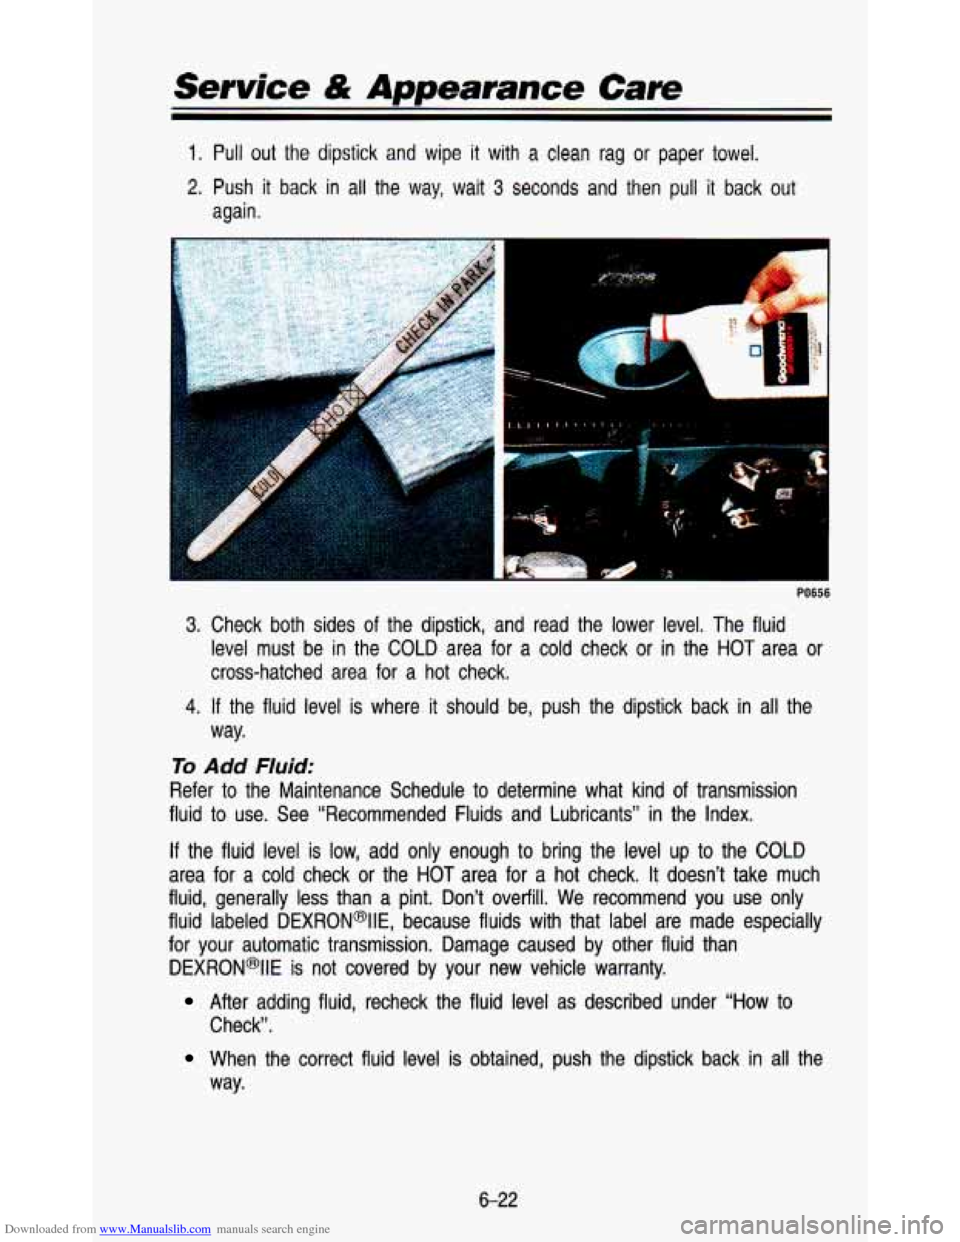
1. Pull out the dipstick and wipe it with a clean rag or paper towel.
2. Push it back in all the way, wait 3 seconds and then pull it back out
again.
3. Check both sides of the dipstick, and read the lower level. The fluid
level must be in the COLD area for a cold check or in the
HOT area or
cross-hatched area for a hot check.
way.
4. If the fluid level is where it should be, push the dipstick back in all the
To Add Fluid:
Refer to the Maintenance Schedule to determine what kind of transmission
fluid
to use. See “Recommended Fluids and Lubricants” in the Index.
If the fluid level is low, add only enough to bring the level up to the COLD
area
for a cold check or the HOT area for a hot check. It doesn’t take much
fluid, generally less than a pint. Don’t overfill. We recommend you use only
fluid labeled DEXRON@IIE, because fluids with that label are ma\
de especially
for your automatic transmission. Damage caused by other fluid t\
han DEXRON*IIE
is not covered by your new vehicle warranty.
After adding fluid, recheck the fluid level as described under “How to
Check”.
When the correct fiuid level is obtained, push the dipstick back in all the
way.
6-22
Page 259 of 345
Downloaded from www.Manualslib.com manuals search engine Rear Axle
When to Check and Change Lubricant:
Refer to the Maintenance Schedule to determine how often to check the
lubricant and when to change it. See “Scheduled Maintenance Services” in
the Index.
How to Check Lubricant:
1
,. . ..
1
If the level is below the bottom of the filler plug hole, you’ll need to add
some lubricant.
Add enough lubricant to raise the level to the bottom of the
filler plug hole.
What to Use:
Refer to the Maintenance Schedule to determine what kind of lubricant to
use. See ”Recommended Fluids and Lubricants” in the Index.
All= Wheel Drive
If you have an all-wheel drive vehicle, be sure to perform the lubricant
checks described in this section. However, they have two additional systems
that need lubrication.
Transfer Case
When to Check Lubricant:
Refer to the Maintenance Schedule to determine how often to check the
lubricant. See “Periodic Maintenance Inspections” in the Index.
6-23
Page 260 of 345
Downloaded from www.Manualslib.com manuals search engine How to Check Lubricant:
J
K3170
If the level is below the bottom of the filler plug hole, you’ll need to add
some lubricant. Add enough lubricant to raise the level to the bottom of the
filler plug hole.
What to Use:
Refer to the Maintenance Schedule to determine what kind of lubricant to
use. See ”Recommended Fluids and Lubricants” in the Index.\
Front Axle
When to Check and Change Lubricant:
Refer to the Maintenance Schedule to determine how often to check the
lubricant and when to change it. See “Scheduled Maintenance Services” in
the Index.
6-24
Page 264 of 345
Downloaded from www.Manualslib.com manuals search engine Service & Appearance Care
Adding Coolant
PO408
TO Check Coolant: When your engine is cold, the coolant level should be at
COLD LEVEL, or a little higher.
When your engine is warm, the level should be up
to COLD LEVEL, or a
little higher.
CAUTION
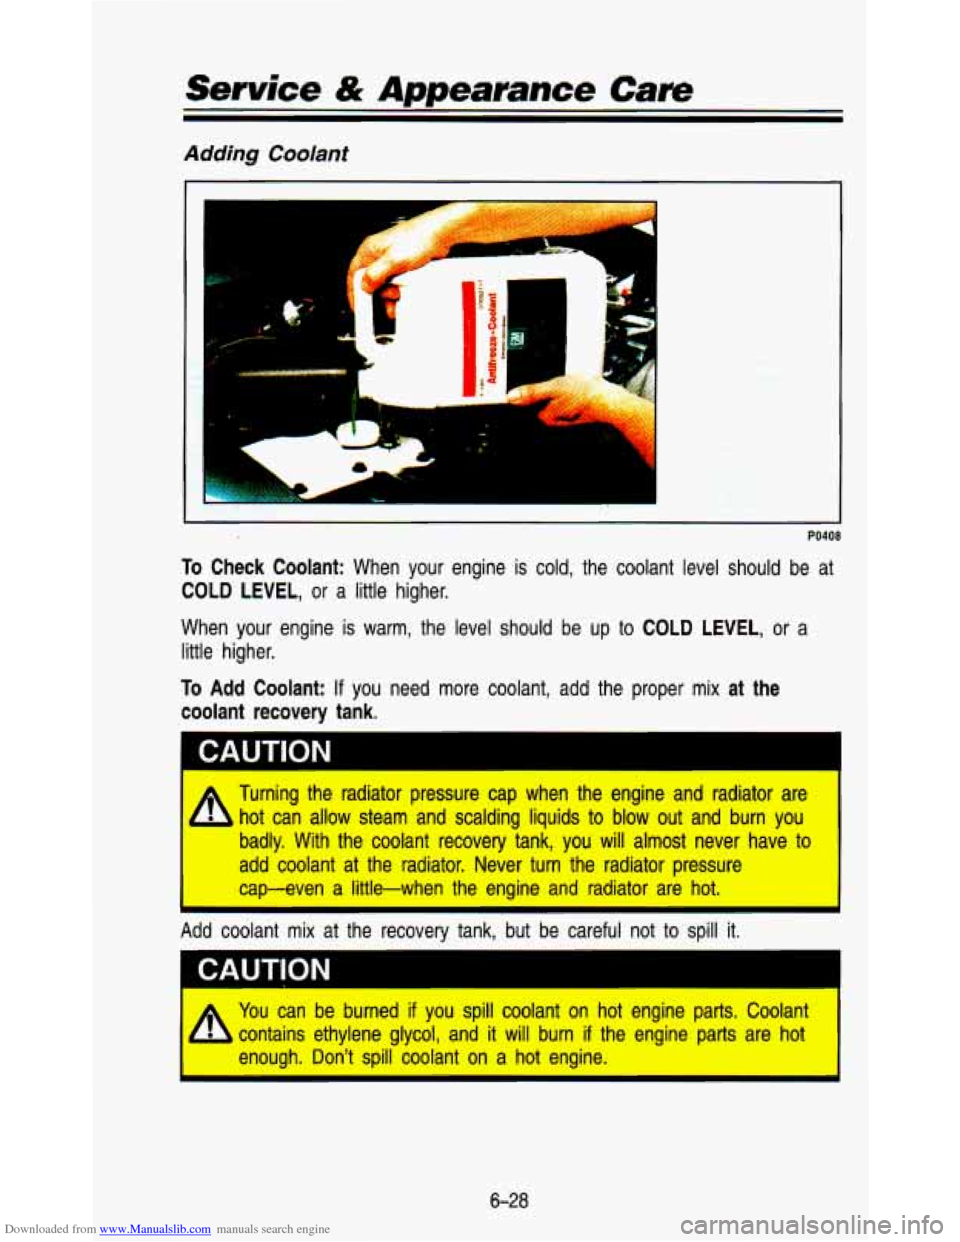
To Add Coolant: If you need more coolant, add the proper mix at the
coolant recovery tank.
Turning the radiator pressure cap when the engine and radiator \
are
hot can allow steam and scalding liquids to blow out and burn you
badly. With the coolant recovery tank, you will almost never h\
ave
to
add coolant at the radiator. Never turn the radiator pressure
cap-even a little-when the engine and radiator are hot.
I
Add coolant mix at the recovery tank, but be careful not to spill it.
CAUTION
i You can be burned if you spill coolant on hot engine parts. Coolant
- contains ethylene glycol, and it will burn if the engine parts are hot
enough. Don't spill coolant on a hot engine.
6-28
Page 268 of 345
Downloaded from www.Manualslib.com manuals search engine Service & Appearance Care
0
I.
I
When using a concentrated washer fluid, follow the manufacturer'\
s instructions for adding water.
Don't mix water with ready-to-use washer fluid. Water can cause\
the
solution
to freeze and damage your washer fluid tank and other parts
of the washer system. Also, water doesn't clean as well as washer\
I
fluid.
Fill your washer fluid tank only 314 full"when it's'vety cold. This
allows for expansion, which could damage the tank
if it is completely I
full.
"L..:.i: , , I_ y:~ i; P .. .. . . .. . .... . *>,: " 2 ..., .- .. .. ;'r : ,y*: , '-I 1' .:a,' ...j , .I' _I .~ ,.., <:':,.YY<..'.% , , .', < .. c7~ Ij
" .,. , , ...j. .. :,,;,.: >: :,:. I, ~,~. .,. ._
Don't use radiator antifreeze in your windshield washer. It can
damage your washer system and paint.
I
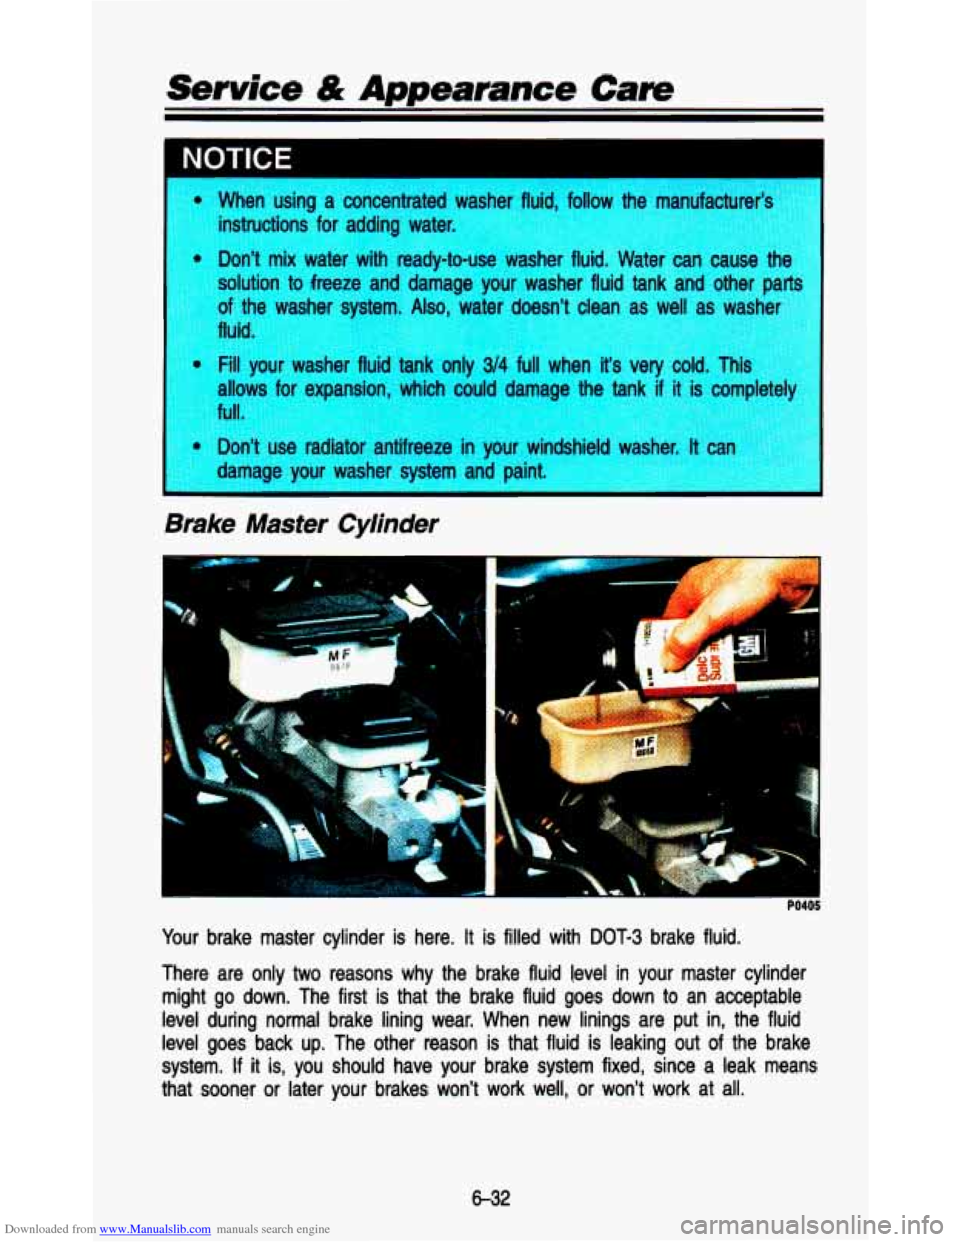
Brake Master Cylhder
Your brake master cylinder is here. It is filled with DOT-3 brake fluid.
There are only
two reasons why the brake fluid level in your master cylinder
might go down. The first is that the brake fluid goes down to an acceptable
level during normal brake lining wear. When new linings are put in, the fluid
level goes back up. The other reason is that fluid is leaking out of the brake
system.
If it is, you should have your brake system fixed, since a leak mea\
ns
that sooner or later your brakes won't work well, or won't wo\
rk at all.
6-32
Page 270 of 345
Downloaded from www.Manualslib.com manuals search engine Service & Appearance Care
braking system-for example, when your brake linings wear down and you
have
to have new ones put in-be sure you get new genuine GM
replacement parts.
If you don’t, your brakes may no longer work properly. For
example,
if someone puts in brake linings that are wrong for your vehicle, the
balance between your front and rear brakes can change, for the\
worse. The
braking performance you’ve come to expect can change in many\
other ways
if someone puts in the wrong replacement brake parts.
Hydro-Boost Brake System (Hydraulic Pump)
The power steering pump is also used as the Hydro-Boost pump. \
Refer to
“Power Steering Fluid” in this section when. checking the fluid level or adding
fluid.
Fluid Leak Check
After the vehicle has been parked for awhile, inspect the surf\
ace beneath the
vehicle for water, oil, fuel or other fluids. Water dripping f\
rom the air
conditioning system is normal. If you notice fuel leaks or fumes, the causes
should be found and corrected at once.
Battery
Every new GM vehicle has
add water
to one of these,
a Delco Freedom@ battery.
the original battery’s label. a Delco Freedom@ battery. You never have
to
When it’s time for a new battery, we recommend
Get one that has the catalog number shown on
Vehicle Storage
If you’re not going to drive your vehicle for 25 days or more, take off the
black, negative
(-) cable from the battery. This will help keep your battery
from running down.
I CAUTION
For more informarlon on vehicle storage, contact your dealer’\
s service
department, or write to:
Adistra Corporation 171 Hamilton Street Plymouth,
MI 48170
General Motors
of Canada, Limited
Customer Services Department
Oshawa, Ontario L1 J5Z6
In
Canada, write
to:
6-34
Page 272 of 345
Downloaded from www.Manualslib.com manuals search engine Service & Appearance Care
I
PO403
4. Remove the four retainer screws and the retainer.
5, Pull the connector out and unplug the light.
6. Install the new
bulb into the connector.
7. Reverse steps 1-5 to reinstall the headlight.
Front ParkingFurn Signal Lights
1. Open the hood.
2. Remove the four Torxhead screws from the headlight bezel. Pull the
bezel out
so you can see the parkinglturn signal lights.
!$
3 :K >: . .- -.
6-36
PO401
Page 274 of 345
Downloaded from www.Manualslib.com manuals search engine Service & Appearance Care
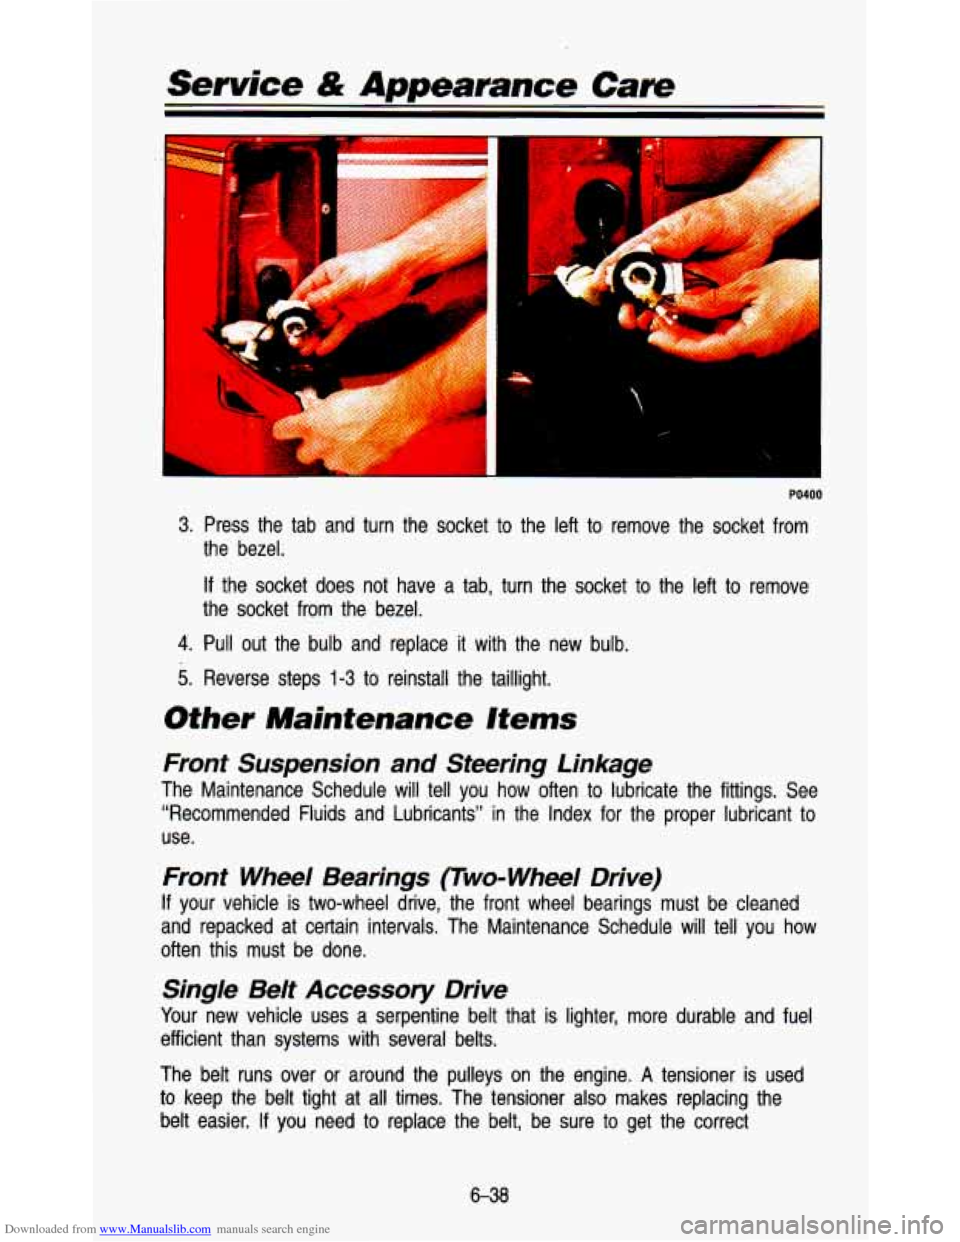
PO400
3. Press the tab and turn the socket to the left to remove the socket from
the bezel.
If the socket does not have a tab, turn the socket to the left to remove
the socket from the bezel.
4. Pull out the bulb and replace it with the new bulb.
5. Reverse steps 1-3 to reinstall the taillight.
Other Maintenance Items
Front Suspension and Steering Linkage
The Maintenance Schedule will tell you how often to lubricate the fittings. See
“Recommended Fluids and Lubricants” in the Index for the proper lubricant to
use.
Front Wheel Bearings (Two-Wheel Drive)
If your vehicle is two-wheel drive, the front wheel bearings must \
be cleaned
and repacked at certain intervals. The Maintenance Schedule will tel\
l you how
often this must be done.
Single Belt Accessory Drive
Your new vehicle uses a serpentine belt that is lighter, more durable and fuel
efficient than systems with several belts.
The belt runs over
or around the pulleys on the engine. A tensioner is used
to keep the belt tight at all times. The tensioner also makes replacing the
belt easier.
If you need to replace the belt, be sure to get the correct
6-38