1992 VOLKSWAGEN TRANSPORTER temperature
[x] Cancel search: temperaturePage 49 of 164

Downloaded from www.Manualslib.com manuals search engine
CONTROLS
AND
EQUIPMENT
Warning
lamps
~ne layout of the warning lamps depends on
:ne model and the engine fitted. The sym-
: ols shown here are also on the actual warn-ng lamps.
|- Coolant temperature/ coolant level 47
1- Engine oil pressure 47
I- High beams 48
-- Turn signals 48
5-
Brake system 48
V Alternator 49
" Glow plugs 49 Coolant
temperature/
Coolant level1'
This
lamp flashes for a few seconds as a
functional check when ignition is switched
on.
If the lamp does not go out afterwards or
flashes
when driving, either the coolant
temperature is too high orthe coolant level1'
too low:
Stop,
switch
engine
off and check
level.
Add coolant if necessary.
11 Only on vehicles
with
automatic coolant level monitor(see page 102).
Attention
• Be
careful
when
opening the
coolant
expansion
tank!
When
the
engine
is hot the cooling
sys
tem is
under
pressure -
Danger
of scalding!
Therefore
let
engine
cool
down
before
unscrewing
the cap.
• Do not
touch
the fan. The fan can
switch
on suddenly -
even
when
ignition
is
switched
off.
For
further details see pages 102 and 103.
If the coolant level is in order the trouble
may be due to failure of the radiator fan.
Check
radiator fan fuse and renew if
necessary-seepage
122.
If the warning lamp does not go out al
though coolant level and fan fuse are in order, do not
drive
on - call in expert as
sistance.
If the trouble is only caused by the fan and
assuming
coolant level is in order and tem perature warning lamp is out - one can drive
on to the nearest Volkswagen dealer. In
order to make good use of the air stream for
cooling,
do not let engine idle or drive very
slowly.
2 - Engine oil pressure -7
www.vwT4camper.info - a useful website for owners and enthusiasts of VW T4 Transporter Campervans
Page 56 of 164

Downloaded from www.Manualslib.com manuals search engine
CONTROLS AND EQUIPMENT
Windscreen
wiper
and
washer
system
Wipers
and washers only work when igni
tion is switched on.
The
heated
windscreen
washer
jets*
are switched on when the ignition is switched on and the amount of heat is regulated automatically according to the ambi
ent temperature
When
it is freezing, check
that
the wiper
blades
are not frozen to the glass before
switching the wipers on for the
first
time.
Windscreen
• Flick
wipe
Lift lever to pressure point before detent 1.
•
Wiper
slow
Lever
at position 1. •
Wiper
fast
Lever
at position 2.
•
Intermittent
wipe
Lever
at position 3
The
wipers work about every 6
seconds.
With an
infinitely
variable
intermit
tent
wipe*
the wipe delay can be programmed between about 1.5 and 22
sec
onds:
- Switch on
intermittent
wipe
- Switch off
intermittent
wipe and then switch on again after the desired delay.
The
selected delay can be changed as often
as
required. After switching off the ignition
the selected pause reverts back to a six
sec
ond interval.
•
Automatic
wash/wipe
facility
Pull
lever towards steering wheel - wipers
and
washer work.
Release
lever -
The
washer stops and the wipers carry on
for about 4
seconds.
Headlight washer system*
When
the headlights are on, the lenses are
washed
every time the windscreen is
washed.
At regular intervals such as when filling the
tank, caked-on
dirt
and insects should be
removed.
Rear
window
Press
lever away from steering wheel and
release
- the wiper works about every 6
seconds
(intermittent
wipe).
Pressing
and
releasing
lever again switches the wiper off.
Automatic
wash/wipe
Press
lever away from steering wheel, and
hold in this position -
The
wiper and washer work as long as the
lever
is held in this position.
Release
lever -
The
washer stops and the wiper carries on
for about 4
seconds.
Notes
Topping-up washer fluid
- see page 108.
Changing
windscreen wiper blades
- see page 109
54
www.vwT4camper.info - a useful website for owners and enthusiasts of VW T4 Transporter Campervans
Page 57 of 164
Downloaded from www.Manualslib.com manuals search engine
CONTROLS
AND
EQUIPMENT
Heating
and
ventilation
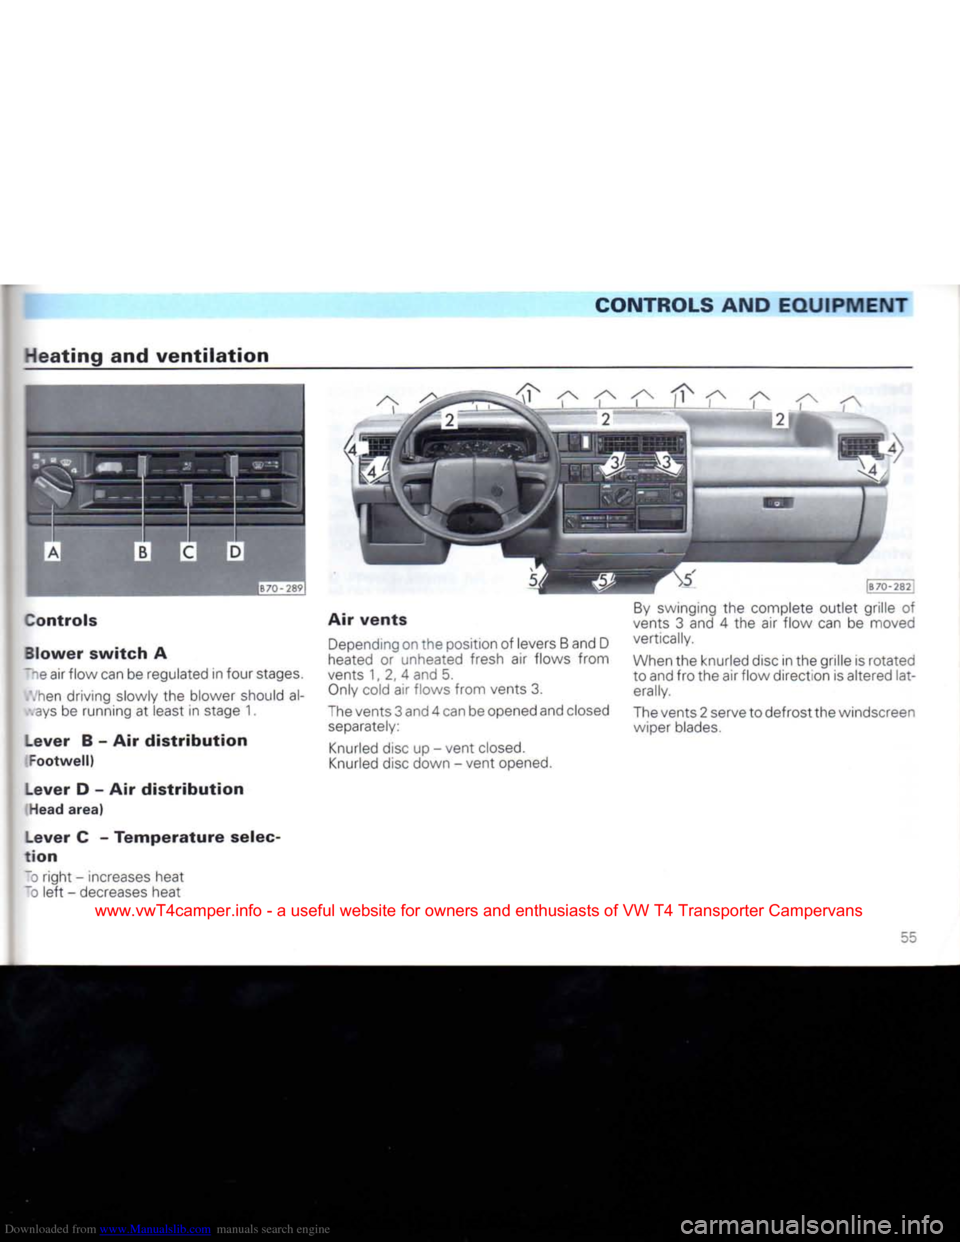
Controls
Blower
switch
A
~~e air flow can be regulated in four stages.
.hen
driving slowly the blower should al-
ays
be running at least in stage 1.
Lever
B - Air
distribution
Footwell)
Lever
D - Air
distribution
Head
area)
Lever
C -
Temperature
selec
tion
To
right - increases heat
~D
left
- decreases heat Air
vents
Depending
on the position of levers B and D
heated
or unheated fresh air flows from
vents 1, 2, 4 and 5.
Only
cold air flows from vents 3.
The
vents 3 and 4 can be opened and closed
separately:
Knurled
disc up - vent
closed.
Knurled
disc down - vent opened.
By
swinging the complete outlet grille of
vents 3 and 4 the air flow can be moved
vertically.
When
the knurled disc in the grille is rotated
to and fro the air flow direction is altered lat
erally.
The
vents 2 serve to defrost the windscreen wiper blades.
55
www.vwT4camper.info - a useful website for owners and enthusiasts of VW T4 Transporter Campervans
Page 58 of 164

Downloaded from www.Manualslib.com manuals search engine
CONTROLS AND
EQUIPMENT
Defrosting
windscreen
and side
windows
• Rotary switch A to stage 3
• All levers to the
right
• Vents 3 closed
• Adjust vents 4 so
that
additional warm air can be directed to the side windows.
Demisting
windscreen
and side
windows
When the windows mist up due to high air humidity, e.g. when it is raining, we recom
mend the following settings:
• Rotary switch A to stage 2 or 3 • Lever C if necessary, to
right
into
heating range
• Lever D to
right
• Vents 3 closed
• Adjust vents 4 so
that
additional warm air
can
be directed to the side windows.
Heating
interior
quickly
• Rotary switch A to stage 3 • Lever C to
right
• Lever B to
left
• Vents 3 closed
• Vents 4 opened.
Heating
interior
comfortably
When the windows are clear and the de sired interior temperature has been re
ached,
we recommend the following set
tings:
• Rotary switch A to stage 1 or 2
• Lever C at the desired heat
output
• Levers B and D set to desired air distribu tion. If the windscreen once again becomes misted up, move levers B and D to the
right.
• Vents 3 closed
• With vents 4 the desired amount of warm air and the air flow direction can be set.
Ventilation
(fresh
air
operation)
With the following settings, unheated fresh air flows from vents 3 and 4:
• Rotary switch A to desired stage
• Lever B to
right
and lever D to
left
• Lever C fully to
left
• Vents 3 and 4 open If required, levers B and D can be set to
other positions.
Notes
• To ensure
that
the heating and ventila
tion
can work properly, the air inlet in
front
of the windscreen should be kept free of
ice,
snow and
leaves.
• All controls except the rotary switch A
can
be set to any intermediate position,
• To prevent the windows from misting up the blower should be running slowly when driving at low
speeds.
• The heat
output
depends on the coolant temperature - the
full
heat
output
is there
fore only available when the engine is warm.
• The stale air
escapes
through ventilation slots in the luggage compartment/loading
area
side panel trim. Therefore these slots should not be covered.
On
vehicles
with
a
full-width
partition and
on the Pick-up and Double Cab models the
stale air
escapes
through slots in the
front
doors.
56
www.vwT4camper.info - a useful website for owners and enthusiasts of VW T4 Transporter Campervans
Page 59 of 164
Downloaded from www.Manualslib.com manuals search engine
CONTROLS AND
EQUIPMENT
Air
conditioner*
in cab
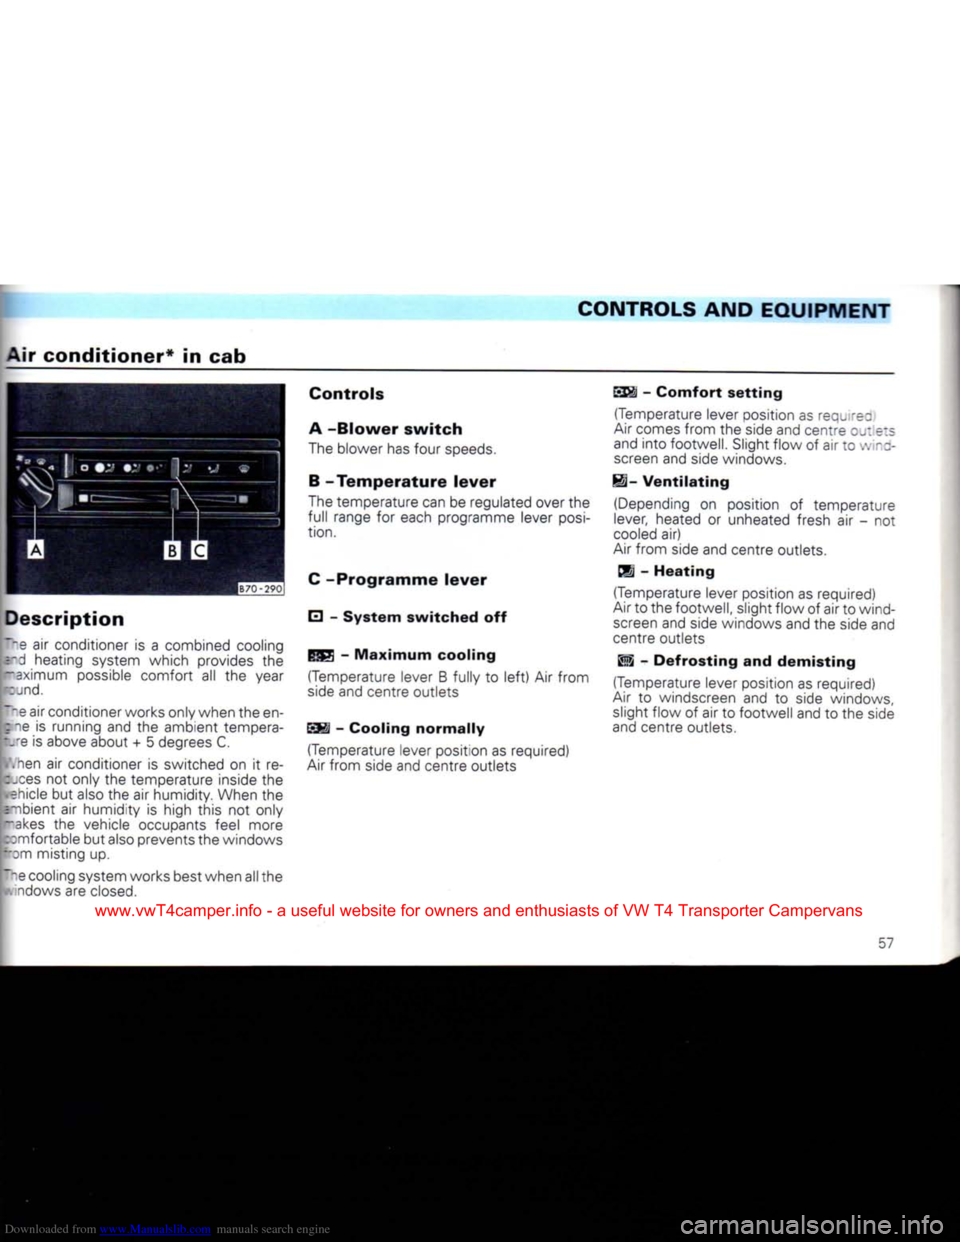
Description
T".e air conditioner is a combined cooling srd heating system which provides the
r-aximum possible comfort all the year
rcjnd.
Tpe air conditioner works only when the en-
pie
is running and the ambient tempera- t.re is above about + 5 degrees C.
,ien air conditioner is switched on it re-
bjces not only the temperature inside the
•
ehicle but also the air humidity. When the
=-nbient
air humidity is high this not only
Iakes
the vehicle occupants feel more
comfortable but also prevents the windows
""Dm
misting up.
~ne cooling system works best when all the
v.indows are closed.
Controls
A
-Blower
switch
The blower has four speeds.
B -
Temperature
lever
The temperature can be regulated over the
full range for each programme lever
posi
tion.
C
-Programme
lever
E] -
System
switched
off -
Maximum
cooling
(Temperature lever B fully to
left)
Air from
side and centre outlets
SSI -
Cooling
normally
(Temperature lever position as required)
Air
from side and centre outlets
SS§i
-
Comfort
setting
(Temperature lever position as requ rez
Air
comes from the side and centre
OJ:
e:s
and into footwell. Slight flow of air to
•:.
-z- screen and side windows.
H-
Ventilating
(Depending on position of temperature
lever, heated or unheated fresh air - not
cooled
air)
Air
from side and centre outlets,
dj -
Heating
(Temperature lever position as required)
Air
to the footwell, slight flow of air to wind screen and side windows and the side and
centre outlets
Wi -
Defrosting
and
demisting
(Temperature lever position as required)
Air
to windscreen and to side windows, slight flow of air to footwell and to the side
and centre outlets.
57
www.vwT4camper.info - a useful website for owners and enthusiasts of VW T4 Transporter Campervans
Page 60 of 164
Downloaded from www.Manualslib.com manuals search engine
CONTROLS
AND EQUIPMENT
Air
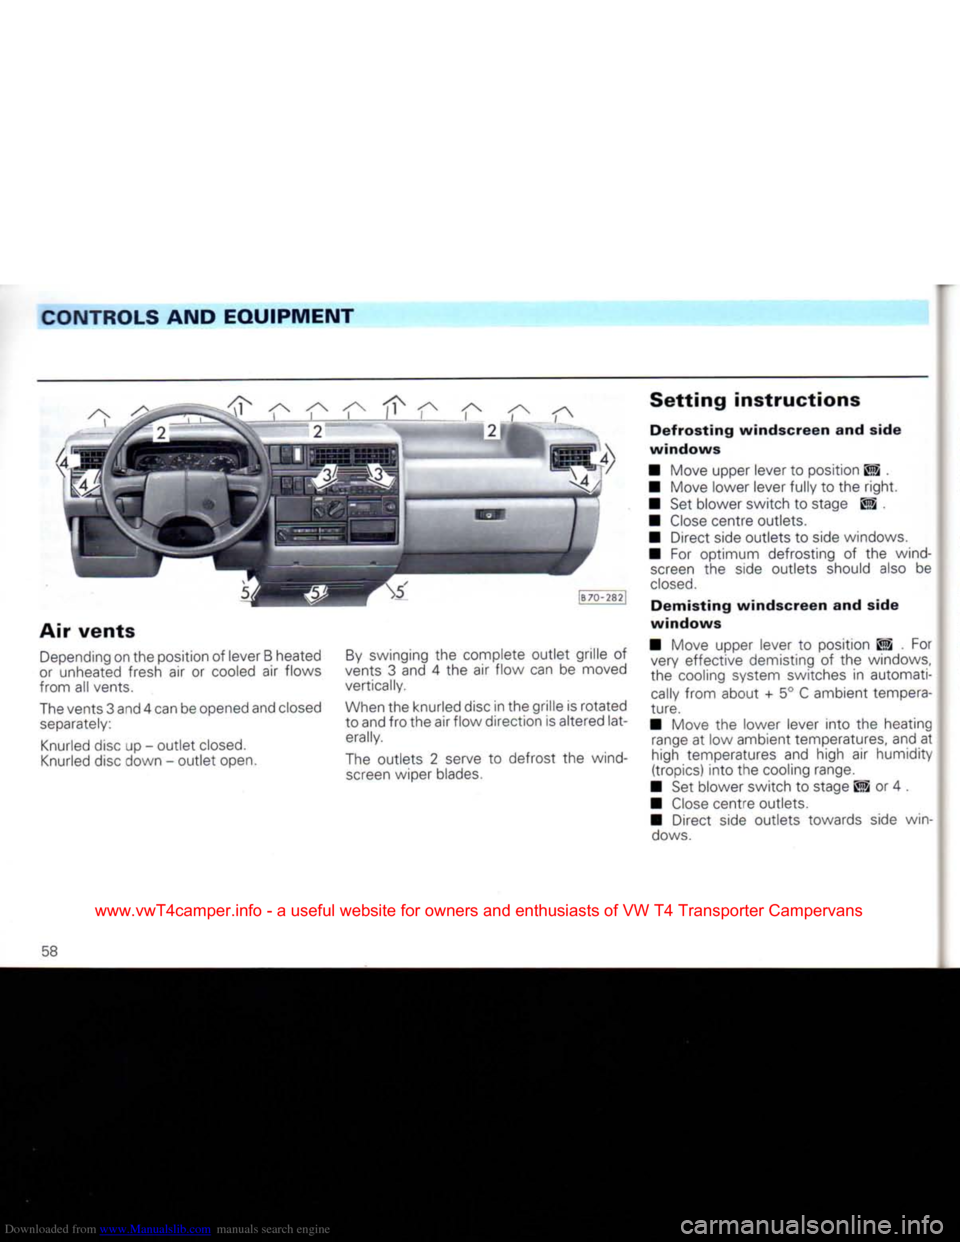
vents
Depending
on the position of lever B heated
or
unheated fresh air or cooled air flows
from all vents.
The
vents 3 and 4 can be opened and closed
separately:
Knurled
disc up - outlet
closed.
Knurled
disc down - outlet open.
By
swinging the complete outlet grille of
vents 3 and 4 the air flow can be moved
vertically.
When
the knurled disc in the grille is rotated
to and fro the air flow direction is altered lat
erally.
The
outlets 2 serve to defrost the wind
screen
wiper blades.
Setting
instructions
Defrosting
windscreen
and side
windows
• Move upper lever to position ES .
• Move lower lever fully to the
right.
• Set blower switch to stage ES , •
Close
centre outlets.
• Direct side outlets to side windows.
• For optimum defrosting of the wind
screen
the side outlets should also be
closed.
Demisting
windscreen
and side
windows
• Move upper lever to position ES . For very effective demisting of the windows,
the cooling system switches in automati
cally
from about + 5° C ambient tempera
ture.
• Move the lower lever into the heating
range
at low ambient temperatures, and at
high temperatures and high air humidity
(tropics) into the cooling range.
• Set blower switch to stage El or 4 .
•
Close
centre outlets.
• Direct side outlets towards side win
dows.
58
www.vwT4camper.info - a useful website for owners and enthusiasts of VW T4 Transporter Campervans
Page 61 of 164
Downloaded from www.Manualslib.com manuals search engine
CONTROLS
AND
EQUIPMENT
Heating
interior
quickly
I Move upper lever to . I Move lower lever fully to the
right.
I Set blower switch to E3 .
I
Close
centre outlets.
I Direct side outlets towards side win-
5:
.vs.
•(eating
interior
comfortably
I Move upper lever to SSi (comfort set 's) or to CS depending on where you
• : jId like the air flow to be.
I Set air temperature as desired
with
: .ver lever.
I Set blower switch to stage 1 or 2.
I Adjust side and centre outlets as re-
:. 'ed. At low ambient temperatures it is
cvisable
to close the centre outlets and di-
ect flow from side outlets towards the side
I ndows. Fresh air
operation
• Move upper lever to
EH
.
• Set air temperature as desired
with
lower lever.
• Set blower switch to desired stage.
• Adjust side and centre outlets as re
quired.
Maximum
cooling
•
Close
all windows. • Move upper lever to •
• Move lower lever fully to
left
or set as re
quired.
• Set blower switch to stage 4.
• Adjust side and centre outlets as re
quired.
However, at least one
outlet
mustal-
ways
be open otherwise the cooling
sys
tem may ice up.
With this setting the air is drawn from inside
the vehicle and cooled (recirculating air operation).
Normal
cooling
• Move upper lever to EM or
ESS*
.
• Set air temperature as desired .-. :~ lower lever.
• Set blower to stage 1 - 4 as desired.
• Adjust side and centre outlets as re
quired.
In position EM at least one
outlet
must always be open otherwise the cooling
system
may ice up.
With this setting ambient air is drawn in and
cooled.
www.vwT4camper.info - a useful website for owners and enthusiasts of VW T4 Transporter Campervans
Page 62 of 164
Downloaded from www.Manualslib.com manuals search engine
CONTROLS
AND
EQUIPMENT
Notes
Pools of
water
under
the
vehicle
• When the ambient temperature is high
and
the air very humid, condensed water
can
drip off the evaporator and form a puddle under the vehicle. This is quite nor
mal
and does not indicate a leak.
Operating
faults
• Should the air conditioner not work at
any
time, either:
- the ambient temperature is below about + 5 degrees C,
- the fuse has blown.
Check
fuse and if necessary renew it - see
page
122. If the trouble is not due to
a
defec
tive fuse, switch the system off and have it
checked.
- the air conditioner has switched off due to the coolant temperature being too high -
see
page 41
also.
• If the cooling
output
drops off, switch the
A/C
off and have the system
checked.
Using air
conditioner
economically
In cooling operation the air conditioner
com
pressor
places demands on the engine and
therefore influences the fuel consumption.
To
keep the period switched on as short as
possible,
the following points should be
noted:
• If the inside temperature is very high after the vehicle has been parked in the sun, it is recommended to open doors or win
dows
briefly to enable the hot air to
escape.
• The air conditioner should not be
switched
on during a journey if the windows
or
sliding/tilting
roof*
are open.
• If the desired interior temperature can be attained
without
switching on the air condi
tioner, the fresh air operation should be se
lected.
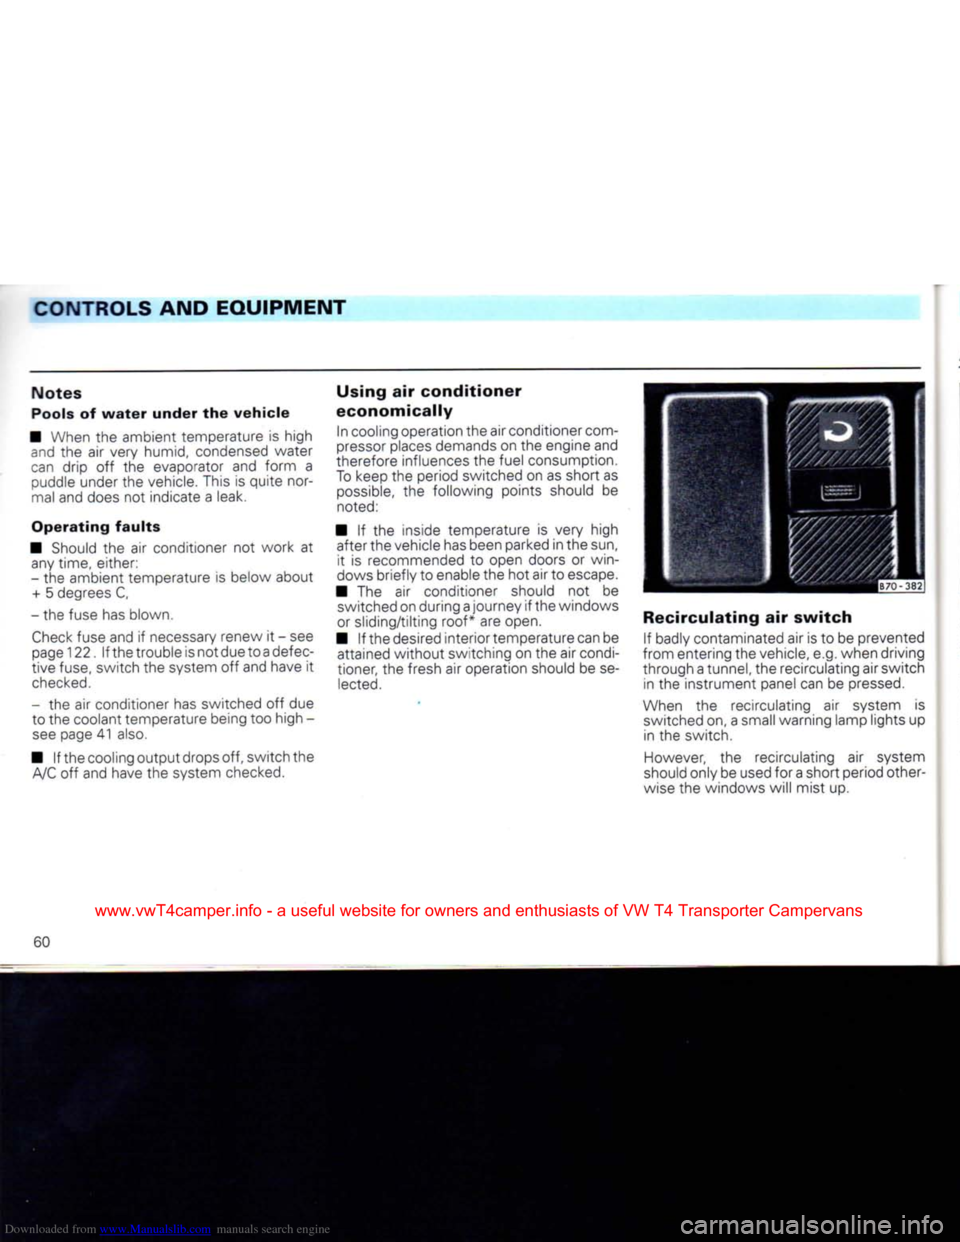
Recirculating
air
switch
If badly contaminated air is to be prevented
from entering the vehicle, e.g. when driving
through a tunnel, the recirculating air switch in the instrument panel can be
pressed.
When
the recirculating air system is
switched
on, a small warning lamp lights up in the switch.
However,
the recirculating air system
should
only be used for a short period other
wise
the windows will mist up.
60
www.vwT4camper.info - a useful website for owners and enthusiasts of VW T4 Transporter Campervans