Page 1043 of 1216
WHEELS AND TIRES - Wheel and Tire22-5
WHEEL AND TIRE
- REMOVAL AND INSTALLATIONSteel typeAluminium type
120-140 Nm87-101 ft.lbs.
1 lA0267
Removal steps
1. Wheel cover 2. Center cover
I)+ 3. Hub nuts4. Center cap
5. Spring
6. Ornament
7. Balance weight
8. Tire
9. WheelNUGA-
120-140 Nm87-101 ftlbs.liA0334
o-140 Nm87-101 ft.lbs.
/llA0336
7
NOTE(1) Reverse the removal procedures to reinstall.(2) l 4 : Refer to “Service Points of Installation”
llAO2661 lAO265
SERVICE POINT OF INSTALLATIONNUGDABa
2. INSTALLATION OF HUB NUTS
On the high speed tire (205/55R16 88V) vehicle, the left andright tires are respectively specified. Attach the tires as
follows :Observe the wheel in the
P direction as illustrated, and the
direction characters will be found.
Attach the
(a Cl ROTATION LEFT SIDE) tire on the left
wheel, and the (ROTATION RIGHT SIDE
DD) tire on the
right wheel.
Page 1044 of 1216

22-6WHEELS AND TIRES - Wheel and Tire
INSTRUCTIONS FOR ALUMINUM TYPE
WHEELSUzzGfM
1. Aluminum is vulnerable to alkalies. If a vehicle
washing detergent has been used, or salt from
sea water or road chemicals has adhered, washthe vehicle as soon as possible. After washing
the vehicle, apply body or wheel wax to the
aluminum type wheels to prevent corrosion.
2. When cleaning the vehicle with steam, do not
direct steam onto the aluminum type wheels.
When tightening nuts for aluminum type
wheels, particularly observe the following:
(1) Clean the hub surface of aluminum type
wheels.(2) After finger-tightening wheel nuts, tighten
them to specifications.
(3) Do not use an impact wrench or push the
wrench by foot to tighten the wheel nuts.
(4) Do not apply oil to the threaded portions.
INSTRUCTIONS FOR TIRE CHAINS AND
SNOW TIRESNZZGGAA
1.Use tire chains only on front wheels. Do not usetire chains on rear wheels.
2. When using snow tires, use them on all four
wheels for maneuverability and safety.
INSTRUCTIONS FOR COMPACT SPARE
TIRE;c.1. The compact spare tire is designed to. save
space in the luggage compartment, and its
L’lighter weight makes it easier to use if a fiat tire
occurs.
2.The following instructions for the compact sparetire should be observed.
(1) Check the inflation pressure after installing
the spare, and adjust to the specified pres-
sure.(2) Avoid driving through automatic car washes
and over obstacles that could possibly dam-
age the vehicle’s undercarriage. Because
the tire is smaller than the original tire, car
ground clearance is slightly reduced.
(3) The compact spare tire should not be used
on any other wheels, nor should standard
tires, snow tires, wheel covers or trim rings
be used with the compact spare wheel. If
such use is attempted, damage to these
items or other vehicle components may
occur.
Page 1077 of 1216

BODY - Service Adiistment Procedures23-33
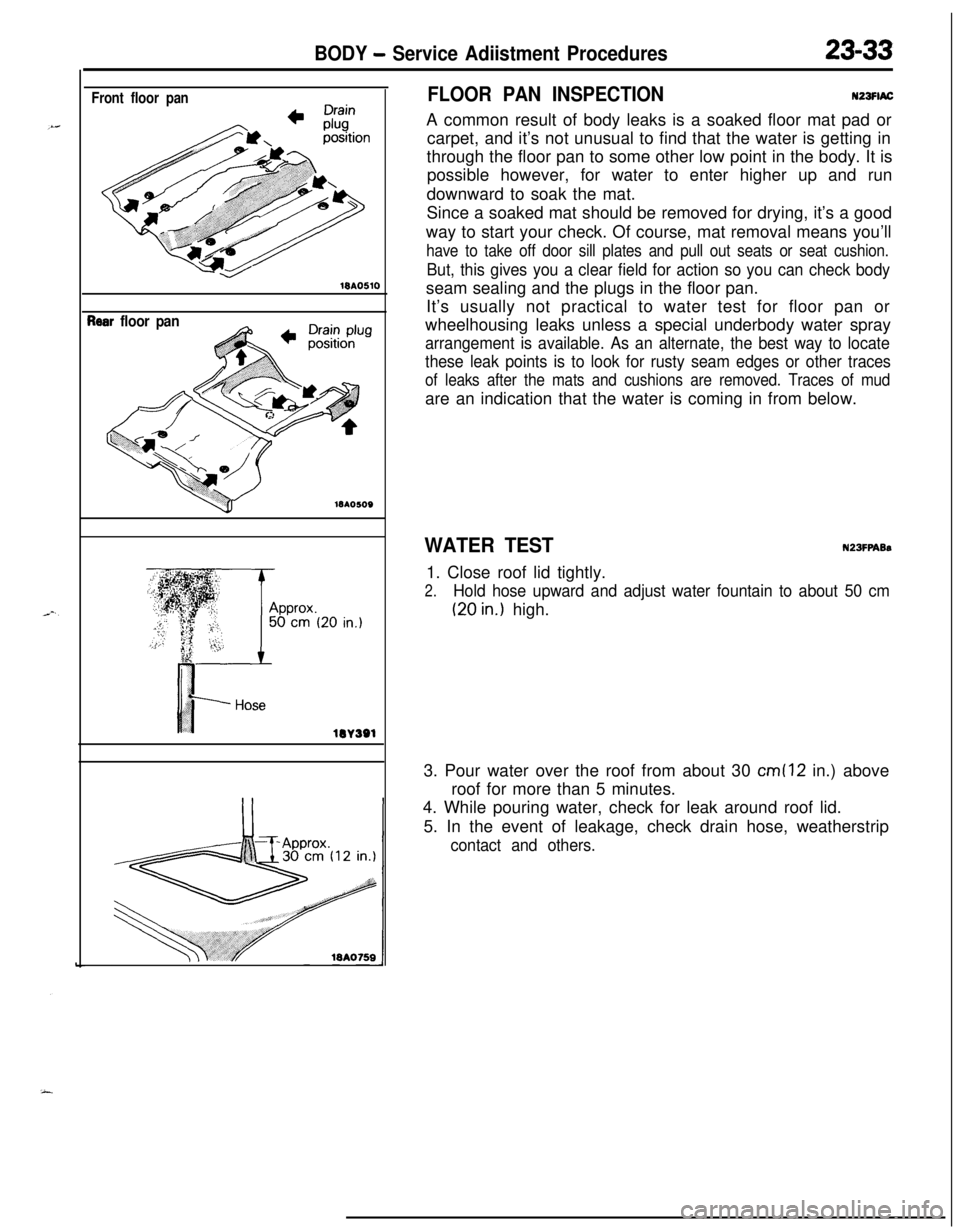
Front floor pan18AO510
?ear floor pan
lOA
lW391
FLOOR PAN INSPECTIONN23FlACA common result of body leaks is a soaked floor mat pad or
carpet, and it’s not unusual to find that the water is getting in
through the floor pan to some other low point in the body. It is
possible however, for water to enter higher up and run
downward to soak the mat.
Since a soaked mat should be removed for drying, it’s a good
way to start your check. Of course, mat removal means you’ll
have to take off door sill plates and pull out seats or seat cushion.
But, this gives you a clear field for action so you can check bodyseam sealing and the plugs in the floor pan.
It’s usually not practical to water test for floor pan or
wheelhousing leaks unless a special underbody water spray
arrangement is available. As an alternate, the best way to locate
these leak points is to look for rusty seam edges or other traces
of leaks after the mats and cushions are removed. Traces of mudare an indication that the water is coming in from below.
WATER TESTN23FPABs1. Close roof lid tightly.
2.Hold hose upward and adjust water fountain to about 50 cm
(20 in.) high.
3. Pour water over the roof from about 30
cm (12 in.) above
roof for more than 5 minutes.
4. While pouring water, check for leak around roof lid.
5. In the event of leakage, check drain hose, weatherstrip
contact and others.
Page 1169 of 1216

HEATERS AND AIR CONDITIONING - Service Adjustment Procedures 24-25
16A1077
20AO499
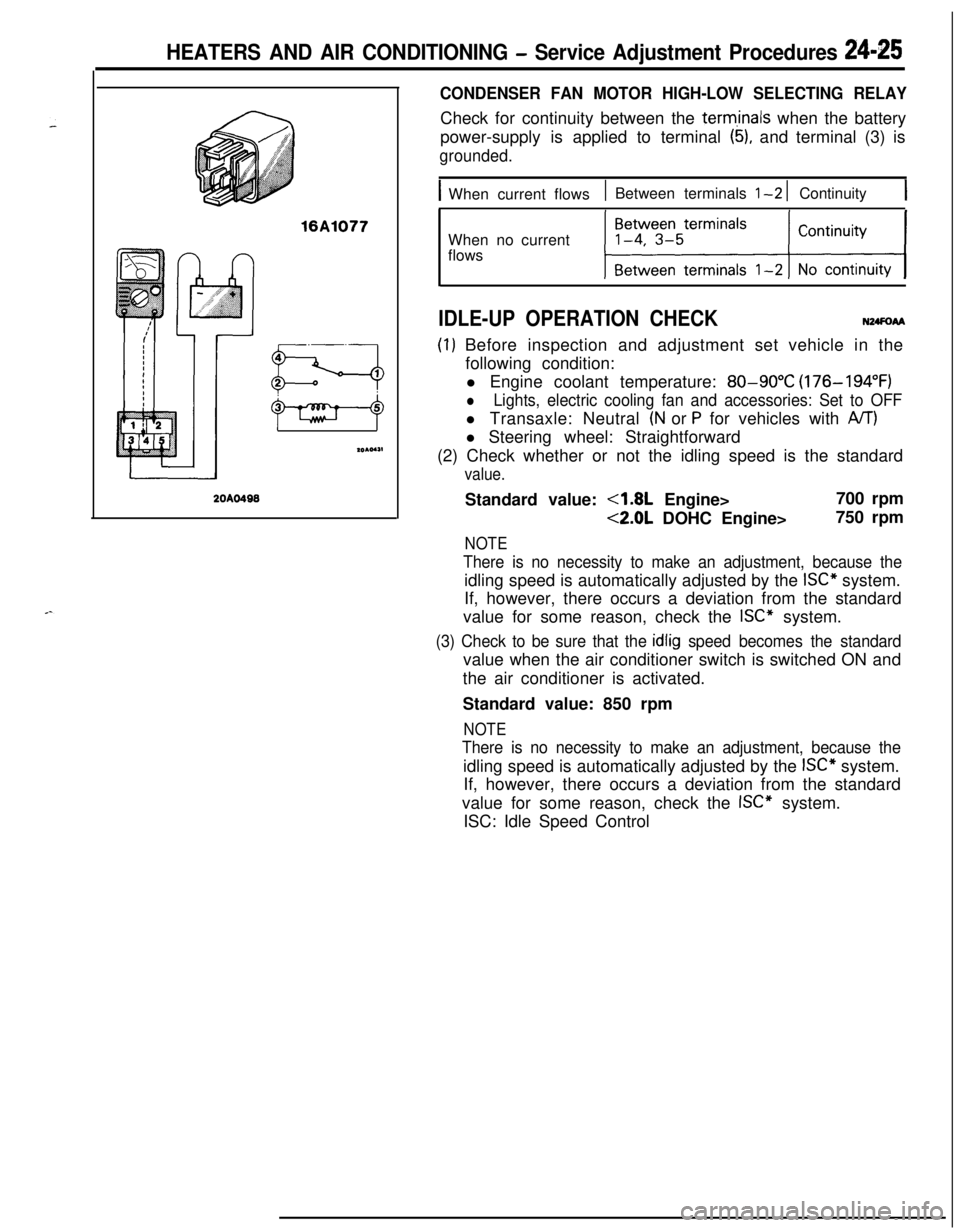
CONDENSER FAN MOTOR HIGH-LOW SELECTING RELAYCheck for continuity between the
term,inals when the battery
power-supply is applied to terminal
(5), and terminal (3) is
grounded.
IWhen current flows1 Between terminals l-2 1 Continuity1When no current
flows
IDLE-UP OPERATION CHECKN24FoAA
(I) Before inspection and adjustment set vehicle in the
following condition:
l Engine coolant temperature:
80-90°C (176-194°F)
lLights, electric cooling fan and accessories: Set to OFFl Transaxle: Neutral
(N or P for vehicles with A/T)l Steering wheel: Straightforward
(2) Check whether or not the idling speed is the standard
value.Standard value:
4.8L Engine>700 rpm
<2.0L DOHC Engine>750 rpm
NOTE
There is no necessity to make an adjustment, because theidling speed is automatically adjusted by the
ISC” system.
If, however, there occurs a deviation from the standard
value for some reason, check the
ISC” system.
(3) Check to be sure that the idlig speed becomes the standardvalue when the air conditioner switch is switched ON and
the air conditioner is activated.
Standard value: 850 rpm
NOTE
There is no necessity to make an adjustment, because theidling speed is automatically adjusted by the
ISC” system.
If, however, there occurs a deviation from the standard
value for some reason, check the
ISC” system.
ISC: Idle Speed Control