Page 2269 of 4087
(c) Remove the four nuts, water by±pass joint and twogaskets.
31. REMOVE REAR WATER BY±PASS JOINT (a) Remove the bolt holding the water by±pass pipe to theengine hanger.
(b) Remove the four nuts, water by±pass joint and two gaskets.
32. REMOVE OIL DIPSTICK AND GUIDE FOR ENGINE (a) Remove the mounting bolt.
(b) Pull out the dipstick guide together with the dipstick.
(c) Remove the O±ring from the dipstick guide.
33. REMOVE OIL DIPSTICK AND GUIDE FOR A/T
34. REMOVE EGR PIPE (a) Remove the two nuts holding the EGR pipe to the RHexhaust pipe.
(b) Remove the EGR pipe and gasket.
35. DISCONNECT GROUND STRAP FROM RH CYLINDER HEAD
36. DISCONNECT ENGINE WIRE FROM RH CYLINDER HEAD
Remove the two bolts, and disconnect the engine wire.
±
ENGINE MECHANICAL Cylinder HeadsEM±69
WhereEverybodyKnowsYourName
Page 2303 of 4087
12. INSTALL ENGINE HANGERSInstall the engine hanger with the two bolts.
Install the two engine hangers.
Torque: 37 N Vm (380 kgf Vcm, 27 ft Vlbf)
13. CONNECT GROUND STRAP TO RH CYLINDER HEAD
14. INSTALL ENGINE WIRE TO RH CYLINDER HEAD
Install the engine wire with the two bolts.
15. INSTALL ENGINE WIRE TO LH CYLINDER HEAD Install the engine wire with the five bolts.
16. INSTALL EGR PIPE TO RH EXHAUST MANIFOLD Install a new gasket and the EGR pipe with the two new nuts.
Torque: 18 N Vm (185 kgf Vcm, 13 ft Vlbf)
17. INSTALL OIL DIPSTICK AND GUIDE FOR ENGINE
(a) Install a new O±ring to the dipstick guide.
(b) Apply a light of engine oil on the O±ring.
(c) Push in the dipstick guide into the guide hole of the No.1
oil pan.
(d) Install the dipstick guide with the bolt.
(e) Install the oil dipstick.
18. INSTALL OIL DIPSTICK AND GUIDE FOR A/T
±
ENGINE MECHANICAL Cylinder HeadsEM±103
WhereEverybodyKnowsYourName
Page 2329 of 4087
COMPONENTS FOR SEPARATION AND
ASSEMBLY OF ENGINE AND
TRANSMISSION
SEPARATION OF ENGINE AND
TRANSMISSION
1. REMOVE OIL DIPSTICK GUIDE FOR TRANSMISSION(a) Remove the mounting bolt.
(b) P u ll ou t th e dip stick gu id e an d dip stick fro m th etransmission.
(c) Remove the O±ring from the dipstick guide.
2. REMOVE OIL COOLER PIPES FOR TRANSMISSION (a) Remove the two mounting bolts.
(b) Loosen the two union nuts, and remove the oil coolerpipes.
±
ENGINE MECHANICAL Cylinder BlockEM±129
WhereEverybodyKnowsYourName
Page 2366 of 4087
3. INSTALL DIPSTICK GUIDE FOR TRANSMISSION(a) Install a new O±ring to the dipstick guide.
(b) Apply soapy water to the O±ring.
(c) Connect the dipstick guide end to the tube of the oil pan,
and install the dipstick guide with the bolt.
(d) Install the dipstick.
4. CONNECT ENGINE WIRE TO TRANSMISSION (a) Connect the following connectors:(1) O/D direct clutch speed sensor connector
(2) No.1 speed sensor connector
(3) No.2 speed sensor connector
(4) Neutral start switch connector
(b) Install the five wire clamps to the brackets on the transmission.
EM±166±
ENGINE MECHANICAL Cylinder Block
WhereEverybodyKnowsYourName
Page 2558 of 4087

A pressure feeding lubrication system has been adopted to supply oil to \
the moving parts of this engine. The
lubrication system consists of an oil pan, oil pump, oil filter and other external p\
arts which supply oil to the moving
parts in the engine block. The oil circuit is shown in the illustration at th\
e top of the previous page. Oil from the
oil pan is pumped up by the oil pump. After it passes through the oil fi\
lter, it is fed through the various oil holes
in the crankshaft and cylinder block. After passing through the cylinder b\
lock and performing its lubricating func-
tion, the oil is returned by gravity to the oil pan. A dipstick on the center\
left side of the cylinder block is provided
to check the oil level.
OIL PUMP The oil pump pumps up oil from the oil pan and sends it under pressure to t\
he various parts of the engine.
An oil strainer is mounted in front of the inlet to the oil pump. The oil \
pump itself is a trochoid type pump, inside
of which there is a drive rotor and a driven rotor. When the drive rotor rotates, the driven rotor rotates in the same
direction, and since the axis of the driven rotor shaft is different from the center of the driven rotor, the space
between the two rotors is changed as they rotate. Oil is drawn in when the space\
is wide and is discharged when
the space in narrow.
OIL PRESSURE REGULATOR At high engine speeds, the engine oil supplied by the oil pump exceeds the\
capacity of the engine to utilize
it. For that reason, the oil pressure regulator works to prevent an over\
supply of oil. During normal oil supply, a
coil spring and valve keep the bypass closed, but when too much oil is being \
fed, the pressure become extremely
high, overpowering the force of the spring and opening the valves. This allow\
s the excess oil to flow through
the valve and return to the oil pump inlet.
OIL FILTER The oil filter is a full flow type filter with a built±in paper filter e\
lement. Particles of metal from wear, airborne
dirt, carbon and other impurities can get into the oil during use and co\
uld cause accelerated wear or seizing if
allowed to circulate through the engine. The oil filter, integrated into the oil line, removes these impurities as the
oil passes through it. The filter is mounted outside the engine to simplify\
replacement of the filter element. A relief
valve is also included ahead of the filter element to relieve the high oil pr\
essure in case the filter element be-
comes clogged with impurities. The relief valve opens when the oil pressure o\
verpowers the force of the spring.
Oil passing through the relief valve by±passes the oil filter and flo\
ws directly into the main oil hole in the engine.
±
LUBRICATION SYSTEM PrecautionsLU±3
WhereEverybodyKnowsYourName
Page 2560 of 4087

OIL PRESSURE CHECK
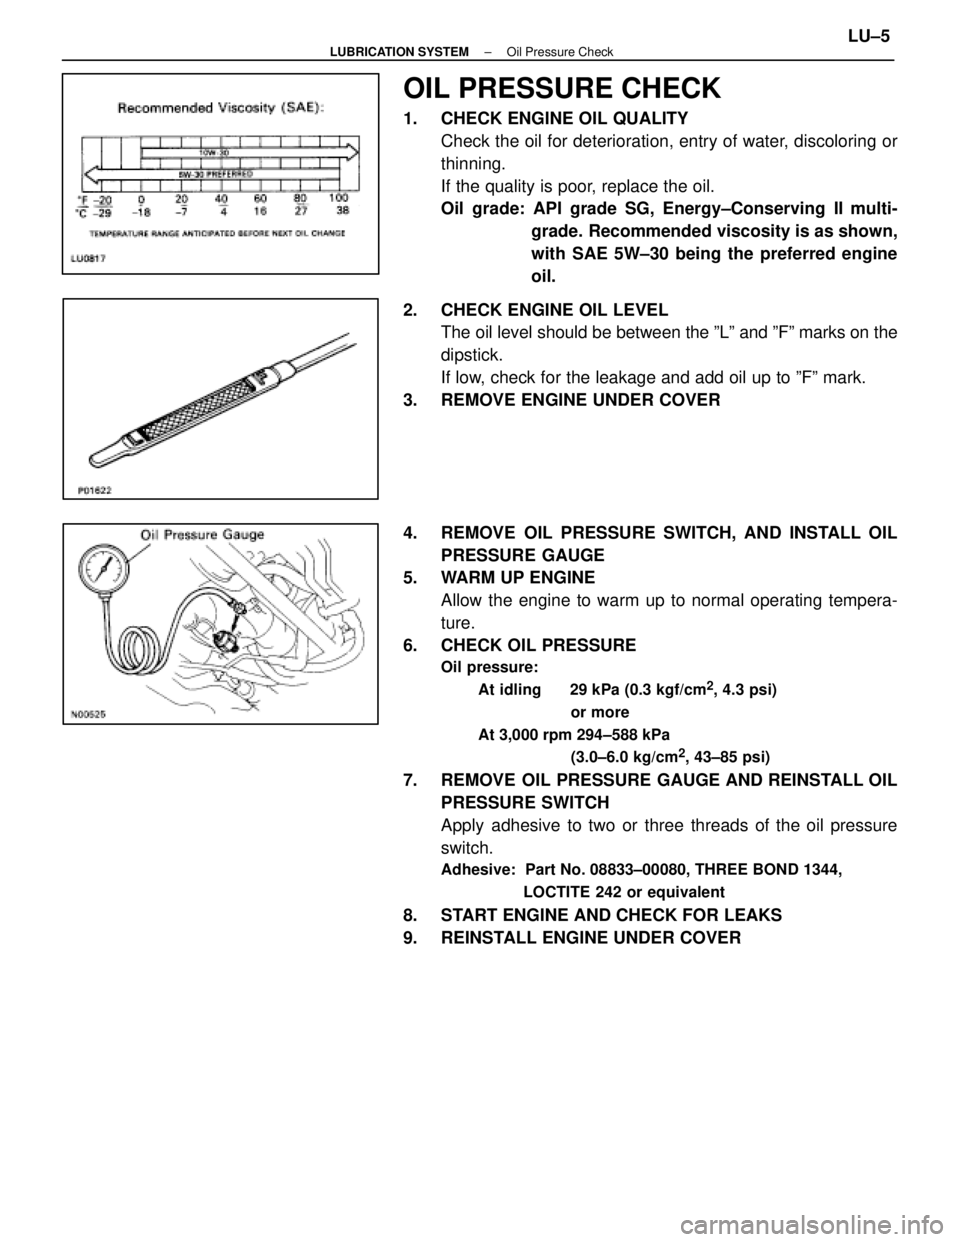
1. CHECK ENGINE OIL QUALITYCheck the oil for deterioration, entry of water, discoloring or
thinning.
If the quality is poor, replace the oil.
Oil grade: API grade SG, Energy±Conserving II multi- grade. Recommended viscosity is as shown,
with SAE 5W±30 being the preferred engine
oil.
2. CHECK ENGINE OIL LEVEL The oil level should be between the ºLº and ºFº marks on the
dipstick.
If low, check for the leakage and add oil up to ºFº mark.
3. REMOVE ENGINE UNDER COVER
4. REMOVE OIL PRESSURE SWITCH, AND INSTALL OIL PRESSURE GAUGE
5. WARM UP ENGINE
Allow the engine to warm up to normal operating tempera-
ture.
6. CHECK OIL PRESSURE
Oil pressure:
At idling 29 kPa (0.3 kgf/cm
2, 4.3 psi)
or more
At 3,000 rpm 294±588 kPa (3.0±6.0 kg/cm
2, 43±85 psi)
7. REMOVE OIL PRESSURE GAUGE AND REINSTALL OILPRESSURE SWITCH
Apply adhesive to two or three threads of the oil pressure
switch.
Adhesive: Part No. 08833±00080, THREE BOND 1344,
LOCTITE 242 or equivalent
8. START ENGINE AND CHECK FOR LEAKS
9. REINSTALL ENGINE UNDER COVER
±
LUBRICATION SYSTEM Oil Pressure CheckLU±5
WhereEverybodyKnowsYourName
Page 2564 of 4087

REMOVAL OF OIL PUMP
(See Components on page LU±8)
HINT: When repairing the oil pump, the oil pan and strainer
should be removed and cleaned.
1. REMOVE ENGINE WITH TRANSMISSION (See pages EM±118 to 128)
2. SEPARATE ENGINE AND TRANSMISSION (See pages EM±129 to 130)
3. INSTALL ENGINE TO ENGINE STAND FOR REMOVAL
4. REMOVE TIMING BELT (See steps 8 to 35 on pages EM±36 to 43)
5. REMOVE NO.2 IDLER PULLEY, NO.1 IDLER PULLEY AND CRANKSHAFT TIMING PULLEY
(See steps 36 to 38 on page EM±44)
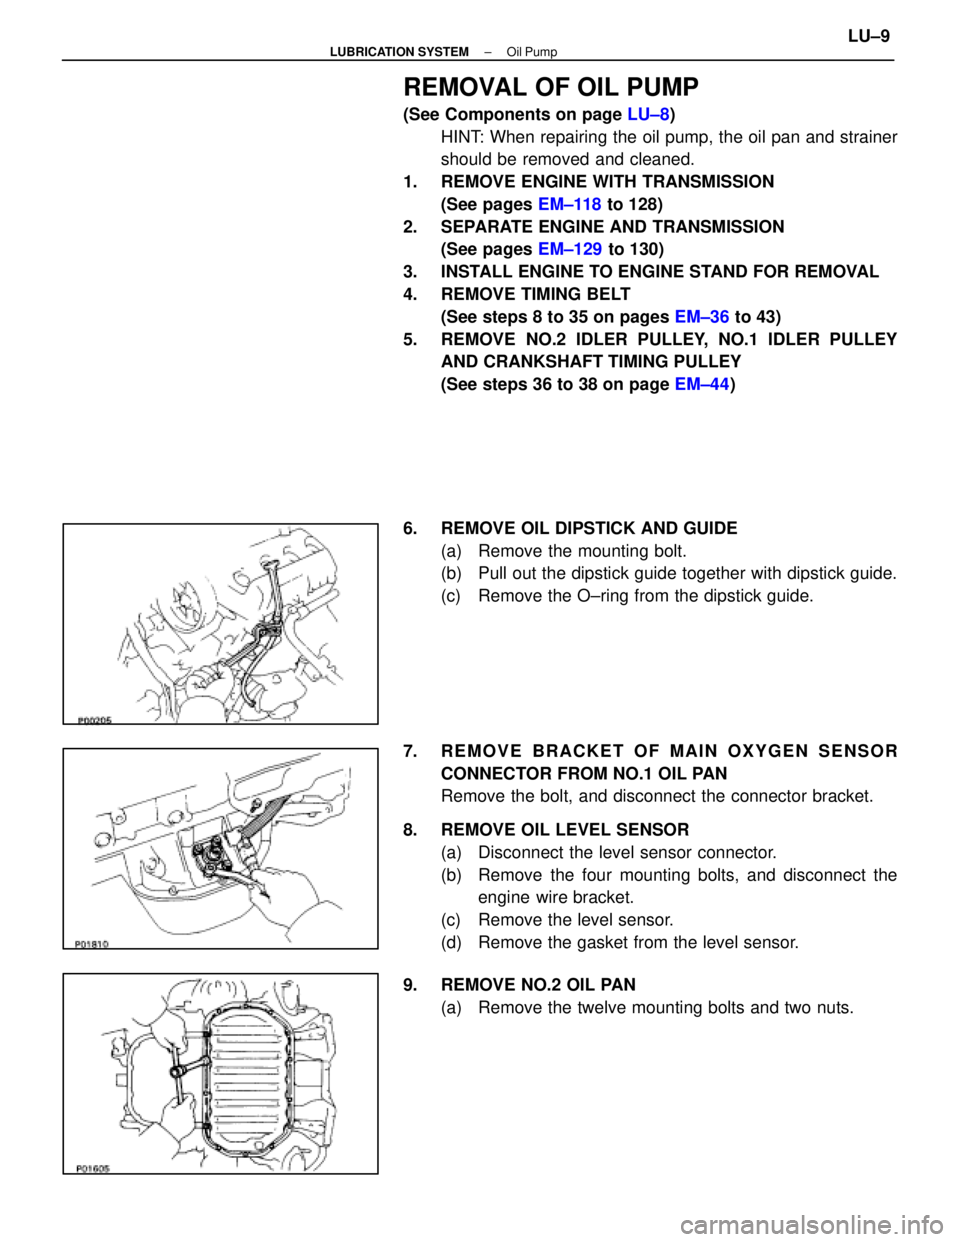
6. REMOVE OIL DIPSTICK AND GUIDE (a) Remove the mounting bolt.
(b) Pull out the dipstick guide together with dipstick guide.
(c) Remove the O±ring from the dipstick guide.
7. REMOVE BRACKET OF MAIN OXYGEN SENSOR CONNECTOR FROM NO.1 OIL PAN
Remove the bolt, and disconnect the connector bracket.
8. REMOVE OIL LEVEL SENSOR (a) Disconnect the level sensor connector.
(b) Remove the four mounting bolts, and disconnect theengine wire bracket.
(c) Remove the level sensor.
(d) Remove the gasket from the level sensor.
9. REMOVE NO.2 OIL PAN (a) Remove the twelve mounting bolts and two nuts.
±
LUBRICATION SYSTEM Oil PumpLU±9
WhereEverybodyKnowsYourName
Page 2574 of 4087

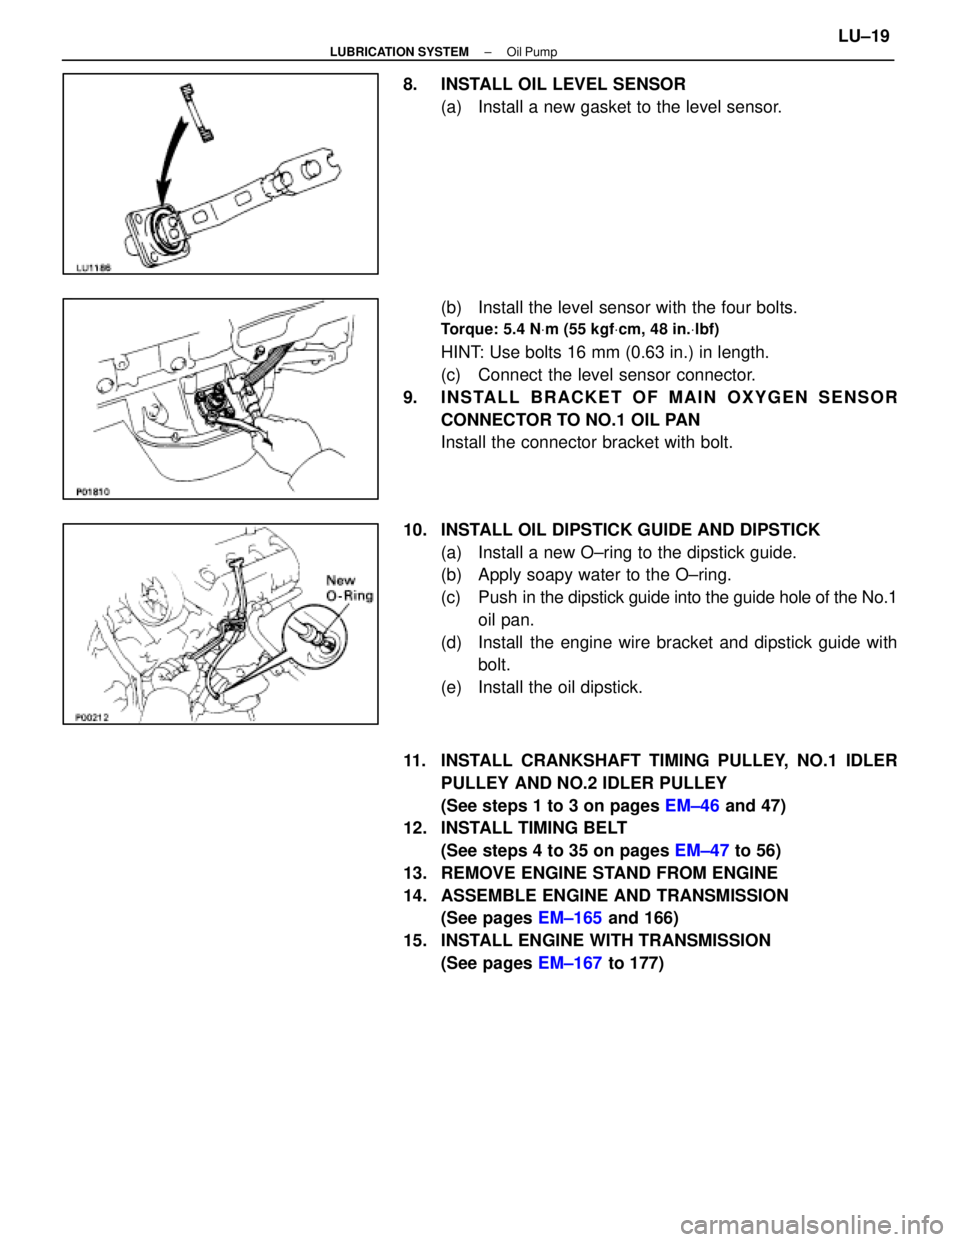
8. INSTALL OIL LEVEL SENSOR(a) Install a new gasket to the level sensor.
(b) Install the level sensor with the four bolts.
Torque: 5.4 N Vm (55 kgf Vcm, 48 in. Vlbf)
HINT: Use bolts 16 mm (0.63 in.) in length.
(c) Connect the level sensor connector.
9. INSTALL BRACKET OF MAIN OXYGEN SENSOR CONNECTOR TO NO.1 OIL PAN
Install the connector bracket with bolt.
10. INSTALL OIL DIPSTICK GUIDE AND DIPSTICK (a) Install a new O±ring to the dipstick guide.
(b) Apply soapy water to the O±ring.
(c) Push in the dipstick guide into the guide hole of the No.1
oil pan.
(d) Install the engine wire bracket and dipstick guide with bolt.
(e) Install the oil dipstick.
11. INSTALL CRANKSHAFT TIMING PULLEY, NO.1 IDLER PULLEY AND NO.2 IDLER PULLEY
(See steps 1 to 3 on pages EM±46 and 47)
12. INSTALL TIMING BELT
(See steps 4 to 35 on pages EM±47 to 56)
13. REMOVE ENGINE STAND FROM ENGINE
14. ASSEMBLE ENGINE AND TRANSMISSION (See pages EM±165 and 166)
15. INSTALL ENGINE WITH TRANSMISSION (See pages EM±167 to 177)
±
LUBRICATION SYSTEM Oil PumpLU±19
WhereEverybodyKnowsYourName