Page 31 of 4087

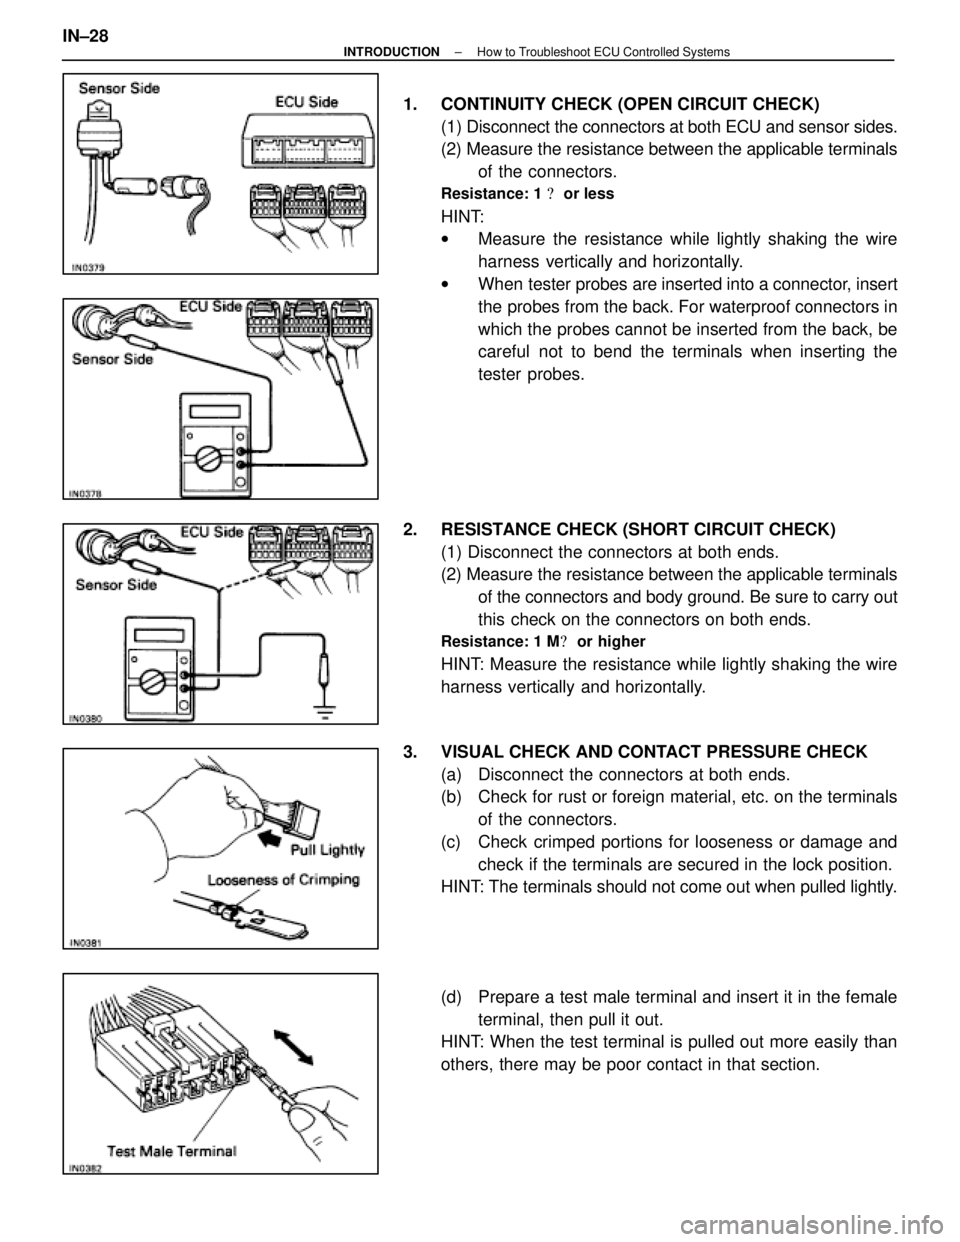
1. CONTINUITY CHECK (OPEN CIRCUIT CHECK)(1) Disconnect the connectors at both ECU and sensor sides.
(2) Measure the resistance between the applicable terminalsof the connectors.
Resistance: 1 � or less
HINT:
w Measure the resistance while lightly shaking the wire
harness vertically and horizontally.
w When tester probes are inserted into a connector, insert
the probes from the back. For waterproof connectors in
which the probes cannot be inserted from the back, be
careful not to bend the terminals when inserting the
tester probes.
2. RESISTANCE CHECK (SHORT CIRCUIT CHECK) (1) Disconnect the connectors at both ends.
(2) Measure the resistance between the applicable terminalsof the connectors and body ground. Be sure to carry out
this check on the connectors on both ends.
Resistance: 1 M � or higher
HINT: Measure the resistance while lightly shaking the wire
harness vertically and horizontally.
3. VISUAL CHECK AND CONTACT PRESSURE CHECK (a) Disconnect the connectors at both ends.
(b) Check for rust or foreign material, etc. on the terminalsof the connectors.
(c) Check crimped portions for looseness or damage and check if the terminals are secured in the lock position.
HINT: The terminals should not come out when pulled lightly.
(d) Prepare a test male terminal and insert it in the female
terminal, then pull it out.
HINT: When the test terminal is pulled out more easily than
others, there may be poor contact in that section.
IN±28
±
INTRODUCTION How to Troubleshoot ECU Controlled Systems
WhereEverybodyKnowsYourName
Page 407 of 4087
18. INSTALL FOLLOWING PARTS:(a) Hood
HINT: Torque the hood support
Torque: 22 N Vm (225 kgf Vcm, 16 ft Vlbf)
(b) Front roof headlining
(c) Holders
(d) Center visor and inner rear view mirror
(e) Interior light
(f) Front pillar garnish
±
BODY WindshieldBO±51
WhereEverybodyKnowsYourName
Page 408 of 4087
QUARTER WINDOW GLASS
COMPONENTS
REMOVAL OF QUARTER WINDOW
GLASS
1. REMOVE FOLLOWING PARTS:(a) Rear seat cushion and back
(b) Seat belt shoulder anchor
(c) Quarter trim and roof side inner garnish
2. REMOVE QUARTER WINDOW GLASS (a) Remove four nuts.
(b) Remove roof side rail weatherstrip.
BO±52
±
BODY Quarter Window Glass
WhereEverybodyKnowsYourName
Page 409 of 4087
(c) Push the piano wire through from the interior.
(d) Cut loose the adhesive and remove the glass.
HINT: Do not damage the body.
INSTALLATION OF QUARTER WINDOW
GLASS
(See page BO±52)
1. CLEAN BODY OR GLASS Wipe off any adhesive left on the body or glass with cleaner.
2. INSTALL QUARTER WINDOW GLASS (a) Apply the primer around the entire ceramic applicationarea.
(b) Install the seal to the glass.
(c) Install the window glass to the body with four bolts.
3. INSTALL FOLLOWING PARTS: (a) Quarter trim and roof side inner garnish
(b) Seat belt shoulder anchor
Torque: 43 N Vm (440 kgf Vcm, 32 ft Vlbf)
(c) Rear seat cushion and back
(See page BO±67)
±
BODY Quarter Window GlassBO±53
WhereEverybodyKnowsYourName
Page 410 of 4087
BACK WINDOW GLASS
COMPONENTS
REMOVAL OF BACK WINDOW GLASS
1. REMOVE FOLLOWING PARTS:(a) Rear seat back and cushion
(b) Roof side inner garnish
(c) Package tray trim
(d) Back window lower moulding
(e) Luggage compartment door
2. DISCONNECT REAR SIDE OF ROOF HEADLINING Pull out the rear end of roof headlining with your hand and
disconnect it.
BO±54
±
BODY Back Window Glass
WhereEverybodyKnowsYourName
Page 413 of 4087
10. INSTALL GLASS(a) Position the glass so that the reference marks are linedup, and press in gently along the rim.
(b) U s e a s p a t u l a t o r e m o v e a n y e x c e s s p r o t r u d i n g adhesive.
(c) Fasten glass securely until the adhesive sets for about 24 hours.
11. INSPECT FOR LEAKS AND REPAIR (a) P e rfo rm a le a k te st afte r th e ha r dening time has
elapsed.
(b) Seal any leak with auto glass sealer.
Part No. 08833±00030 or equivalent
12. INSTALL FOLLOWING PARTS: (a) Back window lower moulding
(b) Luggage compartment door
(c) Package tray trim
(d) Roof side inner garnish
(e) Rear seat back and cushion
±
BODY Back Window GlassBO±57
WhereEverybodyKnowsYourName
Page 427 of 4087
Front Seat Belt
REMOVAL OF FRONT SEAT BELT
(See page BO±70)
1. REMOVE FOLLOWING PARTS: (a) Front seat
(b) Rear seat cushion and seat back
(c) Front pillar garnish
(d) Quater trim and roof side inner garnish
2. REMOVE FRONT SEAT OUTER BELT (a) Using a screwdriver, pry out the front seat belt anchorbolt cover.
HINT: Tape the screwdriver tip before use.
(b) Remove the front seat belt anchor bolt.
(c) Disconnect the connector.
(d) Remove two bolts and the outer belt.
3. REMOVE FRONT SEAT INNER BELT (a) Disconnect the connector.
(b) Remove a nut and the inner belt.
±
BODY Seat Belt (Front Seat Belt)BO±71
WhereEverybodyKnowsYourName
Page 428 of 4087

INSTALLATION OF FRONT SEAT BELT
(See page BO±70)
1. INSTALL FRONT SEAT INNER BELT
Torque: 43 N Vm (440 kgf Vcm, 32 ft Vlbf)
2. INSTALL FRONT SEAT OUTER BELT
Torque:
Retractor bolt 43 N Vm (440 kgf Vcm, 32 ft Vlbf)
Anchor bolt 43 N Vm (440 kgf Vcm, 32 ft Vlbf)
HINT: After installing the anchor bolt, check that the an-
chor turns smoothly.
3. INSTALL FOLLOWING PARTS: (a) Quarter trim and roof side inner garnish
(b) Front pillar garnish
(c) Rear seat cushion and seat back
(d) Front seat
INSPECTION OF FRONT SEAT BELT
[Emergency Locking Retractor (ELR) Type]
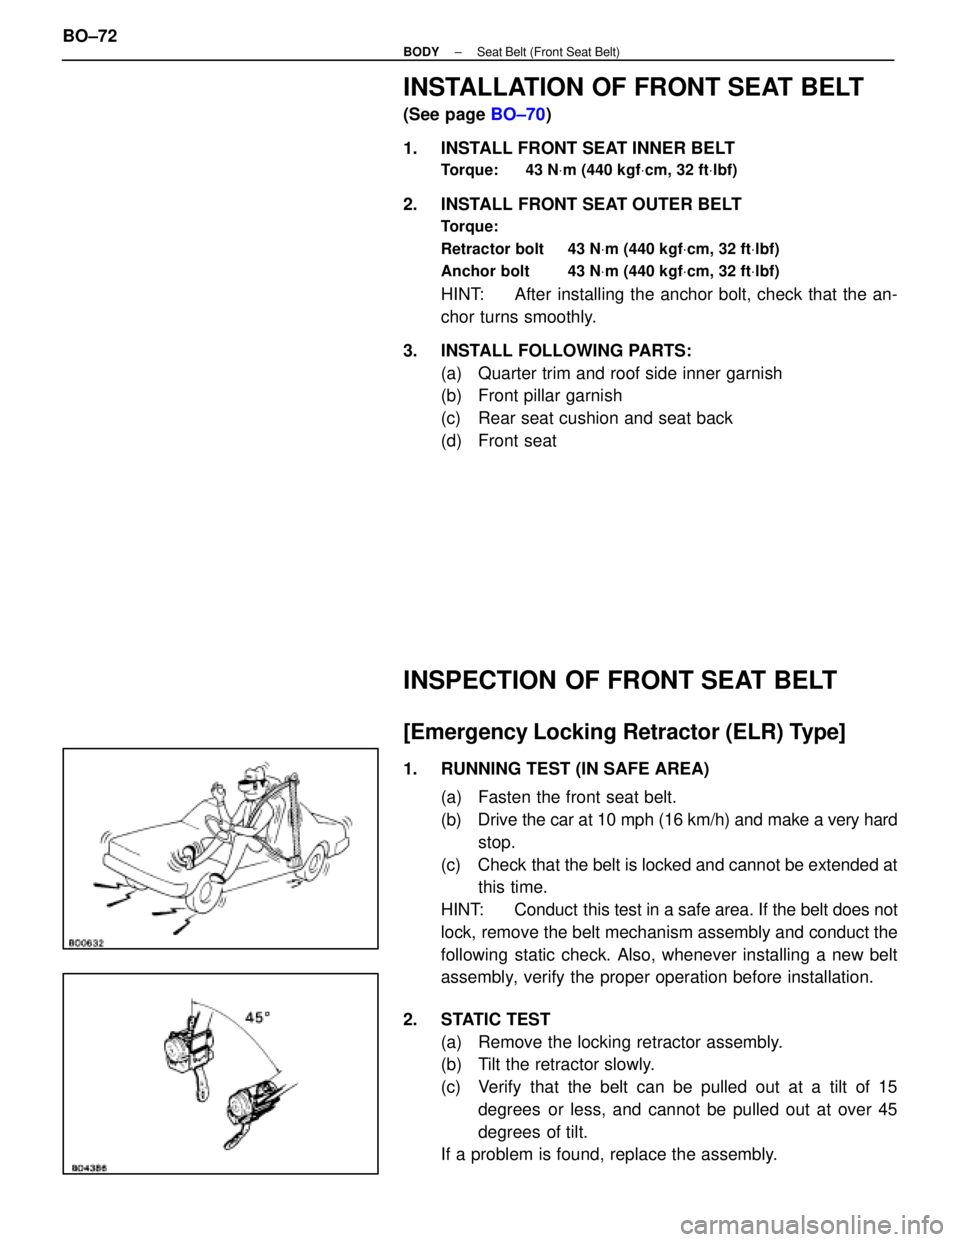
1. RUNNING TEST (IN SAFE AREA)
(a) Fasten the front seat belt.
(b) Drive the car at 10 mph (16 km/h) and make a very hardstop.
(c) Check that the belt is locked and cannot be extended at this time.
HINT: Conduct this test in a safe area. If the belt does not
lock, remove the belt mechanism assembly and conduct the
following static check. Also, whenever installing a new belt
assembly, verify the proper operation before installation.
2. STATIC TEST (a) Remove the locking retractor assembly.
(b) Tilt the retractor slowly.
(c) Verify that the belt can be pulled out at a tilt of 15degrees or less, and cannot be pulled out at over 45
degrees of tilt.
If a problem is found, replace the assembly.
BO±72
±
BODY Seat Belt (Front Seat Belt)
WhereEverybodyKnowsYourName