Page 2277 of 4087
HINT: Arrange the valve lifters and adjusting shims in correct
order.
2. REMOVE VALVES (a) Using SST, compress the valve spring and remove thetwo keepers.
SST 09202±70010
(b) Remove the following parts: (1) Spring retainer
(2) Valve spring
(3) Valve
(4) Spring seat
HINT: Arrange the valves, valve springs, spring seats and
spring retainers in correct order.
(c) Using needle±nose pliers, remove the oil seal.
±
ENGINE MECHANICAL Cylinder HeadsEM±77
WhereEverybodyKnowsYourName
Page 2278 of 4087
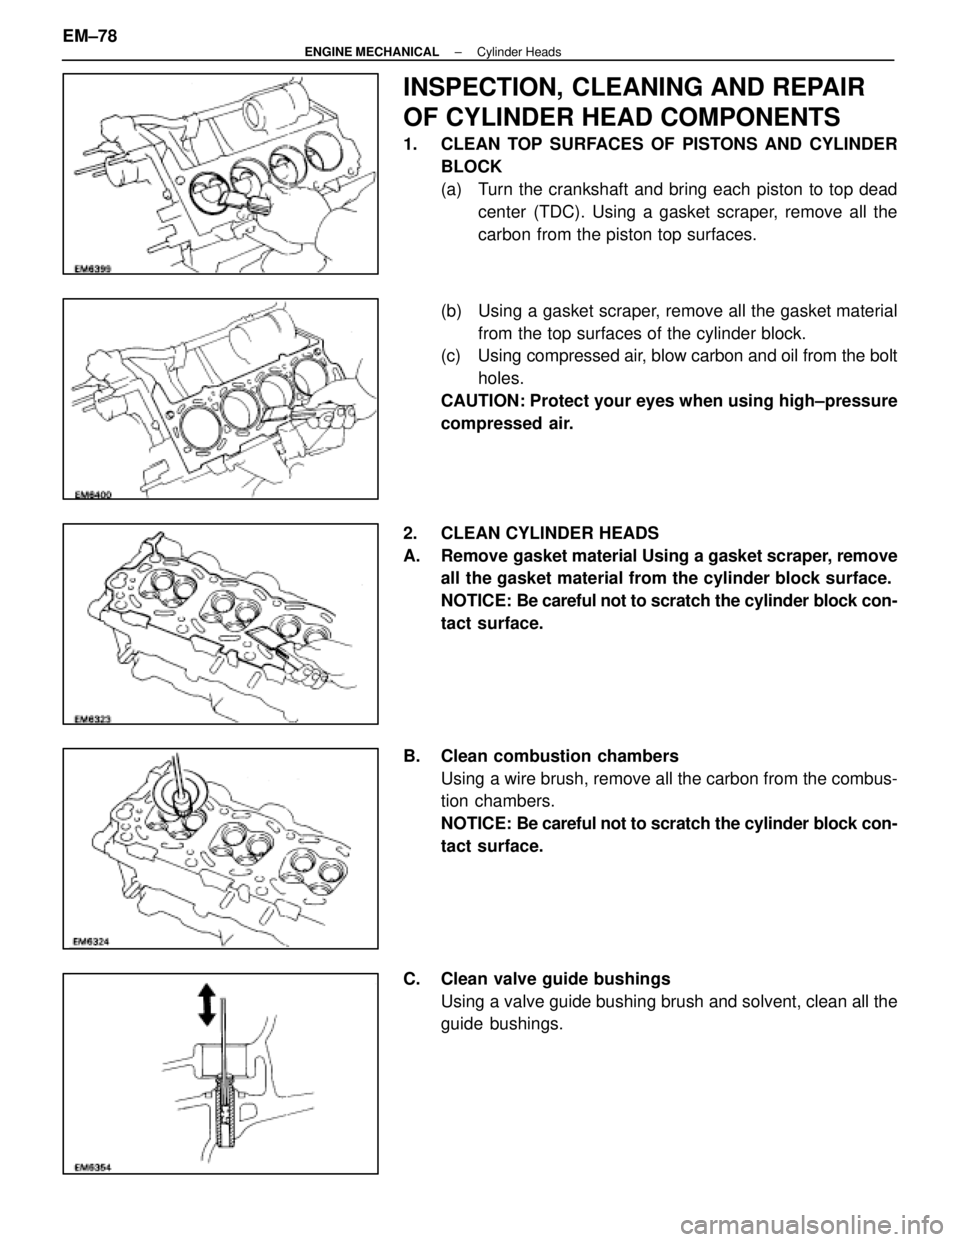
INSPECTION, CLEANING AND REPAIR
OF CYLINDER HEAD COMPONENTS
1. CLEAN TOP SURFACES OF PISTONS AND CYLINDERBLOCK
(a) Turn the crankshaft and bring each piston to top deadcenter (TDC). Using a gasket scraper, remove all the
carbon from the piston top surfaces.
(b) Using a gasket scraper, remove all the gasket material from the top surfaces of the cylinder block.
(c) Using compressed air, blow carbon and oil from the bolt
holes.
CAUTION: Protect your eyes when using high±pressure
compressed air.
2. CLEAN CYLINDER HEADS
A. Remove gasket material Using a gasket scraper, remove all the gasket material from the cylinder block surface.
NOTICE: Be careful not to scratch the cylinder block con-
tact surface.
B. Clean combustion chambers Using a wire brush, remove all the carbon from the combus-
tion chambers.
NOTICE: Be careful not to scratch the cylinder block con-
tact surface.
C. Clean valve guide bushings Using a valve guide bushing brush and solvent, clean all the
guide bushings.
EM±78
±
ENGINE MECHANICAL Cylinder Heads
WhereEverybodyKnowsYourName
Page 2280 of 4087
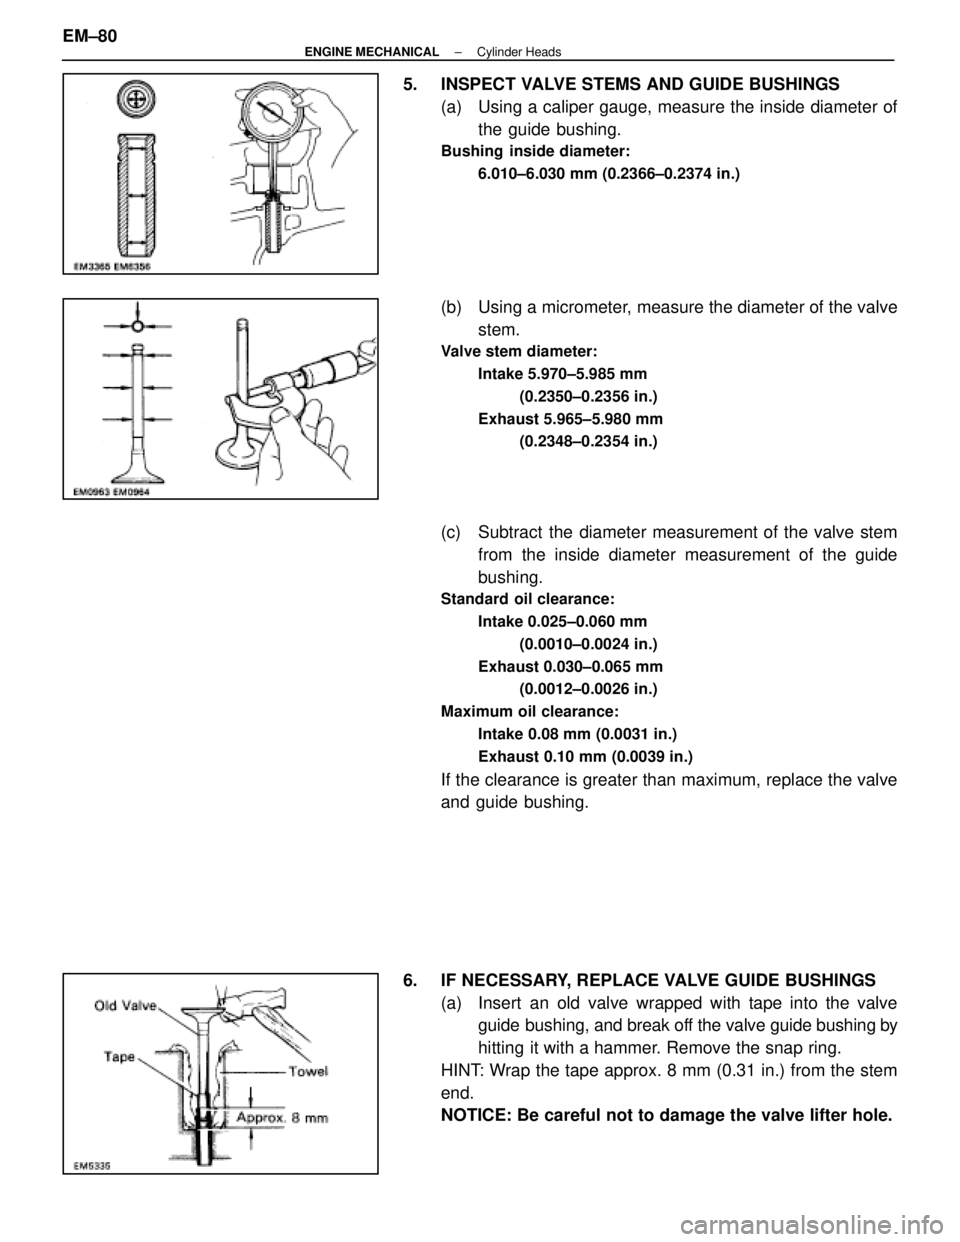
5. INSPECT VALVE STEMS AND GUIDE BUSHINGS(a) Using a caliper gauge, measure the inside diameter ofthe guide bushing.
Bushing inside diameter:
6.010±6.030 mm (0.2366±0.2374 in.)
(b) Using a micrometer, measure the diameter of the valvestem.
Valve stem diameter:
Intake 5.970±5.985 mm (0.2350±0.2356 in.)
Exhaust 5.965±5.980 mm (0.2348±0.2354 in.)
(c) Subtract the diameter measurement of the valve stemfrom the inside diameter measurement of the guide
bushing.
Standard oil clearance:
Intake 0.025±0.060 mm (0.0010±0.0024 in.)
Exhaust 0.030±0.065 mm (0.0012±0.0026 in.)
Maximum oil clearance: Intake 0.08 mm (0.0031 in.)
Exhaust 0.10 mm (0.0039 in.)
If the clearance is greater than maximum, replace the valve
and guide bushing.
6. IF NECESSARY, REPLACE VALVE GUIDE BUSHINGS (a) Insert an old valve wrapped with tape into the valveguide bushing, and break off the valve guide bushing by
hitting it with a hammer. Remove the snap ring.
HINT: Wrap the tape approx. 8 mm (0.31 in.) from the stem
end.
NOTICE: Be careful not to damage the valve lifter hole.
EM±80
±
ENGINE MECHANICAL Cylinder Heads
WhereEverybodyKnowsYourName
Page 2285 of 4087
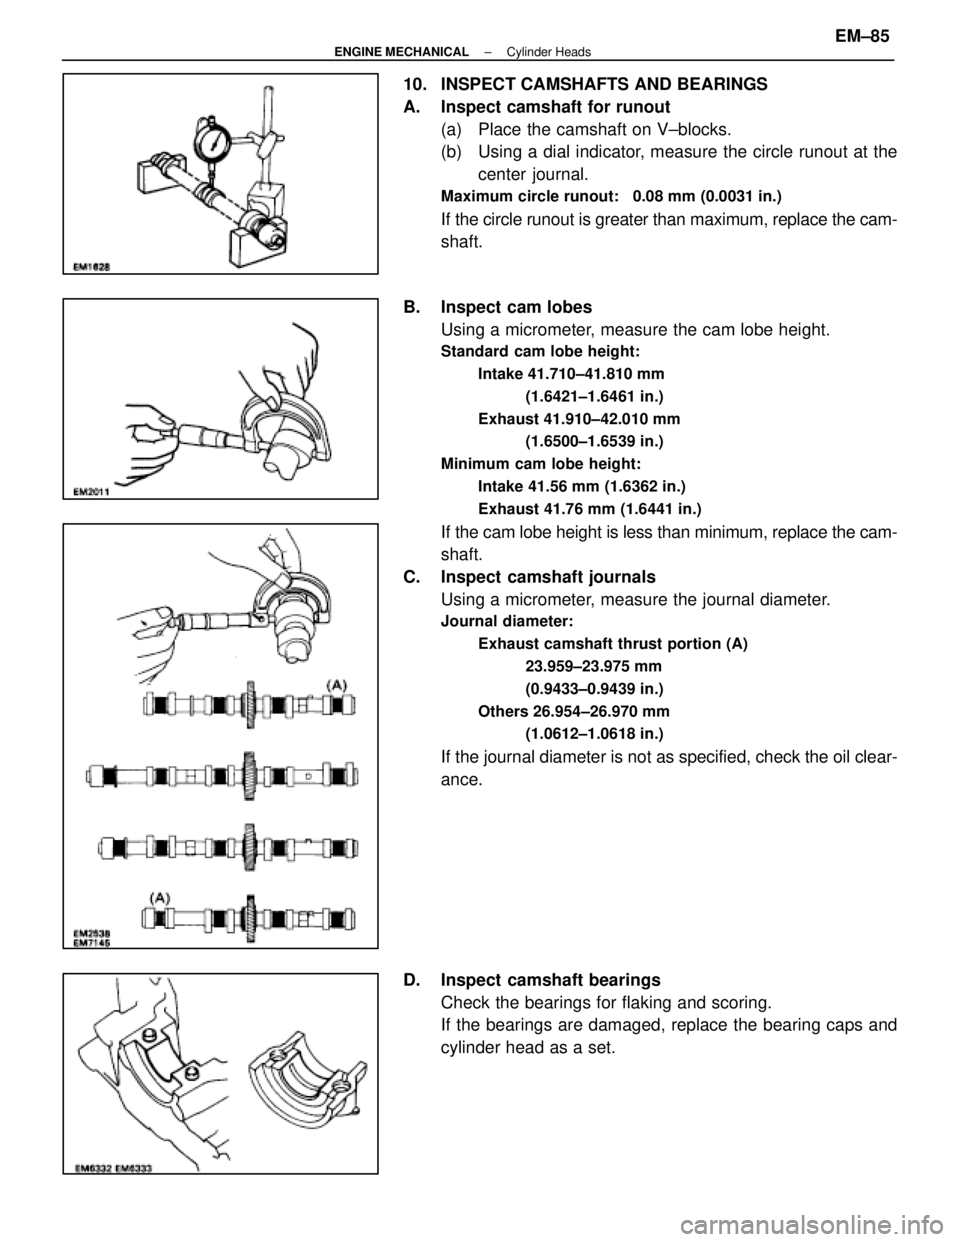
10. INSPECT CAMSHAFTS AND BEARINGS
A. Inspect camshaft for runout(a) Place the camshaft on V±blocks.
(b) Using a dial indicator, measure the circle runout at thecenter journal.
Maximum circle runout: 0.08 mm (0.0031 in.)
If the circle runout is greater than maximum, replace the cam-
shaft.
B. Inspect cam lobes Using a micrometer, measure the cam lobe height.
Standard cam lobe height:
Intake 41.710±41.810 mm (1.6421±1.6461 in.)
Exhaust 41.910±42.010 mm (1.6500±1.6539 in.)
Minimum cam lobe height: Intake 41.56 mm (1.6362 in.)
Exhaust 41.76 mm (1.6441 in.)
If the cam lobe height is less than minimum, replace the cam-
shaft.
C. Inspect camshaft journals Using a micrometer, measure the journal diameter.
Journal diameter:
Exhaust camshaft thrust portion (A) 23.959±23.975 mm
(0.9433±0.9439 in.)
Others 26.954±26.970 mm (1.0612±1.0618 in.)
If the journal diameter is not as specified, check the oil clear-
ance.
D. Inspect camshaft bearings Check the bearings for flaking and scoring.
If the bearings are damaged, replace the bearing caps and
cylinder head as a set.
±
ENGINE MECHANICAL Cylinder HeadsEM±85
WhereEverybodyKnowsYourName
Page 2286 of 4087
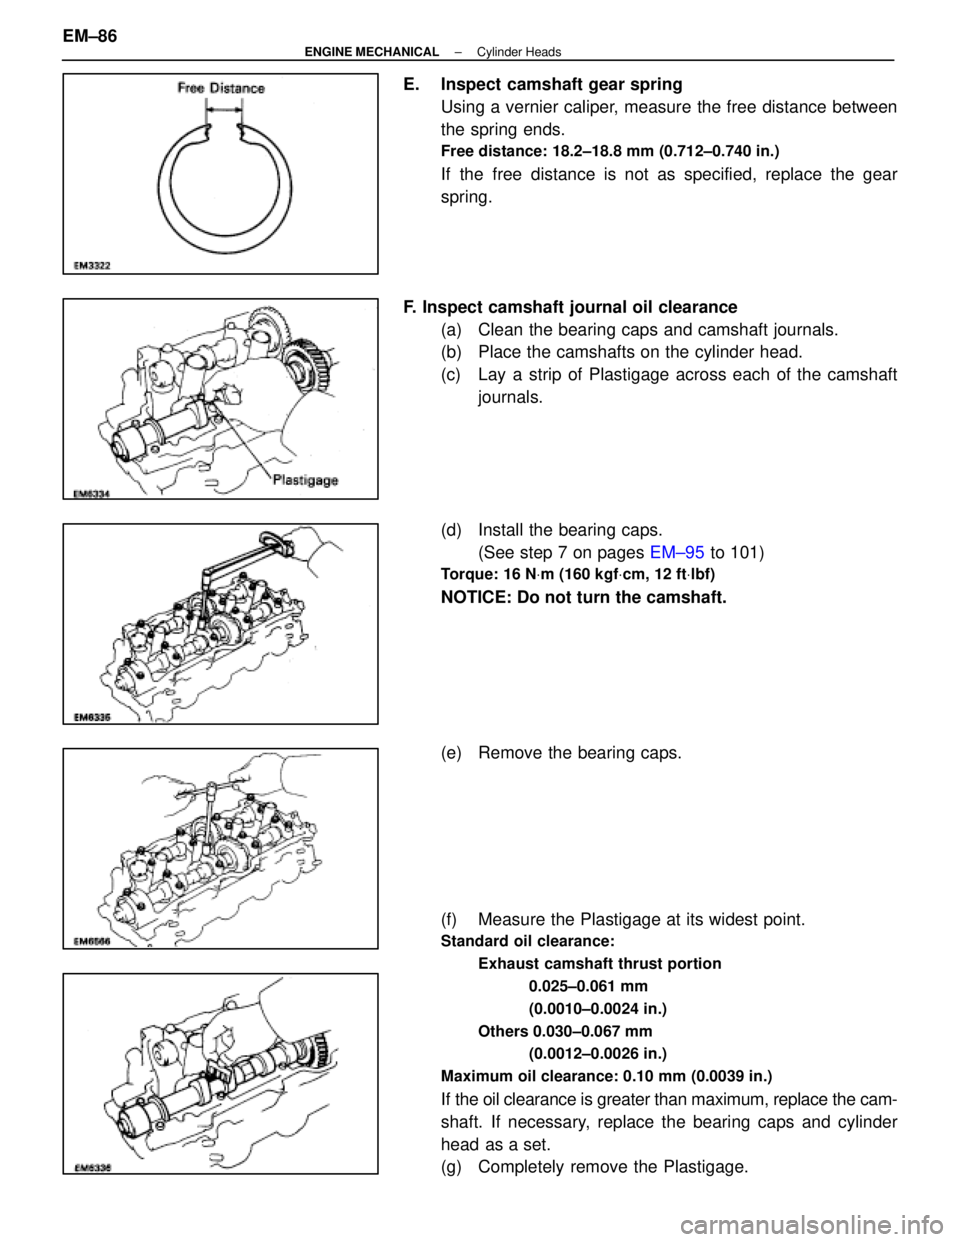
E. Inspect camshaft gear springUsing a vernier caliper, measure the free distance between
the spring ends.
Free distance: 18.2±18.8 mm (0.712±0.740 in.)
If the free distance is not as specified, replace the gear
spring.
F. Inspect camshaft journal oil clearance (a) Clean the bearing caps and camshaft journals.
(b) Place the camshafts on the cylinder head.
(c) Lay a strip of Plastigage across each of the camshaftjournals.
(d) Install the bearing caps. (See step 7 on pages EM±95 to 101)
Torque: 16 N Vm (160 kgf Vcm, 12 ft Vlbf)
NOTICE: Do not turn the camshaft.
(e) Remove the bearing caps.
(f) Measure the Plastigage at its widest point.
Standard oil clearance:
Exhaust camshaft thrust portion 0.025±0.061 mm
(0.0010±0.0024 in.)
Others 0.030±0.067 mm (0.0012±0.0026 in.)
Maximum oil clearance: 0.10 mm (0.0039 in.)
If the oil clearance is greater than maximum, replace the cam-
shaft. If necessary, replace the bearing caps and cylinder
head as a set.
(g) Completely remove the Plastigage.
EM±86
±
ENGINE MECHANICAL Cylinder Heads
WhereEverybodyKnowsYourName
Page 2287 of 4087
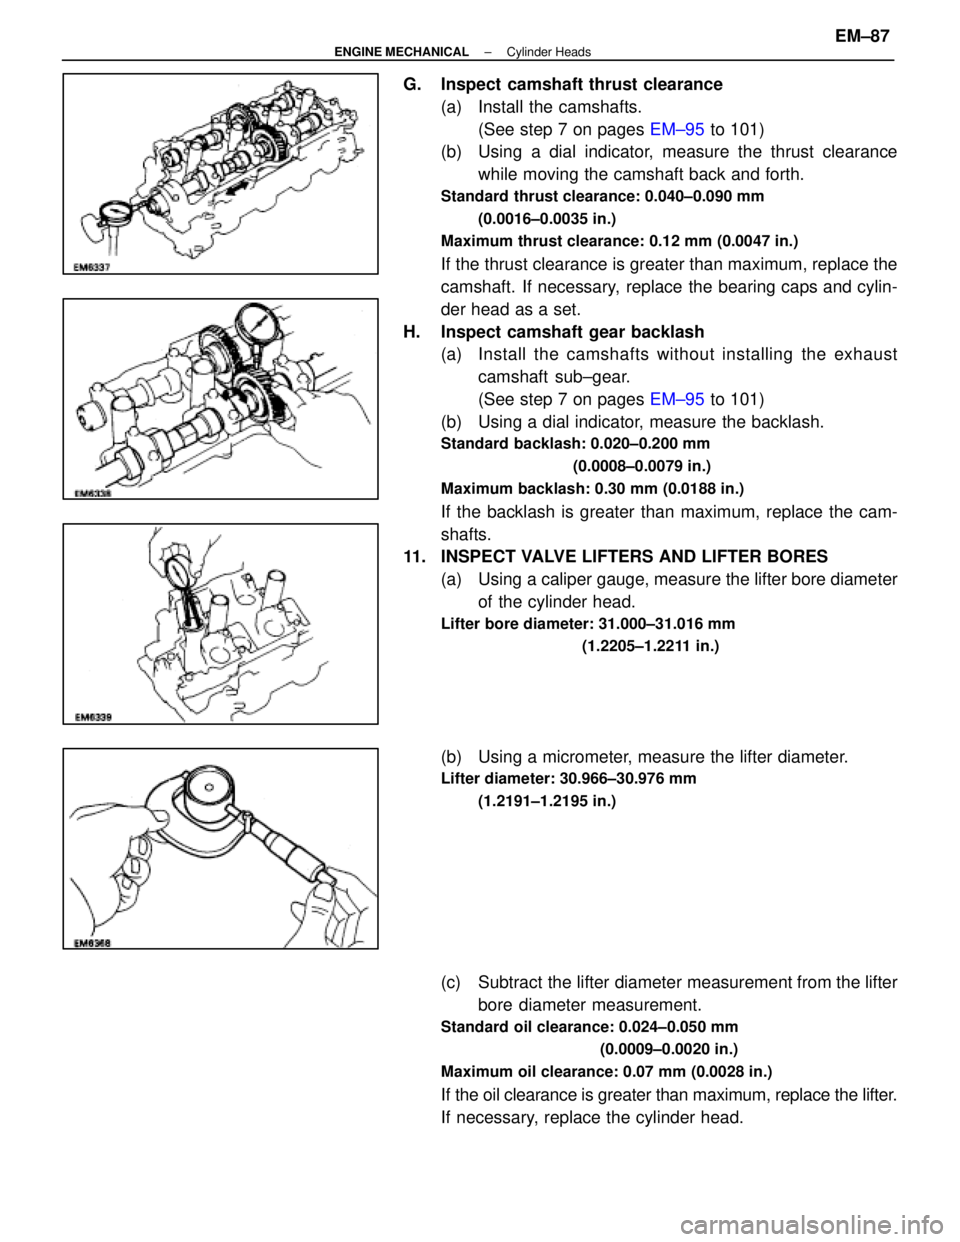
G. Inspect camshaft thrust clearance(a) Install the camshafts.(See step 7 on pages EM±95 to 101)
(b) Using a dial indicator, measure the thrust clearance
while moving the camshaft back and forth.
Standard thrust clearance: 0.040±0.090 mm
(0.0016±0.0035 in.)
Maximum thrust clearance: 0.12 mm (0.0047 in.)
If the thrust clearance is greater than maximum, replace the
camshaft. If necessary, replace the bearing caps and cylin-
der head as a set.
H. Inspect camshaft gear backlash (a) Install the camshafts wit hout installing the ex haust
camshaft sub±gear.
(See step 7 on pages EM±95 to 101)
(b) Using a dial indicator, measure the backlash.
Standard backlash: 0.020±0.200 mm
(0.0008±0.0079 in.)
Maximum backlash: 0.30 mm (0.0188 in.)
If the backlash is greater than maximum, replace the cam-
shafts.
11. INSPECT VALVE LIFTERS AND LIFTER BORES
(a) Using a caliper gauge, measure the lifter bore diameterof the cylinder head.
Lifter bore diameter: 31.000±31.016 mm
(1.2205±1.2211 in.)
(b) Using a micrometer, measure the lifter diameter.
Lifter diameter: 30.966±30.976 mm
(1.2191±1.2195 in.)
(c) Subtract the lifter diameter measurement from the lifterbore diameter measurement.
Standard oil clearance: 0.024±0.050 mm
(0.0009±0.0020 in.)
Maximum oil clearance: 0.07 mm (0.0028 in.)
If the oil clearance is greater than maximum, replace the lifter.
If necessary, replace the cylinder head.
±
ENGINE MECHANICAL Cylinder HeadsEM±87
WhereEverybodyKnowsYourName
Page 2289 of 4087
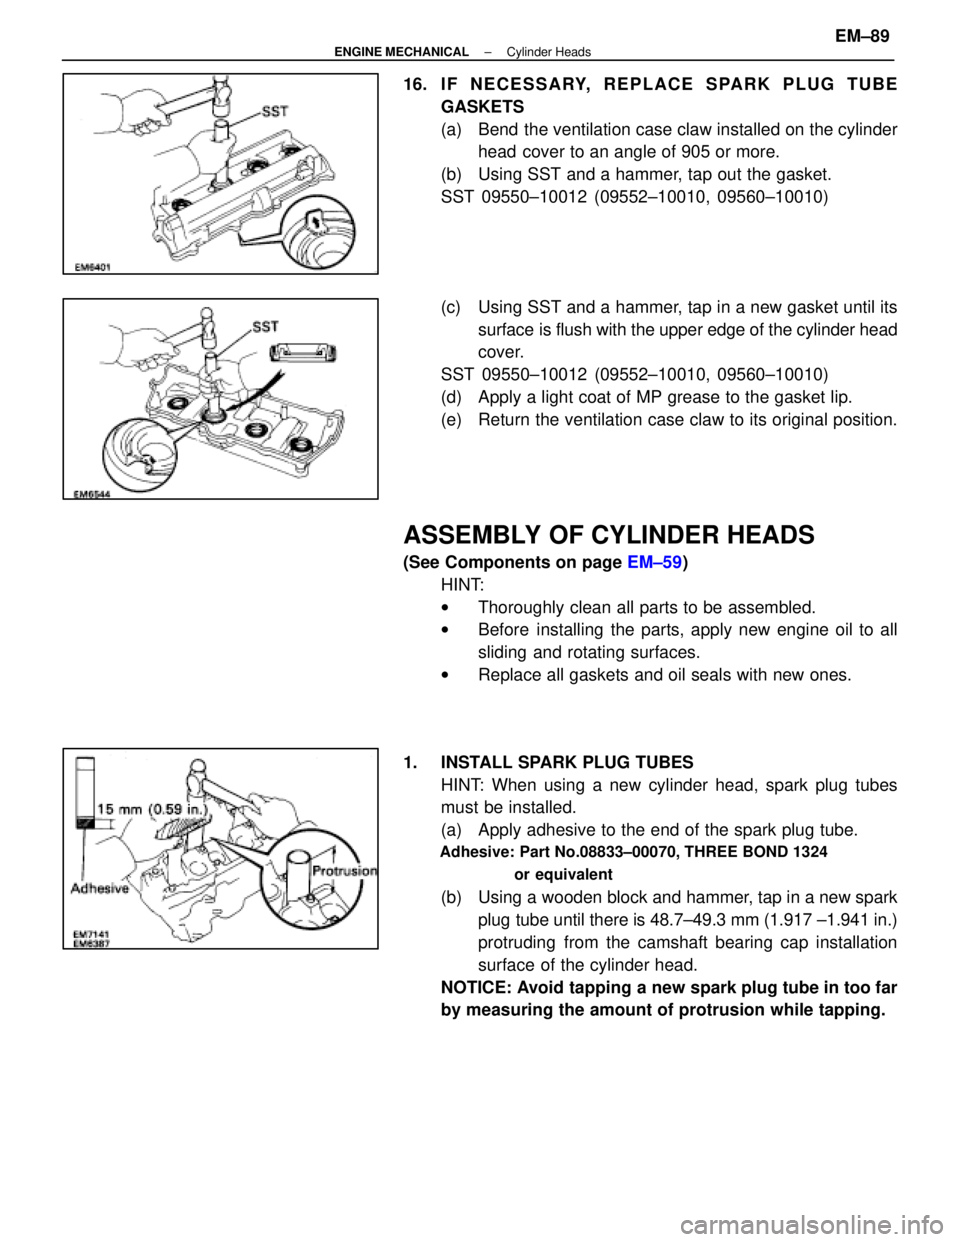
16. IF NECESSARY, REPLACE SPARK PLUG TUBEGASKETS
(a) Bend the ventilation case claw installed on the cylinderhead cover to an angle of 905 or more.
(b) Using SST and a hammer, tap out the gasket.
SST 09550±10012 (09552±10010, 09560±10010)
(c) Using SST and a hammer, tap in a new gasket until its surface is flush with the upper edge of the cylinder head
cover.
SST 09550±10012 (09552±10010, 09560±10010)
(d) Apply a light coat of MP grease to the gasket lip.
(e) Return the ventilation case claw to its original position.
ASSEMBLY OF CYLINDER HEADS
(See Components on page EM±59)
HINT:
w Thoroughly clean all parts to be assembled.
w Before installing the parts, apply new engine oil to all
sliding and rotating surfaces.
w Replace all gaskets and oil seals with new ones.
1. INSTALL SPARK PLUG TUBES HINT: When using a new cylinder head, spark plug tubes
must be installed.
(a) Apply adhesive to the end of the spark plug tube.
Adhesive: Part No.08833±00070, THREE BOND 1324
or equivalent
(b) Using a wooden block and hammer, tap in a new sparkplug tube until there is 48.7±49.3 mm (1.917 ±1.941 in.)
protruding from the camshaft bearing cap installation
surface of the cylinder head.
NOTICE: Avoid tapping a new spark plug tube in too far
by measuring the amount of protrusion while tapping.
±
ENGINE MECHANICAL Cylinder HeadsEM±89
WhereEverybodyKnowsYourName
Page 2290 of 4087
2. INSTALL VALVES(a) Using SST, push in a new oil seal.
SST 09201±41020
(b) Install the following parts:(1) Valve
(2) Spring seat
(3) Valve spring
(4) Spring retainer
(c) Using SST, compress the valve spring and place the two
keepers around the valve stem.
SST 09202±70010
(d) Using a plastic±faced hammer, lightly tap the valve stem
tip to assure proper fit.
3. INSTALL VALVE LIFTERS AND SHIMS Check the valve lifter rotates smoothly by hand.
EM±90
±
ENGINE MECHANICAL Cylinder Heads
WhereEverybodyKnowsYourName