1991 FORD FESTIVA engine overheat
[x] Cancel search: engine overheatPage 51 of 454
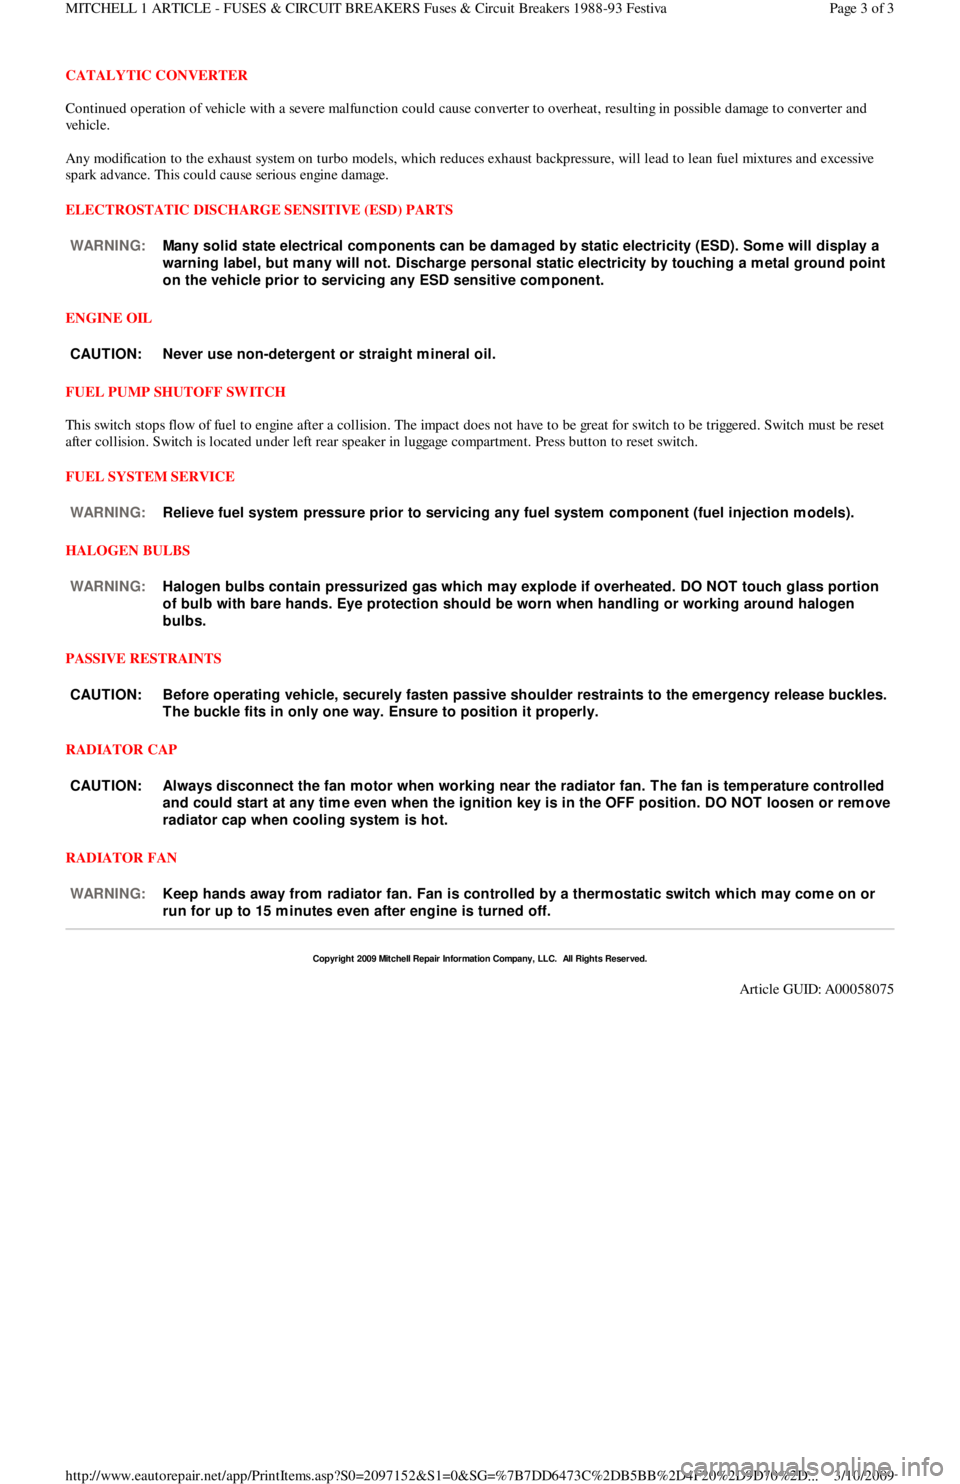
CATALYTIC CONVERTER
Continued operation of vehicle with a severe malfunction could cause converter to overheat, resulting in possible damage to converter and
ve h ic l e .
Any modification to the exhaust system on turbo models, which reduces exhaust backpressure, will lead to lean fuel mixtures and excessive
spark advance. This could cause serious engine damage.
ELECTROSTATIC DISCHARGE SENSITIVE (ESD) PARTS
ENGINE OIL
FUEL PUMP SHUTOFF SWITCH
This switch stops flow of fuel to engine after a collision. The impact does not have to be great for switch to be triggered. Switch must be reset
after collision. Switch is located under left rear speaker in luggage compartment. Press button to reset switch.
FUEL SYSTEM SERVICE
HALOGEN BULBS
PASSIVE RESTRAINTS
RADIATOR CAP
RADIATOR FAN WARNING:Many solid state electrical com ponents can be dam aged by static electricity (ESD). Som e will display a
warning label, but m any will not. Discharge personal static electricity by touching a m etal ground point
on the vehicle prior to servicing any ESD sensitive com ponent.
CAUT ION: Never use non-detergent or straight m ineral oil.
WARNING:Relieve fuel system pressure prior to servicing any fuel system com ponent (fuel injection m odels).
WARNING:Halogen bulbs contain pressurized gas which m ay explode if overheated. DO NOT touch glass portion
of bulb with bare hands. Eye protection should be worn when handling or working around halogen
bulbs.
CAUT ION: Before operating vehicle, securely fasten passive shoulder restraints to the em ergency release buckles.
T he buckle fits in only one way. Ensure to position it properly.
CAUT ION: Always disconnect the fan m otor when working near the radiator fan. T he fan is tem perature controlled
and could start at any tim e even when the ignition key is in the OFF position. DO NOT loosen or rem ove
radiator cap when cooling system is hot.
WARNING:Keep hands away from radiator fan. Fan is controlled by a therm ostatic switch which m ay com e on or
run for up to 15 m inutes even after engine is turned off.
Copyr ight 2009 Mitchell Repair Information Company, LLC. All Rights Reserved.
Article GUID: A00058075
Page 3 of 3 MITCHELL 1 ARTICLE - FUSES & CIRCUIT BREAKERS Fuses & Circuit Breakers 1988-93 Festiva
3/10/2009 http://www.eautorepair.net/app/PrintItems.asp?S0=2097152&S1=0&SG=%7B7DD6473C%2DB5BB%2D4F20%2D9D70%2D
...
Page 163 of 454

POWER STEERING PRESSURE SWITCH
1. Start engine and run it at idle. Remove connector from switch. Connect ohmmeter to switch terminals. Turn steering wheel from side to
side while observing ohmmeter.
2. Replace power steering switch if continuity does not exist with front wheels turned, or if continuity exists with wheels straight ahead.
THROTTLE POSITION SENSOR (1.6L)
Unplug connector from sensor. Connect ohmmeter to sensor terminals TP and SIGRTN (Orange and Blue/Yellow wires on mating connector).
Measure resistance at each throttle opening specified in THROTTLE POSITION SENSOR RESISTANCE
. Replace sensor if resistance is
not within specification.
THROTTLE POSITION SENSOR RESISTANCE
THROTTLE POSITION SWITCH (1.3L)
1. Ensure idle speed and ignition timing are adjusted to specification. Stop engine. Disconnect negative battery cable.
2. Unplug TPS connector at throttle body. Insert appropriate feeler gauge between throttle stop screw and stop lever. Check for continuity
between specified terminals on TPS connector. See ON-VEHICLE ADJUSTMENTS article and TPS CONTINUITY table.
TPS CONTINUITY
VANE AIRFLOW (VAF) METER
1. Check all wiring, harnesses, connectors and components for evidence of damage, overheating, shorting or looseness. If any defect exists,
repair as necessary.
2. Inspect vane airflow meter for damage and ensure measuring plate moves smoothly. Install BOB. Turn ignition on. Measure voltage
between BOB test pins VAF and ground on 1.3L, or between VAF and SIGRTN on 1.6L. Voltage measurements must be as specified in
VANE AIRFLOW METER VOLTAG
.
VANE AIRFLOW METER VOLTAGE
VANE AIR TEMPERATURE (VAT) SENSOR
1. Unplug connector from VAF meter. On 1.3L, connect ohmmeter to terminals VAT and ground (Green/Black and Black wires on mating
connector). On 1.6L, connect ohmmeter to VAF meter terminals VAT and SIGRTN (Brown and Blue/Yellow wires on mating
connector).
2. Measure intake air temperature. Measure resistance between specified terminals. See VANE AIR TEMPERATURE RESISTANCE
.
Replace VAF if resistance is not as specified.
Throttle Opening(1) Ohms
1/8989
1/41104
3/81278
1/21462
5/81480
3/41459
7/81144
Fully Open1072
(1)Resistance may vary by plus or minus 15 percent.
CAUT ION: DO NOT tam per with throttle stop screw at throttle lever. Doing so m ay result in dam age to the
throttle body.
Test Condition (1) Cont. Between IDL-TLCont. Between PSW-TL
.02" (.5 mm)YesNo
.03" (.7 mm)NoNo
Wide Open ThrottleNoYes
(1)Insert specified feeler gauge between throttle adjustment screw and stop lever.
Door Opening(1) Volts: 1.3L(1) Volts: 1.6L
Fully Closed.5-1.5(2) *
1/8.593.24
1/41.195.60
3/81.785.62
1/22.385.83
5/82.976.02
3/43.566.57
7/84.167.48
Fully Open4.5-5.07.87
(1)Voltage may vary by plus or minus 15 percent.
(2)Voltage not specified.
Page 3 of 7 MITCHELL 1 ARTICLE - I - SYSTEM/COMPONENT TESTS 1991 ENGINE PERFORMANCE Ford Motor Co. - Ford/Merc
...
3/10/2009 http://www.eautorepair.net/app/PrintItems.asp?S0=2097152&S1=0&SG=%7B7DD6473C%2DB5BB%2D4F20%2D9D70%2D
...
Page 172 of 454
WIGGLE TEST
Checking Circuitry
1. Visually inspect suspected sensor, switch, or solenoid. Enter WIGGLE TEST if using Super Star II tester. If using VOM, connect it to
STO terminal on self-test connector, and ground STI self-test connector terminal. Lightly tap sensor, switch, or solenoid.
2. Push and pull on suspected sensor, switch, or solenoid connector, but DO NOT unplug it. Test and wiggle harness vigorously, working
in small sections, from suspected device toward dash panel, and from dash panel to ECA.
3. If VOM or Super Star II tester does not display a positive indication of an intermittent defect, carefully disconnect suspected device.
Remove terminals from connector.
4. Inspect terminals at both ends for corrosion, bad crimps, or improperly seated terminals. Reconnect after inspection. Unplug harness
fro m E CA.
5. Inspect ECA and harness connector terminals for corrosion, bad crimps, or improperly seated terminals. If VOM does not indicate any
intermittent defect, reconnect wiring and erase codes.
PINPOINT TESTS
HOW TO USE PINPOINT TESTS
1. DO NOT perform any PINPOINT TEST unless directed by a QUICK TESTS procedure. Ensure all non-EEC related defects are
corrected. Follow each test step in order until defect is found. DO NOT replace any part unless so directed. When more than one service
code exists, start with first code displayed.
2. PINPOINT TESTS require ensuring electrical circuits are okay before replacing sensors or any other components. Always test circuits
for continuity between sensor and ECA. Test all circuits for shorts to power, opens, or shorts to ground. VREF and VPWR circuits
should be tested with KOEO or as specified in PINPOINT TESTS.
3. DO NOT measure voltage or resistance at ECA, or connect any test light unless specified in testing procedure. DO NOT pierce wiring.
Isolate both ends of a circuit and turn key off whenever checking for shorts or continuity, unless otherwise specified.
4. Disconnect solenoids and switches before checking circuit continuity or energizing solenoids.
5. An open is defined as any resistance greater than 10,000 ohms, unless otherwise specified.
6. To help diagnose circuits to ECA, turn ignition off and disconnect ECA harness. Connect BOB between ECA and ECA harness to
perform circuit and pinpoint tests.
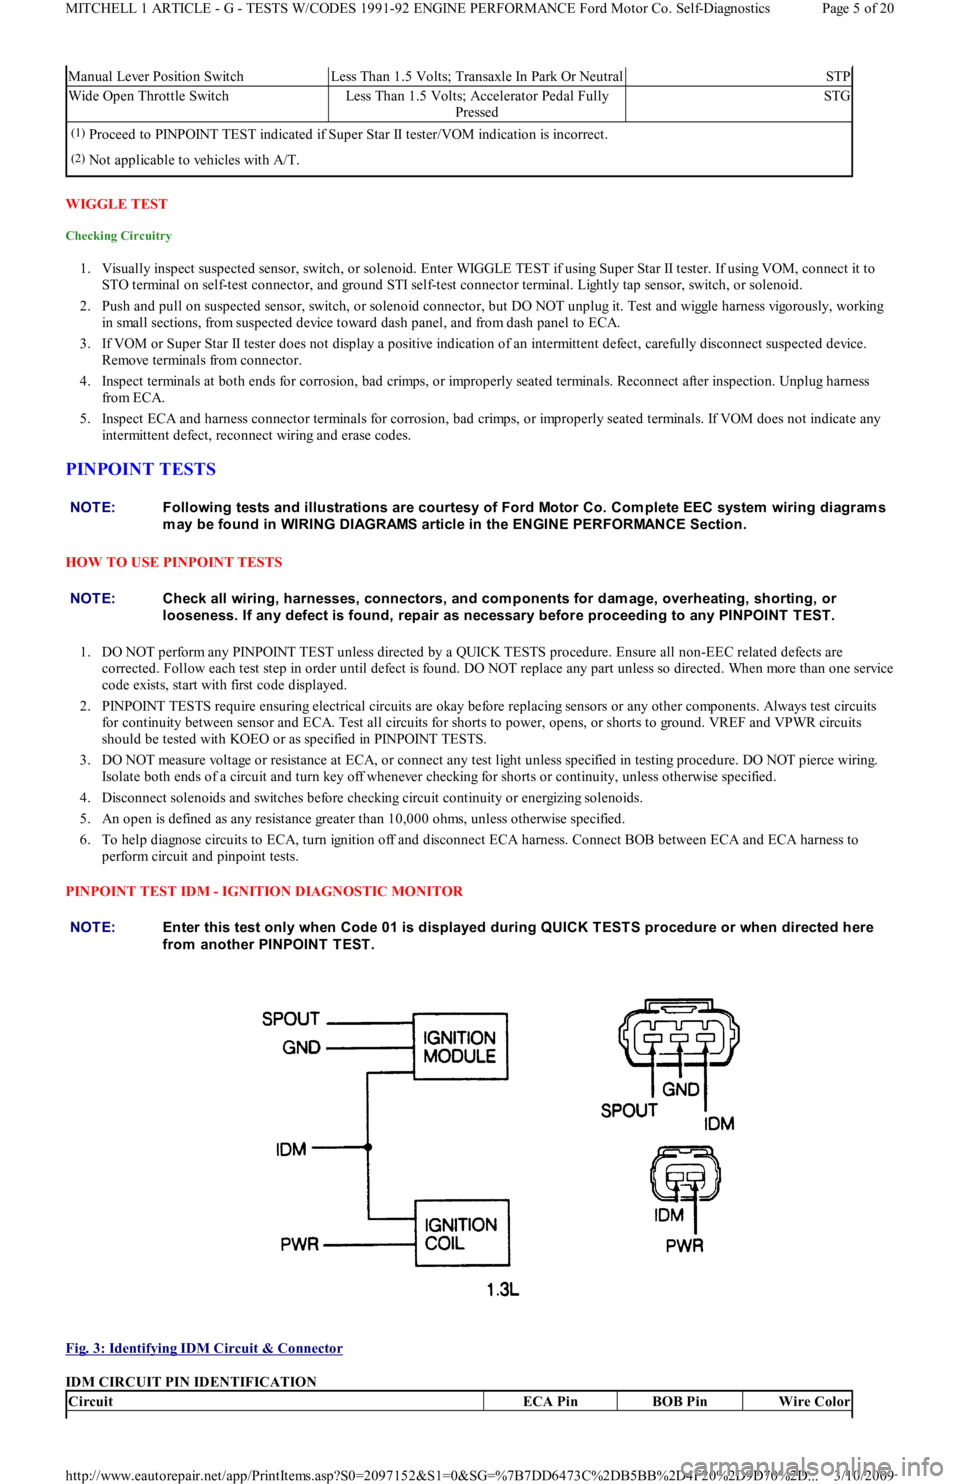
PINPOINT TEST IDM - IGNITION DIAGNOSTIC MONITOR
Fig. 3: Identifying IDM Circuit & Connector
IDM CIRCUIT PIN IDENTIFICATION
Manual Lever Position SwitchLess Than 1.5 Volts; Transaxle In Park Or NeutralSTP
Wide Open Throttle SwitchLess Than 1.5 Volts; Accelerator Pedal Fully
PressedSTG
(1)Proceed to PINPOINT TEST indicated if Super Star II tester/VOM indication is incorrect.
(2)Not applicable to vehicles with A/T.
NOTE:Following tests and illustrations are courtesy of Ford Motor Co. Com plete EEC system wiring diagram s
m ay be found in WIRING DIAGRAMS article in the ENGINE PERFORMANCE Section.
NOTE:Check all wiring, harnesses, connectors, and com ponents for dam age, overheating, shorting, or
looseness. If any defect is found, repair as necessary before proceeding to any PINPOINT T EST .
NOTE:Enter this test only when Code 01 is displayed during QUICK T EST S procedure or when directed here
from another PINPOINT TEST.
CircuitECA PinBOB PinWire Color
Page 5 of 20 MITCHELL 1 ARTICLE - G - TESTS W/CODES 1991-92 ENGINE PERFORMANCE Ford Motor Co. Self-Diagnostics
3/10/2009 http://www.eautorepair.net/app/PrintItems.asp?S0=2097152&S1=0&SG=%7B7DD6473C%2DB5BB%2D4F20%2D9D70%2D
...
Page 218 of 454
Broken clutch housingSee STARTER article
Pinion shaft rusted or drySee STARTER article
Engine basic timing incorrectSee Ignition Timing in TUNE-
UP article
Broken teeth on engine flywheelReplace flywheel and check for
starter pinion gear damage
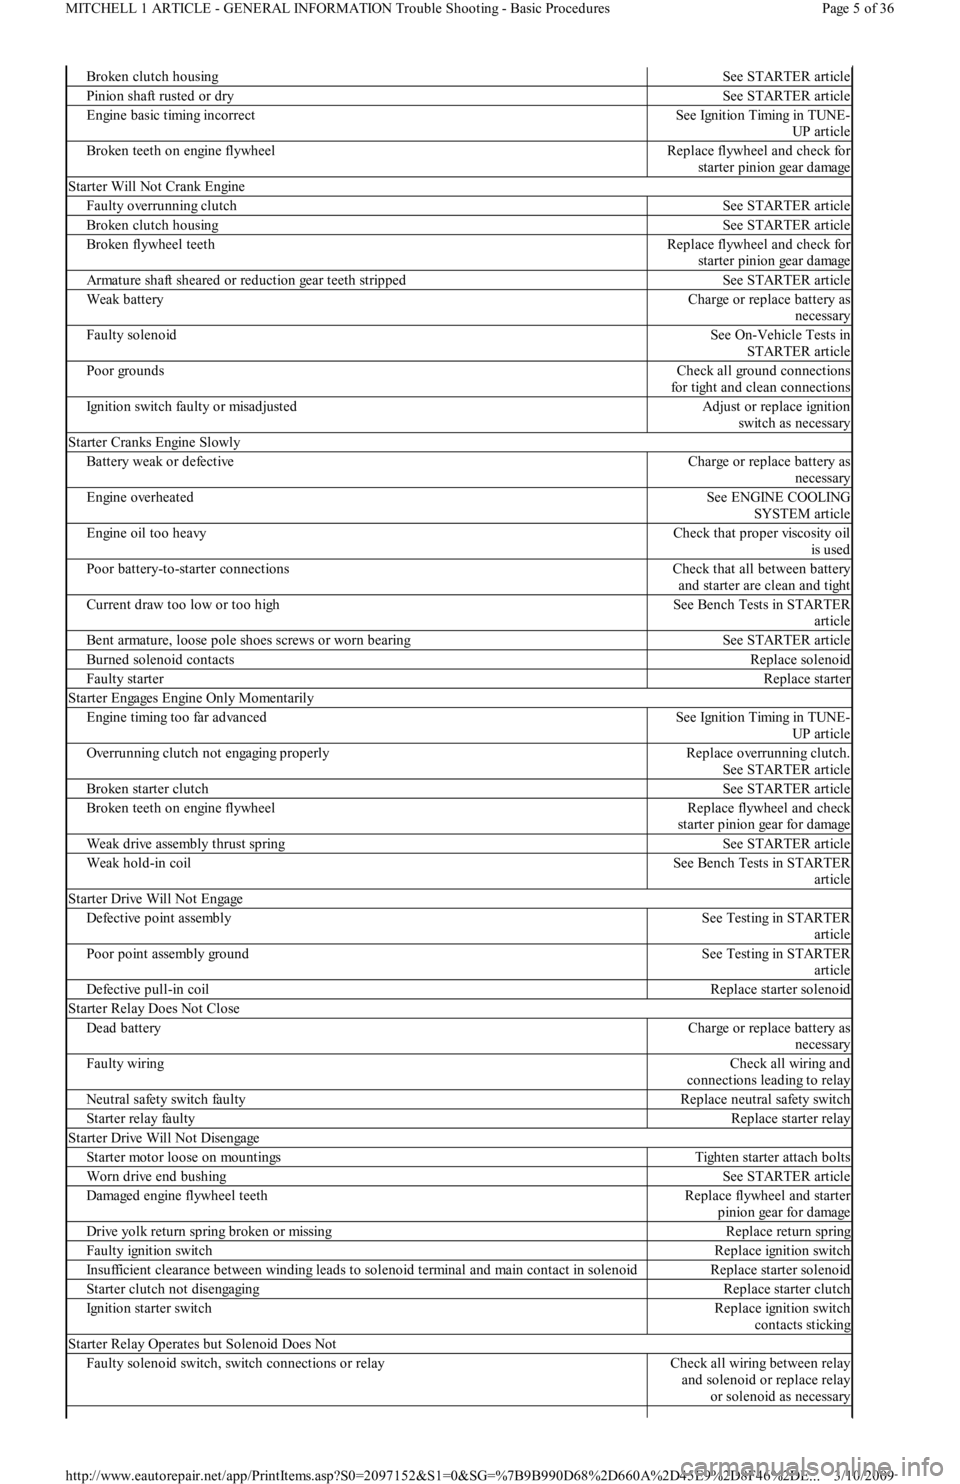
Starter Will Not Crank Engine
Faulty overrunning clutchSee STARTER article
Broken clutch housingSee STARTER article
Broken flywheel teethReplace flywheel and check for
starter pinion gear damage
Armature shaft sheared or reduction gear teeth strippedSee STARTER article
Weak batteryCharge or replace battery as
necessary
Faulty solenoidSee On-Vehicle Tests in
STARTER article
Poor groundsCheck all ground connections
for tight and clean connections
Ignition switch faulty or misadjustedAdjust or replace ignition
switch as necessary
Starter Cranks Engine Slowly
Battery weak or defectiveCharge or replace battery as
necessary
Engine overheatedSee ENGINE COOLING
SYSTEM article
Engine oil too heavyCheck that proper viscosity oil
is used
Poor battery-to-starter connectionsCheck that all between battery
and starter are clean and tight
Current draw too low or too highSee Bench Tests in STARTER
article
Bent armature, loose pole shoes screws or worn bearingSee STARTER article
Burned solenoid contactsReplace solenoid
Faulty starterReplace starter
S t a r t e r E n ga ge s E n gin e On l y M o me n t a r il y
Engine timing too far advancedSee Ignition Timing in TUNE-
UP article
Overrunning clutch not engaging properlyReplace overrunning clutch.
See STARTER article
Broken starter clutchSee STARTER article
Broken teeth on engine flywheelReplace flywheel and check
starter pinion gear for damage
Weak drive assembly thrust springSee STARTER article
Weak hold-in coilSee Bench Tests in STARTER
article
Starter Drive Will Not Engage
Defective point assemblySee Testing in STARTER
article
Poor point assembly groundSee Testing in STARTER
article
Defective pull-in coilReplace starter solenoid
Starter Relay Does Not Close
Dead batteryCharge or replace battery as
necessary
Faulty wiringCheck all wiring and
connections leading to relay
Neutral safety switch faultyReplace neutral safety switch
Starter relay faultyReplace starter relay
Starter Drive Will Not Disengage
Starter motor loose on mountingsTighten starter attach bolts
Worn drive end bushingSee STARTER article
Damaged engine flywheel teethReplace flywheel and starter
pinion gear for damage
Drive yolk return spring broken or missingReplace return spring
Faulty ignition switchReplace ignition switch
Insufficient clearance between winding leads to solenoid terminal and main contact in solenoidReplace starter solenoid
Starter clutch not disengagingReplace starter clutch
Ignition starter switchReplace ignition switch
contacts sticking
Starter Relay Operates but Solenoid Does Not
Faulty solenoid switch, switch connections or relayCheck all wiring between relay
and solenoid or replace relay
or solenoid as necessary
Page 5 of 36 MITCHELL 1 ARTICLE - GENERAL INFORMATION Trouble Shooting - Basic Procedures
3/10/2009 http://www.eautorepair.net/app/PrintItems.asp?S0=2097152&S1=0&SG=%7B9B990D68%2D660A%2D45E9%2D8F46%2DE
...
Page 222 of 454
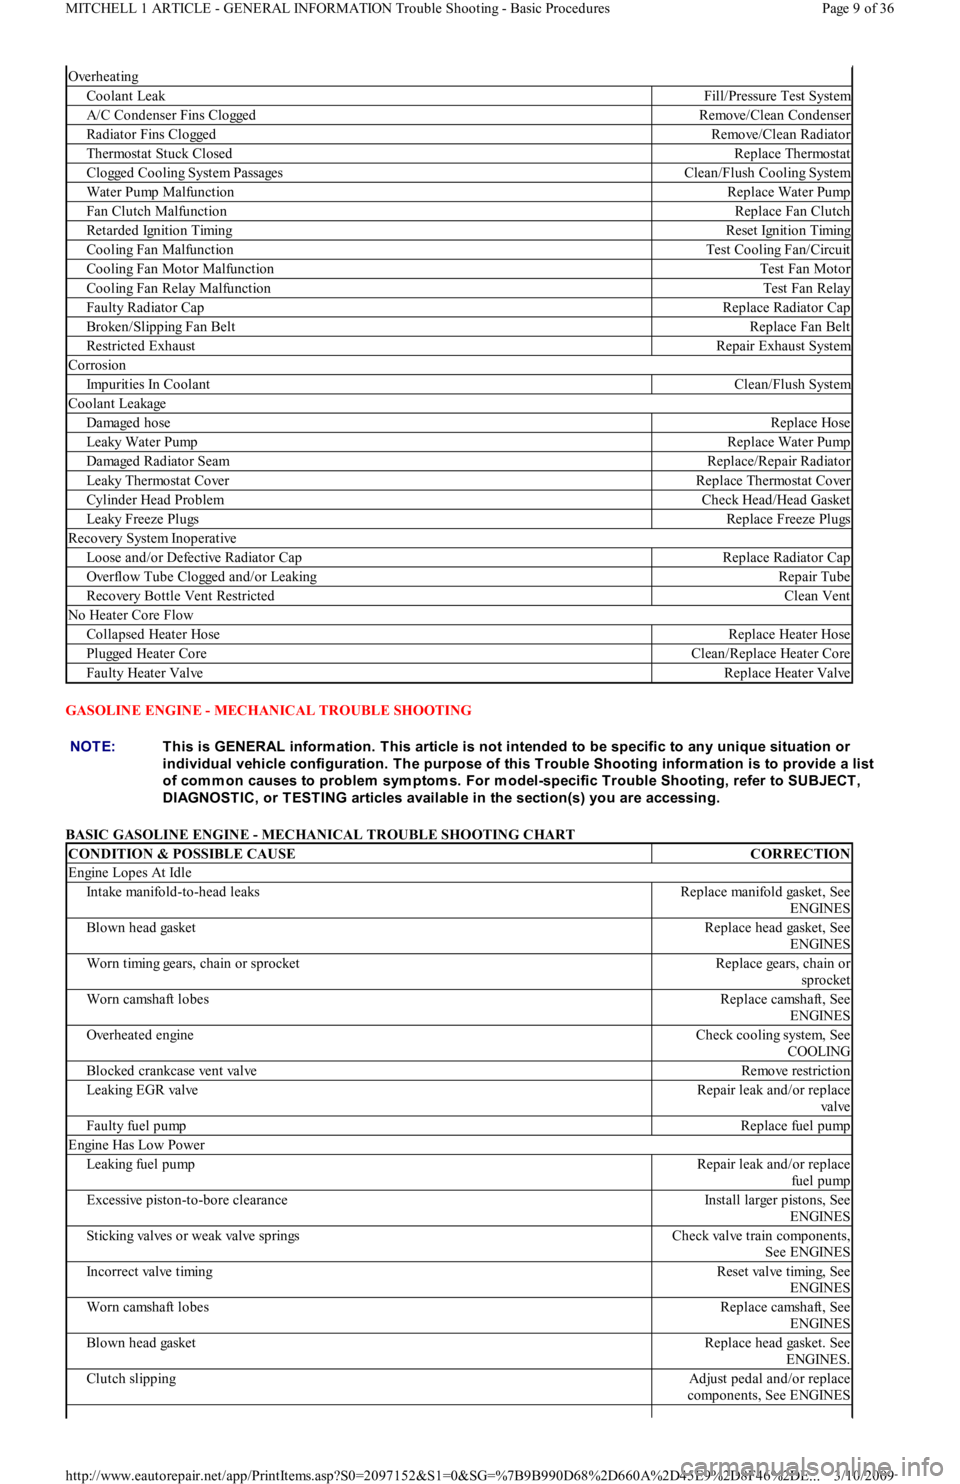
GASOLINE ENGINE - MECHANICAL TROUBLE SHOOTING
BASIC GASOLINE ENGINE - MECHANICAL TROUBLE SHOOTING CHART
Overheating
Coolant LeakFill/Pressure Test System
A/C Condenser Fins CloggedRemove/Clean Condenser
Radiator Fins CloggedRemove/Clean Radiator
Thermostat Stuck ClosedReplace Thermostat
C l o gge d C o o l in g S yst e m P a ssa ge sClean/Flush Cooling System
Water Pump MalfunctionReplace Water Pump
Fan Clutch MalfunctionReplace Fan Clutch
Retarded Ignition TimingReset Ignition Timing
Cooling Fan MalfunctionTest Cooling Fan/Circuit
Cooling Fan Motor MalfunctionTest Fan Motor
Cooling Fan Relay MalfunctionTest Fan Relay
Faulty Radiator CapReplace Radiator Cap
Broken/Slipping Fan BeltReplace Fan Belt
Restricted ExhaustRepair Exhaust System
Corrosion
Impurities In CoolantClean/Flush System
Coolant Leakage
Damaged hoseReplace Hose
Leaky Water PumpReplace Water Pump
Damaged Radiator SeamReplace/Repair Radiator
Leaky Thermostat CoverReplace Thermostat Cover
Cylinder Head ProblemCheck Head/Head Gasket
Leaky Freeze PlugsReplace Freeze Plugs
Recovery System Inoperative
Loose and/or Defective Radiator CapReplace Radiator Cap
Overflow Tube Clogged and/or LeakingRepair Tube
Recovery Bottle Vent RestrictedClean Vent
No Heater Core Flow
Collapsed Heater HoseReplace Heater Hose
Pl u gge d He a t e r C o r eClean/Replace Heater Core
Faulty Heater ValveReplace Heater Valve
NOTE:This is GENERAL inform ation. This article is not intended to be specific to any unique situation or
individual vehicle configuration. T he purpose of this T rouble Shooting inform ation is to provide a list
of com m on causes to problem sym ptom s. For m odel-specific T rouble Shooting, refer to SUBJECT ,
DIAGNOST IC, or T EST ING articles available in the section(s) you are accessing.
CONDITION & POSSIBLE CAUSECORRECTION
Engine Lopes At Idle
In t ake man ifo l d -t o -h ead l eaksReplace manifold gasket, See
ENGINES
Blown head gasketReplace head gasket, See
ENGINES
Worn timing gears, chain or sprocketReplace gears, chain or
sprocket
Worn camshaft lobesReplace camshaft, See
ENGINES
Overheated engineCheck cooling system, See
COOLING
Blocked crankcase vent valveRemove restriction
Le a kin g E GR va l veRepair leak and/or replace
va l ve
Faulty fuel pumpReplace fuel pump
Engine Has Low Power
Leaking fuel pumpRepair leak and/or replace
fu el p u mp
Excessive piston-to-bore clearanceInstall larger pistons, See
ENGINES
Sticking valves or weak valve springsCheck valve train components,
See ENGINES
Incorrect valve timingReset valve timing, See
ENGINES
Worn camshaft lobesReplace camshaft, See
ENGINES
Blown head gasketReplace head gasket. See
ENGINES.
Clutch slippingAdjust pedal and/or replace
components, See ENGINES
Page 9 of 36 MITCHELL 1 ARTICLE - GENERAL INFORMATION Trouble Shooting - Basic Procedures
3/10/2009 http://www.eautorepair.net/app/PrintItems.asp?S0=2097152&S1=0&SG=%7B9B990D68%2D660A%2D45E9%2D8F46%2DE
...
Page 223 of 454
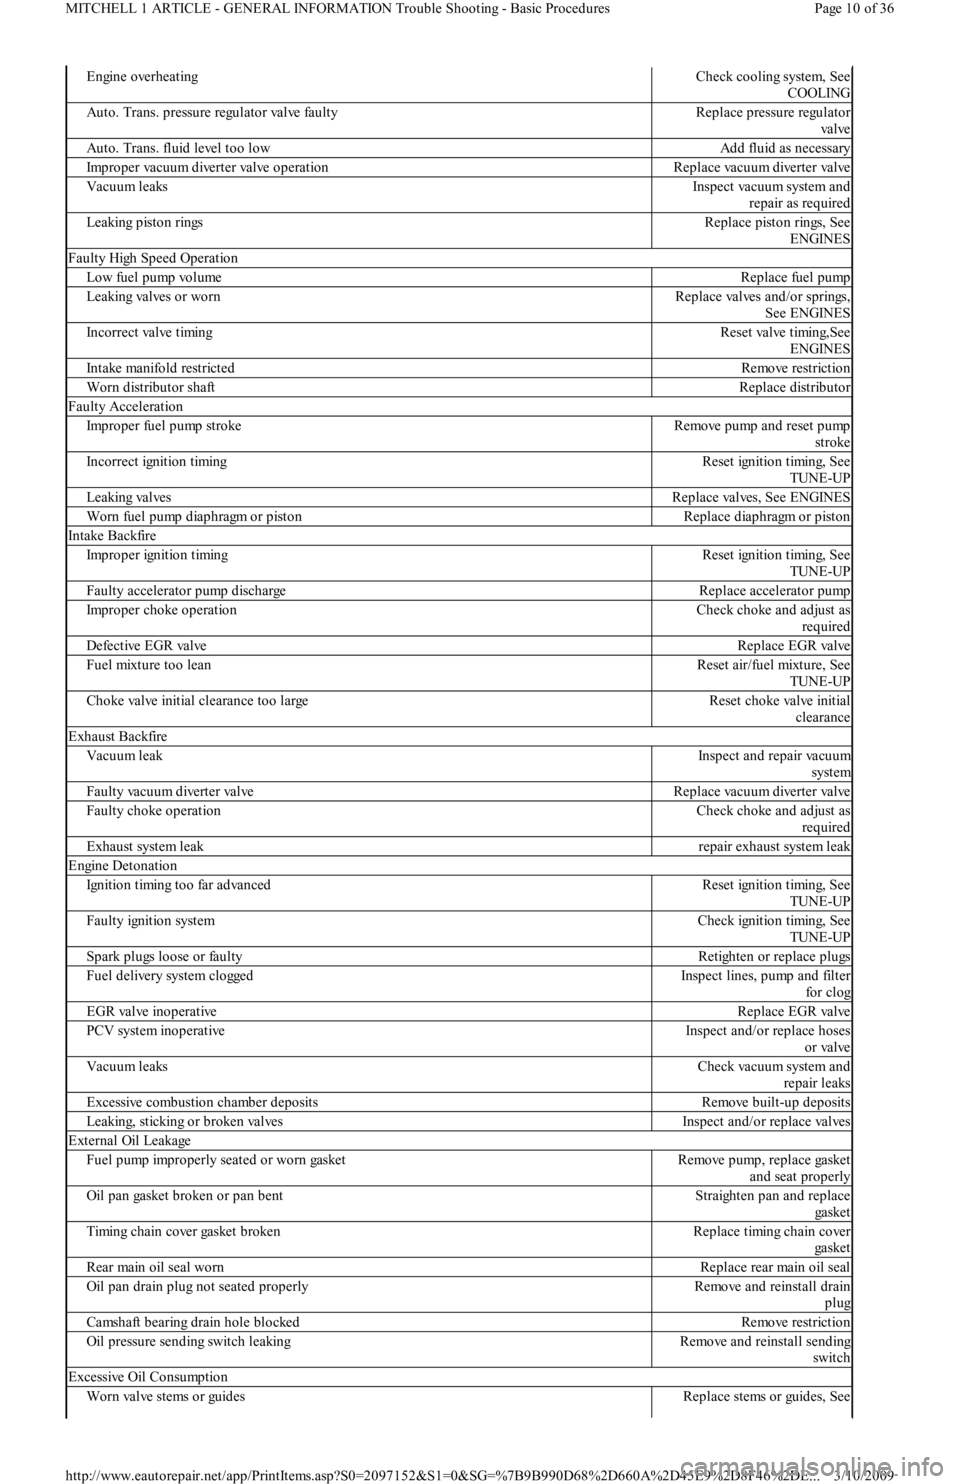
Engine overheatingCheck cooling system, See
COOLING
Auto. Trans. pressure regulator valve faultyReplace pressure regulator
va l ve
Auto. Trans. fluid level too lowAdd fluid as necessary
Improper vacuum diverter valve operationReplace vacuum diverter valve
Vacuum leaksInspect vacuum system and
repair as required
Leaking piston ringsReplace piston rings, See
ENGINES
Faulty High Speed Operation
Low fuel pump volumeReplace fuel pump
Le a kin g va l ve s o r wo r nReplace valves and/or springs,
See ENGINES
Incorrect valve timingReset valve timing,See
ENGINES
In t ake man ifo l d rest rict edRemove restriction
Worn distributor shaftReplace distributor
Faulty Acceleration
Improper fuel pump strokeRemove pump and reset pump
stroke
Incorrect ignition timingReset ignition timing, See
TUNE-UP
Le a kin g va l ve sReplace valves, See ENGINES
Worn fuel pump diaphragm or pistonReplace diaphragm or piston
In t ake Backfire
Improper ignition timingReset ignition timing, See
TUNE-UP
Faulty accelerator pump dischargeReplace accelerator pump
Improper choke operationCheck choke and adjust as
required
Defective EGR valveReplace EGR valve
Fuel mixture too leanReset air/fuel mixture, See
TUNE-UP
Choke valve initial clearance too largeReset choke valve initial
clearance
Exhaust Backfire
Vacuum leakInspect and repair vacuum
system
Faulty vacuum diverter valveReplace vacuum diverter valve
Faulty choke operationCheck choke and adjust as
required
Exhaust system leakrepair exhaust system leak
Engine Detonation
Ignition timing too far advancedReset ignition timing, See
TUNE-UP
Faulty ignition systemCheck ignition timing, See
TUNE-UP
Spark plugs loose or faultyRetighten or replace plugs
Fuel delivery system cloggedInspect lines, pump and filter
fo r cl o g
EGR valve inoperativeReplace EGR valve
PCV system inoperativeInspect and/or replace hoses
or valve
Vacuum leaksCheck vacuum system and
repair leaks
Excessive combustion chamber depositsRemove built-up deposits
Leaking, sticking or broken valvesInspect and/or replace valves
External Oil Leakage
Fuel pump improperly seated or worn gasketRemove pump, replace gasket
and seat properly
Oil pan gasket broken or pan bentStraighten pan and replace
ga ske t
Timing chain cover gasket brokenReplace timing chain cover
ga ske t
Rear main oil seal wornReplace rear main oil seal
Oil pan drain plug not seated properlyRemove and reinstall drain
plug
Camshaft bearing drain hole blockedRemove restriction
Oil pressure sending switch leakingRemove and reinstall sending
switch
Excessive Oil Consumption
Worn valve stems or guidesReplace stems or guides, See
Page 10 of 36 MITCHELL 1 ARTICLE - GENERAL INFORMATION Trouble Shooting - Basic Procedures
3/10/2009 http://www.eautorepair.net/app/PrintItems.asp?S0=2097152&S1=0&SG=%7B9B990D68%2D660A%2D45E9%2D8F46%2DE
...
Page 226 of 454
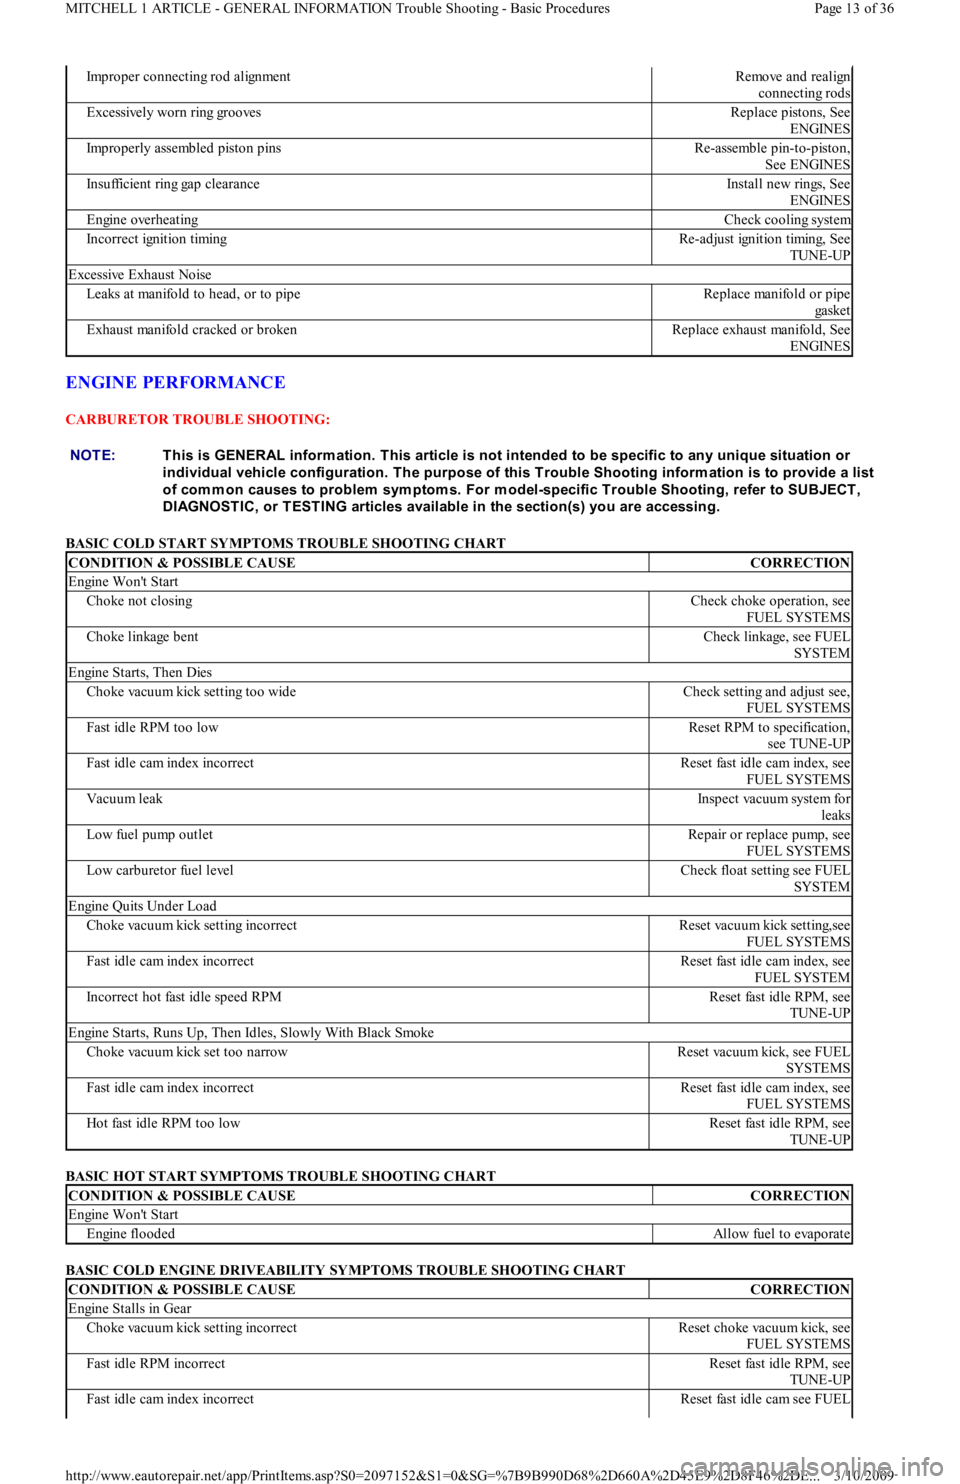
ENGINE PERFORMANCE
CARBURETOR TROUBLE SHOOTING:
BASIC COLD START SYMPTOMS TROUBLE SHOOTING CHART
BASIC HOT START SYMPTOMS TROUBLE SHOOTING CHART
BASIC COLD ENGINE DRIVEABILITY SYMPTOMS TROUBLE SHOOTING CHART
Improper connecting rod alignmentRemove and realign
connecting rods
E xc e ssive l y wo r n r in g gr o o ve sReplace pistons, See
ENGINES
Improperly assembled piston pinsRe-assemble pin-to-piston,
See ENGINES
Insufficient ring gap clearanceInstall new rings, See
ENGINES
Engine overheatingCheck cooling system
Incorrect ignition timingRe-adjust ignition timing, See
TUNE-UP
Excessive Exhaust Noise
Leaks at manifold to head, or to pipeReplace manifold or pipe
ga ske t
Exhaust manifold cracked or brokenReplace exhaust manifold, See
ENGINES
NOTE:This is GENERAL inform ation. This article is not intended to be specific to any unique situation or
individual vehicle configuration. T he purpose of this T rouble Shooting inform ation is to provide a list
of com m on causes to problem sym ptom s. For m odel-specific T rouble Shooting, refer to SUBJECT ,
DIAGNOST IC, or T EST ING articles available in the section(s) you are accessing.
CONDITION & POSSIBLE CAUSECORRECTION
Engine Won't Start
Choke not closingCheck choke operation, see
FUEL SYSTEMS
Choke linkage bentCheck linkage, see FUEL
SYSTEM
Engine Starts, Then Dies
Choke vacuum kick setting too wideCheck setting and adjust see,
FUEL SYSTEMS
Fast idle RPM too lowReset RPM to specification,
see TUNE-UP
Fast idle cam index incorrectReset fast idle cam index, see
FUEL SYSTEMS
Vacuum leakInspect vacuum system for
leaks
Low fuel pump outletRepair or replace pump, see
FUEL SYSTEMS
Low carburetor fuel levelCheck float setting see FUEL
SYSTEM
Engine Quits Under Load
Choke vacuum kick setting incorrectReset vacuum kick setting,see
FUEL SYSTEMS
Fast idle cam index incorrectReset fast idle cam index, see
FUEL SYSTEM
Incorrect hot fast idle speed RPMReset fast idle RPM, see
TUNE-UP
Engine Starts, Runs Up, Then Idles, Slowly With Black Smoke
Choke vacuum kick set too narrowReset vacuum kick, see FUEL
SYSTEMS
Fast idle cam index incorrectReset fast idle cam index, see
FUEL SYSTEMS
Hot fast idle RPM too lowReset fast idle RPM, see
TUNE-UP
CONDITION & POSSIBLE CAUSECORRECTION
Engine Won't Start
Engine floodedAllow fuel to evaporate
CONDITION & POSSIBLE CAUSECORRECTION
Engine Stalls in Gear
Choke vacuum kick setting incorrectReset choke vacuum kick, see
FUEL SYSTEMS
Fast idle RPM incorrectReset fast idle RPM, see
TUNE-UP
Fast idle cam index incorrectReset fast idle cam see FUEL
Page 13 of 36 MITCHELL 1 ARTICLE - GENERAL INFORMATION Trouble Shooting - Basic Procedures
3/10/2009 http://www.eautorepair.net/app/PrintItems.asp?S0=2097152&S1=0&SG=%7B9B990D68%2D660A%2D45E9%2D8F46%2DE
...
Page 229 of 454
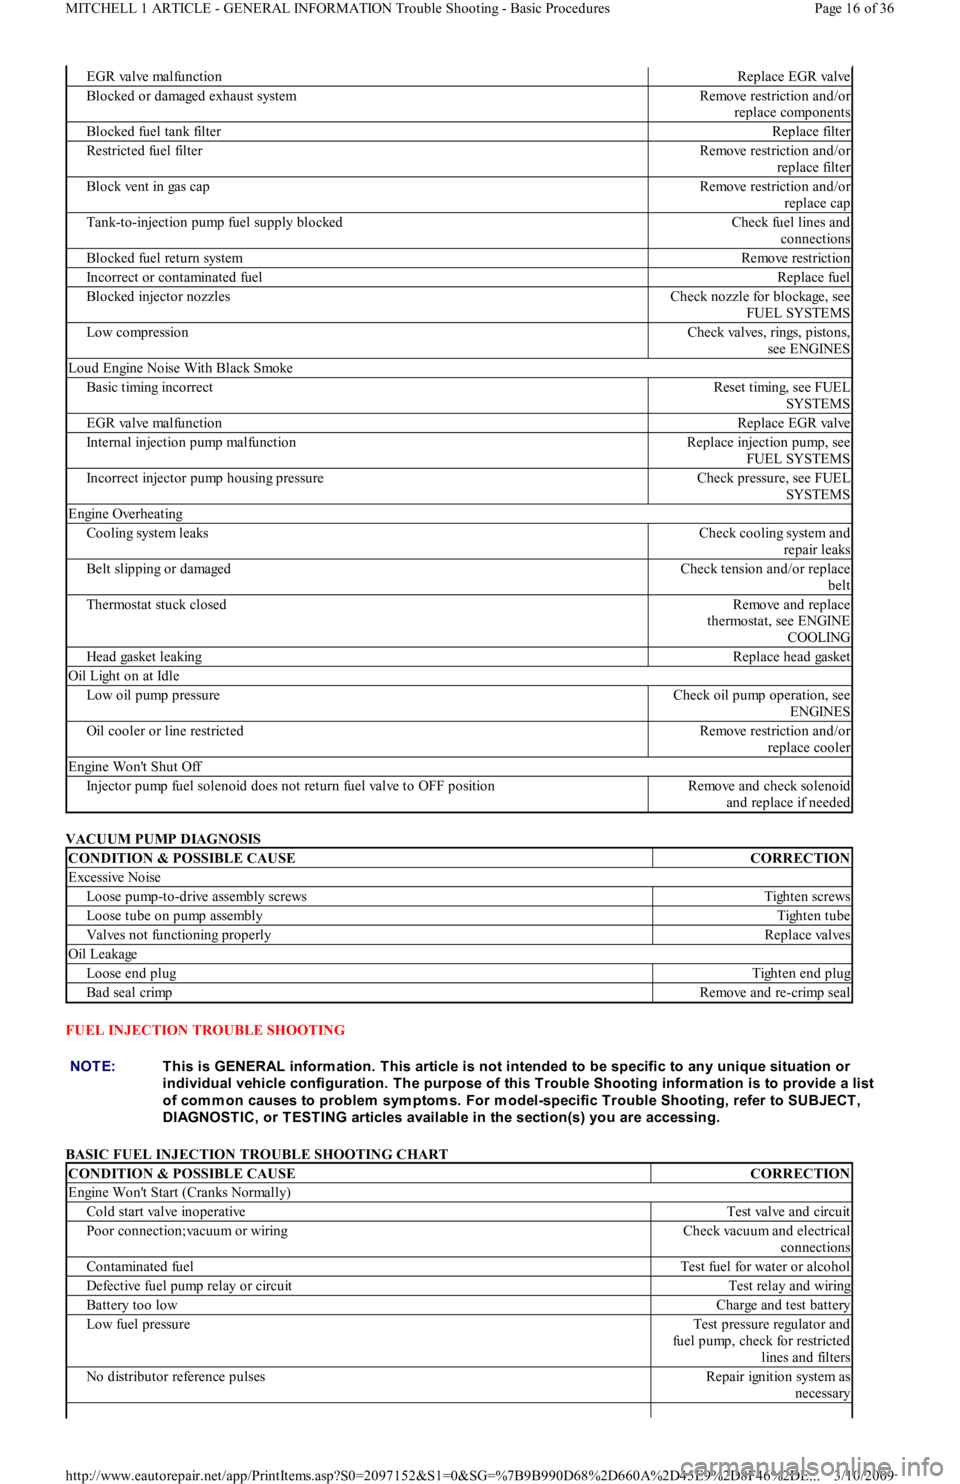
VACUUM PUMP DIAGNOSIS
FUEL INJECTION TROUBLE SHOOTING
BASIC FUEL INJECTION TROUBLE SHOOTING CHART
EGR valve malfunctionReplace EGR valve
Blocked or damaged exhaust systemRemove restriction and/or
replace components
Blocked fuel tank filterReplace filter
Restricted fuel filterRemove restriction and/or
replace filter
Block vent in gas capRemove restriction and/or
replace cap
Tank-to-injection pump fuel supply blockedCheck fuel lines and
connections
Blocked fuel return systemRemove restriction
Incorrect or contaminated fuelReplace fuel
Blocked injector nozzlesCheck nozzle for blockage, see
FUEL SYSTEMS
Low compressionCheck valves, rings, pistons,
see ENGINES
Loud Engine Noise With Black Smoke
Basic timing incorrectReset timing, see FUEL
SYSTEMS
EGR valve malfunctionReplace EGR valve
Internal injection pump malfunctionReplace injection pump, see
FUEL SYSTEMS
Incorrect injector pump housing pressureCheck pressure, see FUEL
SYSTEMS
Engine Overheating
Cooling system leaksCheck cooling system and
repair leaks
Belt slipping or damagedCheck tension and/or replace
belt
Thermostat stuck closedRemove and replace
thermostat, see ENGINE
COOLING
Head gasket leakingReplace head gasket
Oil Light on at Idle
Low oil pump pressureCheck oil pump operation, see
ENGINES
Oil cooler or line restrictedRemove restriction and/or
replace cooler
Engine Won't Shut Off
Injector pump fuel solenoid does not return fuel valve to OFF positionRemove and check solenoid
and replace if needed
CONDITION & POSSIBLE CAUSECORRECTION
Excessive Noise
Loose pump-to-drive assembly screwsTighten screws
Loose tube on pump assemblyTighten tube
Valves not functioning properlyReplace valves
Oil Leakage
Loose end plugTighten end plug
Bad seal crimpRemove and re-crimp seal
NOTE:This is GENERAL inform ation. This article is not intended to be specific to any unique situation or
individual vehicle configuration. T he purpose of this T rouble Shooting inform ation is to provide a list
of com m on causes to problem sym ptom s. For m odel-specific T rouble Shooting, refer to SUBJECT ,
DIAGNOST IC, or T EST ING articles available in the section(s) you are accessing.
CONDITION & POSSIBLE CAUSECORRECTION
Engine Won't Start (Cranks Normally)
Cold start valve inoperativeTest valve and circuit
Poor connection;vacuum or wiringCheck vacuum and electrical
connections
Contaminated fuelTest fuel for water or alcohol
Defective fuel pump relay or circuitTest relay and wiring
Battery too lowCharge and test battery
Low fuel pressureTest pressure regulator and
fuel pump, check for restricted
lines and filters
No distributor reference pulsesRepair ignition system as
necessary
Page 16 of 36 MITCHELL 1 ARTICLE - GENERAL INFORMATION Trouble Shooting - Basic Procedures
3/10/2009 http://www.eautorepair.net/app/PrintItems.asp?S0=2097152&S1=0&SG=%7B9B990D68%2D660A%2D45E9%2D8F46%2DE
...