1990 VOLKSWAGEN TRANSPORTER bulb
[x] Cancel search: bulbPage 4 of 165

Downloaded from www.Manualslib.com manuals search engine
1
INSTRUMENT PANEL
Illustration instruments and controls
Warning and indicator light symbols
CONTROLS AND EQUIPMENT
Keys,
central locking system .... 7, 8
Doors 9
Rear lid 11
Windows, mirrors 12, 13 Safety belts, head restraints . . . .14,19
Seats 20 Luggage compartment, pedals . 28,29
Brakes, Transmission 29, 32 Differential lock 33
Automatic-transmission 35 Steering lock/ignition/starter switch . 38
Starting procedures 39 Instrument cluster 40
Warning/indicator lights 43 Switches 46 Emergency flasher 46
Light switch, turn signals .... 46,48
Cruise control 49
Windshield wipers 50 Ventilation/Heating 51
Air conditioning 54
Heater 57
Sliding roof 62
Roof-rack 68 VEHICLE OPERATION
Break-in period - and afterwards . . 69
Operate your vehicle safety 70
Operate your vehicle economically
and minimize pollution 72
Trailer towing 73 Driving with the all-wheel drive ... 75
VEHICLE CARE
Fuel tank, fuel supply 85,86
Vehicle care (exterior/interior) . . 90, 93 Maintenance, inspection intervals . . 95 Engine compartment lid,
engine compartment 97 Lubricants, engine oil 98,99
Engine oil filter 101
Transmission oil 102
Power steering 103
Cooling system 104 Brake fluid 108
Battery 109
Windshield washers/wipers . . . 112,113
Tires/wheels 114 Difficult operating conditions .... 120
Winter driving 121
Accessories 122
DO-IT-YOURSELF SERVICE
Jack and tools 123 Spare wheel 124
Changing a wheel 125 Fuses, bulbs 128, 130 Adjusting headlights
134
Installing,
replacing the radio . . . . 135
Emergency starting 136
Emergency towing 138
Lifting vehicle . . 140
TECHNICAL DESCRIPTION
Engine, transmission 142
Steering,
suspension, brakes,
body, chassis 143 Emission-control-system 144
TECHNICAL DATA
Engine, spark plugs .
V-belts capacities . . Dimensions
Weights
Vehicle identification 146
147
148
150 151
CONSUMER INFORMATION
Service manuals 152
GAS STATION INFORMATION
Location of servicing points 156
ALPHABETICAL INDEX 158
www.westfaliaT3.info - a useful website for owners and enthusiasts of VW Westfalia T25 / T3 Campervans
Page 45 of 165
Downloaded from www.Manualslib.com manuals search engine
I CONTROLSAND EQUIPMENT
WARNING If the brake warning
light
does not go
out
with
the engine running and the parking brake released or lights up
while driving, the fluid level
in
the brake
fluid reservoir may
be
too low.
This might be
due
to
a
leak in one of the two independently functioning brake circuits.
If the brake pedal travel has increased,
one of the brake circuits may have
failed.
Avoid driving the vehicle and have it towed to the nearest Volkswa
gen dealer or qualified workshop for re pair.
If brake pedal travel has not increased
and
braking performance remains un
impaired,
proceed carefully to
your
nearest Volkswagen dealer or qualified
workshop to have the braking system inspected and corrected.
For detailed information see
"Brakes" on
page 29. 2-
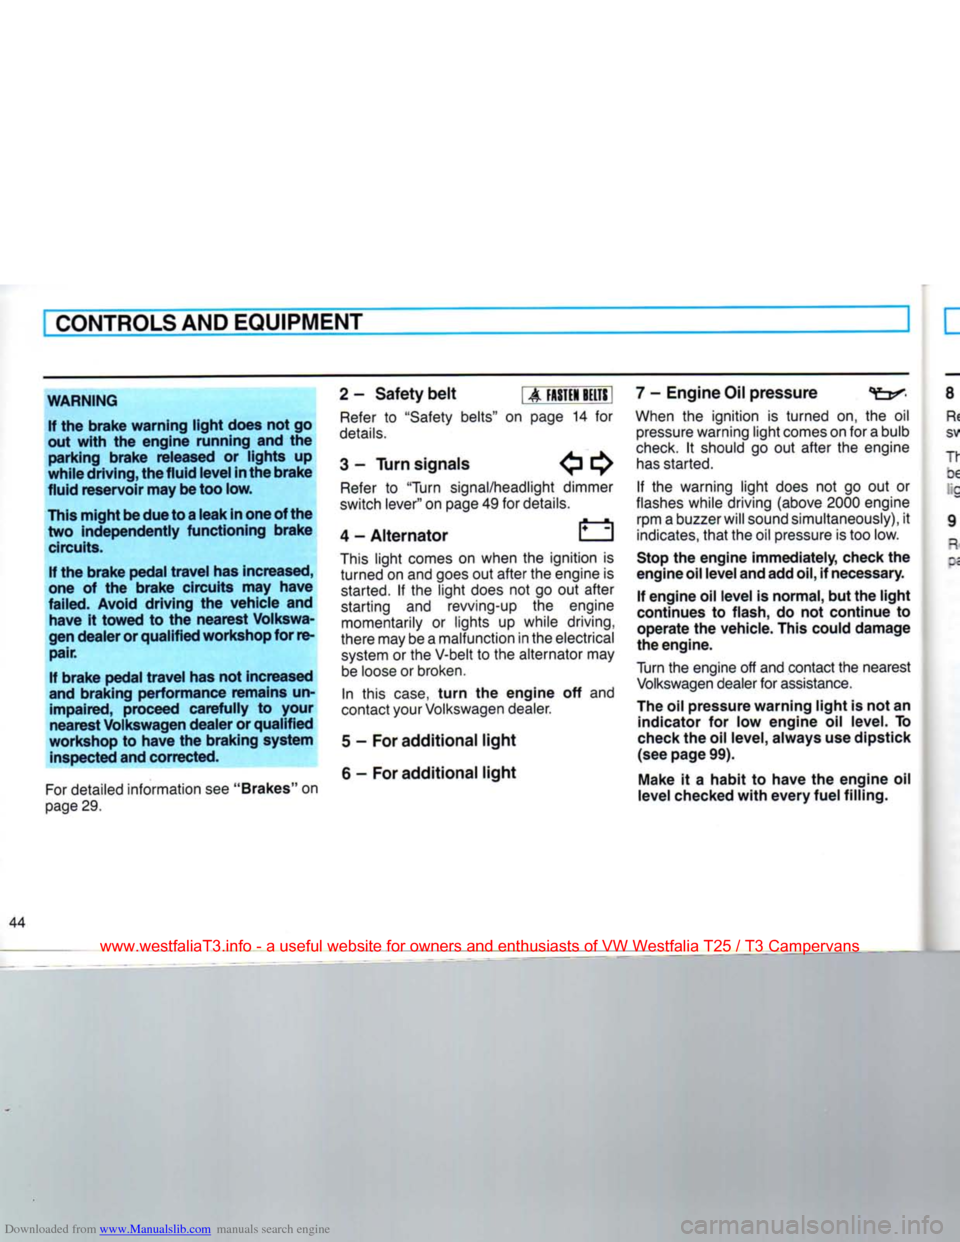
Safety belt
|
A
FASTEN
BELTS
Refer
to
"Safety belts"
on
page
14 for
details.
3
-
Turn
signals E^
Refer
to
"Turn
signal/headlight dimmer
switch lever" on page 49 for details.
4
- Alternator
This
light comes
on
when
the
ignition
is
turned on and goes out after the engine
is
started.
If the
light does
not go out
after
starting
and
revving-up
the
engine
momentarily
or
lights
up
while driving,
there may be a malfunction
in
the electrical system
or
the V-belt
to
the alternator may be loose
or
broken.
In
this
case,
turn
the engine off and
contact
your
Volkswagen dealer.
5
- For additional
light
6
- For additional
light
7
- Engine Oil pressure
When
the
ignition
is
turned
on, the oil
pressure warning light comes on for a bulb
check.
It
should
go out
after
the
engine
has
started.
If the
warning light does
not go out or
flashes
while driving
(above
2000
engine rpm a buzzer
will
sound simultaneously),
it
indicates,
that the oil pressure is too low.
Stop the engine immediately, check the
engine
oil
level
and add
oil, if necessary.
If engine oil level is normal, but the
light
continues to flash, do not continue to
operate the vehicle. This could damage
the engine.
Turn
the engine off and contact the nearest Volkswagen dealer for assistance.
The oil pressure warning
light
is not an indicator for low engine oil level. To
check
the oil level, always use dipstick
(see page 99).
Make
it a habit to have the engine oil
level checked
with
every
fuel filling.
www.westfaliaT3.info - a useful website for owners and enthusiasts of VW Westfalia T25 / T3 Campervans
Page 49 of 165
Downloaded from www.Manualslib.com manuals search engine
fCONTROLS AND EQUIPMENT
TURN SIGNAL / HEADLIGHT DIMMER SWITCH LEVER
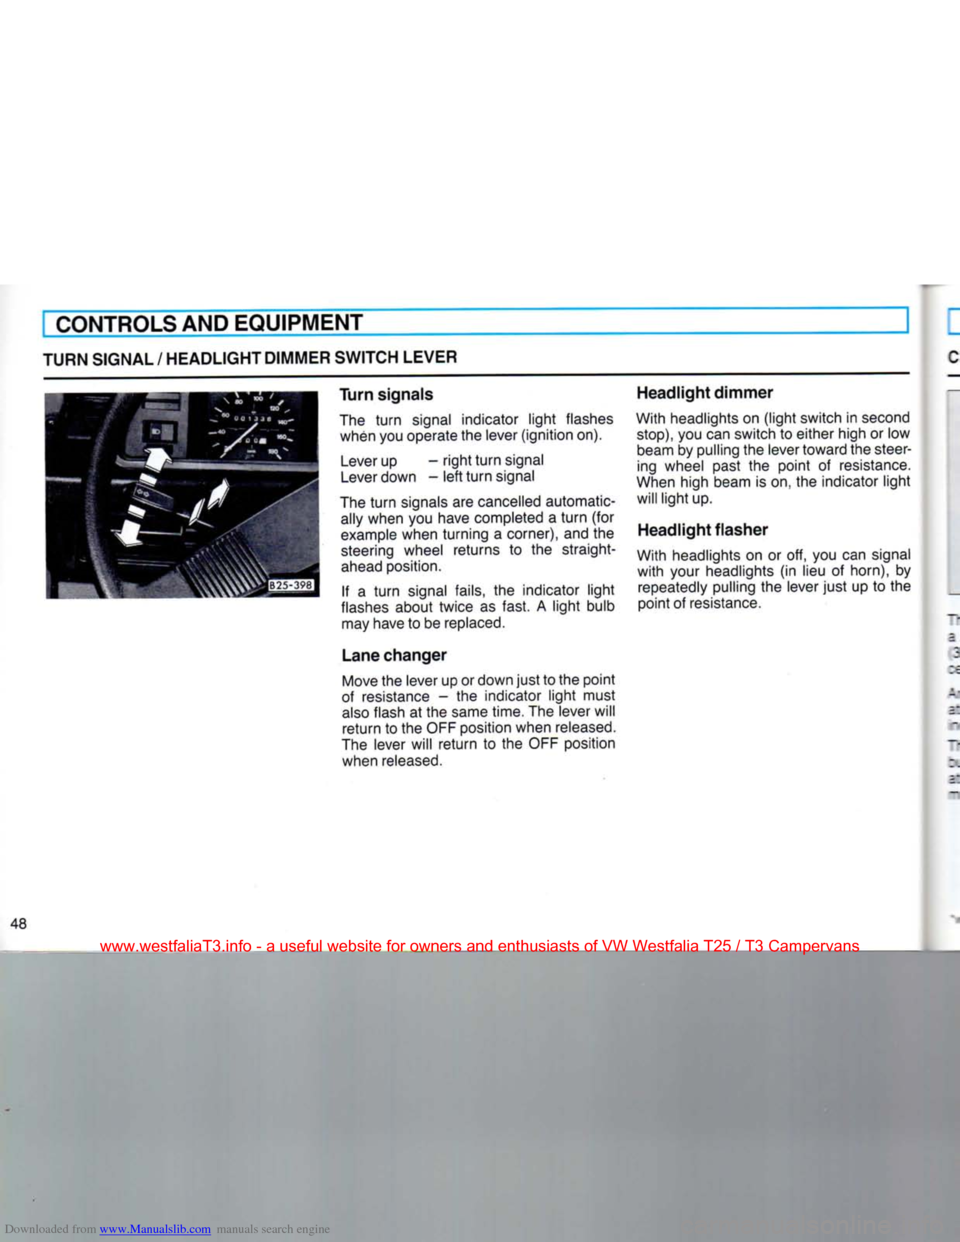
Turn signals
The turn signal indicator light flashes when you operate the lever (ignition on).
Lever up - right turn signal
Lever down - left turn signal
The turn signals are cancelled automatic ally when you have completed a turn (for
example when turning a corner), and the
steering wheel returns to the straight-
ahead position.
If a turn signal fails, the indicator light
flashes about twice as fast. A light bulb may have to be replaced. Headlight dimmer
With headlights on (light switch in second
stop),
you can switch to either high or low beam by pulling the lever toward the steering wheel past the point of resistance.
When high beam is on, the indicator light will light up.
Headlight flasher
With headlights on or off, you can signal with your headlights (in lieu of horn), by repeatedly pulling the lever just up to the
point of resistance.
Lane changer
Move the lever up or down just to the point
of resistance - the indicator light must also flash at the same time. The lever will
return to the OFF position when released.
The lever will return to the OFF position when released.
www.westfaliaT3.info - a useful website for owners and enthusiasts of VW Westfalia T25 / T3 Campervans
Page 97 of 165
Downloaded from www.Manualslib.com manuals search engine
VEHICLE
CARE
Weatherstrips
Keep silicone sprays
off the
windshield
to avoid wiper smear
in
rain.
To seal properly, weatherstrips around
hood,
hatch, windows, doors,
etc.,
must
be pliable. Spray with silicone
or
coat with
talcum powder
or
glycerine
to
retain
flexibility
of the
rubber
and to
protect against freezing
in the
winter.
Sliding roof quide rails
To assure that
the
sliding roof* function properly, clean
the
guide rails
and
lubri
cate with silicone spray
at
least once
a
year.
See
your Volkswagen dealer
for
cor rect procedures
and
lubricant.
Dull finishes and plastics
Plastic parts, such
as
light bulb lenses,
decorative stripes, panels, bumpers,
etc.,
will come clean with regular washing. Should additional cleaning
or
spot
re
moval
be
necessary,
use a
soft brush
or
cloth soaked with
a
mild detergent
solu
tion.
Then rinse thoroughly
and im
mediately with clear water.
Do not use anything which could mar the
plastic
or
dull finished surface, such
as
wax, polish, abrasive detergents
or
chemical cleaning solvents.
Sliding door
The sliding door mounting points,
the
guide tracks
and the
roller guides should be lubricated regularly
and as
often
as
necessary.
Bright metal trim
Bright
or
black anodized trim will come
clean with regular washing.
To
protect metal
trim,
use car
wax. Remove spots
or
dirt from chrome
and
stainless steel with
a
chrome cleaner. Apply
a
chrome polish
for
continued luster and protection.
Steel wheels
Always include
the hub
caps
and
whee rims when washing your vehicle
to
remove
road dirt, salt sprays and brake dust.
If
nec
essary,
use a
commercial wheel cleaner
t:
remove accumulated brake dust. Pain:
scratches should
be
touched
up to
prever
corrosion.
Light alloy wheels
To preserve
the
decorative appearance
c-
the light aluminium cast, some specie
care
is
necessary.
In
addition
to
road
dr
and salt sprays, brake metal dust
is
alsc
corrosive.
If
left
on too
long,
brake meta
dust
can
cause pitting. Wash
the
wheels
with
a
sponge
or
hose brush every othe-
week. Road salt should
be
remove:
weekly with
an
acid free cleaning solutior Every three months (after regular clear
ing)
the
wheels should
be
coated
wit-
petroleum jelly
or car
wax.
Rub it in
firml.
with
a
soft cloth. Never
use
abrasive
c
metal polishing cleaning agents.
Remember that moisture,
ice and
roac
salt
on
brakes
may
affect braking
eff
ciency. Test
the
brakes carefully afte'
each washing. Heed warning
on
page
29.
92
*
where applicable
www.westfaliaT3.info - a useful website for owners and enthusiasts of VW Westfalia T25 / T3 Campervans
Page 135 of 165
Downloaded from www.Manualslib.com manuals search engine
DO-IT-YOURSELF-SERVICE
REPLACING BULBS
Before starting to replace a bulb, switch off
the respective circuit.
Do not touch the glass part of the new bulb
with bare fingers. Finger prints left on the
glass evaporate when the bulb gets hot,
the vapor settles on the reflector surface and dims it.
Always use the same
type
of bulb. The designation is marked on the bulb.
It is advisable to always
carry
a box of
spare bulbs in the vehicle. Bulbs can be
obtained from any VW dealer.
It should contain, at least, the following
bulbs which are important for traffic safety:
12V/70/50W
- Headlight
12V/21
/5W -
Front
turn
signal and
front
side marker light
12V/21W
- Rear
turn
signal
12V/3W
- Rear side marker light
12V/21/5W
- Brake and tail lights
12V/4W
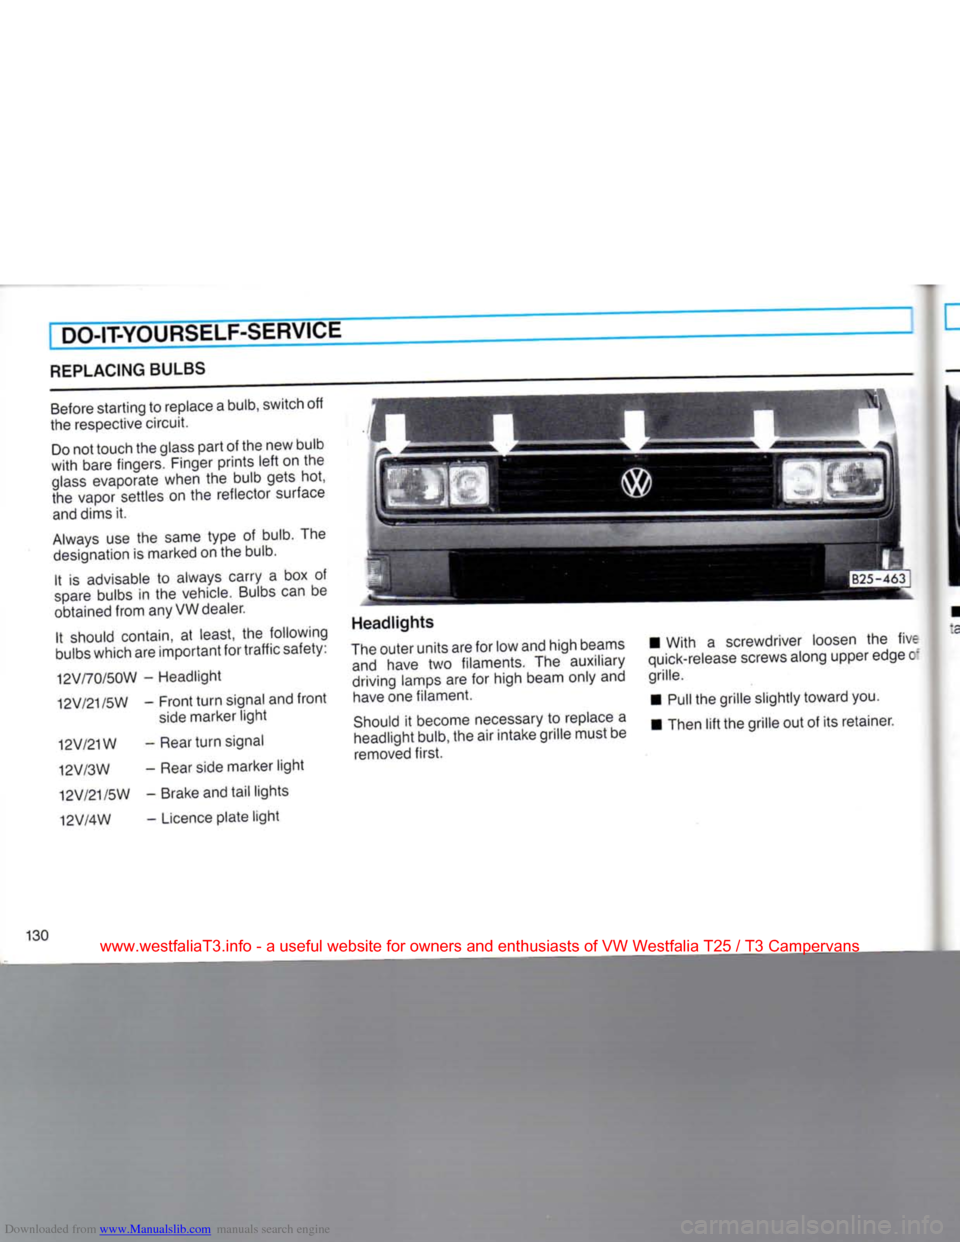
- Licence plate light Headlights
The outer units are for low and high beams and have two filaments. The auxiliary
driving lamps are for high beam only and have one filament.
Should it become necessary to replace a
headlight bulb, the air intake grille must be
removed first. • With a screwdriver loosen the five
quick-release screws along upper edge c
grille.
•
Pull
the grille slightly toward you.
•
Then
lift the grille out of its retainer.
130
www.westfaliaT3.info - a useful website for owners and enthusiasts of VW Westfalia T25 / T3 Campervans
Page 136 of 165
Downloaded from www.Manualslib.com manuals search engine
DO-IT-YOURSELF-SERVICEI
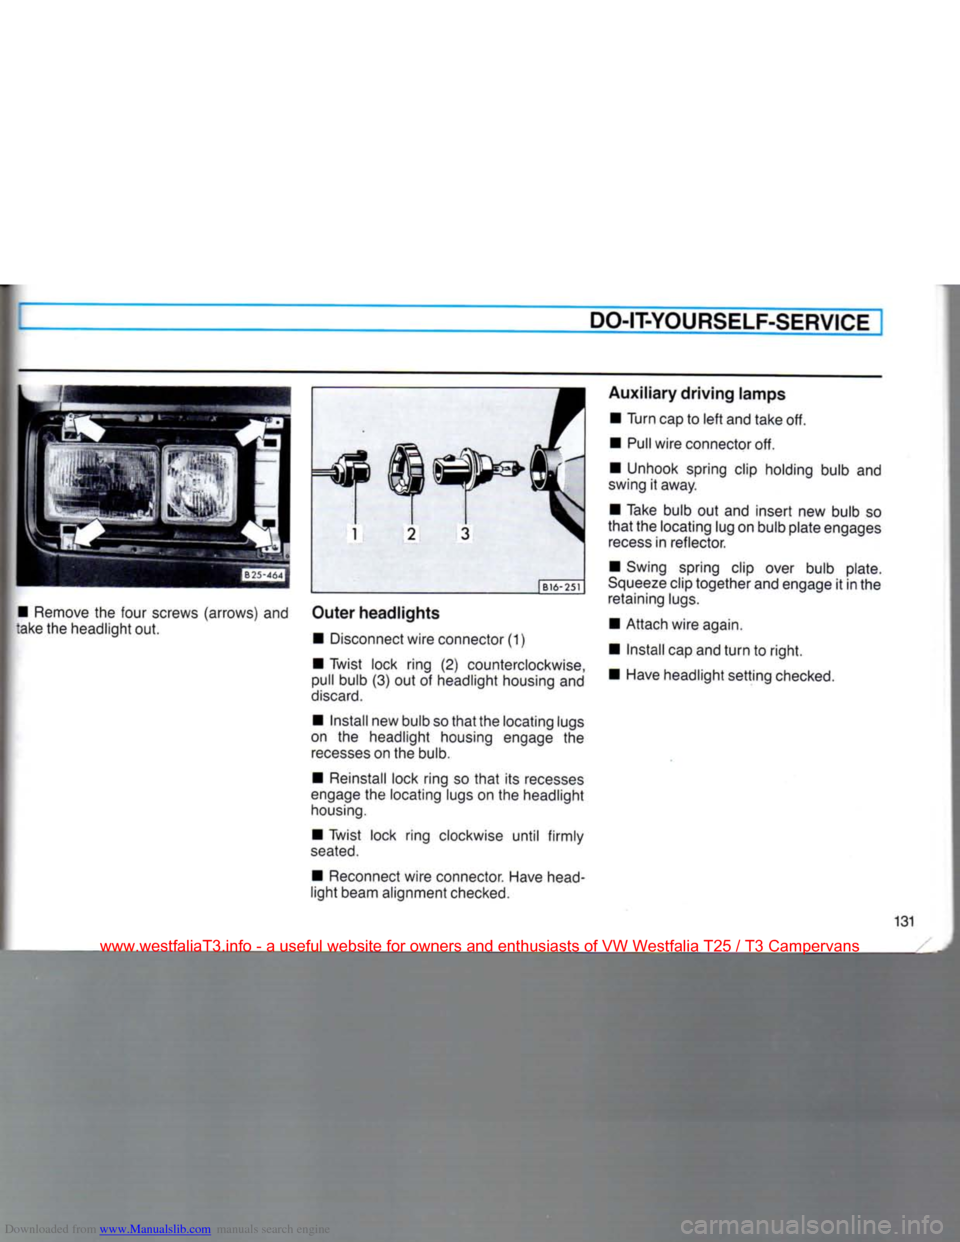
• Remove the four screws (arrows) and
take the headlight out. | B16-251
Outer
headlights
• Disconnect wire connector (1)
• Twist lock ring (2) counterclockwise,
pull bulb (3) out ot headlight housing and
discard.
• Install new bulb so
that
the locating lugs
on the headlight housing engage the
recesses
on the bulb.
• Reinstall lock ring so
that
its recesses
engage
the locating lugs on the headlight
housing.
• Twist lock ring clockwise until firmly
seated.
• Reconnect wire connector. Have head
light beam alignment checked.
Auxiliary
driving
lamps
• Turn cap to
left
and take off.
• Pull wire connector off.
• Unhook spring clip holding bulb and
swing it away.
• Take bulb out and insert new bulb so
that
the locating lug on bulb plate engages
recess
in reflector.
• Swing spring clip over bulb plate.
Squeeze
clip together and engage it in the retaining lugs.
• Attach wire again.
• Install cap and
turn
to
right.
• Have headlight setting checked.
131
www.westfaliaT3.info - a useful website for owners and enthusiasts of VW Westfalia T25 / T3 Campervans
Page 137 of 165
Downloaded from www.Manualslib.com manuals search engine
DO-IT-YOURSELF-SERVICE
IB25-325I
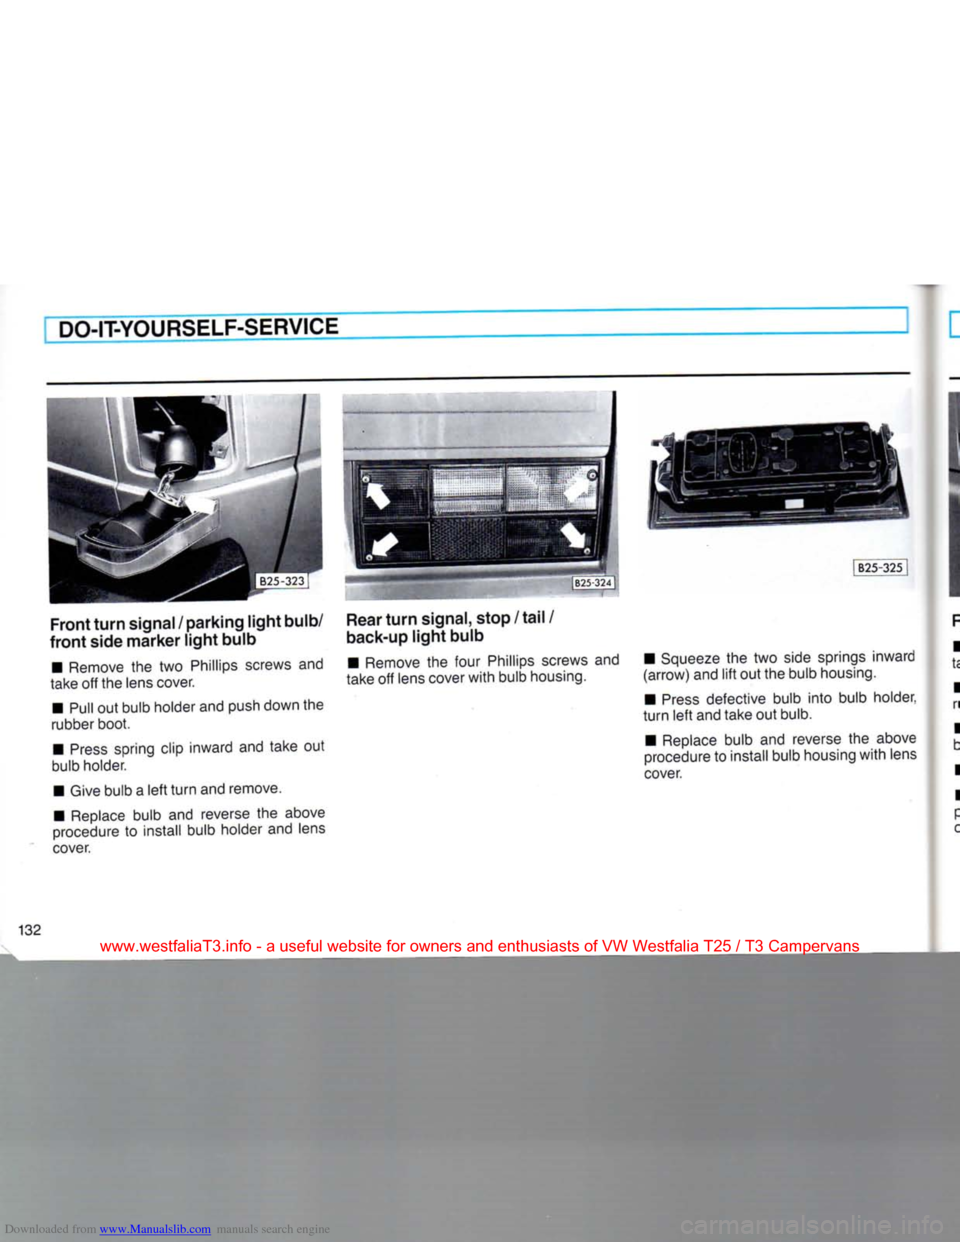
Front
turn
signal / parking
light
bulb/
front
side
marker
light
bulb
• Remove
the two
Phillips screws
and
take
off
the lens cover.
• Pull
out
bulb holder and push down
the
rubber boot.
•
Press
spring clip inward
and
take
out
bulb holder.
• Give bulb
a
left
turn
and remove.
• Replace bulb
and
reverse
the
above
procedure
to
install bulb holder
and
lens
cover.
Rear
turn
signal, stop /
tail
/
back-up
light
bulb
• Remove
the
four Phillips screws
and
take
off
lens cover
with
bulb housing. • Squeeze
the two
side springs inward
(arrow)
and
lift
out
the bulb housing.
•
Press
defective bulb
into
bulb holder
turn
left
and take
out
bulb.
• Replace bulb
and
reverse
the
above
procedure
to
install bulb housing
with
lens
cover.
132
www.westfaliaT3.info - a useful website for owners and enthusiasts of VW Westfalia T25 / T3 Campervans
Page 138 of 165
Downloaded from www.Manualslib.com manuals search engine
DO-IT-YOURSELF-SERVICE
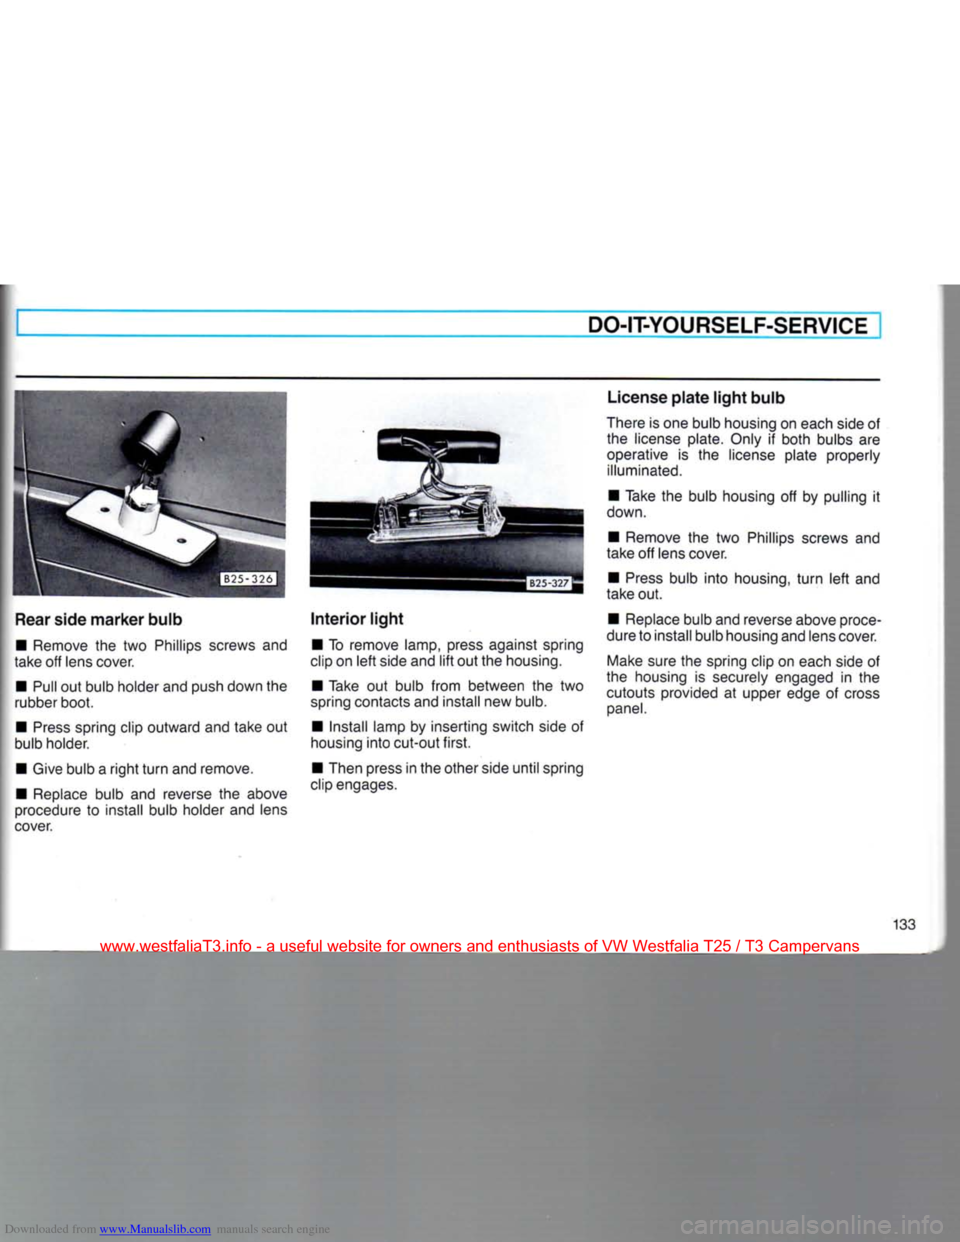
Rear
side
marker
bulb
• Remove the two Phillips screws and
take off lens cover.
• Pull out bulb holder and push down the
rubber boot.
•
Press
spring clip outward and take out
bulb holder.
• Give bulb a
right
turn
and remove. • Replace bulb and reverse the above
procedure to install bulb holder and lens
cover.
Interior
light
• To remove lamp, press against spring
clip on
left
side and
lift
out the housing.
• Take out bulb from between the two
spring contacts and install new bulb.
• Install lamp by inserting switch side of
housing
into
cut-out
first.
• Then press in the other side
until
spring
clip engages. License
plate
light
bulb
There is one bulb housing on each side of the license plate. Only if both bulbs are
operative is the license plate properly illuminated.
• Take the bulb housing off by pulling it
down.
• Remove the two Phillips screws and
take off lens cover.
•
Press
bulb
into
housing,
turn
left
and
take out.
• Replace bulb and reverse above proce
dure to install bulb housing and lens cover.
Make
sure the spring clip on each side of
the housing is securely engaged in the
cutouts provided at upper edge of cross
panel.
133
www.westfaliaT3.info - a useful website for owners and enthusiasts of VW Westfalia T25 / T3 Campervans