Page 727 of 906
SERVICE INDICATOR & WARNING LIGHTS
Article Text (p. 3)
1990 Volkswagen Corrado
For Volkswagen Technical Site: http://vw.belcom.ru
Copyright © 1998 Mitchell Repair Information Company, LLC
Thursday, March 23, 2000 09:51PM
"OXS" OXYGEN SENSOR LIGHT
Indicates service due on emission control system.
END OF ARTICLE
Page 742 of 906
STEERING COLUMN SWITCHES
Article Text (p. 3)
1990 Volkswagen Corrado
For Volkswagen Technical Site: http://vw.belcom.ru
Copyright © 1998 Mitchell Repair Information Company, LLC
Thursday, March 23, 2000 09:51PM
follow air bag service precautions may result in air bag
deployment and personal injury. See SERVICE PRECAUTIONS.
After component replacement, perform a system operational
check to ensure proper system operation. See SYSTEM
OPERATION CHECK.
Removal
1) Before proceeding, follow air bag service precautions. See
SERVICE PRECAUTIONS. Disable air bag system. See DISABLING &
ACTIVATING AIR BAG SYSTEM.
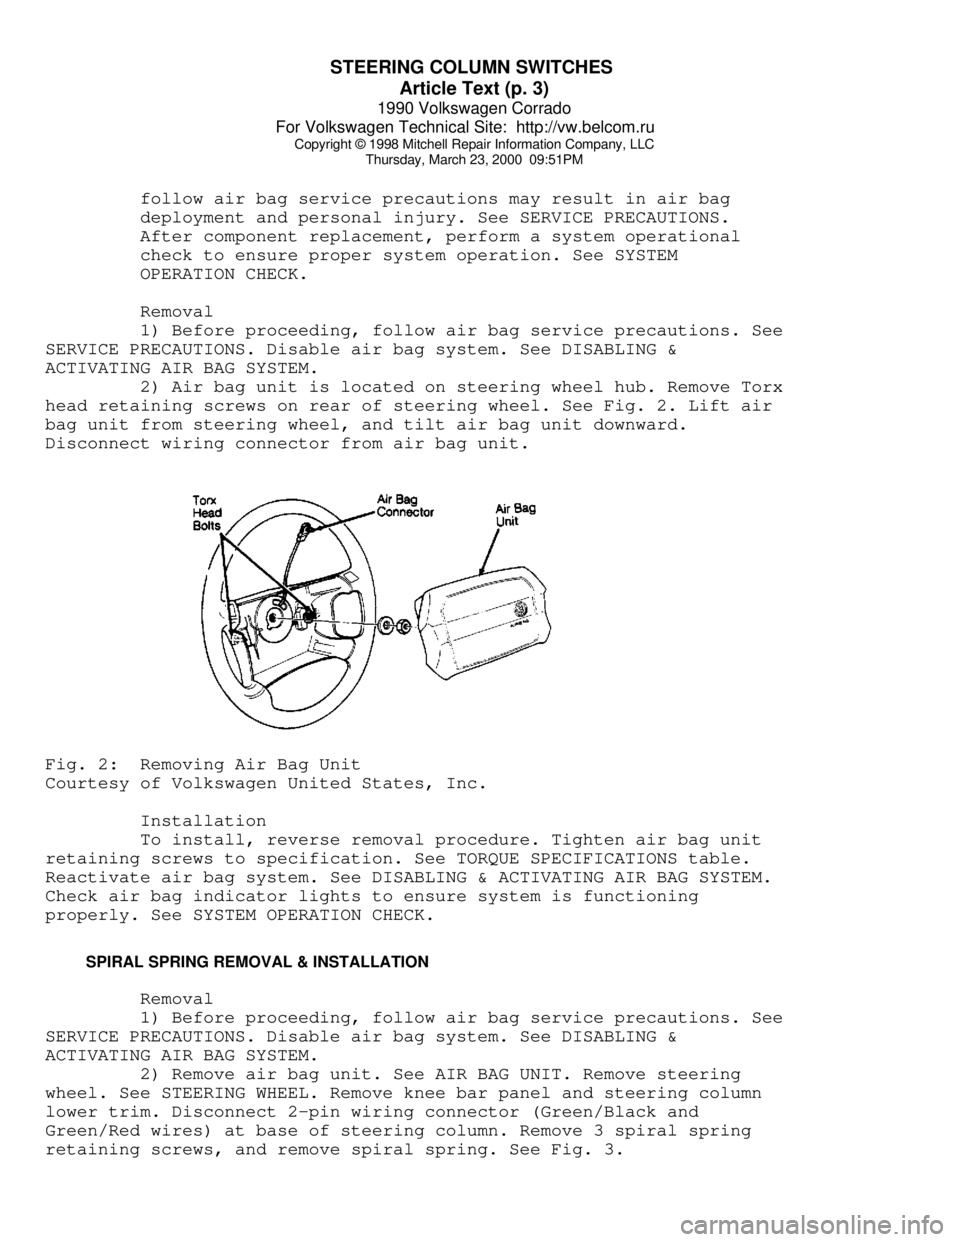
2) Air bag unit is located on steering wheel hub. Remove Torx
head retaining screws on rear of steering wheel. See Fig. 2. Lift air
bag unit from steering wheel, and tilt air bag unit downward.
Disconnect wiring connector from air bag unit.Fig. 2: Removing Air Bag Unit
Courtesy of Volkswagen United States, Inc.
Installation
To install, reverse removal procedure. Tighten air bag unit
retaining screws to specification. See TORQUE SPECIFICATIONS table.
Reactivate air bag system. See DISABLING & ACTIVATING AIR BAG SYSTEM.
Check air bag indicator lights to ensure system is functioning
properly. See SYSTEM OPERATION CHECK.
SPIRAL SPRING REMOVAL & INSTALLATION
Removal
1) Before proceeding, follow air bag service precautions. See
SERVICE PRECAUTIONS. Disable air bag system. See DISABLING &
ACTIVATING AIR BAG SYSTEM.
2) Remove air bag unit. See AIR BAG UNIT. Remove steering
wheel. See STEERING WHEEL. Remove knee bar panel and steering column
lower trim. Disconnect 2-pin wiring connector (Green/Black and
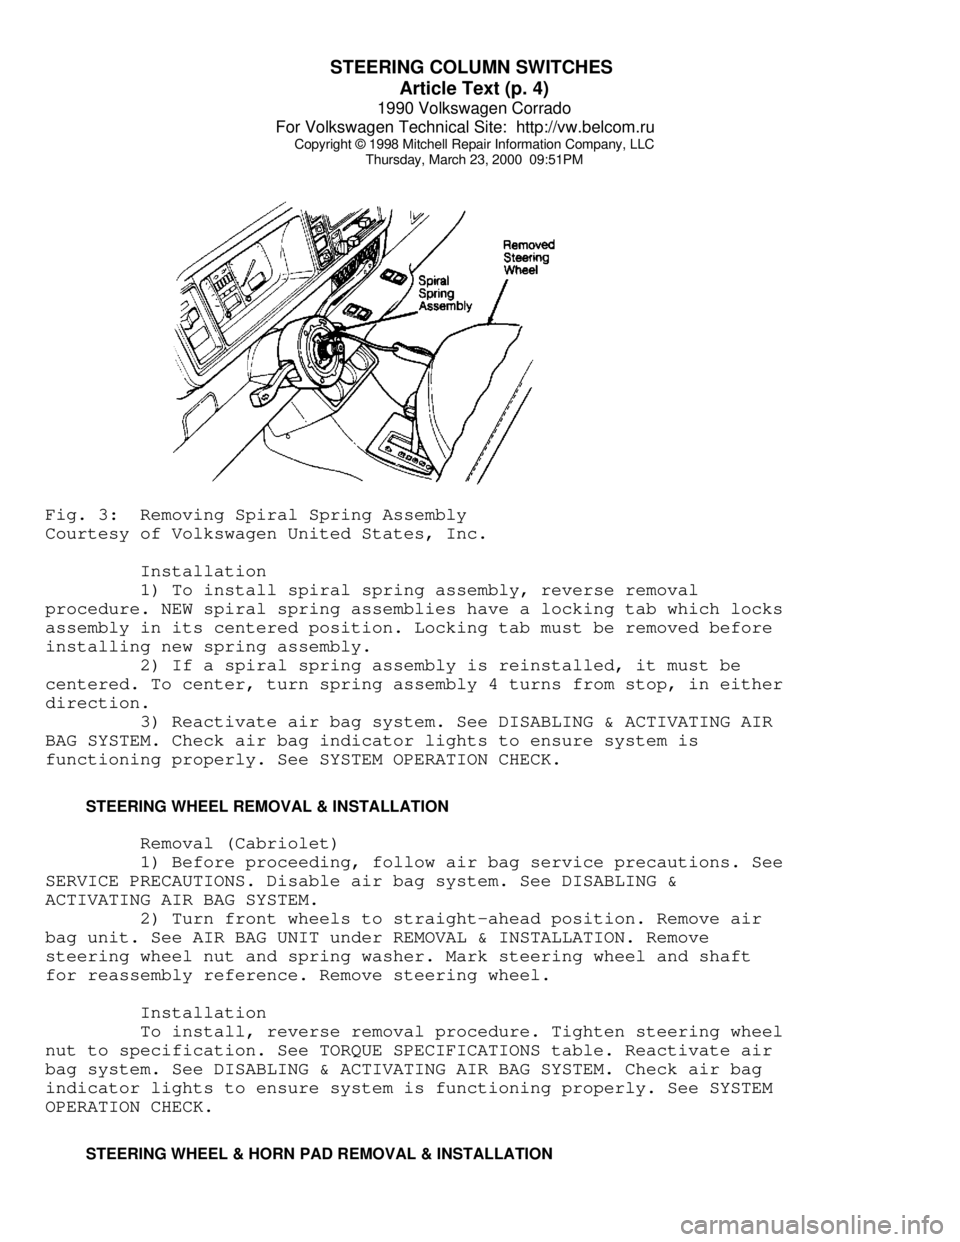
Green/Red wires) at base of steering column. Remove 3 spiral spring
retaining screws, and remove spiral spring. See Fig. 3.
Page 743 of 906
STEERING COLUMN SWITCHES
Article Text (p. 4)
1990 Volkswagen Corrado
For Volkswagen Technical Site: http://vw.belcom.ru
Copyright © 1998 Mitchell Repair Information Company, LLC
Thursday, March 23, 2000 09:51PMFig. 3: Removing Spiral Spring Assembly
Courtesy of Volkswagen United States, Inc.
Installation
1) To install spiral spring assembly, reverse removal
procedure. NEW spiral spring assemblies have a locking tab which locks
assembly in its centered position. Locking tab must be removed before
installing new spring assembly.
2) If a spiral spring assembly is reinstalled, it must be
centered. To center, turn spring assembly 4 turns from stop, in either
direction.
3) Reactivate air bag system. See DISABLING & ACTIVATING AIR
BAG SYSTEM. Check air bag indicator lights to ensure system is
functioning properly. See SYSTEM OPERATION CHECK.
STEERING WHEEL REMOVAL & INSTALLATION
Removal (Cabriolet)
1) Before proceeding, follow air bag service precautions. See
SERVICE PRECAUTIONS. Disable air bag system. See DISABLING &
ACTIVATING AIR BAG SYSTEM.
2) Turn front wheels to straight-ahead position. Remove air
bag unit. See AIR BAG UNIT under REMOVAL & INSTALLATION. Remove
steering wheel nut and spring washer. Mark steering wheel and shaft
for reassembly reference. Remove steering wheel.
Installation
To install, reverse removal procedure. Tighten steering wheel
nut to specification. See TORQUE SPECIFICATIONS table. Reactivate air
bag system. See DISABLING & ACTIVATING AIR BAG SYSTEM. Check air bag
indicator lights to ensure system is functioning properly. See SYSTEM
OPERATION CHECK.
STEERING WHEEL & HORN PAD REMOVAL & INSTALLATION
Page:
< prev 1-8 9-16 17-24