1984 CHEVROLET CAVALIER towing
[x] Cancel search: towingPage 56 of 105
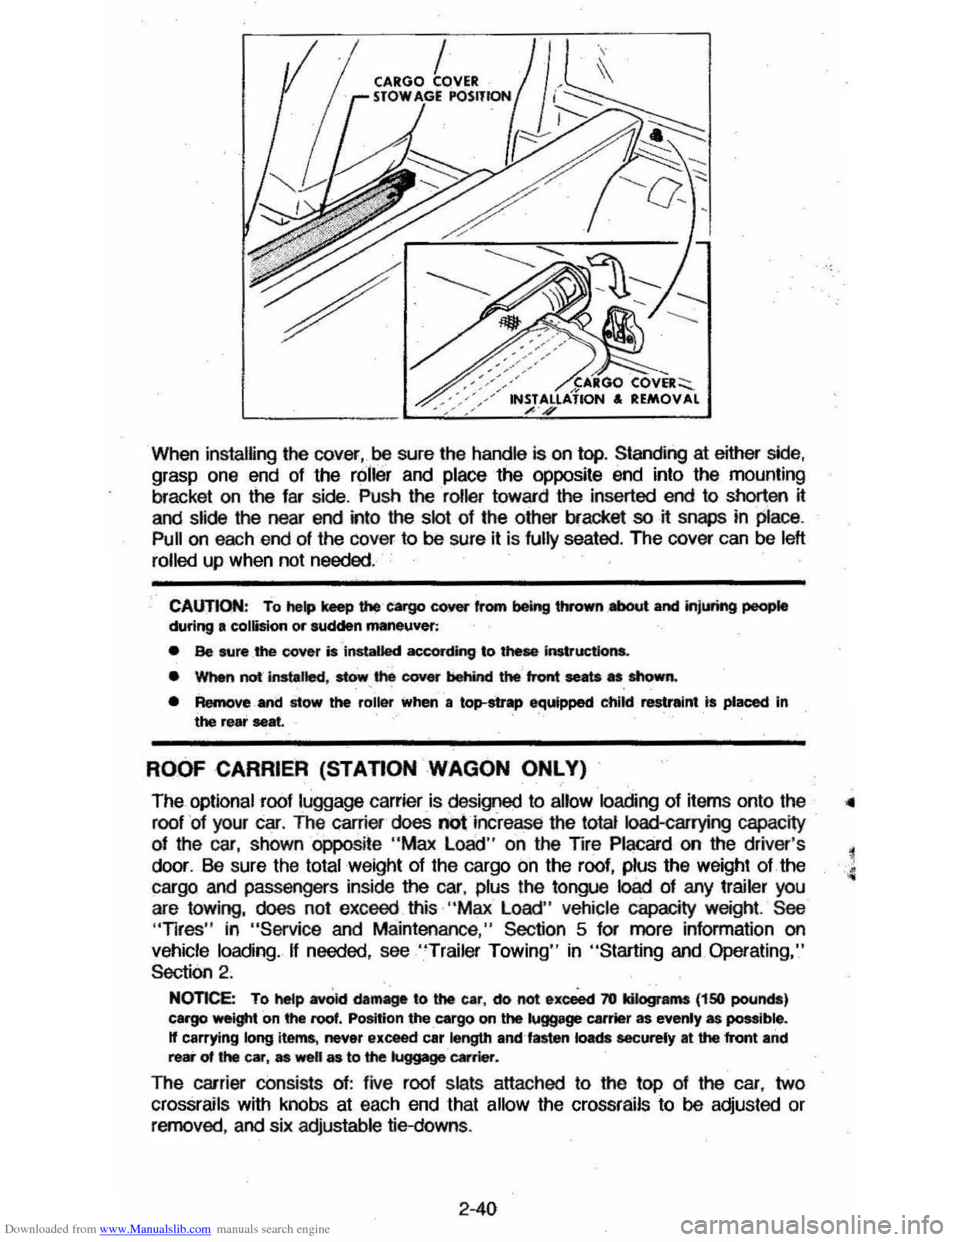
Downloaded from www.Manualslib.com manuals search engine When installing the cover,oo sure the handle is on top. Standing at either side, grasp one end of the roller and place the opposite end into the mounting
bracket on
the far side . Push the roller toward the inserted end to shorten it
and slide the near end into the slot of the other bracket so it snaps in place.
Pull on each end of the cover to 00 sure it is fully seated. The cover can be left
rolled
up when not needed .
CAUTION: To help keep u.., cargo cover from being thrown .,.a,oot and jnjlM'ing people during a collision or sudden maneuver:
• Be sure _the cover is installed according to these Instructions.
• WMn not-instalted, stow, the cover behind the front seats as shown.
• Remove and stow the roiler when a top-strap equipped child restraint is placed In the rear seat.
ROOF CARRIER (STAnON WAGON ONLY)
The optional roof luggage carrier is designed to allow loading of items onto the
roof
' of your car. The carrier does not increase the total Ioad-carrying capacity
of the car, shown oppoSite "Max Load " on the TIre Placard on the driver's
door. Be sure the
total weight of the cargo on the roof, plus the weight of the
cargo and passengers inside
the car, plus the tongue load of any trailer you
are towing, does not exceed this· "Max Load" vehicle capacity weight. See "Tires" in "Service and Maintenance," Section 5 for more information on
vehicle loading. If needed, see "Trailer Towing" in "Starting and. Operating,"
Section 2 .
NOnce: To hetp avOid damage to the car, do not exceect 70 kilograms (150 pounds) cargo weight on the roof. Position the cargo on the luggage carrier as evenly as possible. If carrying long items , never exceed car length emUasten loads eacurely at the front and rear of the car, as well as to the luggage ~rier.
The carrier consists of: five roof slats attached to the top of the car, two
crossrails with knobs at each end that allow the crossrails to 00 adjusted or removed, and six adjustable tie-downs.
2-40
Page 61 of 105
Downloaded from www.Manualslib.com manuals search engine ENGINE COOLING SYSTEM OVERHEATING
If you see or hear escaping steam or have other reason to suspect there is a
serious overheat condition, stop and park the vehicle as soon as it is safe
to do so and turn off the engine immediately and get out of the vehicle.
The cooling system may overheat if the coolant level is too low, if there is a
sudden
loss of coolant (such as a worn hose splitting), or if other problems occur. It may also temporarily overheat during severe operating conditions
such as:
• climbing a long hill on a hot day,
• stopping after high-speed driving,
• idling for long periods in trallic, or
• towing a trailer.
I! the Engine Coolant Temperature light comes on (or if you have an Engine
Coolant Temperature gage and it shows an overheat condition), or you have
any reason to suspect the engine may be overheating:
• tfyour air conditioner is on, turn it off.
• If you are stopped in traffic, shift the transaxle to "N" (Neutral).
If the warning light does not go off (or engine coolant temperature does not
start to drop) within a minute
Or two:
• Pull over, stop and park the vehicle as soon as it is safe to do so.
• Let the engine run at normal idle speed for two or three minutes.
I! the warning light does not go off (or engine coolant temperature does not
start to drop),
turn off the engine and get out of the car, then proceed as
follows:
CAUTION: To help avokt being burned:
• DO NOT OPEN ntE HOOD if you see or hear steam or coolant escaping from the engine compartment. Wait until no steam or coolant can be seen or heard before opening the hood.
• DO NOT REMOVE THE RADIATOR CAP or coolant RECOVERY TANK CAP IF THE COOLANT IN THE RECOVERY TANK IS BOIUNG. Also do not remove the radiator
cap while the engine and radiator are still hot Scalding fluid and steam can be blown out under pressure if eHher cap is taken off too soon.
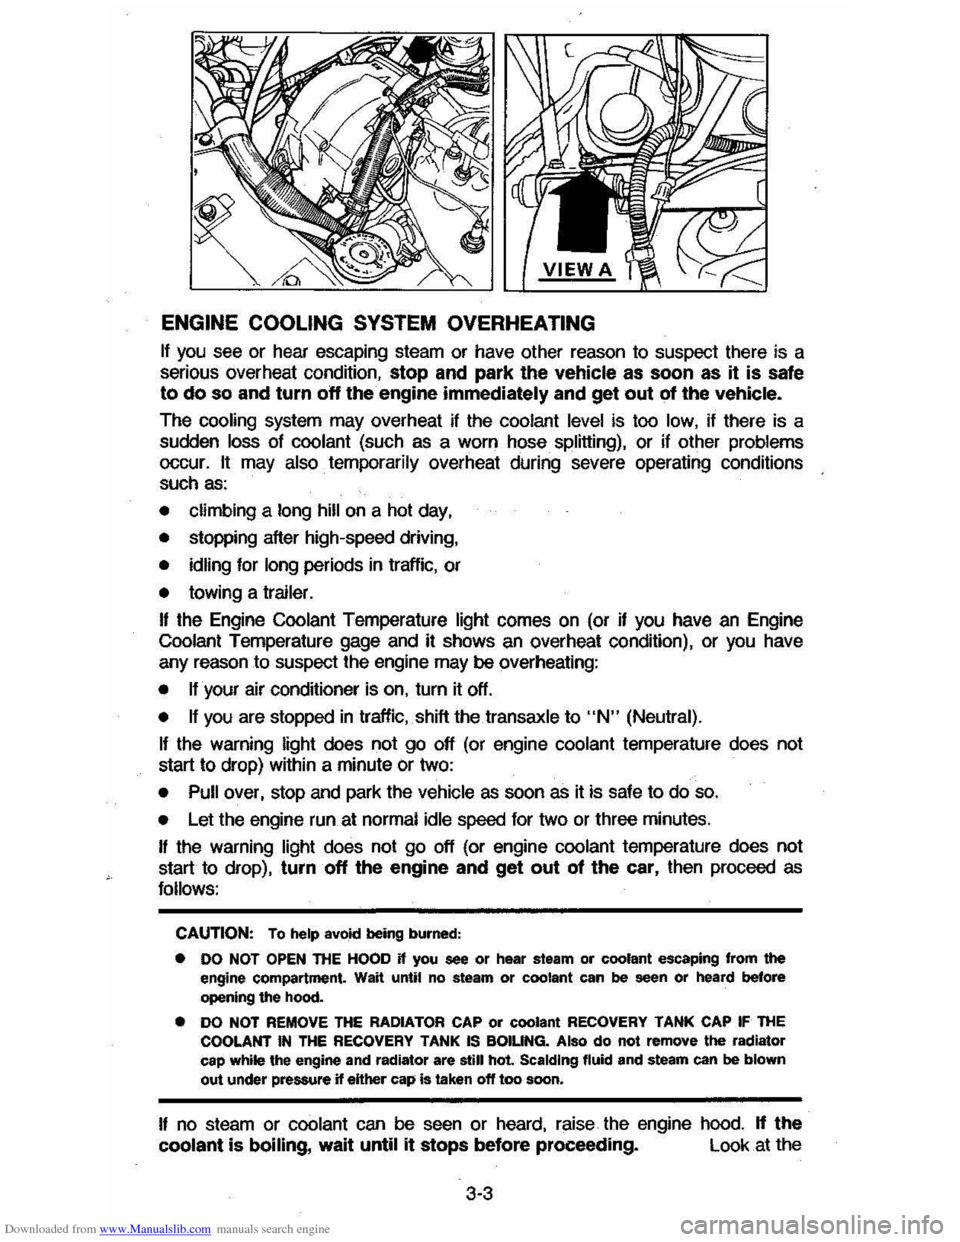
I! no steam or coolant can be seen or heard, raise the engine hood. If the
coolant is boiling, wait until it stops before proceeding. Look at the
3-3
Page 66 of 105
Downloaded from www.Manualslib.com manuals search engine TOWING
Proper equipment must be used to prevent damage to vehicles during any
towing . State (provincial in
Canada) and local laws which apply to vehicles in .'
tow must be foltowed. Gel detailed towing instructions from your dealer.
Your vehicle, if equipped with
an automatic transaxle, may be towed on alt four
wheels at speeds less than
35 mph (55 km/h) for distances up to 50 miles (80
kilometers). These speed and distance restrictions do not apply if your vehicle
has a manual transaxle . The driveline and steering must be normalty operable.
For such towing, the steering must
be unlocked, transaxle in neutral and the
parking brake released.
Connect to main structural parts of the vehicle. Do NOT attach to bumpers or brackets. Remember also that power assist for
brakes
and steering wilt not be available when the engine is off.
n the vehicle is to be towed by a wrecker , use only equipment designed for this
purpose, following
the instructions of the wrecker manufacturer . Towing on the rear wheels is preferred because of the front-wheel drive. However, if
necessary, your vehicle may be towed backwards on the front drive wheels at speeds up to 35 mph (55 km/h) for distances of 50 miles (80 kilometers) if it is
equipped with
an automatic transaxle. These speed and distance restrictions do not apply ij your vehicle has a manual transaxle. Severe damage to the
transaxle may result
II speeder distance ~m~s are exceeded.
A safety chain system must
be used. for alt towing .
FREEING VEHICLE FROM SAND, MUD, SNOW OR ICE
n your vehicle gets stuck in sand, mUd, snow or ice, shift the transaxle from a
forward range to reverse in a repeat pattern.
(On manual transaxle models, shift the Ifansaxle from First or Second to Reverse .) Apply a tight pressure to
the accelerator pedal
while the transaxle is in gear. Remove your foot from the
accelerator while shifting.
Do not race the engine. For best traction, avoid
spinning the wheels. Incorrect rocking of your' vehicle while it is stuck may
resuh in damage to vehicle components.
CAUTION: Do ............ -.. _ IN. 35 ""'" ,55 Om/h). _ In)ufy .... .-nave (including tire, vehicle body parte. and/or tr.., .. xle failure) mIIy mutt from exCQ:live wheel spinning.
If the vehicle remains stuck after several rocking attempts, seek other
assistance. Also
see the Notice under "Automatic Transaxles" in "Starting and
Operating", Section 2 01 this manual .
Extended Vehicle Storage
If you plan to store your vehicle over an extended period of time, certain steps
should
be taken to give it maximum protection. It is recommended that you
write the Consumer Relations Department , Chevrolet Motor Division, Warren,
Michigan 48090,
(in Canada, write to General Motors of canada Um~ed,
Customer Services Departmeht, Oshawa, Ontario L 1 J5Z6) for detailed
instructions on how to prepare your vehicle for storage .
3-8
Page 76 of 105
Downloaded from www.Manualslib.com manuals search engine most cases the vehicle is drivable, and does not require towing, see your
authorized dealer as soon as possible for service of the system.
Continued
driving without having the Computer Command Control system serviced could eventually cause damage to the emission control system. It
could
also affect fuel economy and drivability .
ENGINE OIL AND FILTER RECOMMENDATIONS
The following engine oil recommendations are based upon the operation . of your engine with the fuels recommended under "Fuel Requirements" in Section 2 of this manual.
Checking Oil Level
The engine oil must be kepi at the right level to help assure proper lubrication
of your vehicle's engine. n Is normal for an engine to use some oil, and some
engines may use more oil when they are new.
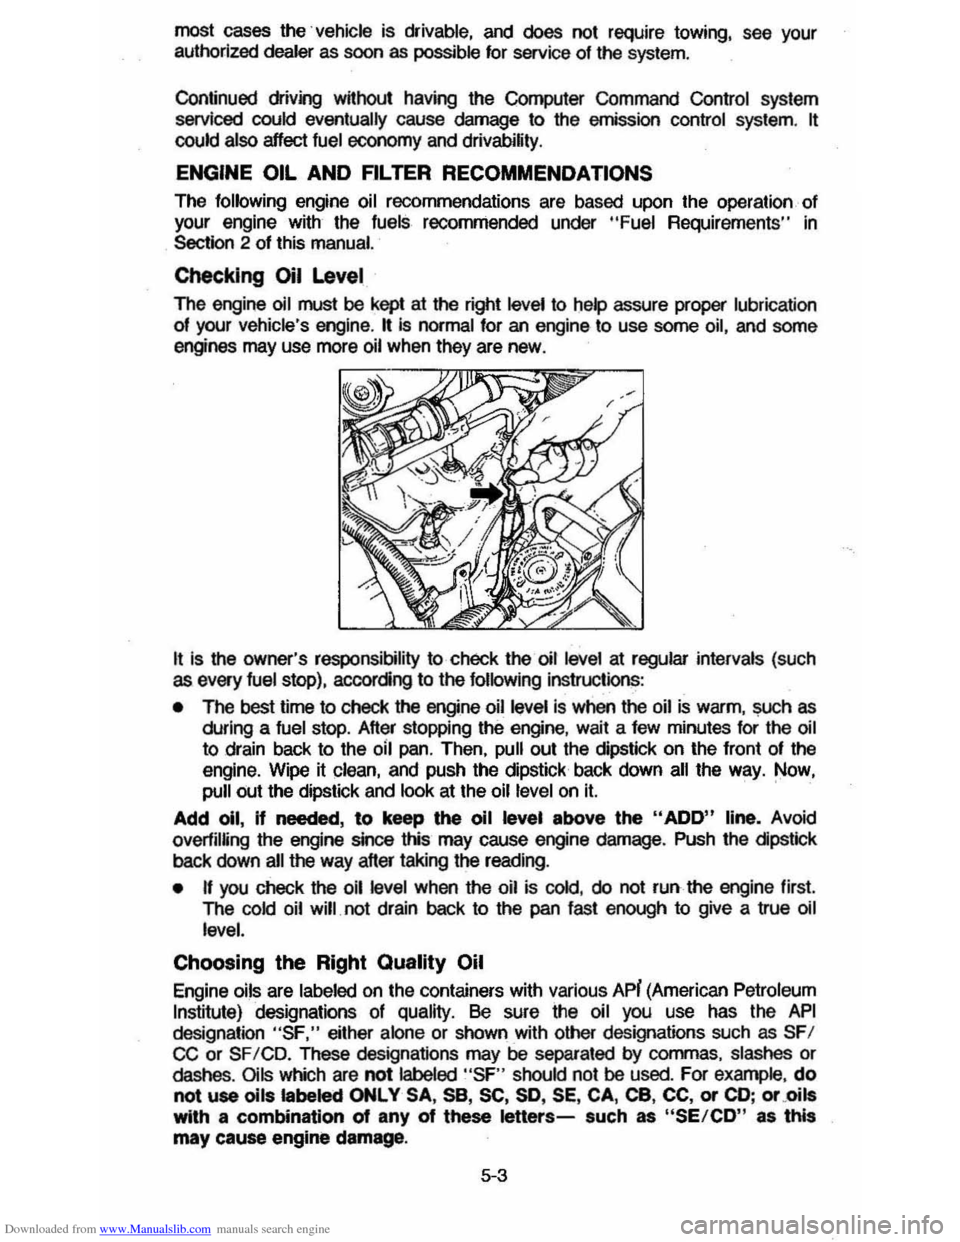
It is the owner's responsibility to check the oil level at regular intervals (such as every fuel stop), accorcing to the following instructions:
• The best time to check the engine oil level is when the oil is warm, ~h as
during a fuel stop. After stopping the engine, wait a few minutes for the oil
to drain back to the oil pan. Then, pull out the dipstick on the front of the
engine. Wipe it clean, and push the dipstick back down
all the way. Now, pull out the dipstick and look at the oil level on It. '
Add 011, If needed, to keep the 011 level above the "ADD" line, Avoid
overfilUng
the engine since this may cause engine damage. Push the cipstlck
back down all the way after taking the reading.
• n you check the oil level when the oil is cold, do not run the engine first.
The
cold oil will. not drain back to the pan fast enough to give a true oil
level.
Choosing the Right Quality Oil
Engine oils are labeled on the containers with various APi (American Petroleum
Institute) designations of quality. Be sure the oil you use has the API
designation "SF," either alone or shown with other designations such as SFI CC or SF ICD. These designations may be separated by commas. slashes or dashes. Oils which are not labeled "SF " should not be used. For example , do
not use oils labeled ONLY SA, sa, SC, SO, SE, CA, ca, CC, or CD; or .oils with a combination of any of these letters-such as "SE/CD" as this
may cause engine damage.
5·3
Page 78 of 105
Downloaded from www.Manualslib.com manuals search engine Oil Identification Logo
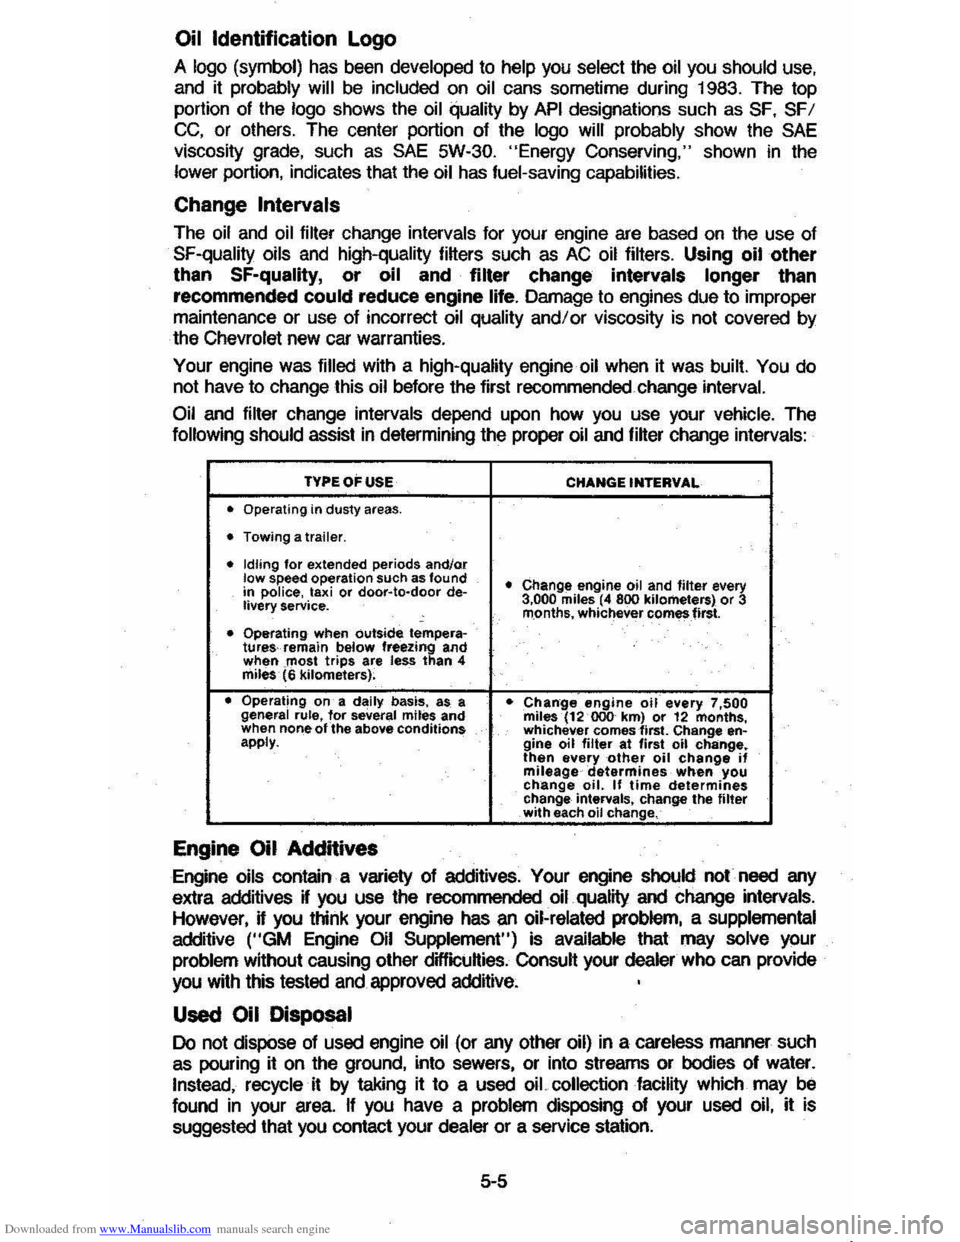
A logo (symbol) has been developed to help you select the oil you should use,
and it probably will be included on oil cans sometime during 1983. The top
portion of the logo shows the oil quality by API designations such as SF, SFI
CC, or others. The center portion of the logo will probably show the SAE
viscosity grade, such as SAE 5W-30. "Energy Conserving," shown in the lower portion, indicates that the oil has fuel-saving capabilities.
Change Intervals
The oil and oil filter change intervals for your engine are based on the use of
SF-quality oils and high-quality fi~ers such as AC oil filters. Using oil other
than SF-quality, or oil and filter change intervals longer than
recommended could reduce engine life. Damage to engines due to improper
maintenance or use of incorrect
oil quality and/ or viscosity is not covered by
the Chevrolet new car warranties.
Your engine was
filled with a high-quality engine oil when it was built. You do
not have to change this oil before the first recommended change interval.
Oil
and filter change intervals depend upon how you use your vehicle. The
following should assist in determining the proper oil and fi~er change intervals:
TVPEOFUSE CHANGE INTERVAL
• Operating
in dusty areas.
• Towing a trailer.
• Idling for extended periods andlor low speed operation such as found • Change engine oil and filter every
in police, taxi or door-Ie-door de-livery service. 3,000 miles (4 800 kilometers) or 3
rn.onths, whichever comes first.
• Operating when outside tempera-tures-remain below freezing and when most trips are less than 4 miles' (6 kilometers)~
• Operating on a daily basis, as a • Chan:ge engine oil every 7,500 general rule, for several miles and miles (12 000-km) or 12 months,
when none of the above conditions whichev.er comes first. Change en·
apply. gine oil filter at first oil change. then every other oil change if mileage determines· when you change oil. If time determines change intervals, change the filter with each oil change.
Engine Oil Additives
Engine oils contain a variety of additives. Your engine should not need any
extra additives
K you use the recommended oil quality and change intervals. However, H you think your engine has an oil-related problem, a supplemental
additive ("GM Engine Oil Supplement") is available that may solve your problem without causing other difficuHies. Consu~ your dealer who can provide
you
w~h this tested and approved additive.
Used Oil Disposal
Do not dispose of used engine oil (or any other oil) in a careless manner such
as pouring it on the ground, into sewers, or into streams or bodies of water.
Instead, recycle it by taking it to a used oiL collection facility which may be
found
in your area. If you have a problem disposing of your used oil, it is
suggested that you contact your
dealer or a service station.
5-5
Page 85 of 105
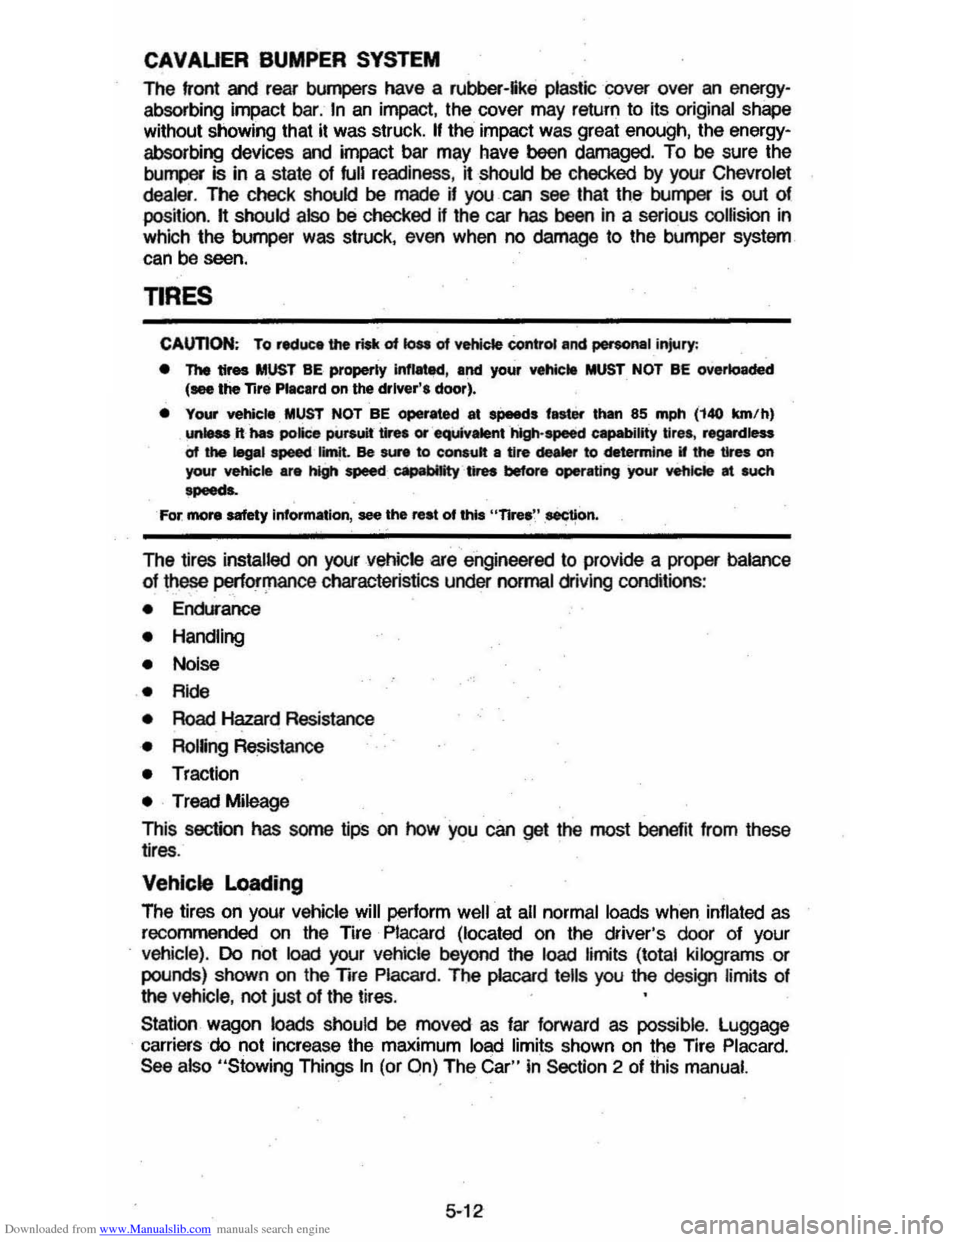
Downloaded from www.Manualslib.com manuals search engine CAVAUER BUMPER SYSTEM
The front and rear bumpers have a rubber- ike plastic cover over an energy
absorbing impact bar.
In an impact , the cover may return to its original shape
without showing that it was struck.
If the impact was great enough, the energy
absorbing devices and impact bar may have been damaged.
To be sure the burrc:>er is in a state of full readiness , it should be checked by your Chevrolet
dealer . The check should be mada if you can sae Ihat the burrc:>er is out of
position . " should also be checked ij the car has been in a serious collision in
which the bumper was struck, even when no damage to the bumper system
can be seen.
TIRES
CAUTION: To reduce the risk of loa of vehicle control and personal injury:
• The tires MUST BE properly in118Wd, and your vehicle MUST NOT BE overioaded (Me the Tir. Placard on the driver'. door).
• Your vehiele MUST NOT BE operated at speeds fa. than 85 mph ('140 km/h) un .... _ft-has police pursuit tires or equlVaienthigh ·speed capability tirea , regllf'dless of the legal speed 1irn!L Be Stn to cOIl$un a Ure dealer to determine II the tires on your vehicle are hlgh speed capability tires before operating )our vehk:le at such
-For more safety information, see the reat of this "Tire.~' ,~on.
The tires installed on your vehicle are engineered to provide a proper balance
of these peffor~ characteristics under noonal driving conditions :
• Endurance
• Handling
•
Noise
• Aide
• Road Hazard Resistance
• Aoling Resistance
• Traction
• Tread Mileage
This section has some tipS on how you can get the most benefit from these
tires .
Vehicle Loading
The tires on your vehicle will perform well at all normal loads when. inflated as
recommended on the Tire
Placard (located on the driver's door of your vehicle). Do not load your vehicle beyond the load limits (total kilograms or
pounds) shown on the Tire Placard . The placard tells you the design limits of the vehicle, not just of the tires .
Station wagon loads should be moved as far forward as possible. Luggage carriers do not increase the maximum load limits shown on the Tire Placard. See also "Stowing Things In (or On) The Car" in Section 2 of this manual.
5-12
Page 100 of 105
Downloaded from www.Manualslib.com manuals search engine SECTION 7
Accessory Position, Steering CoIl.m Lock 2-7 AIr Cir ctJlalioo. . 2-26 Ai' Cleaner. 5-,0 Air Conditio ning ............ . 2-27 M ainte nance .. Antenna . 5-\1 2 -35 5-8 Antifreeze (See Coo~ng System) .. Appearance cae ...• ....•.. 4·t .... ...... 2 -25 ASh Tra y .. Automatic T 'ansalC!e Fluid Chedi: . ___ .. . _ ..... _ ._ ... ... . Maintenance .. Notice ,. .. Op$ralion .. Surter Safety Switch Axlo, Drive-Fluid Level Ball Joints. Ba"&,y
· ....... 5-6 .... 5'-6 2,13 · .... 2 -12 2'13
........ . 5-11 5-1 I
Caution.. 5-11 Emergenc y Starling.. 3-1 Freedom.. .. 3·1 , 5-11 Gas caution . ___ ............. ..... ... . ...... .... 3·, Specilicalions .... ... ... ... .. ... .. .. . T esl indlealor .. Belor e Driving Your cavalier .. B loc k Healer, Engine Blower, Ventilating .. Brakes Driving Through Deep Water "
Parking Brake .. P eda l TraVel .. Power ... SelI·AqusIing ...... ... ..... .. ... .. .. . T railer ..... . Warning Light .. Br eak -In Period Cars Pulrng Tra~ars New Car .. Bucke l Seats .. R ttelininQ .. Bulbs and Fuses ..
""_ Jad< Operation . Stowage ............. ... ... .. .... •..•. • _ ..
Key RemiAder .. Cap FIJI:II .. R adiator Capa.cities .. carbon Monoxide Caution .. Cargo Cover (Hatchback) .. cargO Cover (Station Wagon) ... Carrier, Infant Safety .. cataIytlc Converter .. care .... OwNheatng ....... . Changing Wheels and Tl"es .. Ct\IICI Restraint.. Cigarette lightsr ..
. .... 6 -1 . . . 5-1 1 1-1 2-11 2-25
2 -18
2 -19
2·18 •.••.•. 2, 18 2-1 8 ....... ... .. 2· 3 2·22
2-2
2-2
1 -5
1-5
6 ·3. 6·4 . 6-5
3 ·5 . 3-6 ........ . 3-5
· ....... 2·'
5 -1 5-10 .... .. 6-1 2 -1 2-38 2 -39 1·11 5-2 ...... .... 5-2 ..3 -3 ....•.••. . 3·5 1-11 · ..... 2-25
INDEX
7-1
C1eri'9 c;a.pet care .. Caution .. Exteriof Finish and Trim Fabri c and Interio r Trim .. Solvents Racomme nded Spot Removal. Vinyl Top .. C kl tch
. .... 4·' . ..... 4 -' 4 -' 4 -1
4 -1
..,
4-3
PeDa l Acl/Ustmeot ........ ... ... ... .......... ........ 5·7 Cold Wealhet Starting ... ... ... ...... ... ... ...... 2·11 CooIiIl9 System care. .. . 5 ·8 Coolan t Rocommeodation 5-9 Overhea ting caution. 3-3 Courtosy Lights .. 6-3 Cruis e Con trof 2-16 Defay Wipo( Sys tem ....................... ,.. 2 -9 [)jmensions, Ve)jcle.. . ......... 6-1 [Xsc Brake Wear IrKicator .......... 2-20 Door locks ' -3 Power Door l ocks ... Drive Axle
"""" Seal Adjus tment. .. Driving on Slippery Surfaces Electn c Fan .. Electric al System Battory .. Bulbs .• . . FI.ISOS ..•..• Emergency. In Case Of . Brake W~ning Liglt .. 1
-3
.• 5·6
1 -5 2 -\' .... ~::<',~~-
5 '11, 6·2 '·3 6-4. 6·5 . .... ..... .. 3 · . ... 2 ·22 Geoefator hdicalor... . ...... 2 ·2 1 Hazru"d Warring . .,fLashef ... -'. __ .... ,,, 3 ·1 Jaddng T o Change Wheels 3·5 Jump Starling with Auxi~ary Banel)'. . 3· Overhe.1tod Radiator.. 3·3 Pushing To Start.. 3-I Spar e Trre.. . . .................... 3-5 , 3·6 Towing.. 3·6 Engine Block Heater ... Codo .. CooIO>g •••.
2 ·' , . . .. . 6·5
5 ·7
8I:haust Gas Caution ............... ... ... ... ... 2-1 Flooded, Staring Procedlre ................ 2·11 Qvome ating ................... ....... .... ............. . 3-3 Serial NulTlbef.. . .... 6-5 Specifications . ............... . ..... . .. ..... .......... 6-' Starting... 2·10 Temperature Gage.. 2 ·24 TefTlP(Iralure Light. 2 -21 EnginO Oil Capacity .. Dipstick •• F~Of . . .
. ............ ....... ... .. .... .......... ... 6-1
Reoo .. wnonootion .. Ethyteno Glycol Coolant .• EXhaUst Gas Caution . .
• •••• 5 -3 5·5. 6 ·2
5 ·'
5 ·7 . ....... 2·' Driving With Trunk Open ..... .. ............. . 2-'
Page 102 of 105
Downloaded from www.Manualslib.com manuals search engine STereo.. 2-3 1 Tapu System ..... ....... .............. ........... 2-30 Rear WnJow Defogger ...•.•.......•.• .. . 2,26 Roar Window Washer/Wiper.. .. 2,29 Aegstration.. &5 Engine Number. &5 VehICle identifICation Number. &5 Replacement Fastener .. 5 -1
Restarting.
Restraints Child ... Lap Belts .. Methods Of Restr~ring Children •.. ReM Seat .. Reslraill lor Pfegnan WomtHI • . Shoulder Belts ___________ .......•..•.•.. Rool
2 -11
'-II ',9, 1-10 1-11 1·9 . HO H H l. l-10
Luggage
ca-rier .... ...... ............. 2-40, 2-4 Removable Panel. 2-37 Rotation. Tire .. Safoty BeltS (Seat Belts) .
5-14
,-, Carrior, InfiYIt . 1 -11 Seal, Child .... ..... ..... .... .. . .•.. 1-1 1
.. " Adj;stment, M
'-II 1-11 1-6 1-6
1-6 SOouIcIer_.. . _ .. _ ....... .............•.•.• SoII.Adjusting Bfakes Sensor Indicator and Check Eogr.e Irdcator Light . Service and Mainl:enMC8 •. Side Marker Ligtts ..
••.•. 2·1 8
2-21 . ....... 5,1 '-3 Spare Tire .. ... .............. 3·6. 3-7 Jacking Instructions .. Specifications, General,. $peed Control (Cruise Control) ..
-. 8tafteJ Sdety Switch ... _ .... _ ..........•.•
.... "'" Automatic Transaxle cars .. Emergency .. S-.. ColImn Controls .. Column Lock, Anti-Theft Power ..
3-5 ' -I 2 -16 2 -2<) 2-10
. ... 2-10 ...... 3-1
2-7 ... 2-7 .. '. 2-15 ' Wheel, Tilt ............. ; ........................... 2·15 Straps, Safety (See Seat Belts)
Stowing 01 Items. .. .............. . 1-' 3·5 , '3-6 Stowage Tire and Jack .. Suspension Maintenance .. 5·11 Tachomeler ...... ... ..... ........... ............ ..... 2·22 Theft, ou.d Againsl... 1-1 ThennostaI ..... ........ 5-9 Tilt SMering WheeL. r .. Alignment and Balance ... Chains •.
........ -2-15
5-15
5-15
Changing .................... .... ..... ................. 3.5 Damage al'l(j Repaj!' ... . .. ...... .. .... .......... 5-16 High Speod Operation __ ............•..•.•. 5-13 Hydroplaning .. _ ................. 5 .15 Wlallorl Pr~e.. . ..................... 5 .13 W;pection ... 5-14 Jackng... 3·5 L03(I Limit . Radial Tires .. Replacemont .. Rotation . Spare .. Tire Chains ..
5·13
5·16
5'16 5·14 3 -5 , 3-6 5 '15 Trac tion ........................... .................. 5 -1 5 lreacl W6iI' 1r"IcIicaIors.. 5017 Warranty ......... _ .................................. 5-18 T_
Caution ........ ~obIod Vehicle .. Mal1tonance , . Tires ...... . To Starl .. To)[iC Cleaning Solvents .. E)[haust n..mes .. Traction . Wei Roads ..
2-3
3 -8
2 ·2
5 ·13 3-1
.. .... ..... 4-1 2 -1 5 '15
Traffic Hazard Flasher ......... ... .... ......... 3,1
, T~ TOWing .... ............. ........ .............. 2 -2 -~,-u,_ BreOk~" Pofiod ................. ....... ............ . 2.2
7-3
CauIioc:II .................. ...... ...................... 2·3
~=~~'~~~~~·~':~~~~~~~~:::~:i·~~:;;---Tips.. 2.4 Tire W1ation.... 5.13 Trailer Tongue Load .............. ........ ,.. 2.3 TrlWlSaX!e AlAomaIic .. 2· 12 'Braking EtIect On Hills ....... 2·14 Checking FUd Level ............... ........ ¥,.,.: 506 ManuaI·, .. : ::.;:-... 2-14 ShIft Controls .. Upshift Indlcator light .. 2 -14 2 ·15 Tread Wear Ind"lCators.. 5·17
Turn Signals and Lane Change Feature ............................................... , 2·8 UndorbOcly Maintenance.. .. .......... 4·5 Upshift Indicator Light.. 2·15 Vehicle kJentjicaliCJO Number.. 6·S Vetjcte Loadir1g •.•.......... _ .......... _........ 5'12 Ventilating System .................... , .......... 2·25 Voltmeter ....................... .. 2·22 Wamny {Sue W.f1Iflty Folder; Wheel Cha.lgiog ................. ... .. _ ............... 3 -5
Wheel Replacement·Considerations.. 5 ·16 Wheel, Tilt. Steering.. 2·t5 Window$ Manual.. 1.3 Power ........ ................................... ......... 1·4 Rear, Defogger .................................... 2.28 Rear , Washer/Wipel. . 2·29
-0et0atIng ..:I 08t0gging .......... 2-27, 2-28 DMay Wiper System .. _ .................. ........ 2·9 Washer Uae In Cold WNilher .. WUhet Solution .. Wipers And Washers .. Wrecker , TOWing ..
2-10
2-10
2-. 3 ..