1984 CHEVROLET CAVALIER service
[x] Cancel search: servicePage 3 of 105
Downloaded from www.Manualslib.com manuals search engine INTRODUCTION
This manual has been prepared to acquaint you with the operation and
maintenan ce of your 1984
Cavalier. and to provide important safety
information .
It is supplemented by a Maintenance Schedule Folder and a
Warranty and Owner Assistance Information booklet. We urge you to read all
Uvee
publications carefully . Following the recommendations will help assure
the most enjoyable. safe and troubl efree operation of your
vehicle.
When it comes to ser vice, remember that your Chevrolet dealer knows your
vehicle best and is inter ested in your complete satisfaction . Your dealer invites
you to return for all 01 your service needs both during and after the warranty
period.
To help dealers handle your needs. Chevrolet has a number of Zone Offices
throughout the country .
If you have a problem that has not been handled to your satisfaction. follow the steps in the separate "Warranty and Owner
Assistance
Information" booklet.
We thank you for choosing a Chevrolet product, and want to assure you of our continuing interest in your motoring pleasure and satisfaction .
SPECIAL NOTE TO CANADIAN OWNERS
Some vehicles sold in Canada have the Computer Command Control system.
while others do not. II a "CHECK ENGINE" light comes on during engine
starting . your vehicle does have this system . For those vehicles sold in
'"canada which do not have the Computer Command Control system, please refer to the Canadian OWner's Manual Supplement supplied with
your vehicle for information on engine starting, specifications, etc. The
"CHECK ENGINE" light is covered in "Instrument Panel." Section 2 of this
manual.
FRENCH OWNER'S MANUAL
If preferred. a French Owner's Manual can be obtained either from your dealer
or by writing to General Motors of Canada ~imited. Technical Publications
Department . Oshawa. Ontario L 1 J 5Z6.
Aux proprietaires canadians:
Vous pouvez vous procurer un exemplaire dece
guide en fran~ais chez votre concessionnaire OU au Service des publications
techniques . General Motors du Canada Limit"", Oshawa . Ontario L 1 J 5Z6.
FOR CONTINUING SATISFACTION. KEEP YOUR GM CAR ALL GM.
GENERAL MOTORS PARTS ARE IDENTIFIED BY ONE OF THESE
TRADEMARKS: ~[j]~
Page 4 of 105
Downloaded from www.Manualslib.com manuals search engine 1984CAVAUER
OWNER'S MANUAL
This manual should be considered a permanent part of this vehicle. It
should stay with the vehicle when sold, to provide the next owner
with important operating, safety, and maintenance information.
All information, illustrations and specifications in this manual are
based on the latest product inforination available at the time of
printing. We reserve the ripht to make changes at any time without notice. For vehicles sold In Canada, substitute the name "General
Motors
of Canada limited" wherever the name Chevrolet Motor Division appears in this manual.
Table of Contents
Section Page
Before Driving Your Cavalier ............... : .. : ................... 1-1
2 Starting and Operating ........................................... 2-1
Steering Column Controls ............................... 2-7
Floor Controls ....... ....................................... 2-18
Instrument
Panel ............................................ 2-23
Other Controls and Features ................................. 2-35
3
In Case of Emergency ............................................ 3-1
4 Appearance and Care .............................................. 4-1
5 Service and Maintenance ......................................... 5-1
6 Specifications and Service Station Information ...................... 6-t
7
Index and Service Publications .......................... ........... 7-1
ii
Page 10 of 105
Downloaded from www.Manualslib.com manuals search engine Convex Rearview Mirror
Your vehicle may have an optional convex outside right-hand mirror. (A convex
mirror has a curved surface.)
• Use care when judging the size or distance of a vehicle· or object seen in Ihis convex mirror -such objecls will LOOK smaller and appear farther
away than when seen in a flat mirror.
• Use your inside mirror (or glance rearward) to determine the size and distance of objects seen in the convex mirror.
• Adjust the mirror so you can just see the side of your vehicle.
SEAT CONTROLS
Bucket Seats
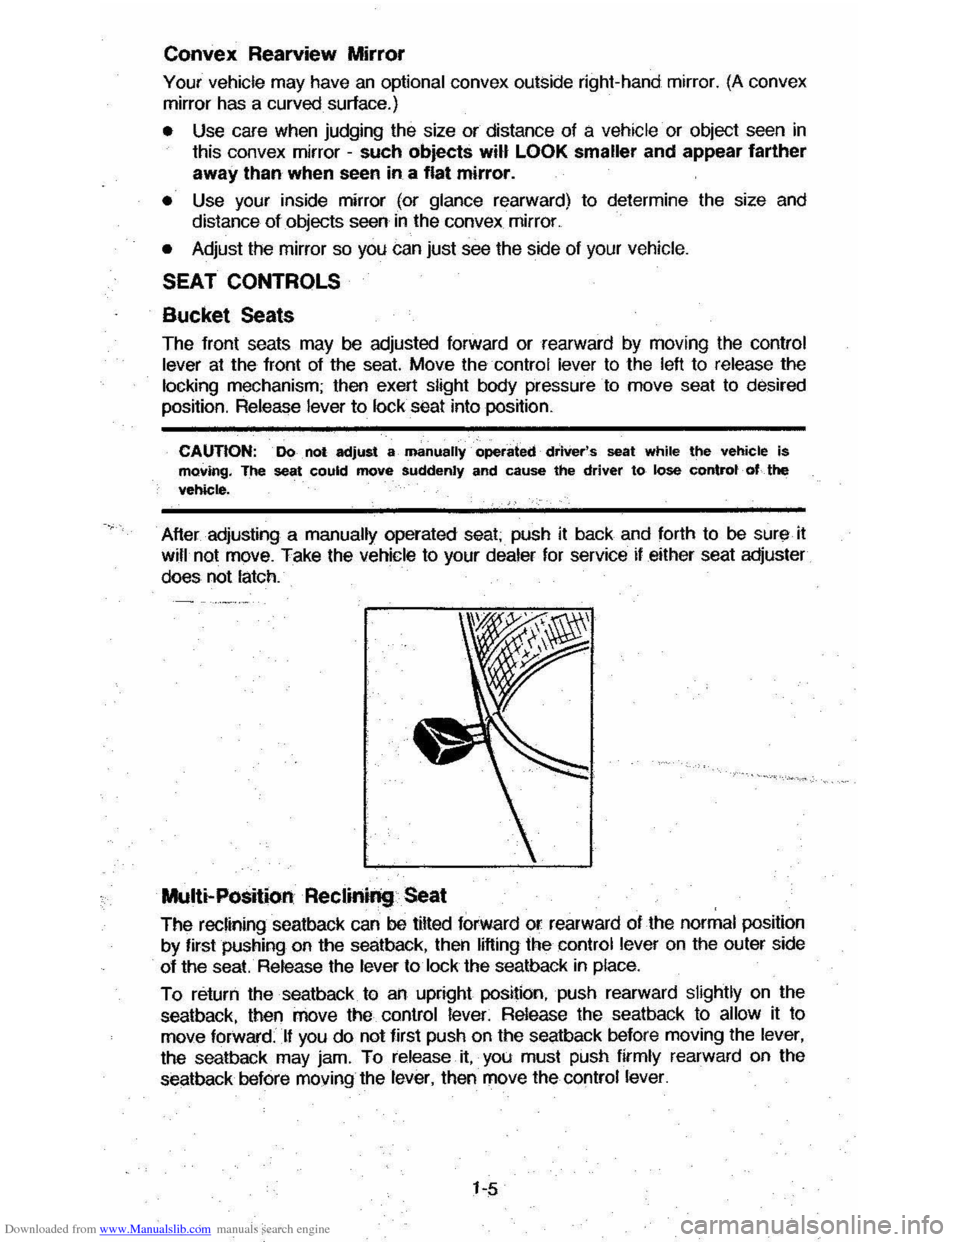
The fronl seals may be adjusled forward or rearward by moving Ihe conlrol
lever at the front of the seat. Move thecontro! lever to the left to release the locking mechanism; then exert slight body pressure· to move seat to desired position. Release lever to lock seat into position.
CAUTION: . Do . not adjust a· manually· operated· driVer's seat while the vehicle is moving. The seat could move suddenly and cause the driver to lose controt· of.. the vehicle.
After adjusling a manually operaled seal; push il back and forlh 10 be sur" il wifl not move. Take the vehicle to your dealer for service if either seat adjuster
does not lalch.
Multi-Position Reclinil'lg Seat
The reclining sealback can be tilted forward or rearward of Ihe normal posilion
by firsl pushing on
Ihe sealback, Ihen lifting the conlrol lever on Ihe ouler side
of
Ihe seat. Release Ihe lever 10 lock the sealback in place.
To relurn Ihe sealback 10 an uprighl position, push rearward slightly on the
sealback, lhen move
Ihe conlrol lever. Release the sealback 10 allow il 10 move forward:· .Lf you do not first push on the seatback before moving the lever,
the seatback may jam.
To release it, you must push firmly rearward on the
seatback before moving the lever, then move
the control lever.
1-5
Page 11 of 105
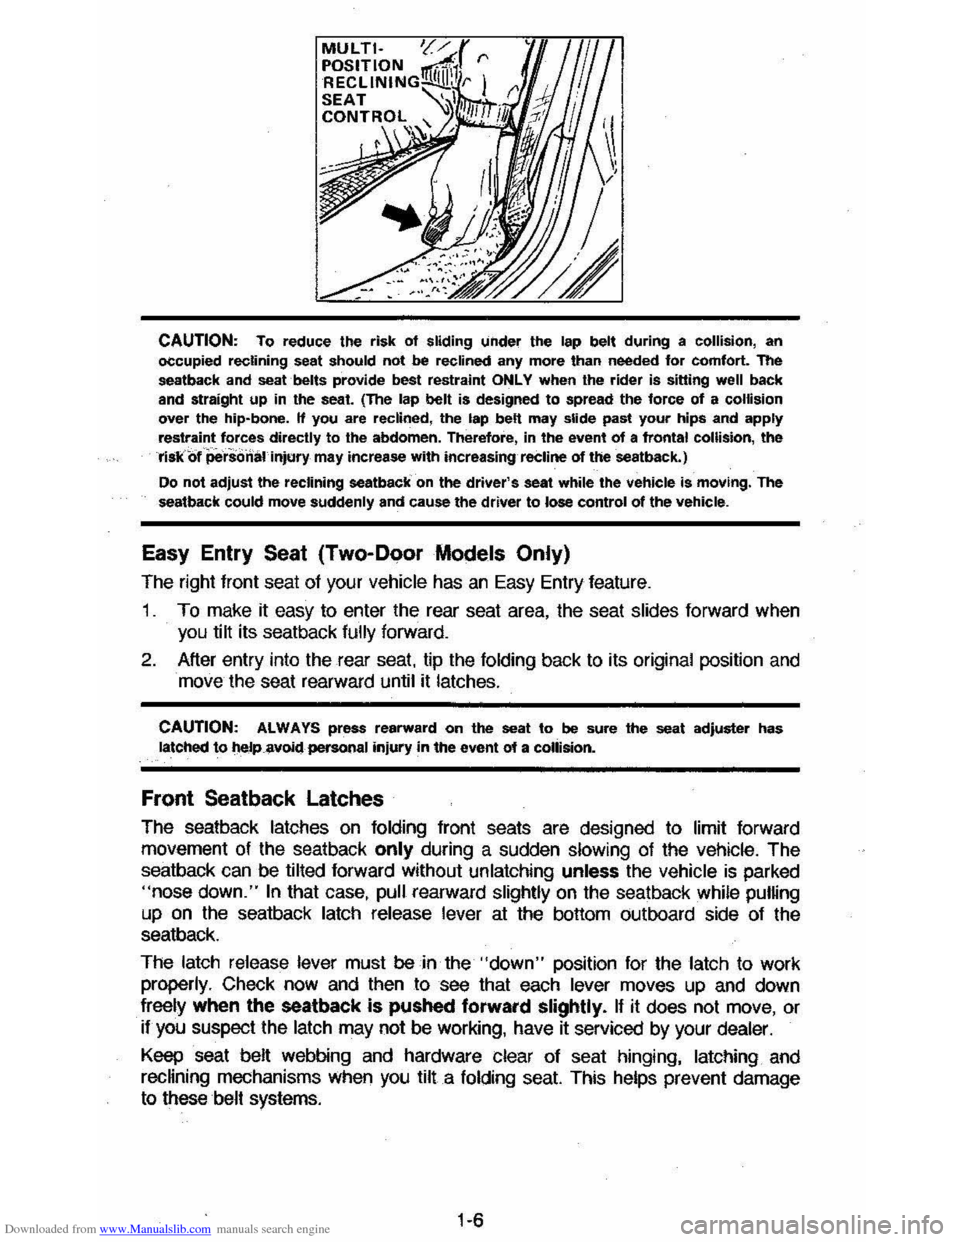
Downloaded from www.Manualslib.com manuals search engine CAUTION: To reduce the risk of sliding under the lap belt during a collision, an
occupied reclining seat should not be reclined any more than needed for comfort. The
seatback and seat belts provide best restraint ONLY when the rider is siuing well back
and straight up in the seat. (The lap belt is designed to spread the force of a collision over the hip-bone. If you are reclined, the lap belt may slide past your hips and apply restraint forces directly to the abdomen. Therefore, in the event of a frontal collision, the riskof 'personal Injury may increase with increasing reCline of theseatback.)
Do not adjust the reclining seatback on the driver's seat while the vehicle is moving. The
seatback could move suddenly and cause the driver to lose control of the vehicle.
Easy Entry Seat (Two-Door Models Only)
The right front seat of your vehicle has an Easy Entry feature.
1 . To make it easy to enter the rear seat area, the seat slides forward when
you tilt its seatback
fully forward.
2. After entry into the rear seat. tip the folding back to its original position and
move the seat rearward until it latches.
CAUTION: ALWAYS press rearward on the seat to be sure the seat adjuster has latched to t\eJp.8voidpersonal injury in the event of a collision.
Front Seatback Latches
The seatback latches on folding front seats are designed to limit forward
movement of the seatback
only during a sudden slowing of the vehicle. The
seatback can be tilted forward without unlatching unless the vehicle
is parked "nose down." In that case, pull rearward slightly on the seatback while pumng
up on the seatback latch release lever at the bottom outboard side of the
seatback.
The latch release lever must
be in the "down" position for the latch to work
properly. Check now and then to see that each lever moves up and down
freely when the seatback
is pushed forward slightly. If it does not move, or
if you suspect the latch may not be working, have it serviced by your dealer.
Keep seat belt webbing and hardware clear of seat hinging, latching and
recHning mechanisms When you tilt a folding seat. This helps prevent damage
to these belt systems.
1·6
Page 16 of 105
Downloaded from www.Manualslib.com manuals search engine Keep any shoulder belt slack to a minimum. Too much belt slack could
reduce the amount of protection in an accident because the belt is too loose to restrain you properly_
Seat Belt Inspection
Now and Ihen check that belts. buckles, latch plates, retractors, reminder
systems and guide
loops work properly; look for loose parts or damage that
could keep the restraint system from doing its job. Replace a
belt if the
webbing has been cut or otherwise damaged. Replace belts in use during all
but a minor collision; if there is any question, replace the belt.
SEAT BELT LIGHT/BUZZER REMINDER
When the key is turned to "Run" or "Start," a light will come on for four to
eight seconds to remind people to fasten their· seat belts. Unless the driver's
seat
belt is buckled, a buzzer will sound at the same time.
If the seat belt or reminder system does not work as described, see your dealer
for service.
CHILD RESTRAINT
All vehicle occupants and especially children should be restrained
whenever riding
in vehicles. Holding a child in your arms is NOT a substitute for a child restraint system. In an accident, a child held in a person's arms can
be struck or crushed by any unrestrained- rider. An unrestrained child could
also be injured by striking the interior, or by being ejected from the vehicle
during a sudden maneuver or impact. A child restraint system can help
protect a child in a vehicle.
In convertibles, a top-strap-equipped child restraint can only be used in
the Iront seat because there is no appropriate place to aUach a top strap
anchor bracket behind the rear seat in this vehicle. Installing a top strap
anchor bracket behind the rear seat may expose the child to hazards if the top
is raised or lowered with the child restraint occupied,
and, the bracket itself
may damage the convertible top.
In using any child restraint system, be sure to read and follow all instructions on installation and use that come with the system.
Riding Without A Child Restraint
For the best protection in an accident or sudden maneuver, children
small enough lor child restraint systems should be restrained that way.
However, the
following may provide some degree of protection for such children if a child restraint is not used.
• Place an infant who cannot sit up in a baby carrier, preferably covered and
padded. Put it crossways on the vehicle seat and securely restrain it with the vehicle's seat belts. Or, if that is not possible, place it crossways on the floor behind the driver's seat.
• Children who can sit up by themselves should be restrained with a lap belt
when riding in a rear seat. In the front seat a child should wear both lap
and shoulder belt. If the shoulder belt irritates the neck or face move the
child
closer to the center of the vehicle or to the rear seat. Never let a child stand or kneel on any seat. If unusual conditions prevent the use of
restraints, the
child should stand on the floor behind the driver's seat.
1-11
Page 18 of 105
Downloaded from www.Manualslib.com manuals search engine Driving with the trunk lid, hatchback or liftgate on station wagon models open is not recommended. Under some conditions, exhaust gases may be drawn
into the vehicle. If the trunk lid, hatchback or liftback must remain open for
some reason while moving, or if electrical wiring or other cable connections to a trailer must pass through the seal between the trunk lid, hatchback or liftback
and the body, follow these precautions:
• Close all windows.
• Adjust the heating or cooling system to force outside air into the vehicle as
described abcve, but set the fan to high speed.
• On vehicles with outside air vents in or under the instrument panel, open the vents fully.
NEW VEHICLE "BREAK-IN" PERIOD
You can drive your new vehicle from its very first mile/kilometer without
following a formal "break-in" schedule. However, there are things you can do during the first few hundred miles/kilometers of driving that will add to the
future performance and economy of your vehicle.
We recommend you limit your speed during the first 500 miles (800 kilometers)
to a maximum of 55 mph (90 km/h); but do not drive for long periods at any
one constant speed, either fast or slow. During this time, avoid full throttle
starts and, if possible, avoid hard stops especially during the first 200 miles (320 kilometers) of driving.
Always drive at moderate speed until the engine has completely warmed up.
I! you plan to use your new vehicle for trailer towing, see the following.
TRAILER TOWING
This car is designed and intended to be used mainly to carry people. Towing a
trailer
will affect handling, durability and economy. Your safety and satisfaction
depend upon proper use of correct equipment. Also, you should avoid
overloads and other abusive use.
The maximum loaded trailer weight you can pull with your vehicle depends on
your intended use
and what special equipment has been installed on it.
Information on trailer towing ability, special equipment required, and optional
equipment available should be obtained from your dealer. Ask for the trailering brochure. Or, write: Consumer Relations Department, Chevrolet Motor
Division, Warren, Michigan 48090.
(In Canada, write to General Motors of
Canada Limited, Customer Services Department, Oshawa, Ontario L lJ 5Z6.)
Tires
When towing trailers, be sure your tires are properly inflated to the inflation pressure shown on the Tire Placard on the driver's door.
The allowable passenger and cargo load for this vehicle, also shown on the
Tire
Placard, is reduced by the trailer tongue weight whenever the trailer is
attached to the vehicle. See "Service and Maintenance," Section 5 for more tire information.
Maintenance
More frequent service is required when using your vehicle to pull a trailer. See
the Maintenance Schedule folder for Automatic Transaxle Fluid and Engine Oil change requirements for trailering.
2-2
Page 20 of 105
Downloaded from www.Manualslib.com manuals search engine NonCE: Use only trailer hitches which permit normal operation of the Energy
Absorbing Bumper system, If so equipped. For example, a rigid fore and aft connection between the bumper and any other part of-the vehicle may increase damage in the event of a collision.
TRAILER TOWING TIPS
Getting Started
Before entering traffic with a trailer that has electric brakes, start the vehicle and trailer moving and apply the trailer brakes by hand to be sure the trailer
brakes are working and the trailer electrical system is connected.
Engine Cooling
If your engine overheats, follow the steps under "Engine Cooling System
Overheating" in "In Case of Emergency," Section 3 of this manual.
Long Uphill Grades
When going up long grades, you can reduce the chance 01 engine overheating
by turning off the air conditioner, if so equipped.
Down Steep Or Long Grades
Before going down a steep or long grade, reduce speed and shift the transaxle
into a lower gear to help control your vehicle's speed. Try not to hold the brake pedal down too long or too often. This could cause the brakes to overheat and
reduce brake effectiveness.
Transaxle
See the method for checking the transaxle fluid level in "Service and
Maintenance,"
Section 5 of this manual.
Parkin!!
You should not park vehicles with trailers on a grade (hill). However, if you
must park on a grade, these steps must be followed:
1. Apply the regular brakes.
2. Have someone place wheel chocks under the trailer wheels.
3. When the wheel chocks are in place, release the regular brakes until the
chocks absorb the load.
4. Apply the parking brake.
5. Shift the transaxle to "P"(Park),
If the vehicle is parked on a grade, don't shift the transaxle to "P"(Park) until the trailer wheels are chocked and the parking brake is set. If you do, the
weight of the
vehicle and trailer may put so much force on the parking pawl in
the transaxle that it may be hard to shift out of "P"(Park).
When starting, after being parked
on a grade:
1. Apply the regular brakes and hold.
2. Start the engine in "P"(Park).
3. Shift into gear and release the parking brake.
4. Release the regular brakes and drive until the chocks are free.
5. Apply the regular brakes and have someone remove the chocks.
2·4
Page 21 of 105
Downloaded from www.Manualslib.com manuals search engine FUEL REQUIREMENTS
Your engine is designed to use Only unleaded gasoline. Unleaded gasoline
must be used for the emission control system to operate properly. Its use will
also reduce spark plug fouling, exhaust system corrosion and engine oil deterioration.
Using leaded gasoline can damage the emission control system and could result in loss of emission warranty coverage. The effectiveness of the catalyst in the catalytic converter decreases after use of as little as one tank of leaded
gasoline. Also, your vehicle may have the "Computer Command Control"
system, which includes an oxygen sensor. Leaded gasoline will damage the sensor, and deteriorate emission control. (For more information, see
"Computer Command Control System" in "Service and Maintenance," Section 5 of this manual).
Federal
regulations require that pumps delivering unleaded gasoline be labeled with the word UNLEADED. Only these pumps have nozzles which fit the filler neck of your vehicle's gasoline tank.
In the United States, Federal law also requires that gasoline octane ratings be
posted on the pumps. The octane rating shown is an average of Research (A)
octane number and Motor (M) octane number. In most parts of the United
States, you should use unleaded gasoline with an octane rating of at least 87. However, you may use unleaded gasoline with an octane fating as low as 85 in these high-altitude areas: Colorado, Montana, New Mexico, Utah, Wyoming,
northeastern Nevada, southern
Idaho, western South Dakota, and that part of
Texas which
is directly south of New Mexico.
Using
unleaded gasoline with an octane rating lower than stated above can
cause persistent, heavy "spark knock."
("Spark knock" is a metallic rapping
noise.) If severe, this can lead to engine damage. If you detect heavy spark
knock even when using gasoline of the recommended octane rating, or if you hear steady spark knock while holding a steady speed on level roads, have
your
dealer correct the problem. Failure to take steps to stop such knocking is misuse of the vehicle, for which Chevrolet is not responsible.
However, now and then you may notice light spark knock for a short time while
accelerating or driving up hills. This'is no cause for concern, becauseyou,,~et the greatest fuel economy benefit from the gasoline's octane rating when there
is occasional light spark knock. Using gasoline with a higher octane rating than
that which allows occasional spark knock is an unnecessary expense.
Gasoline/Ethanol Blends
Blends of unleaded gasoline and ethanol (grain alcohol) sometimes known as gasohol are available in some areas. You may use these blends in your
vehicle, if they are no more than 10 percent ethanol, without jeopardizing the New Vehicle and Emission Warranties. Be sure the gasoline-ethanol blend has
octane ratings no lower than those recommended for unleaded gasoline. Most
drivers
will not notice operating differences with blends of up to 1 0 percent
ethanol, but some may. In that case, your authorized dealer can make certain
adjustments, provided they
do not violate the Federal Emission Standards. If you are still not satisfied with ethanol-gasoline blend performance, you may
prefer
to use unleaded gasoline.
2-5