1984 CHEVROLET CAVALIER roof rack
[x] Cancel search: roof rackPage 54 of 105

Downloaded from www.Manualslib.com manuals search engine >1;' l ' "0'
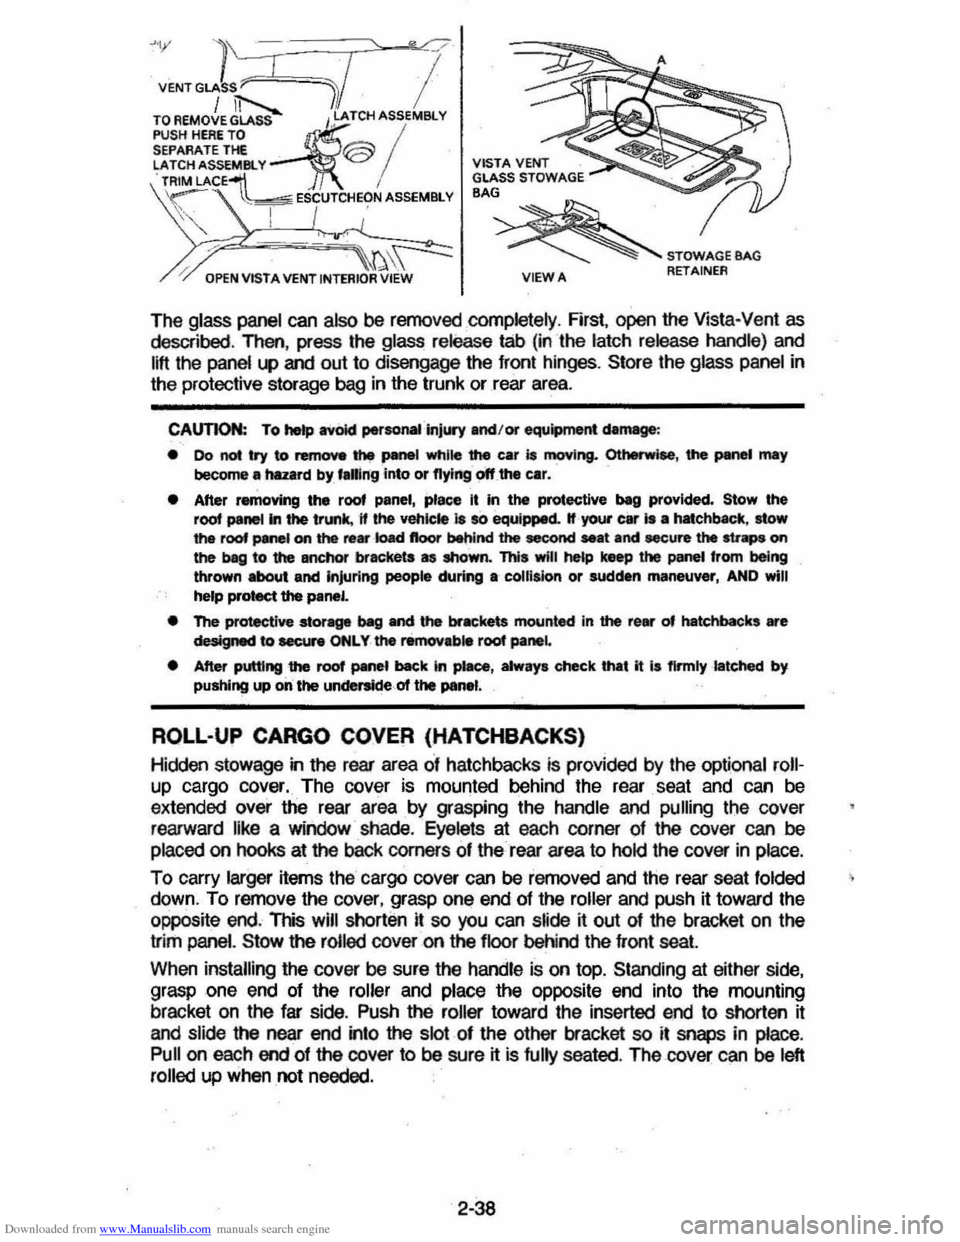
VENT GLASS ~C"rl I / iT'--.... /.1 TO AEMOVE GLASS I,~ATCH ASSEMBlY
PUSH HERE TO ~ / SEPARATE THE @ ':ATCH ASSEM81. Y TRIM LACE~ i VISTA VENT GLASS STOWAGE BAG
/, ---~\~ ~STOWAGEBAG
\~ . ~~ ESCUTCHEON ASSEMBLY S', I I '
" I .,'
OPEN VISTA VENT INTERIOR VIEW VIEWA RETAINER
The glass panel can also be removed completely , First, open the Vista-Vent as described , Then, press the glass release tab (in the latch release handle) and
lift the panel
l.P and out to disengage the front hinges, Store the glass panel in
the protective storage bag in the trunk or rear area.
CAUTION: To hetp avoid perso ..... ·injUIY and/or equipment damage :
• 00 not try to remove the panel while the car is moving. Otherwise, the PMWI may become a hazard by, f.ling into or flying off the car.
• After removing the roof panel, place It in the protective beg provided. Stow the root panel In the trunk, 11 the vehicle 18 so equipped. If your car Is • hatchbKk, stow the roof panel on the re ... ·k)ad floor behind the second seat and secure the straps on the beg to the anchor brackets as shown. This will he&p keep the panel from being thrown about and Injuring people during a collision or sudden maneuver, AND will
help protect the panel.
• The protective stor-ve ~ and the brackets mounted in the rear of hatchbacks are designed to eecur. ONLY the removab. root panel
• After putting the roof panel back In piaee, alway. check that it I. flrmlylatehed by pushing up on the underside of the panel.
ROLL-UP CARGO COVER (HATCHBACKS)
Hidclen stowage in the rear area of hatchbacks is provided by the optional roll
up cargo cover. The cover is mounted behind the rear . seat and can be
extended over the rear area by grasping the handle and pulling the cover
rearward like a window shade.
Eyelets at each corner of the cover can be
placed on hooks at the baCk corners of the rear area to hold the cover in place.
To carry larger items the cargo cover can be removed and the rear seat folded
down, To remove the cover, grasp one end of the roller and push it toward the
opposite end. This
will shorten it so you can s~de ~ out of the bracket on the
trim
panel. Stow the rolled cover on the floor behind the front seat
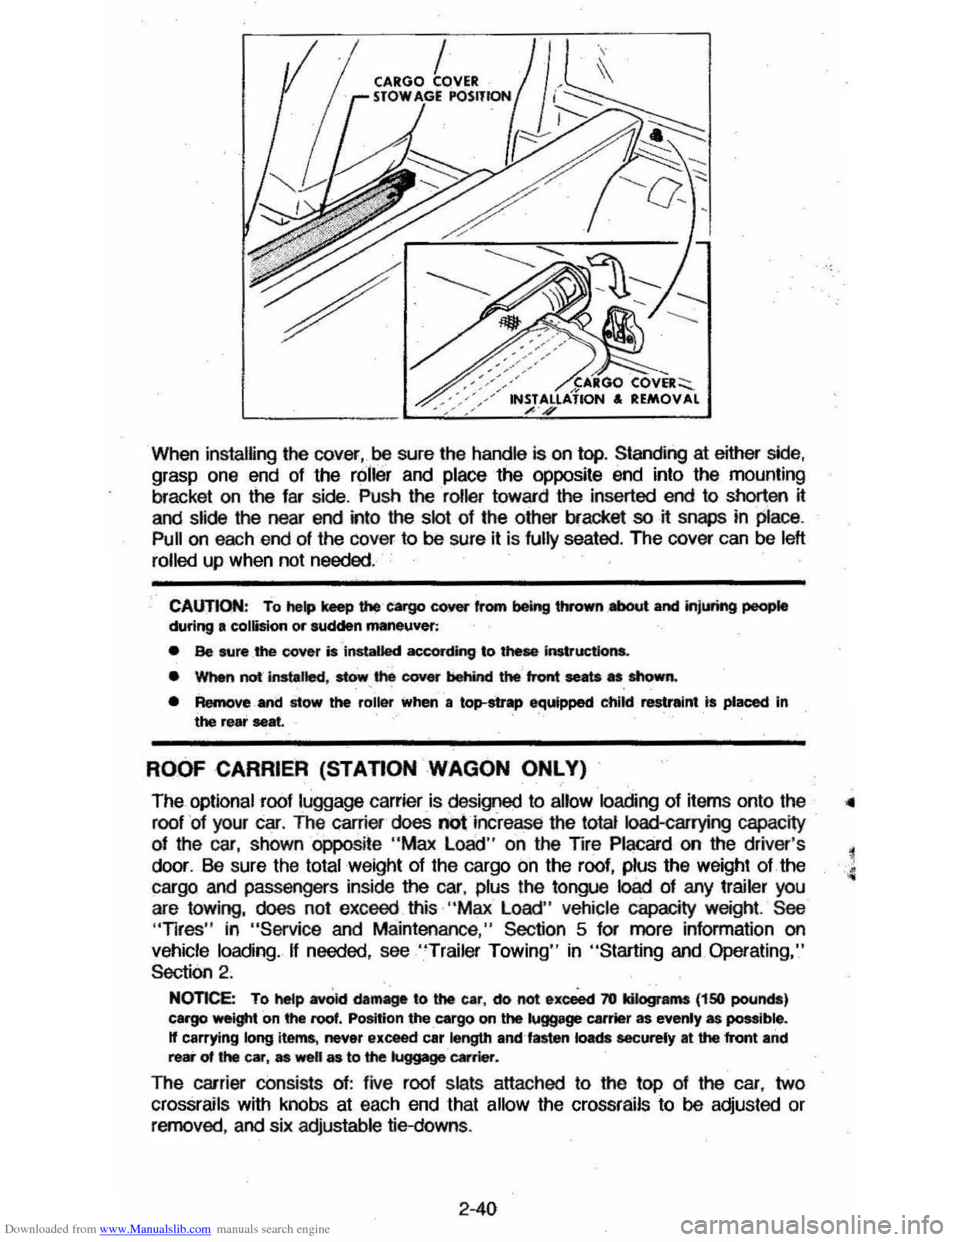
When installing the cover be sure the handle is on top. Standing at either side,
grasp one end of the roller and place the
opPOSite end into the mounting
bracket on the far side . Push the roller toward the inserted end to shorten it
and slide the near
end into the slot of the other bracket so it snaps in place,
Pull on each end of the cover to be sure it is fully seated . The cover can be left
rolled up when not needed.
2-38
Page 56 of 105

Downloaded from www.Manualslib.com manuals search engine When installing the cover,oo sure the handle is on top. Standing at either side, grasp one end of the roller and place the opposite end into the mounting
bracket on
the far side . Push the roller toward the inserted end to shorten it
and slide the near end into the slot of the other bracket so it snaps in place.
Pull on each end of the cover to 00 sure it is fully seated. The cover can be left
rolled
up when not needed .
CAUTION: To help keep u.., cargo cover from being thrown .,.a,oot and jnjlM'ing people during a collision or sudden maneuver:
• Be sure _the cover is installed according to these Instructions.
• WMn not-instalted, stow, the cover behind the front seats as shown.
• Remove and stow the roiler when a top-strap equipped child restraint is placed In the rear seat.
ROOF CARRIER (STAnON WAGON ONLY)
The optional roof luggage carrier is designed to allow loading of items onto the
roof
' of your car. The carrier does not increase the total Ioad-carrying capacity
of the car, shown oppoSite "Max Load " on the TIre Placard on the driver's
door. Be sure the
total weight of the cargo on the roof, plus the weight of the
cargo and passengers inside
the car, plus the tongue load of any trailer you
are towing, does not exceed this· "Max Load" vehicle capacity weight. See "Tires" in "Service and Maintenance," Section 5 for more information on
vehicle loading. If needed, see "Trailer Towing" in "Starting and. Operating,"
Section 2 .
NOnce: To hetp avOid damage to the car, do not exceect 70 kilograms (150 pounds) cargo weight on the roof. Position the cargo on the luggage carrier as evenly as possible. If carrying long items , never exceed car length emUasten loads eacurely at the front and rear of the car, as well as to the luggage ~rier.
The carrier consists of: five roof slats attached to the top of the car, two
crossrails with knobs at each end that allow the crossrails to 00 adjusted or removed, and six adjustable tie-downs.
2-40
Page 57 of 105

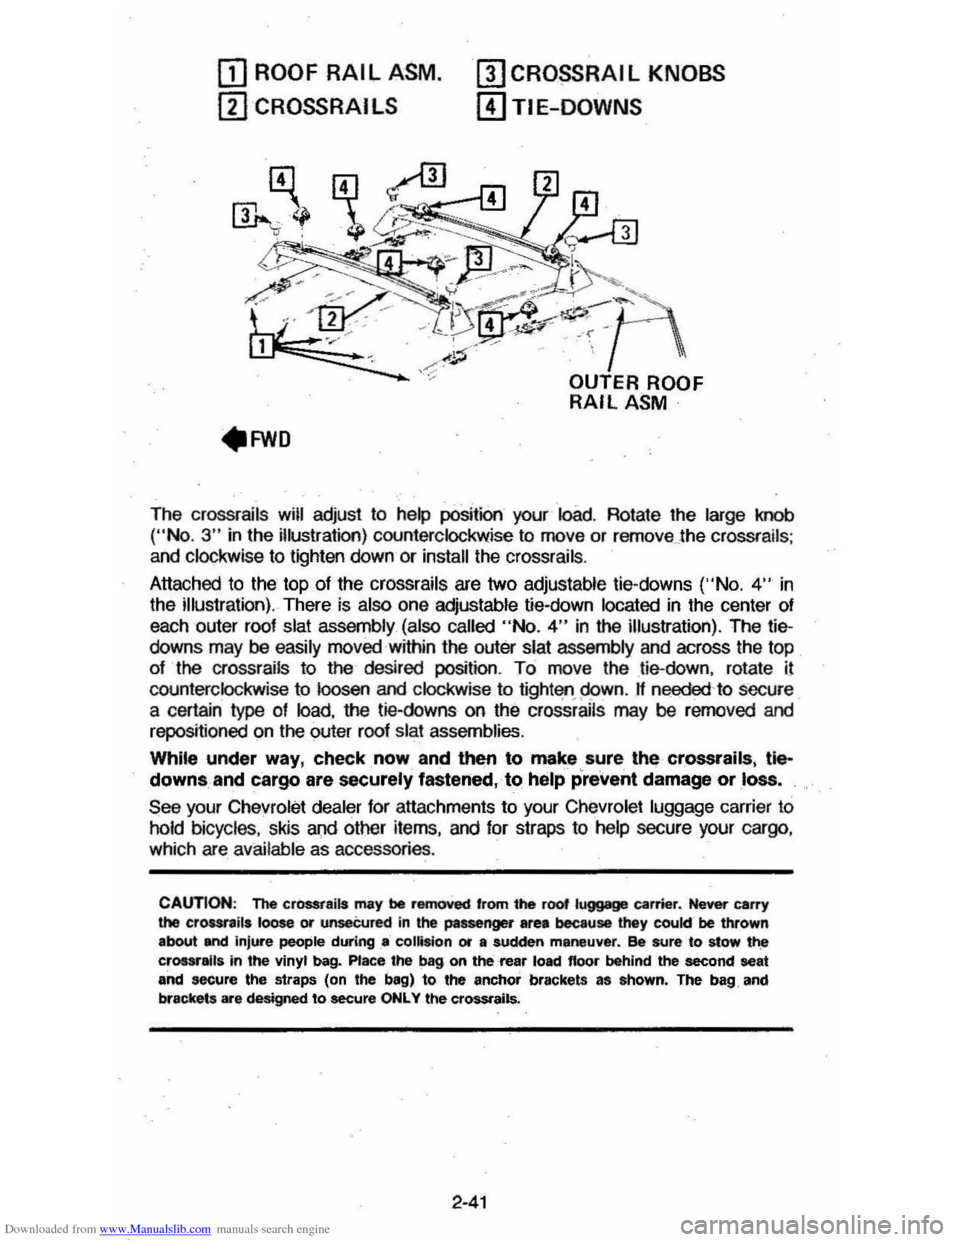
Downloaded from www.Manualslib.com manuals search engine OJ ROOF RAIL ASM.
ill CROSSRAI LS
mCRO~RAIL KNOBS
[!)TIE-DOWNS
The crossrails will adjust to help position your load. Rotate the large knob ("No.3" in the illustration) counterclockwise to move or remove . the crossrails ;
and clockwise to lighten down or install the crossrails .
Attached to the top
of the crossrails are two adjustable tie-downs ('·No. 4" in
the illustration). There is also one adjustable tie-down located in the center of
each outer roof
slat assembly (also called "No.4" in the illustration). The tiedowns may be easily moved within the outer slat assembly and across the top
of the crossrails to the desired position. To move the tie-down, rotate il
counterclockwise to loosen and clockwise to tight'lfl.95>wn. If needed 'to secure
a certain type of load, the tie-downs on the crossrails may be rerncved and
repositioned on the outer roof slat assemblies.
While under way, check, now and then to make sure, the crossrails, tle~
downs, and cargo are securely fastened, to help prevent damage or loss.
See your Chevrolet dealer for attachments to your Chevrolet luggage carrier to
hold bicycles, skis and other items, and for straps to help secure your cargo ,
which are available as accessories .
CAUTION: The cr0SSt8ils may be removed 'rom the root luggage carrier. Never carry the crour,ils loose or unseCured in the passenger area because they cookr be thrown
about and injure people during .. collision or a sudden maneuver. ee sure to stow t~ crossralla in the vinyl bag. Place the bag on the rea, load floor behind the second seat and secure the straps (on the bag) to the anchor brackets as ahown. The bag, and
brackets are designed to secure ONLY the crossrails.
2-41