1982 CHEVROLET CAMARO check engine
[x] Cancel search: check enginePage 782 of 875

GM – CAMARO 1982-1992 – Repair Guide (Checked by WxMax) 782
10. Refill the engine with the correct amount
of fresh oil. Please refer to the
Capacities chart at the end of this section.
11. Check the oil level on the dipstick. It is normal for the level to be a bit
above the full mark. Start the engine and allow it to idle for a few
minutes.
CAUTION - Do not run the engi ne above idle speed until it has built up oil
pressure, as indicated w hen the oil light goes out
12. Shut off the engine and allow the oil to flow back to the crankcase for a
minute, then recheck the oil level. C heck around the filter and drain plug
for any leaks, and correct as necessary.
MANUAL TRANSMISSIONS
FLUID RECOMMENDATIONS
• 1982-85 4-speed manual transmissi ons - SAE 80W/90 GL-5 gear
lubricant
• 1986-87 4-speed manual transmission - Dexron®®II automatic
transmission fluid
• 1982-84 5-speed manual transmissions - use SAE 80W/90 GL-5 gear
lubricant (SAE 80W GL-5 in Canada)
• 1985-92 5-speed manual transmissi ons - Dexron®II automatic
transmission fluid
LEVEL CHECK
The oil in the manual tr ansmission should be check ed every 12 months or
15,000 miles.
1. Raise the car and support on jackstands as close to level as possible. \
2. Remove the filler plug from the side of the transmission housing.
3. If lubricant begins to trickle out of the hole, there is enough and you need
not go any further. Otherwise, carefully insert your finger (watch out for
sharp threads) and check to see if the oil is up to the edge of the hol\
e.
4. If not, add oil through the hole until the level is at the edge of the hole.
Most lubricants come in a plasti c squeeze bottle with a nozzle; making
additions simple.
5. Install and tighten the filler plug.
DRAIN AND REFILL
The fluid in the manual transmission do es not require changing. If you do
choose to change the transmission fluid, the fluid can be drained out through
the lower drain plug hole on the side of the transmission. Fill the transmission
with the recommended lubricant to the bottom of the filler plug hole and install
the filler plug.
Page 783 of 875

GM – CAMARO 1982-1992 – Repair Guide (Checked by WxMax) 783
AUTOMATIC TRANSMISSION
FLUID RECOMMENDATIONS
Use only Dexron®II Automati
c Transmission Fluid.
LEVEL CHECK
Fig. 1: Read automatic transmission flui d level on dipstick and add, as required
Check the automatic transmission fluid le vel at each oil change. Driving with too
much or too little transmission fluid ca n damage the transmission. The dipstick
can be found in the rear of the engine compartment. The fluid level should be
checked only when the transmission is at normal operating temperature. If your
Camaro has been driven at highway speeds fo r a long time, in city traffic in hot
weather, or pulling a trailer, wait for about 30 minutes for the fluid to cool down
so a correct reading can be read.
1. Park the car on a level surface, with the parking brake on. Start the
engine and let it idle for about 15 minutes. Move the transmission
through all the gears and then back to P.
2. Remove the dipstick and carefully touch the wet end of the dipstick to see if the fluid is cool, warm, or ho t. Wipe it clean and then reinsert it
firmly. Be sure that it has been pushed all the way in. Remove the
dipstick again and check the fluid leve l while holding it horizontally.
a. If fluid is cool (room temper ature), the level should be about
1/8-3/8
in. (3-10mm) below the ADD mark.
Page 792 of 875

GM – CAMARO 1982-1992 – Repair Guide (Checked by WxMax) 792
The fluid level may be checked by obs
erving the fluid level marks of the
recovery tank. The leve l should be between the FULL HOT and FULL COLD
mark when the system is at normal operat ing temperature. When the engine is
cold, the fluid level should be above the FULL COLD mark on the reservoir. At
normal operating temperatures, t he level should be between the ADD and the
FULL marks. Only add coolant to bring the level to the FULL mark.
CAUTION - Should it be necessary to remove the radiator cap, make sure that
the system has had time to cool, reducing t he internal pressure. If the system is
opened while the engine is st ill hot, scalding fluid and steam may be blown out
under pressure.
DRAINING AND REFILLING
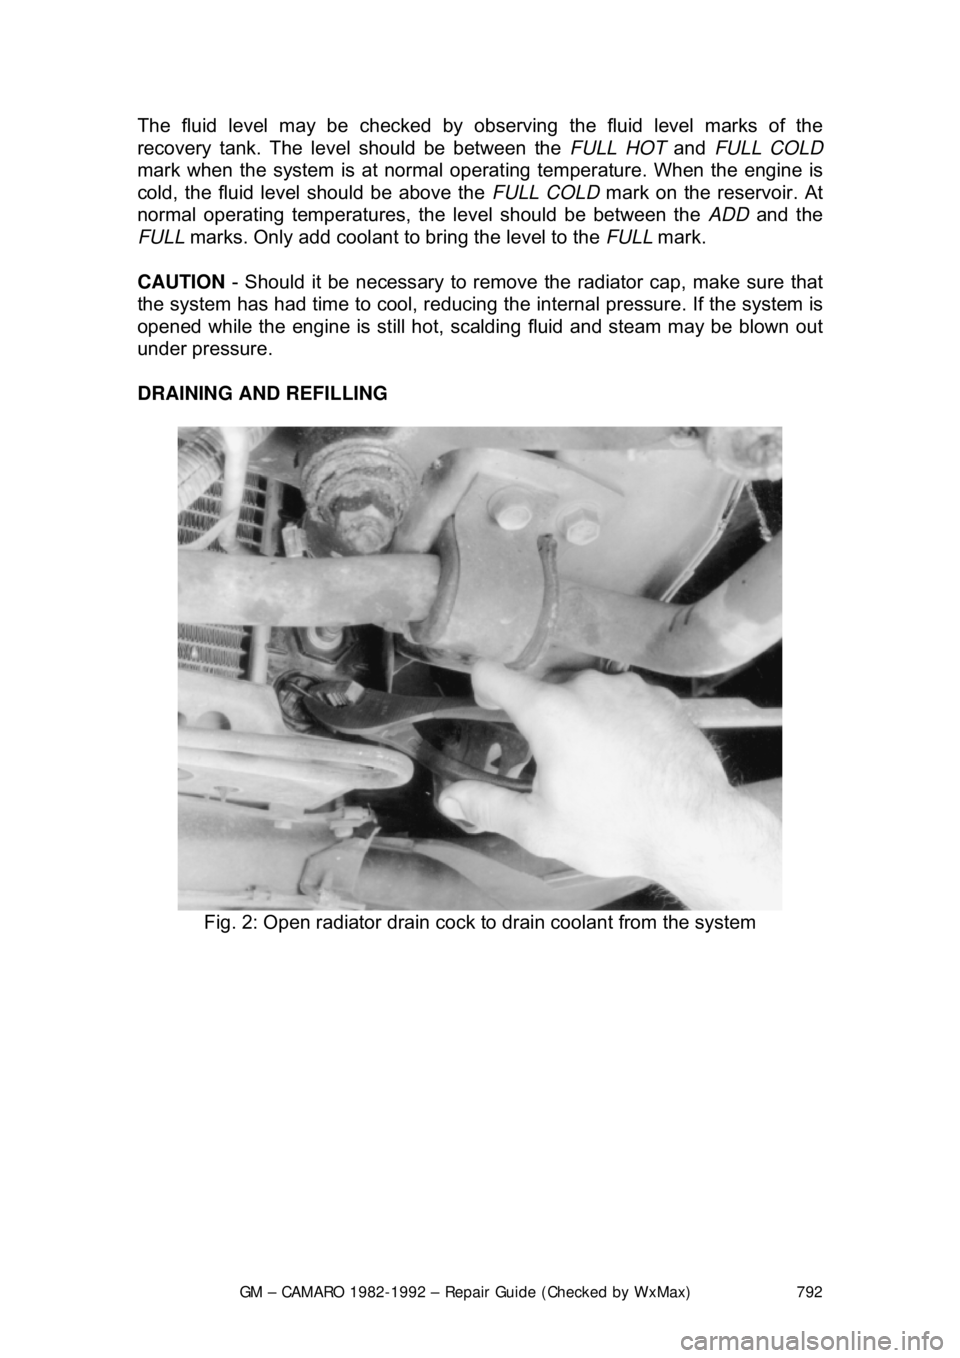
Fig. 2: Open radiator drain cock to drain coolant from the system
Page 794 of 875

GM – CAMARO 1982-1992 – Repair Guide (Checked by WxMax) 794
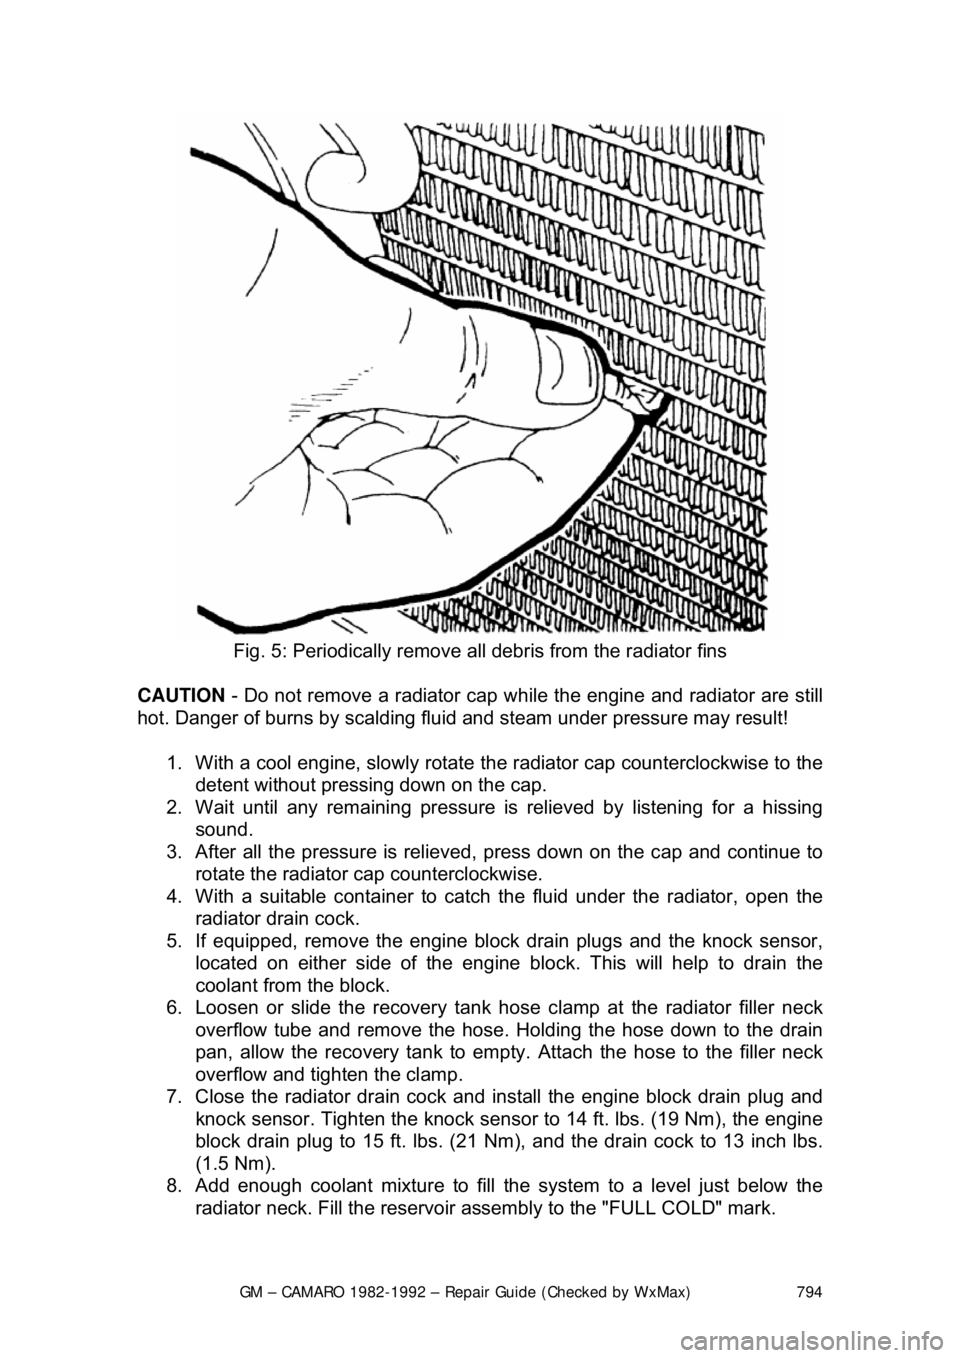
Fig. 5: Periodically remove all debris from the radiator fins
CAUTION - Do not remove a radiator cap wh ile the engine and radiator are still
hot. Danger of burns by scalding fluid and steam under pressure may result!
1. With a cool engine, slowly rotate t he radiator cap counterclockwise to the
detent without pressing down on the cap.
2. Wait until any remaini ng pressure is relieved by listening for a hissing
sound.
3. After all the pressure is relieved, press down on the cap and continue to
rotate the radiator cap counterclockwise.
4. With a suitable container to catc h the fluid under the radiator, open the
radiator drain cock.
5. If equipped, remove the engine blo ck drain plugs and the knock sensor,
located on either side of the engine block. This will help to drain the
coolant from the block.
6. Loosen or slide the recovery tank hos e clamp at the radiator filler neck
overflow tube and remove the hose. Holding the hose down to the drain
pan, allow the recovery tank to empty. Attach the hose to the filler neck
overflow and tighten the clamp.
7. Close the radiator drain cock and install the engine block drain plug and
knock sensor. Tighten the knock sensor to 14 ft. lbs. (19 Nm), the engine
block drain plug to 15 ft. lbs. (21 N m), and the drain cock to 13 inch lbs.
(1.5 Nm).
8. Add enough coolant mixture to fill the system to a level just below the
radiator neck. Fill the reservoir a ssembly to the "FULL COLD" mark.
Page 795 of 875

GM – CAMARO 1982-1992 – Repair Guide (Checked by WxMax) 795
Fill the cooling system wit
h a 50/50 mixture of water and Ethylene Glycol
antifreeze. Freezing protection should be appropriate for temperatures of -34°F
(-37°C). When filling the coolant system, add two cooling system sealer pellets
(GM part no. 3634621 or equivalent).
9. Firmly set the parking brake. Run t he engine with the radiator cap OFF,
until normal operating tem perature is reached.
CAUTION - Under some conditions, ethylene glycol is flammable. To avoid
being burned when adding engine coolant, do not spill it on the exhaust system
or on hot engine parts.
10. With the engine idlin g, add engine coolant to t he radiator until the level
reaches the bottom of t he radiator fill neck. Install the cap assembly.
When installing the cap, make sure t hat the arrows on the cap line up
with the overflow tube.
Never add cold water to an overheated engine.
11. Add coolant to the recovery tank, as necessary.
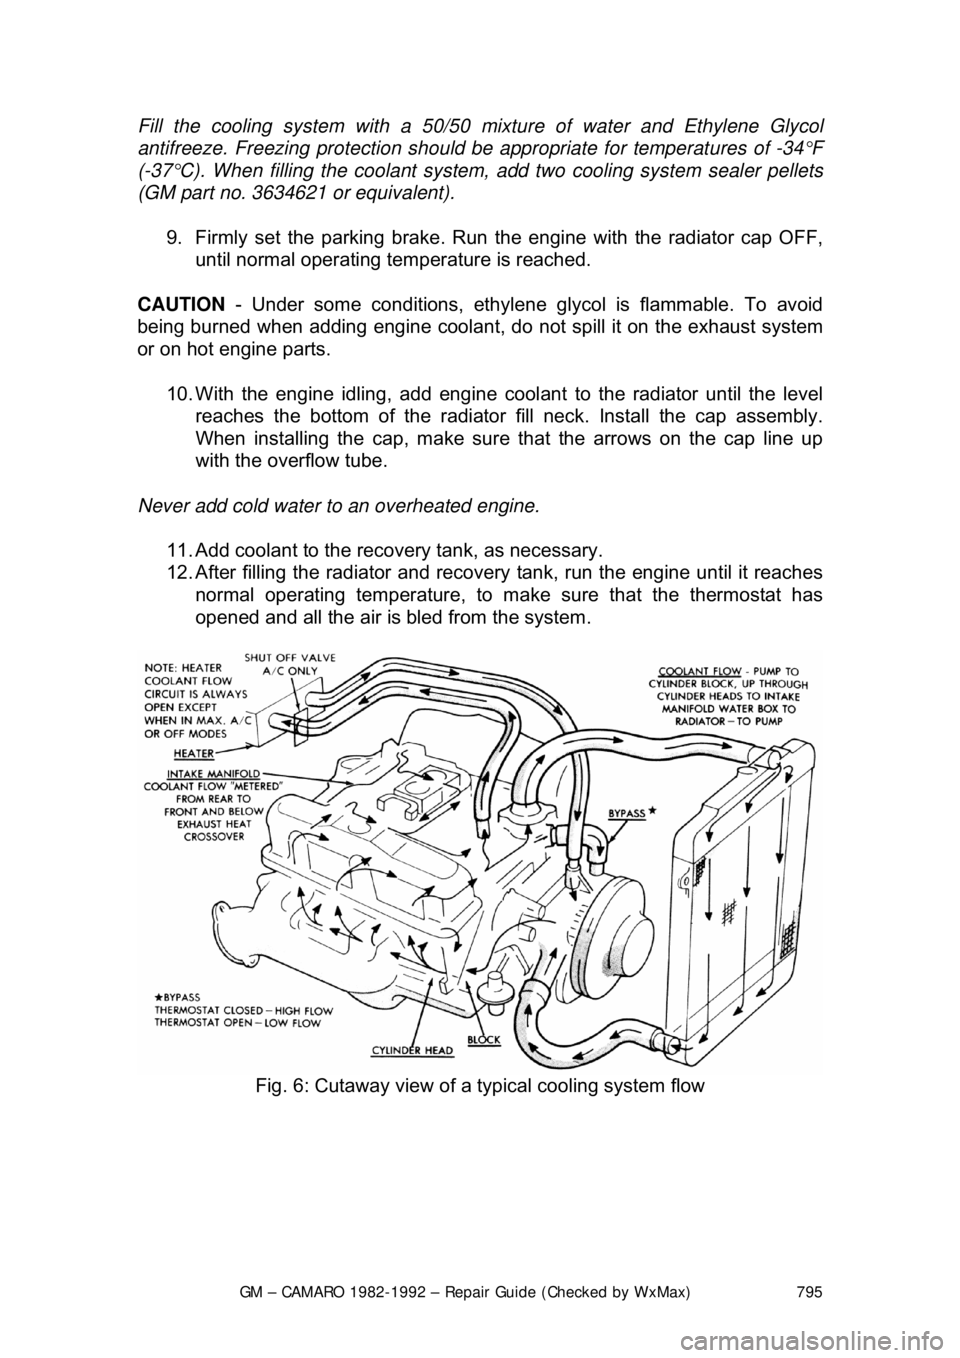
12. After filling the radiator and recovery tank, run the engine until it reaches
normal operating temperature, to ma ke sure that the thermostat has
opened and all the air is bled from the system.
Fig. 6: Cutaway view of a typical cooling system flow
Page 797 of 875

GM – CAMARO 1982-1992 – Repair Guide (Checked by WxMax) 797
The cooling system should be drained, th
oroughly flushed and refilled at least
every 30,000 miles or 24 months. This operation should be done with the \
engine cold.
1. Drain the cooling system as de scribed earlier in this section.
2. Fill the cooling system with warm water and start the engine. Run the
engine until normal operating temperature is reached.
3. At this point, turn the engine o ff and again drain the cooling system.
4. Repeat this procedure until the flui d draining from the system is nearly
colorless.
5. Remove, empty and reinstall the coolant recovery reservoir assembly.
6. Fill the cooling system with a 50/50 mixture of ethylene glycol antifreeze,
as outlined in the prev ious procedure.
BRAKE MASTER CYLINDER
FLUID RECOMMENDATIONS
When adding or replacing the brake fluid, always use a top quality fluid, such as
Delco Supreme II or equivalent DOT-3 flui d. DO NOT allow the master cylinder
reservoir to remain open for long periods of time; brake fluid absorbs moisture
from the air, reducing it s effectiveness and causing corrosion in the lines.
Avoid spilling brake fluid on any of the vehicle's painted surfaces, wiring cables
or electrical connections. Brake fl uid will damage paint and electrical
connections. If any fluid is spilled on t he vehicle, flush with water to lessen
damage.
LEVEL CHECK
Fig. 1: Check master cylinder fluid leve l against indicator on side of reservoir.
Fluid level should not be below MIN marking on reservoir.
Page 799 of 875

GM – CAMARO 1982-1992 – Repair Guide (Checked by WxMax) 799
The master cylinder is located in
the left rear section of the engine
compartment. The brake master cylinder consists of an aluminum body and a
translucent nylon reservoir with minimum fill indicators.
1. Check the master cylinder body for cracks. Inspect the area around the
master cylinder for brake fluid. Leaks are indicated if there is at least a
drop of fluid. A damp condition is not normal.
2. Inspect the level of the brake fluid to assure it is at the correct height.
Clean the top of the reservoir cap so t hat all dirt is removed. Remove the
cap(s) or reservoir cover and the reservoir diaphragm.
3. Inspect the brake fluid level. Add clean DOT-3 brake fluid as required to
bring the fluid level to the line located inside the neck of the reservoir fill
opening.
4. Install the reservoir cap.
WARNING - Any sudden decrease in the fluid level indicates a possible leak in
the system and should be check ed out immediately. Do not allow brake fluid to
spill on the vehicle's finish; it will remove the paint. In case of a spill, flush the
area with water and mild soap.
HYDRAULIC CLUTCH SYSTEM
FLUID RECOMMENDATIONS
• 1982-1991 - Delco Supreme II Brake fl uid or an equivalent fluid that
meets DOT-3 specifications
• 1992 - Hydraulic clutch fluid, GM part number 12345347 or equivalent
LEVEL CHECK
The clutch master cylinder is normally lo cated below the brake master cylinder.
The reservoir for it is located right bes ide the brake master cylinder and is made
of translucent nylon. The fl uid level of the reservoir sh ould be kept near the top
of the observation window. Before removing the cap to the reservoir, clean all
dirt from the area. This will prevent syst em contamination due to particles falling
into the reservoir when the caps are removed.
POWER STEERING PUMP
FLUID RECOMMENDATIONS
• GM power steering fluid, or equivalent.
Page 802 of 875

GM – CAMARO 1982-1992 – Repair Guide (Checked by WxMax) 802
BODY LUBRICATION
HOOD LATCH AND HINGES
Clean the latch surfaces and
apply clean engine oil to the latch pilot bolts and
the spring anchor. Use the engine oil to l ubricate the hood hinges as well. Use a
chassis grease to lubricate all the pivot points in the latch release mechanism.
DOOR HINGES
The gas tank filler door, car door, and rear hatch or trunk lid hinges should be
wiped clean and lubricated with clean engi ne oil. Silicone spray also works well
on seals, but must be applied more often. Use engine oil to lubricate the trunk
or hatch lock mechanism and the lock bo lt and striker. The door lock cylinders
can be lubricated easily with a shot of silicone spray or one of the many dry
penetrating lubricants commercially available.
PARKING BRAKE LINKAGE
Use chassis grease on the parking brake c able where it contacts the guides,
links, levers, and pulleys. The grease s hould be water resistant for durability.
ACCELERATOR LINKAGE
Lubricate the throttle lever, and the accele rator pedal lever at the support inside
the car with clean engine oil.
TRANSMISSION SHIFT LINKAGE
Lubricate the shift linkage with water re sistant chassis grease which meets GM
Specification 6031M or its equal.
FRONT WHEEL BEARINGS
Once every 30,000 miles, clean and repack wheel bearings with a wheel
bearing packer. Remove any excess grea se from the exposed surface of the
hub and seal.
REMOVAL, REPACKING, INSTA LLATION AND ADJUSTMENT
WARNING - It is important that wheel b earings be properly adjusted after
installation. Improperly adj usted wheel bearings can c ause steering instability,
front end shimmy and wander, and increased tire wear.
1. Raise the car and support it at the lower arm. Remove the tire and wheel
assembly.
2. Remove the brake caliper and support it on a wire.
3. Remove the dust cap, cotter pin, ca stle nut, thrust washer and outside
wheel bearing.
4. Pull the disc/hub assembly from the steering knuckle.