1982 CHEVROLET CAMARO oil level
[x] Cancel search: oil levelPage 399 of 875

GM – CAMARO 1982-1992 – Repair Guide (Checked by WxMax) 399
3. Unplug the oxygen sensor and disconnect the exhaust pipe from the
exhaust manifold.
4. Remove the engine oil level dipstick and tube.
5. Remove the exhaust manifold atta ching bolts and remove the manifold.
To install: 6. Position the exhaust manifold onto the engine with a new gasket. Torque
the bolts, following the correct sequenc e, to 44 ft lbs. (60 Nm).
7. Install the engine oil level dipstick tube and dipstick.
8. Connect the exhaust pipe to the exhaust manifold.
9. Engage the oxygen sensor connector.
10. Install the air cleaner assembly and connecting hoses.
11. Connect the negative battery cable at the battery.
RADIATOR
REMOVAL & INSTALLATION
Fig. 1: Removing radiator upper shield bolts
Page 404 of 875

GM – CAMARO 1982-1992 – Repair Guide (Checked by WxMax) 404
13. Replace the radiator assembly by
reversing the above steps. Check that
radiator lower cradles are locat ed properly in radiator recess.
14. Refill the cooling system. Check the engine oil and transmission fluid
levels, if necessary. Run engine for a short period of time and check for
leaks.
ENGINE OIL COOLER
The engine oil cooler consists of an adapter, bolted to the engine block, to
which the oil filter is scr ewed onto. The adapter has 2 hoses which attach to the
oil cooler and the radiator , these hoses are the inlet and return lines.
REMOVAL & INSTALLATION 1. Disconnect the negative battery cabl e. Drain the cooling system into a
suitable container.
CAUTION - When draining the coolant, keep in mind that cats and dogs are
attracted by the ethylene gl ycol antifreeze, and are quite likely to drink any that
is left in an uncovered container or in puddles on the ground. This will prove
fatal in sufficient quantity. Always drai n the coolant into a sealable container.
Coolant should be reused unless it is contaminated or several years old.
2. Remove the radiator, if the oil c ooler is to be repaired or replaced,
otherwise remove the engine oil cooler from the radiator as necessary.
3. Remove the oil filter.
4. Remove the hoses from the oil cooler adapter.
5. Unscrew the oil cooler adapter re tainer and remove the assembly.
Discard the gasket.
6. Installation is the reverse of t he removal procedure. Use new gaskets.
ELECTRIC COOLING FAN
REMOVAL & INSTALLATION 1. Disconnect the battery ground cable.
2. Remove the air cleaner and ducts, if necessary.
3. Unplug the fan harness connector.
4. Remove the fan frame to radiator support mounting bolts and remove the
fan assembly. Some models are retai ned by clips. Remove these, then
slide the fan assembly from the radiator.
5. Install the cooling fan frame to t he radiator support bolt. Reconnect the
wiring harness, the negative battery cable and check fan operation.
BELT-DRIVEN COOLING FAN
REMOVAL & INSTALLATION 1. Disconnect the negative battery cable.
2. Remove the fan shroud, as required.
Page 409 of 875

GM – CAMARO 1982-1992 – Repair Guide (Checked by WxMax) 409
When servicing the engine, be absolutely sure to mark vacuum hoses and
wiring so that these items
may be properly reconnected during installation. Also,
when disconnecting fittings of metal lines (fuel, power brake vacuum), always
use two flare nut (or line) wrenches. Ho ld the wrench on the large fitting with
pressure on the wrench as if you were tightening the fitting (clockwise), THEN
loosen and disconnect the smaller fitting fr om the larger fitting. If this is not
done, damage to the line will result.
CAUTION - When draining the coolant, keep in mind that cats and dogs are
attracted by the ethylene gl ycol antifreeze, and are quite likely to drink any that
is left in an uncovered container or in puddles on the ground. This will prove
fatal in sufficient quantity. Always drai n the coolant into a sealable container.
Coolant should be reused unless it is contaminated or several years old.
2.5L ENGINE
Fig. 1: Cylinder head bolt torque sequence for 2.5L engine
1. Disconnect the negative battery cable.
2. Drain the engine block and radiator of coolant.
3. Raise and safely support the vehi cle. Remove the exhaust pipe and
lower the vehicle.
4. Remove the oil level indicator tube.
5. Remove the air cleaner.
6. Unplug the electrical and vac uum connections and disconnect the
linkage from the TBI unit.
7. Disconnect the fuel lines.
8. Remove the EGR valve.
9. Disconnect the heater hoses from the intake manifold.
10. Remove the ignition coil.
Page 451 of 875

GM – CAMARO 1982-1992 – Repair Guide (Checked by WxMax) 451
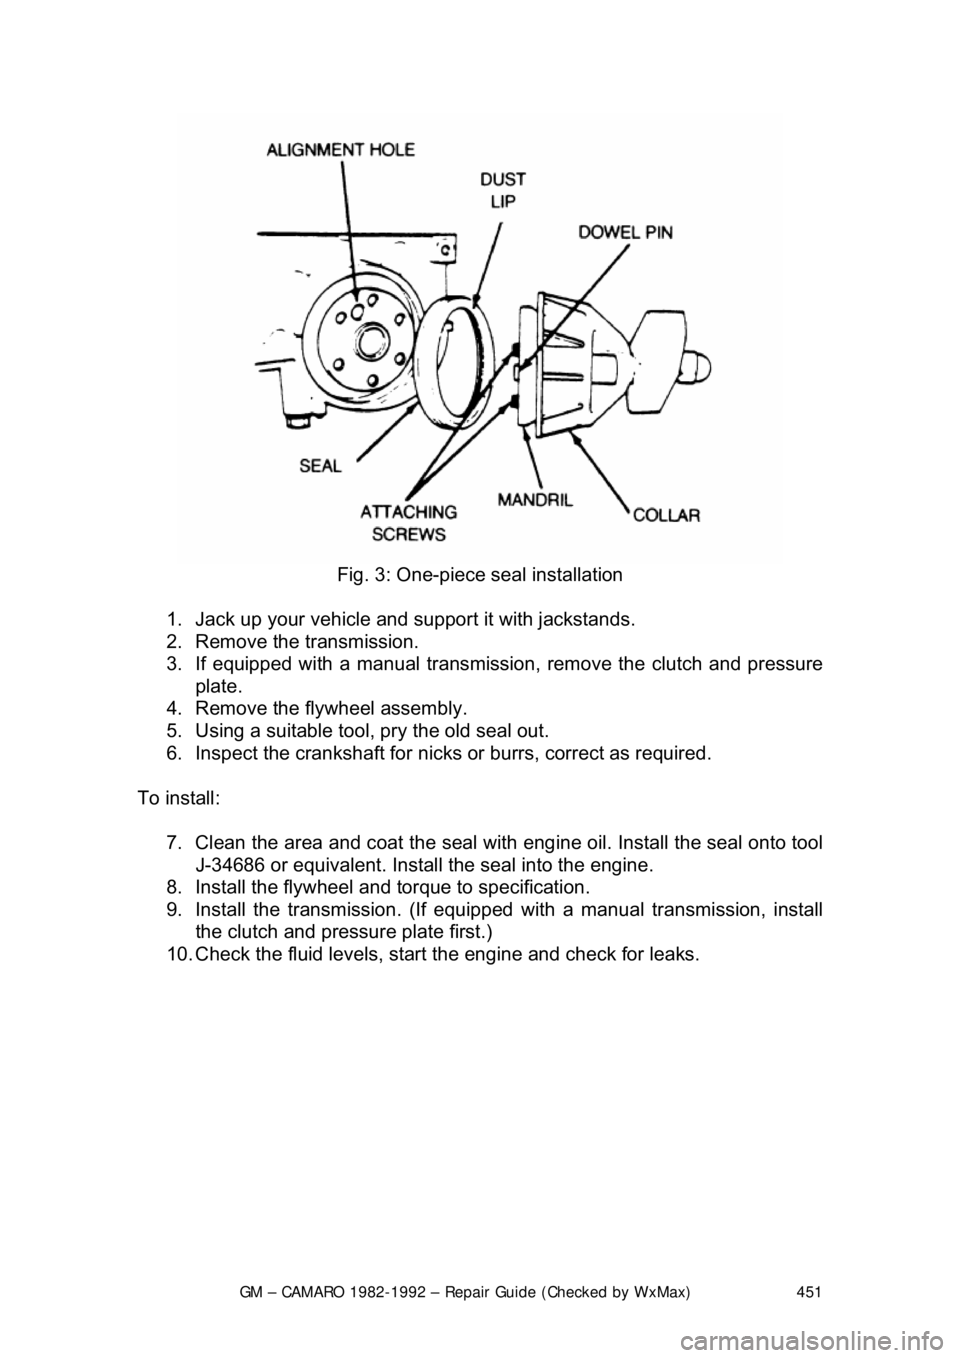
Fig. 3: One-piece seal installation
1. Jack up your vehicle and support it with jackstands.
2. Remove the transmission.
3. If equipped with a manual transmission, remove the clutch and pressure
plate.
4. Remove the flywheel assembly.
5. Using a suitable tool, pry the old seal out.
6. Inspect the crankshaft for nicks or burrs, correct as required.
To install: 7. Clean the area and coat the seal with eng ine oil. Install the seal onto tool
J-34686 or equivalent. Install the seal into the engine.
8. Install the flywheel and torque to specification.
9. Install the transmission. (If equipped with a manual transmission, install
the clutch and pressure plate first.)
10. Check the fluid levels, star t the engine and check for leaks.
Page 513 of 875

GM – CAMARO 1982-1992 – Repair Guide (Checked by WxMax) 513
1. Connect the vehicle battery.
2. Start the engine. Keep y
our eye on your oil pressure indicator; if it does
not indicate oil pressure within 10 se conds of starting, turn the vehicle
off.
WARNING - Damage to the engine can result if it is allowed to run with no oil
pressure. Check the engine oil level to make sure that it is full. Check for any
leaks and if found, repair the leaks be fore continuing. If there is still no
indication of oil pressure, y ou may need to prime the system.
3. Confirm that there are no fluid leaks (oil or other).
4. Allow the engine to reach nor mal operating temperature (the upper
radiator hose will be hot to the touch).
5. If necessary, set the ignition timing.
6. Install any remaining components such as the air cleaner (if removed for
ignition timing) or body panels which were removed.
BREAKING IT IN
Make the first miles on the new engine , easy ones. Vary the speed but do not
accelerate hard. Most importantly, do not lug the engine, and avoid sustained
high speeds until at least 100 miles. Ch eck the engine oil and coolant levels
frequently. Expect the engine to use a littl e oil until the rings seat. Change the
oil and filter at 500 miles, 1500 mile s, then every 3000 miles past that.
KEEP IT MAINTAINED
Now that you have just gone through all of that hard work, keep yourself from
doing it all over again by thoroughly maintaining it. Not that you may not have
maintained it before, heck you c ould have had one to two hundred thousand
miles on it before doing this. However, you may have bought the vehicle used,
and the previous owner did not keep up on maintenance. Which is why you just
went through all of that hard work. See?
Page 776 of 875

GM – CAMARO 1982-1992 – Repair Guide (Checked by WxMax) 776
Use only oil which has the API (Ameri
can Petroleum Institute) designation SG,
CC , CD , SG/CC or SG/CD .
Since fuel economy is effected by the viscosity (thickness) of the engine oil, it is
recommended to select an oil with reference to the outside temperature. For
satisfactory lubrication, us e a lower viscosity oil for colder temperatures and a
higher viscosity oil for warmer temperatures.
ENGINE
OIL LEVEL CHECK
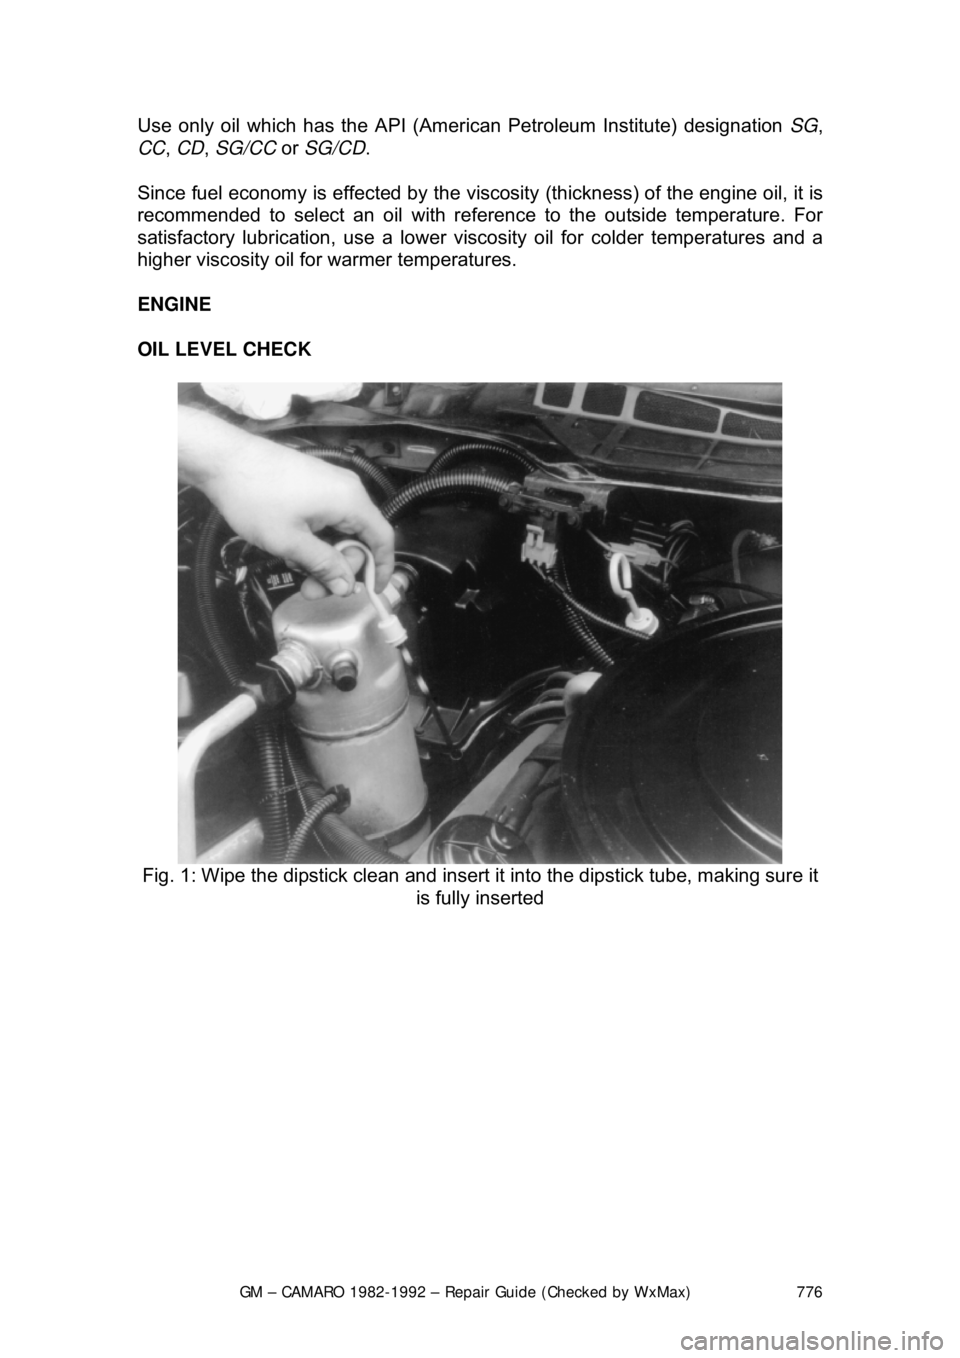
Fig. 1: Wipe the dipstick clean and insert it into the dipstick tube, making sure it
is fully inserted
Page 778 of 875

GM – CAMARO 1982-1992 – Repair Guide (Checked by WxMax) 778
Fig. 4: Add clean oil to the engine to ac hieve the correct level, indicated on
dipstick. Do not overfill
Your engine oil should be checked at regular intervals (such as every fuel stop).
Check the engine oil as follows:
1. Make sure the car is parked on level ground.
2. When checking the oil le vel it is best for the engine to be at normal
operating temperature, although checking the oil immediately after
stopping will lead to a false reading. Wa it a few minutes after turning off
the engine to allow the oil to drain back into the crankcase.
3. Open the hood and locate the dipsti ck which should be on either the
passenger's side for the V8 engine or driver's side for the L4 and V6
engines. Pull the dipstick fr om its tube, wipe it clean and then reinsert it.
4. Pull the dipstick out agai n and, holding it horizontally, read the oil level.
The oil should be between the FULL and ADD marks on the dipstick. If
the oil is below the ADD mark, add oil of the prop er viscosity through the
capped opening in the top of the cylinder head cover.
5. Replace the dipstick and check the o il level again after adding any oil. Be
careful not to overfill the crankcase. Approximately 1 quart (0.9L) of oil
will raise the level from the ADD mark to the FULL mark. Excess oil will
generally be consumed at an accelerated rate.
Page 782 of 875

GM – CAMARO 1982-1992 – Repair Guide (Checked by WxMax) 782
10. Refill the engine with the correct amount
of fresh oil. Please refer to the
Capacities chart at the end of this section.
11. Check the oil level on the dipstick. It is normal for the level to be a bit
above the full mark. Start the engine and allow it to idle for a few
minutes.
CAUTION - Do not run the engi ne above idle speed until it has built up oil
pressure, as indicated w hen the oil light goes out
12. Shut off the engine and allow the oil to flow back to the crankcase for a
minute, then recheck the oil level. C heck around the filter and drain plug
for any leaks, and correct as necessary.
MANUAL TRANSMISSIONS
FLUID RECOMMENDATIONS
• 1982-85 4-speed manual transmissi ons - SAE 80W/90 GL-5 gear
lubricant
• 1986-87 4-speed manual transmission - Dexron®®II automatic
transmission fluid
• 1982-84 5-speed manual transmissions - use SAE 80W/90 GL-5 gear
lubricant (SAE 80W GL-5 in Canada)
• 1985-92 5-speed manual transmissi ons - Dexron®II automatic
transmission fluid
LEVEL CHECK
The oil in the manual tr ansmission should be check ed every 12 months or
15,000 miles.
1. Raise the car and support on jackstands as close to level as possible. \
2. Remove the filler plug from the side of the transmission housing.
3. If lubricant begins to trickle out of the hole, there is enough and you need
not go any further. Otherwise, carefully insert your finger (watch out for
sharp threads) and check to see if the oil is up to the edge of the hol\
e.
4. If not, add oil through the hole until the level is at the edge of the hole.
Most lubricants come in a plasti c squeeze bottle with a nozzle; making
additions simple.
5. Install and tighten the filler plug.
DRAIN AND REFILL
The fluid in the manual transmission do es not require changing. If you do
choose to change the transmission fluid, the fluid can be drained out through
the lower drain plug hole on the side of the transmission. Fill the transmission
with the recommended lubricant to the bottom of the filler plug hole and install
the filler plug.