1980 CHEVROLET CITATION key
[x] Cancel search: keyPage 5 of 95
Downloaded from www.Manualslib.com manuals search engine SECTION 1
BEFORE DRIVING YOUR
CHEVROLET
DRIVER DAILY CHECKLIST
Be sure you know your vehicle and its, equipment and how to use it safely.
Before Entering the Vehicle
1. See that windows, mirrors, and lights are clean and unobstructed.
2. Check whether any tire is low or flat. (If any tire looks different from nonnal,
we recommend you check
it with a tire pressure gage.)
3. Check that all lights work.
4. Look for fluid leaks.
5. Be sure everything is properly stowed.
6. Check the area behind the vehicle if you are about to back up.
Before Driving Off
1. Lock all doors.
2. Adjust seat.
3. Adjust inside and outside mirrors.
4. Fasten seat belts.
5. Check that all the warning lights work as the key is turned to "'Start."
6. Check all gages (including the fuel gage).
7. Release the parking brake (and see that the "Brake" light turns om.
Seerelated topics in this manual, or the Maintenance Schedule folder, if problems
are found.
Guard Against Theft
For tips on how to protect your vehicle and its contents, see "Starting and
Operating" in section 2 of this manuaL
KEYS
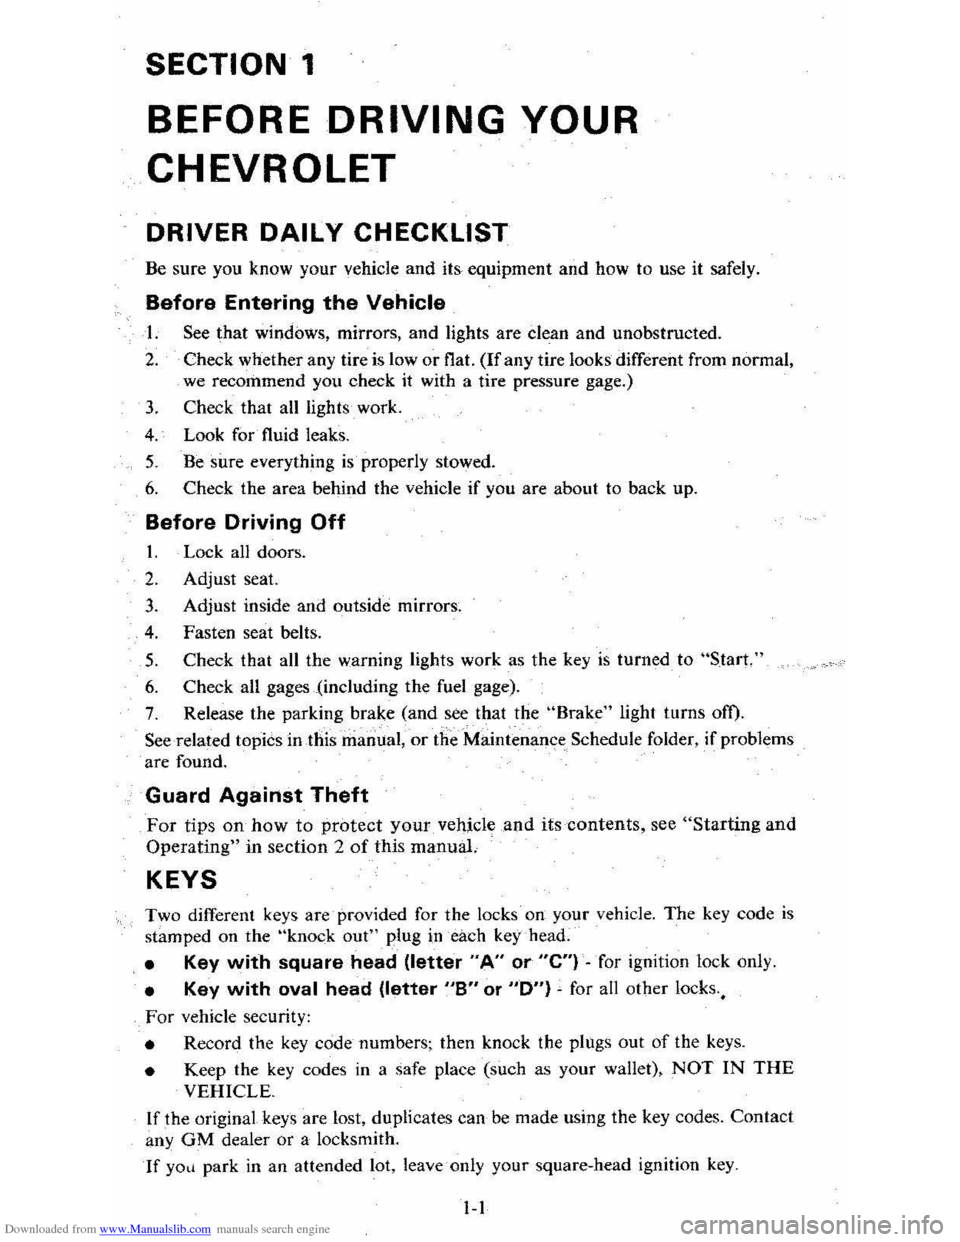
Two different keys are· provided for the locks on your vehicle. The key code is
stamped on the "knock out" plug in each key head.
• Key with square head (letter "A" or "e") -for ignition lock only.
• Key with oval head (letter "8" or "0") ~ for all other locks.,
For vehicle security:
• Record the key code numbers; then knock the plugs out of the keys.
• Keep the key codes in a safe place (such as your wallet), NOT IN THE
VEHICLE.
If the original keys are lost, duplicates can
be made using the key codes. Contact
any
OM dealer or a locksmith.
If yO~i park in an attended lot, leave only your square-head ignition key.
1-1
Page 6 of 95
Downloaded from www.Manualslib.com manuals search engine DOOR LOCKS
ALL OTHER LOCKS
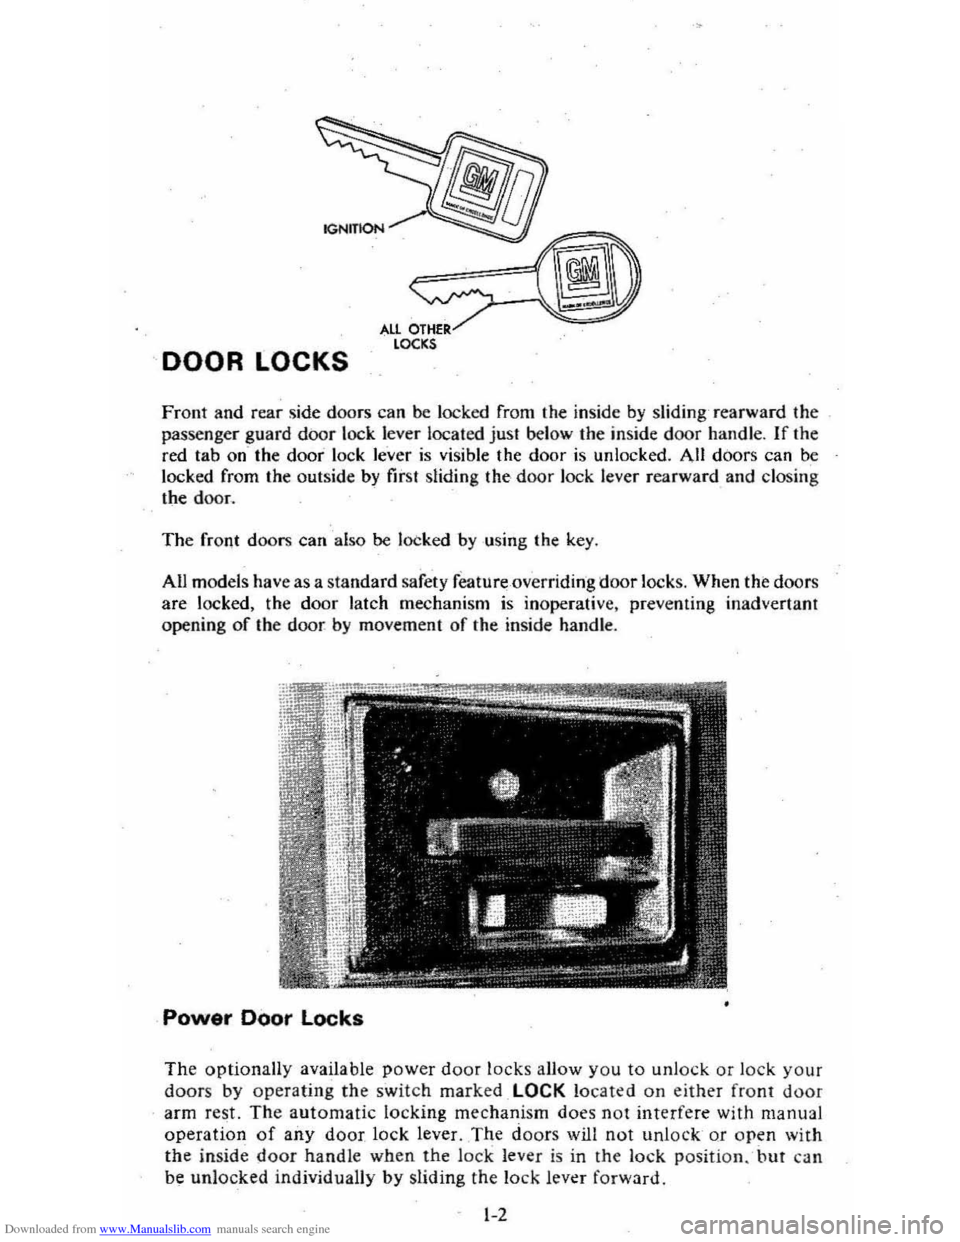
Front and rear side doors can be lock ed from the inside by sliding rearward the
passenger guard
door lock. lever located just below the ins ide door handle . If the
red tab on the door loc k lever is visible the doo r is unlocked . All doors can be
lock ed from the outsid e by
fir st sliding the door lock lever rearw ard and closin g
the d oo L
The front doors can also be loc ked by using the key .
All models have as a stan
dard sa fety fe ature overriding doo r locks. When the doors
are loc ked, the door latch mechani sm is inoperative, preventing inadvertant
opening of th e door by movem ent of the inside handle.
Power Door Locks
The optionally available power door locks aH ow yo u to unloc k or lock your doors by o perating the sw itch marked LOCK loca ted on either front door
arm rest. The automatic locking mechanism does not interfe re with manual
operation of any door lock lever. The doors will not unlock or open with
the in sid e door h andle wh en the loc-k lev er is in the lo ck posi tion. but can
be unlocked individually by sliding the lock levl!r forward.
1-2
Page 12 of 95
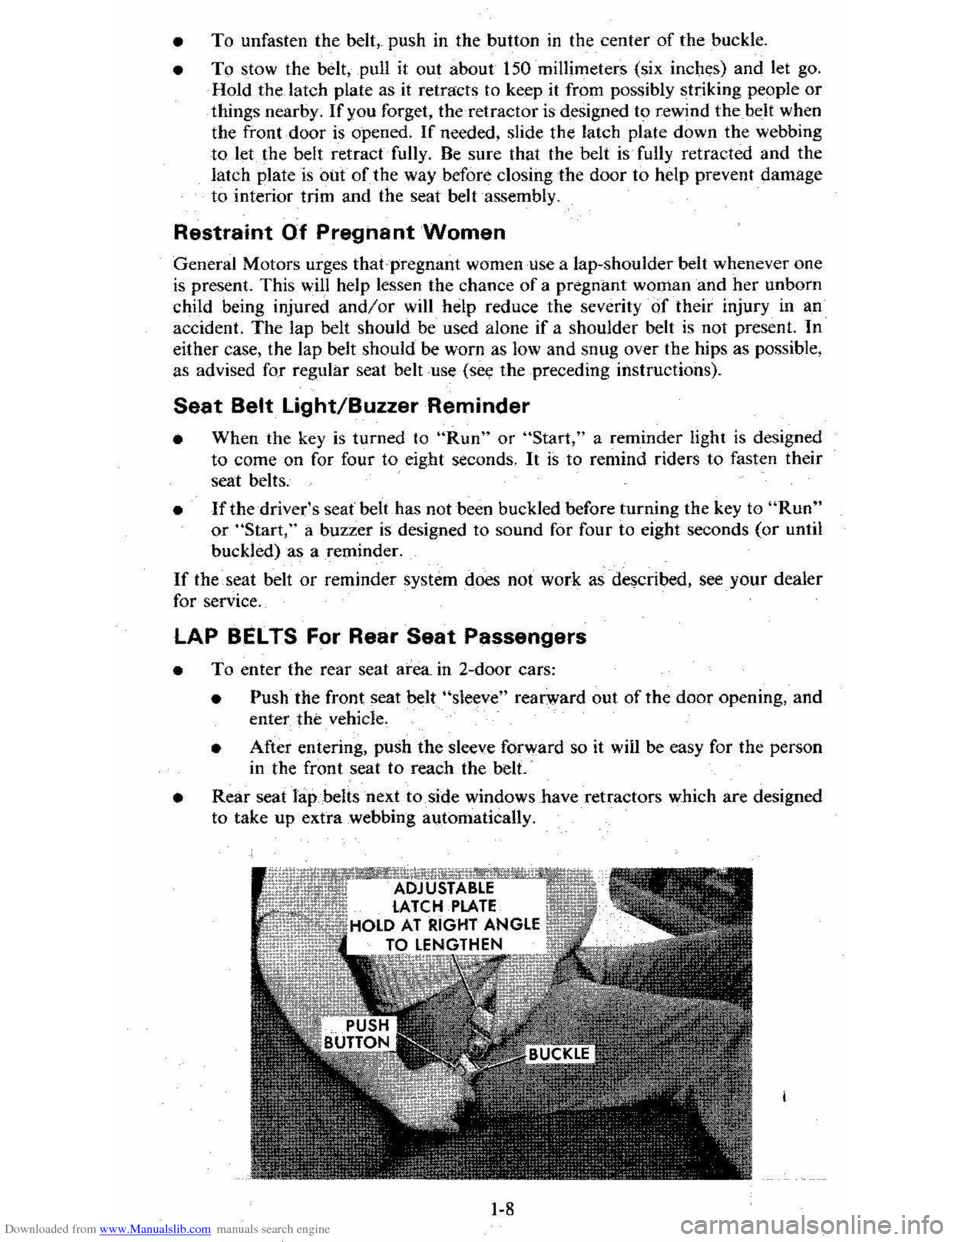
Downloaded from www.Manualslib.com manuals search engine • To unfasten the belt,. push in the button in the center of the buckle.
• To stow the belt, pull it out about 150 millimeters (six incbt::s) and let go.
Hold the latch plate as it retracts to keep it from possibly striking people or things nearby. If you forget, the-retractor is designed to rewind the_belt when
the front door
is opened. If needed, slide the latch plate down the webbing
to let the belt retract fully. Be sure that the belt is fully retracted and the
latch plate is out of the way before closing the door to help prevent damage
to interior trim and the seat belt assembly.
Restreint Of Pregnant Women
General Motors urges that-pregnant women lise a lap-shoulder belt whenever one
is present. This will help lessen the chance of a pregnant woman and her unborn
child being injured
and/or will help reduce the severitYClf their injury in an
accident. The lap belt should be used alone if a shoulder belt is not present. In
either case, the lap belt should be worn as low and snug over the hips as possible,
as advised for regular seat belt
·use (see the preceding instructions).
Seat Belt Light/Buzzer Reminder
• When the key is turned to "Run" or "Start," a reminder light is designed
to come on for four to eight seconds.
It is to remind riders to fasten their
seat belts.
• .If the driver's seat belt has not been buckled before turning the key to "Run" or "Start," a buzzer is designed to sound for four to eight seconds (or until
buckled) as a reminder.
If the seat belt or reminder system does not work as de~cribed. see your dealer
for service.
LAP BELTS For Rear Seat Passengers
• To enter the rear seat area in 2-door cars:
• Pushthe front seat belt "sleeve " rearward out of the door opening, and
enter the vehicle.
• After entering, push the sleeve forward so it wiil be easy for the person
in the front seat to reach the belt.-
• Rear seat lap belts next to side windows have retractors which are designed
to take up extra webbing automatically.
1-8
Page 13 of 95
Downloaded from www.Manualslib.com manuals search engine • In a single motion, pull the rear seat outboard lap belt across your lap far
enough to-push the latch plate into the buckle. un Iii it clicks._ If the belt is
not pulled out far enough to rcadi the-buckle, let the lap bell rewind fully
into its retractor. This unlocks
it so the belt can be puBed .out to the proper length .
• These belts should be positioned, worn, and released as described above under "Front Seat Lap~ShouJder Belt." After fastening, check that the belt is SNUG by pulling the belt firmly across', your lap toward the Jap belt retractor. This
will allow the retractor to take up slack.
• The lap belt at the center seat also should be positioned, worn, and relea sed
as described above-however , it does not have a retractor. It should be
adju sted 10 a SNUG FIT by pulling on the end of the belt coming from the
adju stable latch plate .
• To lengthen the center seat lap belt. place the latch plate at a right angle to
the belt webbing and pull on the latch plate. The belt should then slide easily.
Additional Rear Seat Shoulder Belts-Offerad as an
Accessory by Your Dealer
• When properly worn with a lap beh,--a -shoulder belt can give riders added
protection . II can prevent or reduce impact with the insides of the vehicle
'by restraining the upper body in a collision. This is especially true in a frontal
impact.
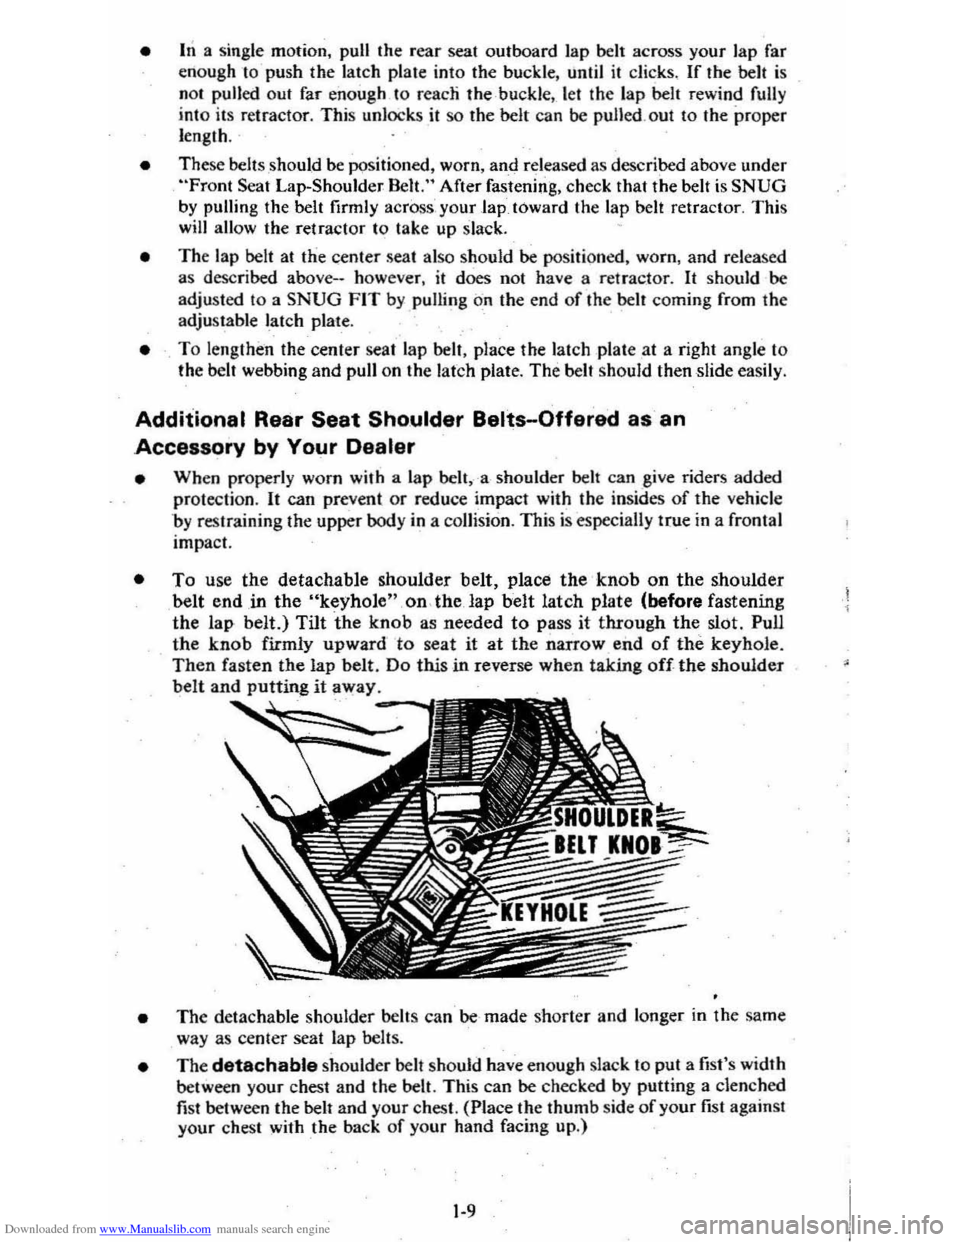
• To use the detachable shoulder belt. place the' knob on the shoulder belt end.in the "keyhole"on.the lap belt latch plate (before fastening
the lap belt.) Tilt the knob as needed
to pass it through the slot. Pull
the knob firmly upward to seat it at the narrow end of the keyhole. Then fasten the lap belt. Do this in reverse when taking off-the shoulder
belt and putting it away.
• The detachable shoulder belts can be made shorter and longer in the same
way as center seat lap belts .
• The detachable shoulder belt should have enough slack to put a fist's width
between your chest and the belt. This can be checked by putting a clenched
fist between the belt and your chest. (Place the thumb side of your fist against
your chest with the back of your hand facing up.)
1-9
Page 19 of 95
Downloaded from www.Manualslib.com manuals search engine • Adjust the heating or cooling system to force outside air into the car as . d esc ribed abo ve bUI set the fan to high speed .
• On cars with outside air vents in or under the instrument panel, open the vents fully.
New. Car "Break-In" Period
You can drive your new car from its very first mile/kilometer without following .
a
formal"break~in" schedule. However, there'are things you can do during the
fir st few hundred miles/kilometers of driving that will add to the future
perf orm ance and econ omy of your car.
We recommend you limit your speed during the first 500 miles (800 kiJomet ers) ~
to a maximum of 55 mph (90 km/h) ; but do not drive for long period s al any'
one constant speed, either Jast
or slow. During this time , avoid fulllhronJe start s _ and, if possible, avoid h"ard stops especially during the first 200 miles (320
kilometers) of driving.
Always drive at moderate speed until the engine has completely warmed
up.
If yo u plan to use your new car for trailer towing, see additional information in Section 1 under "Trailer Towing."
GUARD AGAINST THEFT
Your new Citation has many features to help prevent theft of the car itself, its
equ ipment, and its content s. But these ami-theft features depend upon you to
work .
THE TIME TO BE MOST ON GUARD IS WHEN LEAVING THE CAR ...
• PARK IN A LIGHTED SPOT WHEN YOU CAN.
• LOCK THE STEERING COLUMN AND TAKE THE KEYS,
•
Turn the key to "Lock," and remove the key. This locks the igniti on and
both steering and shift connols unless your car has a manual transaxle.
In that case, the shift control- is not locked .
• If you must leave a key with the car, leave the square-head key .only .
Take the oval-Read key with you. This will help prevent unwanted entry into your car at a later date, or into your -trunk.
•
FULLY CLOSE ALL WINDOWS AND ANY ROOF PANELS. AND LOCK ALL DOORS.
•
KEEP COSTLY ITEMS OUT OF SIGHT AND LOCKED UP,
•
Never leave things of value in plain sight on seats or noor.
• The glove box offers a place -to hide small items.
• Lock larger items in the trunk or place them in the rear storage .
FUEL REQUIREMENTS
Your engine is designed to use only unleaded gasoline. Unleaded gasoline must
be' used for the emission control $ystem to operate properly. Its use will also reduce
s park plug fouling , -exhaust system corrosion and engine oil deterionition .
Using leaded gasoline can damage the emiS5ion control system and could result
in loss of warranty coverage. This is especially true on cars that have the C-4
System . Leaded gasoline will damage tbe oxygen sensor, which may affect
emission control, fuel economy
and drivabiJity . See "C-4 (Computer Controlled
Catalytic Converter) System" in "Service and Maintenance" Section 5 of this
manual for more information.
2-2
Page 22 of 95
Downloaded from www.Manualslib.com manuals search engine Air Conditioner
If your vehicle has an optional air cOnditioner , use the "Economy;' (" Vent" or
"Heater") position s whenever possible, The air conditioner compr essor is not on in these positions and the reduced engine load can improve fuel eco nomy.
Engine Maintenance
An engine that is properly maintained wjJl provide better fuel economy than .one
thai is not . One misfirin g spa rk plu g will cut fuel economy quite a bit , and will
make a difference in the amount of pollution _emitted fro m your vehicle .
Excess Weight
Fuel economy is related to the work the engine must do. The heavier the load,
the more fuel
it takes to run your vehicle. Keep weight to a minimum by taking o~t any luggage or cargo when it is not needed. .
Tire Inflation
Underinflation not only causes needLess wear of the tires, but can also waste fuel. It's a good idea to check tire pressures often and, for the best fuel econ omy, keep
your tires inflated to the highest
pr~suresshown on the Tire Placard on'the left
front doo r of your car.
Wheel Alignment
Improper toe alignment will cause the tires to roll at an angle, which will result
in faster tire wear.
It takes power to ove rcome this improper alignment which,
in tum, wastes fuel.
STEERING COLUMN CONTROLS
ANTI-THEFT STEERING COLUMN LOCK
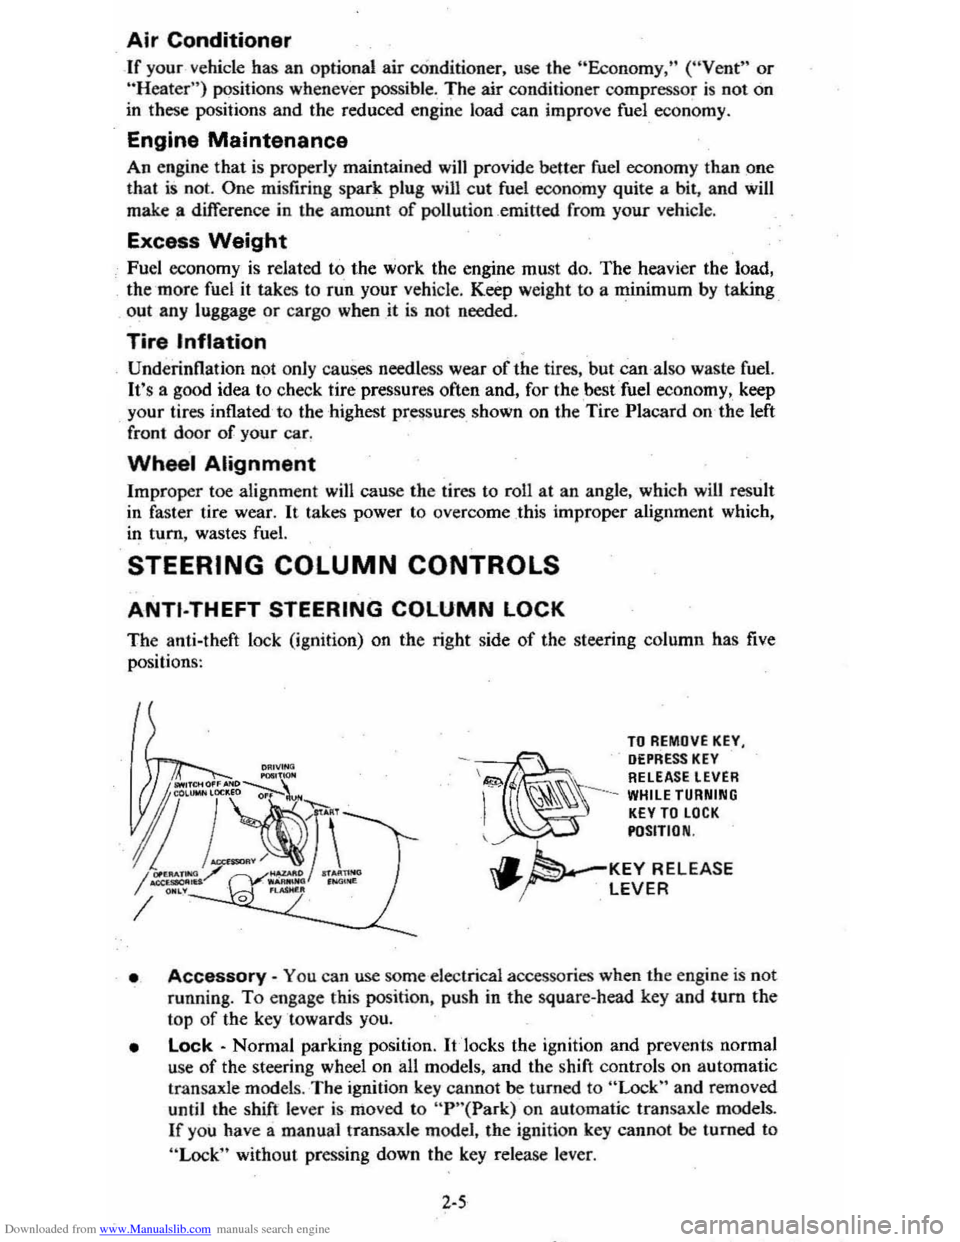
The anti-theft lock (ignition) on the right side of the steering column has five
positi on
s:
TO REMOVE KEY, DEPRESS KEY \&!;;>. RELEASE LEVER
-~ I
~~~ --WHILE TURNING KEY TO LOCK POSITION
.. ~'-KEY RELEASE "..~ LEVER
• Accessory -You ca n use some elec trical a ccessories when the e ngin e is not
running.
To engage this position, push in the square-head key and tum the
top of the key towards you.
• Lock -Norm al parking position. It 'locks the ignition and prev en ts normal
use
of the steering wheel on all models, and the shift controls on automatic
transaxl e model
s. The ignition key canno t be turned to "Lock" and removed
until the shift lever is mo ved to "P "( Park) on automatic transaxle mode1s .
If you have a manual transaxle model, the ignition key cannot be turned to
"Lock" without pressing down the key release leve r.
2-5
Page 23 of 95
Downloaded from www.Manualslib.com manuals search engine • Off· You can turn off the engine without loc king the steering ,wheel and shirt control s o'n aut omatic tranSaxle models. or steering -wh eel only on
mariual transaxle models.
• Run· Normal operating position.
• Start -Cranks the engine:
If you have trouble turning the key to unlock the ignition. first be sure the key
i s pushed in all the way. Then try to turn the ste ering wheel as hard as you can
in the _di rec tion the Wheels are turned. At th e same time, turn the ignition key
with
as mu ch effort as you can apply with your ha nd. Do not try to use a tool
of any kind to
a_pply more force on 'the lock knob. as this could bre ak the kn.ob.
CAUTION: .on manual tranS8xle cars. if you need to turn off the engina while the car is moving. turn the key onlv to ".off." DO NOT press down on the key release lever while turning the ignition off. This will result in locking the steering wheel and If'S8 of steering control.
NOTICE: Do_.oot drive through . idle or park your vehicle over combustible materials. such as grass or lC!'aves. They could touch the hot exhaust system and Ignite.
Parking
When leaving your car unatte nded :
• Firml y appl y the park ing brake. Do n o t use th e tran saxle a 's a substitut e for (he parking brake.
• Mov e the automatic transaxle shift lever to "P"(Park) ("Rever se" for man ual
tran saxle ).
• 'Turn the key to "Lock ," On manualtransaxle cars, press,down the key release
lever a
nd turn the key to "Lock. "
•
Close all windows.
• Remove the key (the buzzer is designed to remind you).
• Lock ,,'n doors.
TURN SIGNAL AND MULTI-FUNCTION LEVER
The I urn signa l-lever on th e left side of the ste erin g column also co ntr ols headlight
l ow -beam
or high·beam. and the windshield wiper/washer .
• Turn Signal -Move the lever up to t he second stop to signal a right tum.
Move it do wn 10 the seco nd stop to sig nal a left turn . When the turn is
compleled, the signal will cancel and the lever will return to' h o rizont al.
• Lane Change Signal. In some turns. such as ch an ging lanes, the steering wheel is not turned far enou gh 10 ca nce l th e turn signal. Fo r convenience.
you
can flash Ihe turn signal by moving the lever part way (to t-he first stop) and h olding it there. The lever will re turn to horizo ntal when 'You release it.
Tw o green lights_ o n the instrum ent panel are des igned to nas h 10 tell you that
th e front and rear turn
sign al light s are working. If the light stays on, but does
not flash, check for bur ned- out turn signal bulbs. If Ihe green light does not com e
all when yo u m ove the leve r. c _h ec k the fuse and indicator . bulb. However, iryou
ordered a ,tra iler towing optio n in which extra wiring waS added to attach the
trailer lighting, a different type
of flasher was installed . In this case , the gree n light will co ntinu e 10 flas h even if a turn sig nal bulb burns out. Therefore, you must
regularly look at the front and
rear turn signal light s 10 be sure they are working.
2-6
Page 25 of 95
![CHEVROLET CITATION 1980 1.G Owners Manual Downloaded from www.Manualslib.com manuals search engine SINGLE WIPE
LOW SPEED (PULSE WIPER)
HIGH
SPEED
• Check the washer fluid levelregu]arly. Do it often when the weather
is bad.
• U CHEVROLET CITATION 1980 1.G Owners Manual Downloaded from www.Manualslib.com manuals search engine SINGLE WIPE
LOW SPEED (PULSE WIPER)
HIGH
SPEED
• Check the washer fluid levelregu]arly. Do it often when the weather
is bad.
• U](/manual-img/24/8083/w960_8083-24.png)
Downloaded from www.Manualslib.com manuals search engine SINGLE WIPE
LOW SPEED (PULSE WIPER)
HIGH
SPEED
• Check the washer fluid levelregu]arly. Do it often when the weather
is bad.
• Use a nuid such as OM Optikleen to help prevent freezing damage, and for better cleaning.
• Do not use radiator antifreeze in the 'windshield washer; ifcould cause
paint damage .
• In cold weather, warm the windshield with the defroster before using the washer-to help prevent Icing that my block
the driver's vision.
STARTING THE ENGINE
I.
2.
Apply the parking brake. . .
Automatic Trl!nsaxl..: Move the transaxle shift lever to "P"(Park) or "N" (Neutral) "P" Preferred). A starter safety device is
designed to keep the starter from operating if the shift lever is in any drive position. (If you need to fe-start the engine while the car is moving . move
the shift lever to "N.")
Manuel Transaxle· Press the clutch pedal to the floor and shift the transaxle to Neutral. Hold the clutch pedal to the floor while you are s tarting ,the engine. A starter safety device l,s d esigned to keep the starter
from operating if the clutch pedal is not fully depres sed.
3. Sta'rt the engine as outlined below for different conditions.
NOTICE: 00 not crenk the engil'. for more than 15 seconds at e time. Walt 10 to 15 seconds before trYiog agein.
• COLD ENGINE:
•
L·4 Engine Press the accelerator pedal to the floor and ·i slowly release It. With your foot off the pedal; crank the engine
by turning the ignition key to "Start ." Release the key when the engine
sta rts.
If the engine starts, but fails to run, repeat this procedure. •
• V-6 Engine: Press the accelerator pedal to the floor twice and slowly release it. With your foot off the pedal. crank the engine by turning the ignition key to 'Stan". Release key when engine
s tarts.
If the engine starts, but fails to run, repeat this procedure but press
the accelerat or pedal only
ONCE to the floor . :When the e ngine is
running smoothly (about 30 seconds), you_ can reduce the engine idle speecf by press ing down slightly on the accelerator pedal. then slowly
releasing it.
2-8