1974 CHEVROLET CAMARO change wheel
[x] Cancel search: change wheelPage 21 of 85
Downloaded from www.Manualslib.com manuals search engine Driving with Manual Transmissions
The 3-and 4-speed transmission
shift levers, extending from the
fioor, have their special shift pat
tern diagram located on the knob.
Depress the clutch pedal fully be
fore attempting to shift
toa differ
ent gear, then release the pedal to
move in that gear.
For normal
accelerations shift into second gear
at
20 mph; into third gear at 30
mph; and on 4-speed models into
fourth gear at
40 mph.
Both transmissions, being fully
synchronized, may be downshifted
into 1 st gear at any speed below
20
m. p.h. Shift into Reverse gear only
after the car has stopped. Always
depress and release the clutch pedal
fully when shifting.
Also, shift into
"Reverse" before
shutting
off engine. This will permit the
ignition key to be turned to the
"Lock" position.
Good Driving Practice: On cars
equipped with manual transmis
sions , use second gear at slow
speeds (less than
30 m.p.h.) when
driving in stop-and-go traffic; for
improved vehicle performance dur
ing acceleration; and when de
scending steep hills.
18
Turn Signals and Lane
Change Feature
The tum signal lever is located
on the left side of the steering col
umn immediately under the steer
ing wheel. The lever
is moved up
,ward to signal a right
tum and
downward to signal a left
tum.
Lamps on the front and rear of the
car transmit this signal to other
motorists and pedestrians. The
ig
nition switch must be in the "ON"
position in order for the tum sig
nals to be operational. This feature
prevents battery drain if the lever .
is left in an "ON" position when
your car
is not in use.
Page 23 of 85

Downloaded from www.Manualslib.com manuals search engine transmiSSIOn in gear, especially if
your car
is equipped with air con
ditioning. This practice
is detri
mental to the transmission, due to
overheating.
Tilt Steering Wheel
The optional tilt steering wheel
can be tilted up above normal posi
tion to provide additional room for
entrance and exit
as well as selected
driving positions below normal
Horn
The horn on your Camara is
actuated by firmly pressing on the
horn button in the center of the
steering wheel. height.
This permits individual
se
lection of the most natural position
for all driving conditions.
On long
trips
the steering wheel position can
be changed to minimi ze tension and
fatigue.
The
tilt mechanism is operated
by lifting up on the .small control
lever on the left side of the
steering
column just below the directional
signal, moving the steering wheel to
As a good motorist , use of the
horn should be kept at a minimum.
However , acquaint yourself
as soon
as possible with this function of the
selected position, and releasing
the lever.
your car, should it ever become
necessary to give a warning
to a
pedestrian or another motorist.
NOTE: For operation of hazard flasher, see page 36 in, Section "In Case of Emergency. "
20
Page 25 of 85
Downloaded from www.Manualslib.com manuals search engine REMINDER: Cars equipped with
front disc brakes have a built-in
wear indicator that
is designed to
make a high frequency, squealing,
or cricket-like warning sound when
the linings are worn to where re
placement
is required. The sound
will occur intermittently or con
tinuously when wheels are rolling,
but will change or cease completely
when the brake pedal
is applied
firmly.
See also the various brake
checks listed in the Chevrolet main
tenance schedule folder.
Automatic Brake Adjusters
• Brakes on this car (except for
the parking brake) are self
adjusting, designed to eliminate
periodic brake adjustments .
• Drum brake adjustment is made
automatically
as the brakes are
applied while car
is moving
backwards .
• Disc brake adjustment is made
automatically with each brake
application.
• If excess brake pedal travel de
velops, drive alternately back
ward and forward several times
and apply brakes firmly in each
direction.
• See your dealer if normal pedal
travel
is not restored, or if there
is a rapid increase in pedal travel,
which could be a sign of other
brake
trOUble.
Clutch Adjustment
Clutch adjustment should be
checked and adjusted periodically
as necessary to compensate for
22
clutch facing wear. To check, de
press pedal by hand until resistance
is felt. Free travel of pedal should
be approximately one inch; if very
little or no free travel
is evident,
clutch adjustment
is required.
Headlight Beam Switch
"High" and "low" headlight
beams are controlled by the floor
button at your left foot. The indi
cator, located in the speedometer
dial, will light up when the high
beams are in use.
Page 55 of 85
Downloaded from www.Manualslib.com manuals search engine Front Wheel Bearings
Every 24,000 miles-clean and
repack with a high melting point
wheel bearing lubricant.
Use wheel
bearing lubricant
GM Part No.
1051344 or equivalent. This is a
premium high melting point
lubri
cant. When replacement is neces
sary specify Delco parts.
c. AUT .I . O .. N. : ."LO .. ng . fibre" ... ot"vi.SC .. 0USI' .. ty .pe
lubricant . sho.uld . not be.used. DO not . mix wheel bearing lubricants. Be sure to thoroughlyclean bearings and hubs(jf all old lubricant betore repac/dng .
Brakes
Brake linings should be periodi
cally inspected for wear by a quali
fied technician. The frequency of
this inspection
depe:pds upon driv
ing conditions such as traffic or
terrain, and also the driving
tech
niques of individual owners. Your
Chevrolet Dealer
is best qualified
to advise you
as to how often this
inspection should be performed. When
replacement
is required,
specify GM and Delco parts.
Master Cylinder -Every 6,000
miles or 4 months -Check fluid
level
in each reservoir and main
tain ~" below lowest edge of each
filler opening with Delco
Supreme
No. 11 or DOT-3 hydraulic brake
fluid .
Parking Brake Pulley, Cables
and Linkage~Every 6,000 miles
or 4
months-Apply water resist
ant EP Chassis Lubricant which
meets GM Specification
6031 M, to
parking brake cable at cable guides
and at all operating links and levers.
Standard Steering Gear
The steering gear is factory
filled with steering gear lubricant.
Seasonal change of this lubricant
should not be performed and the
housing should not be
drained-no
lubrication is required for the life
of the steering gear.
Every 36,000 miles, the gear
52
should be inspected for seal leak
age (actual solid grease-not just
oily film).
If a seal is replaced or
the gear is overhauled, the gear
housing should be refilled with
Part No.
1051052 (13 oz. con
ta iner ) Steering Gear Lubricant
which meets GM Specification GM
4673M, or its equivalent.
NOTE: Do not use EP, Chassis
Lube, meeting GM Specification
GM
6031 M , to lubricate the gear.
DO NOT OVER-FILL the gear
housing.
Power Steering System
Check the fluid level in the
pump reservoir at each oil change
period. Add GM Power Steering
Fluid (or
DEXRON®-II or DEX
RON® Automatic Transmissiol1
Fluid) as necessary to bring level
into proper range on filler cap
in
dicator depending upon fluid tem
perature.
Page 65 of 85
Downloaded from www.Manualslib.com manuals search engine Inflation Instructions with
Canister
(Inflator)
1. Install deflated Space Saver Spare
on car with valve stem at the bot
tom and tighten all
five lug nuts.
2. Remove valve cap and make sure
valve core
is screwed tight in
valve stem.
3. Remove plastic cap from can
ister.
*
4. Place canister over valve stem
and push squarely onto stem
until gas entering tire can be
heard.
*If temperature is below 20°F,
Canister should be warmed on left hand
defroster outlet for
10 min
utes to provide adequate tire in
flation. Heater should be on de
frost and fan on high.
S. To ensure complete draining of
fluid, hold the canister in posi
tion for one minute after sound
stops. Then remove canister for
disposal in proper receptacle.
6. Replace valve cap.
NOTE: Inflation pressure should
be checked and adjusted to the rec
ommended pressure shown on tire
placard
as soon as possible after
installing tire on car.
Inflation Instructions at a
Service Station
1. Mount wheel on car, or place on
center-post tire changer with
lock-down mechanism engaged.
62
2. If beads have become unseated,
lubricate wheel and beads with
soapy water
or tire mO,unting lub
ricant before inflation .
3.
To seat beads, inflate tire to a
maximum of 35 psi.
4. Adjust inflation to recommended
pressure shown on tire placard.
5.
On assemblies so equipped,
check that dust cover is pressed
firmly into un threaded relief stem
before road use.
Deflation Instructions
Remove valve core using slotted
end of valve cap.
Flatten tire and replace core and
cap. Store tire in trunk compart
ment.
Page 73 of 85
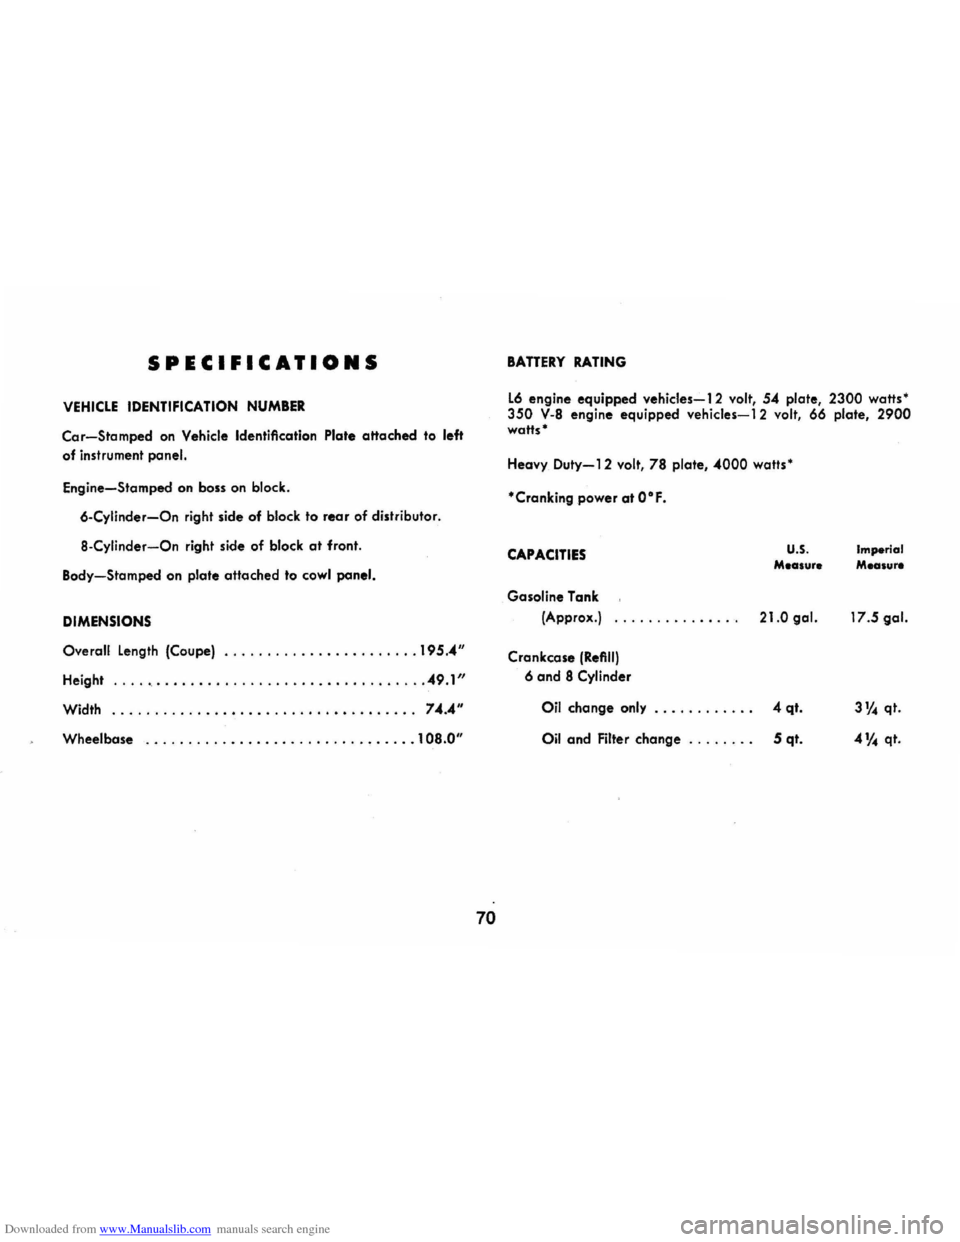
Downloaded from www.Manualslib.com manuals search engine SPECIFICATIONS
VEHICLE IDENTIFICATION NUMBER
Car-Stamped on Vehicle Identification Plate attached to left
of instrument panel.
Engine-Stamped on boss on block.
6-Cylinder-On right side of block to rear of distributor.
8-Cylinder-On right side of block at front.
Body-Stamped on plate attached to
cowl panel.
DIMENSIONS
Overall Length (Coupe) ....................... 195.4"
Height ...................................... 49.1"
Width .......................•..••........ 74.4"
Wheelbase ..........•..................... 108.0"
70
BAnERY RATING
L6 engine equipped vehicles-l 2 volt, 54 plate, 2300 watts· 350 V-8 engine equipped vehicles-12 volt, 66 plate, 2900 watts·
Heavy Duty-12 volt, 78 plate, 4000 watts·
·Crankingpower at O·F.
CAPACITIES
Gasoline Tank
(Approx.)
Crankcase
(Refill)
6 and 8 Cylinder
U.S. Mealure
21.0 gal.
Oil change only . . . . . . . . . . .. 4 qt.
Oil and Filter change . . . . . . .. 5 qt.
Imperial Measure
17.5 gal.
31f .. qt.
4 V. qt.
Page 82 of 85
Downloaded from www.Manualslib.com manuals search engine Dealer Assistance ..................... 74 Defogger, Rear Window ............... 31 Defroster, Defogger, Windshield ........ 30 Dimensions, Vehicle ................... 70 Dimmer Switch, Headlamp. . . . . . . . . . .. 22 Directional Signals.. . . . . . . . . . . . . . . . . .. 18 Door Locks. . . . . . . . . . . . . . . . . . . . . . . . .. 4
Drive Belts, Engine. . . . . . . . . . . . . . . . . .. 49 Driver Seat Adjustment. . . . . . . . . . . . . . . . . . . . 5 "Drive". (D) Transmission Range. . . .. 17 Dusty Conditions, Operating Under Oil Change Interval. ................ 47 Oil Filter Change IntervaL ........... 47 Electric Clock. . .. .. . . . . .. .. . .. . .. . . .. 28 Electrical System Ammeter .......................... 27 Battery .......................... 63, 70 Bulbs ............................. 73 Fuses ............................. 73 Generator Indicator Light. . . . . . . . . .. 25 Emergency, In case Of. ............... 36 Brake Warning Light ................ 25 Generator Indicator Not Charging. . .. 25 Hazard Warning Flasher ............. 36 Jacking To Change Wheels ........... 39 Jump Starting with Auxiliary Battery .. 37 Overheated Radiator. . . . . . . . . . . . . . .. 39 (Temperature Indicator: Hot)
Pushing To Start. . . . . . . . . . . . . . . . . .. 36 ' Energizer (See Battery)
Engine Cooling
........................... 53 Exhaust Gas Caution ........ , . . . . . .. 13 Flooded, Starting Procedure .......... 14 Overheating. . . . . . . . . . . . . . . . . . . . . . .. 39 Serial Number ...................... 70
Specifications ................. , . . . .. 70 Starting ........................... 14 Temperature Light. . . . . . . . . . . . . . . . .. 25 Engine Oil Capacity ..... , . . . . . . . . . . . . . . . . . . . .. 70 Change Interval. ................... 47 Dip Stick. . . . . . . . . . . . . . . . . . . . . . . . .. 48 Filter .............................. 47 Pressure Indicator. . . . . . . . . . . . . . . . .. 24 Recommendation ............... ' ... 47 Ethylene Glycol Coolant. . . . . . . . . . . . . .. 54 Exhaust Gas Caution ............ ' ..... ' 13 Driving With Trunk Open. . . . . . . . . .. 13 Parked With Engine Running. . . . . . .. 13 Pulling A Trailer. . . . . . . . . . . . . . . . . .. 11 Exterior Finish and Trim care. . . . . . . .. 44
Fabric Care .......................... 41 Fan Belt. .............................. 49 Ventilating ......................... 28 Filters OiL ............................... 47 Finish Care, Exterior. . . . . . . . . . . . . . . .. 44 First Few Hundred Miles of Driving............................ 2 First Gear. . . . . . . . . . . . . . . . . . . . . . . . . .. 17 Flame Arrestor ......... , . . . . . . . . . . . .. 49 Flammable Cleaning Solvents .......... 41 Flashers
Hazard Warning .................... 36 Turn Signal. . . . . . . . . . . . . . . . . . . . . . .. 18 Flooded Engine, Starting. . . . . . . . . . . . .. 15 Floor Controls ....................... 21 Fluid Levels
Battery ............................ 63 Brake Master Cylinder. . . . . . . . . . . . .. 52 Engine Oil. ........................ 49 Power Steering ..................... 52
79
Radiator ........................... 55 Rear Axle. . . . . . . . . . . . . . . . . . . . . . . .. 49 Transmission ....................... 50 Fluid Recommendations
Battery ......................... , .. 63 Brake ............................. 52 Power Steering. . . . . . . . . . . . . . . . . . . .. 52 Radiator. . . . . . . . . . . . . . . . . . . . . . . . . .. 56
Transmission ....................... 50 Windshield Washer. . . . . . . . . . . . . . . .. 28 Fogging, With Air Conditioner. . . . . . . .. 33 Folding Seat Back Latches. . . . . . . . . . . .. 4 Foreign Countries, Operation In ........ 12 Four Way Hazard Flasher ............. 36 Front Suspension ..................... 51 Front Wheel Bearings. . . . . . . . . . . . . . . .. 52 Fuel (See Gasoline)
Full Rated Load (See Tires)
Fumes Engine Exhaust. . . . . . . . . . . . . . . . . . .
.. 13 Gasoline. . . . . . . . . . . . . . . . . . . . . . . . . .. 13 Fuses Chart. ............................ 73 Location ........................... 72 Gas Station Information
Inside Back Cover
Gasoline
(See Also Fuel) Do Not Use For Cleaning ........... 41 Filler Cap Location ................ IBC
Fumes ............................. 13 Gauge ............................. 24 Low-Lead .......................... 46 Recommendations. . . . . . . . . . . . . . . . .. 46 Gauge, FueL... . . . . . . . . . . . . . . . . . . . . .. 24 Gearshift Lever.. . . . . . . . . . . . . . . . . . . . .. 17 Generator Indicator Light ' ("AMP") .......................... 25 Glove Box. . . . . . . . . . . . . . . . . . . . . . . . . .. 23
Page 85 of 85
Downloaded from www.Manualslib.com manuals search engine Steering Disabled Vehicle .................... 36 Upholstery And Carpet Care ........ ... 41 Column Controls ................... 14 To Start. .......................... 36 Vehicle Identification Number .... ...... 70 Column Lock ...................... 14 Toxic Vehicle Loading ...................... 58 Gear Lubricant. .................... 52 Cleaning Solvents ......... .. ........ 41 Ventilating Blower ................. ... 28 Linkage Inspection .................. 51 Exhaust Fumes ............. ........ 13 Ventilating Grilles .................... 28 Maintenance ....................... 51 Traction, Wet Roads .................. 5 Vents Outside Air .................. '" 29
Power ... ............... ........... 19 Traffic Hazard Flasher. ............... 36 Vinyl Wheel, Tilt. ........................ 20 Trailer Hauling ....................... 11 Fabric Care Interior ................. 41 Straps, Safety (See Seat Belts) Break-In Period .................... 12 Roof Care ......................... 44 Storage Of Items ............ .......... 5 Cautions ........................... 12 Volatile Cleaning Solvents ............. 41 Suspen sion Maintenance ............... 51 Equipment ......... ................. 11 Caution ........................... 41 Stereo System ........................ 34 Special Maintenance ................. 11 Volume Control, Radio ......... ... .... 34 Temperature ................. ........ 30 Tire Inflation ....................... 11 Warning Flasher, Hazard .............. 36 Control , Cooling .................... 31 Trailer Tongue Load .... .......... .. 11 Warning Lights ....................... 24 Control , Heating .................... 30 Transmission
Brake ....................... ...... 25 Indicator Light/Gauge ... ............ 27 3-Speed Manual .................... 18 Engine Temperature ............... .. 25 Thermostat ...... .. .................. 56 Automatic ....................... .. 16 Generator .......................... 25 Tilt Steering Wheel.. .................. 20 Braking Effect On Hills .............. 18 Oil Pressure ........................ 24 Tire Checking
Fluid Level. ............... 50 Warranty (See Warranty Folder)
Belted ......... .................. .. 56 Fluid And Strainer ................ .. 50 Washers
Care ........... .................. . 56 Fluid Change Interval. .............. 50 Windshield ............. ......... ... 28 Changing .. .............. .......... 39 Maintenance .............. ....... .. 50 Washing .......... ................... 44 Full Rated Load .................... 58 Shift Controls ...................... 51 Waxing And Polishing ................. 44 High Speed Operation ............... 57 Shift Indicato r
Wheel Bearings, Front. ................ 52 Hydroplaning ...................... 61 Turbo Hydramatic ......... ; ........ 51 Wheel Changing ...................... 39 Infla tion Pressure . . . . . . . . . . . . . . . . . . . 57 Tread Wear Indicators ................ 58 Wheel Discs, Replacement ............. 39 Inspection ....... .................. 58 Trim Care, Interior ................... 41 Wheel, Tilt Steering ................... 20 Load Limit ........................ 57 Trunk
Windshield
Rotation ........ ................... 58 Driving With Trunk Open ........... 13 Defrosting and Space Saver .. .......... : . .......... 61 Turbo-Hydramatic .............. ...... 50 Defogging ................. ...... 30 Traction ............. .............. 61 Maintenance .... .... ...... ......... 50 Washer Use In Cold Weather ........ 28 Tread Wear Indicators .............. 58 Operation .......................... 16 Washer Solution .................... 28 Usage and Options .................. 56 Turn Signals and
Lane Change Wipers And Washers ................ 28 Towing Feature ..................
.......... 18 Wrecker , Towing ....... .............. 36 Caution .................. .... ...... 36 Underbody Maintenance ......... ...... 63 Zone Offices ................. ...... 76, 77
82