1974 CHEVROLET CAMARO brake
[x] Cancel search: brakePage 5 of 85

Downloaded from www.Manualslib.com manuals search engine YOUR CAR'S FIRST
FEW HUNDRED MILES OF DRIVING
You can operate your new car from
its very first mile without adhering
to a formal
"break-in" schedule.
However, during the first
few hun
dred miles of driving you can, by
observing a
few simple precautions,
add to the future performance and
economy of your car.
It is recommended that your speed
during the first
500 miles
be confined to a maximum of
60
M.P.H.,
but do not drive for ex
tended periods at
anyone constant
speed, either fast
or slow. Dur
ing this period, avoid full throttle
starts and, if possible, avoid hard
stops especially during the first
200
miles of operation since brake mis- use
during this period will destroy
much future
bnlke efficiency.
Always drive at moderate speed
until the engine has completely
warmed up.
If you plan to use your new car
for trailer hauling see additional
information on page 11.
SEE PAGE 64 for ADDITIONAL INFORMATION ON
HOW TO IMPROVE YOUR GAS M,ILEAGE.
2
Page 6 of 85

Downloaded from www.Manualslib.com manuals search engine BEFORE DRIVING YOUR CAMAR 0
DRIVER CHECKLIST
Before Entering Car
1. See that windows, mirrors and
lights are clean.
2. Visually note inflation condition
of tires.
3. Check that area to rear is clear
if about to back up.
Before Driving Off
1. Lock all doors.
2. Position seat.
3 . Adjust inside and outside mirrors.
4. Fasten seat belts.
5. Check that warning bulbs light
when key
is turned to start
position.
6. Release parking brake (and see
that brake warning light turns
off) .
7. Be sure you understand your car
and how to operate it safely.
Keys
Two separate keys are provided
for your car. Each key has a differ
ent" cross section so that it can be
inserted only in certain locks.
• Key with square head
(stamped "J") -for ignition
switch only.
• Key with oval head (stamped
"K")-for all other locks.
fIiJJ
~===(iD
ALlOTHER~ LOCKS
3
The code number of each key is
stamped on the "knock out" plug
in the key head. Your Chevrolet
dealer removed these plugs and
placed them with the spare set of
keys in the special key envelope
that was given to 'you at time of
delivery.
For your protection:
• Record the numbers on the key
envelope and discard the key
plugs.
• Keep the key envelope in a safe
place such
as your wallet, Not
In The Car.
In the event the original keys are
lost, duplicates can be made by
your dealer
or a locksmith using
the key code information.
Be sure to lock the glove box or
console compartments and remove
the key from the car whenever it
is
necessary to leave the ignition key
with
an attendant.
Page 9 of 85
Downloaded from www.Manualslib.com manuals search engine To Start Car:
• Seat belts must be properly
buckled around each outboard
front seat occupant , after getting
in the car, before the starter will
operate.
• The reminder buzzer and light
are designed to
go on if seat
belts are unbuckled at occupied
front seats while the vehicle
is
underway (the engine will con
tinue to
run).
• The engine may be restarted
after a stall without interlock in
terference if the driver remains
seated.
If Starter Will Not Operate:
• Remove any objects from un
occupied front seats.
• Re-buckle front seat belts.
NOTE: Front seating positions
contain a weight detector which is
, designed to activate the starter in
terlock
or the buzzer and light ni-
minder whenever a nominal weight
is placed on the seat and belts are
not buckled. The weight detector
cannot distinguish between a pas
senger and any object on the seat,
therefore, such items should be
stowed elsewhere in the vehicle.
Leaving something on the front
seat and leaving the front
seat belts
fastened while the
car is parked
creates a current drain which could
result in a discharged battery after
a period of time, which will vary
depending on battery and weather
conditions.
IfStarterSti IIWi II NotOperate:
• Set parking brake firmly, move
transmission lever to
"Park" (re
verse for manual transmission
cars) .
• TURN IGNITION KEY TO
"ON" ("RUN").
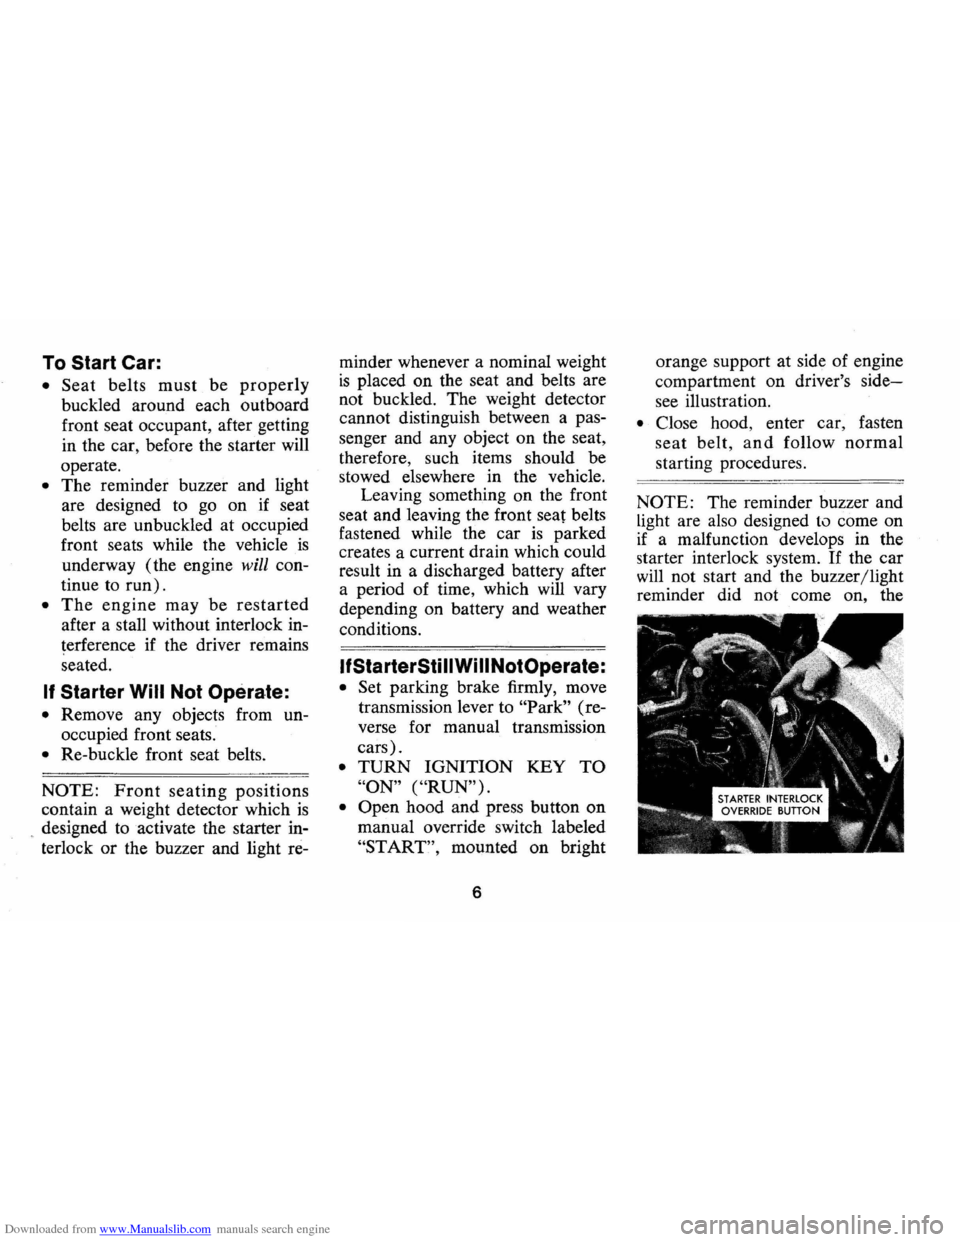
• Open hood and press button on
manual override switch labeled
"START", mounted on bright
6
orange support at side of engine
compartment
on driver's side
see illustration.
• Close hood, enter car, fasten
seat belt, and follow normal
starting procedures.
NOTE: The reminder buzzer and
Light are also designed to come on
if a malfunction develops in the
starter interlock system.
If the car
will not start and the buzzer/light
reminder did
not come on, the
Page 12 of 85
Downloaded from www.Manualslib.com manuals search engine Seat Belt Buzzer/Light
Reminder
• The front seat belts are linked to
a buzzer and light which remind
occupants to fasten their belts.
• The buzzer and light are de
signed to come on when any
outboard front seat occupant's
belt
is not fastened, while at
tempting to start the engine; or
if any front seat belt
is un
fastened while driving in any
forward gear.
• The reminders do not come on
when the engine
is running and
a front belt
is unbuckled if the
transmission
is in Park or neu
tral (automatic and column
shift transmission cars), or if the
parking brake
is engaged (floor
shift transmission cars).
If seat belt system , ignition in
terlock system, or reminder system
does not work
as described , see
your dealer for information and assistance.
Lap Belts (For
Rear Seat
Passengers)
• Seating positions next to side
windows have retractors which
are designed to automatically
take up excess webbing and
maintain tension on the lap belt.
These belts should be positioned
and secured
as described above
under
"Lap-Shoulder Belt Com
bination.
"
Seat Belt Inspection
• Periodically inspect belts,
buckles, adjustable latch plates,
retractors, interlock and re
minder systems, guide loops,
clips, and anchors for damage
that could lessen the effective
ness of the restraint system.
• Keep sharp edges and damaging
objects away from belts, and
other parts of restraint system.
• Replace belts if cut, weakened,
9
frayed, or subjected to collision
loads.
• Check that anchor mounting
bolts are tight.
• Have questionable parts re
placed.
• Keep seat belts clean and dry.
• Clean only with mild soap solu
tion and lukewarm water.
• Do not bleach or dye belts since
this may severely weaken belts.
Child Restraint
Children in automobiles should
be restrained to lessen the risk of
injury in accidents, sudden stops
or other hazardous situations. Gen
eral Motors dealers offer restraint
systems designed specifically for
use with infants and with small
children. The GM
"Infant Love
Seat" is designed for babies up to
20 pounds. The GM "Child Love
Seat" is designed for children
weighing 20 to 40 pounds, up to 3
Page 14 of 85
Downloaded from www.Manualslib.com manuals search engine erly when riding. However, if
unusual conditions prohibit use
of restraints
and require that a
Trailer Hauling
Since passenger cars are designed
and intended to be used primarily
as passenger conveyances, towing
a trailer will affect handling,
dura
bility and economy. Maximum
safety and satisfaction depends
upon proper use of correct
equip
ment and avoiding overloads and
other abusive operation.
The maximum loaded trailer
weight which you
can pull with your
Camaro depends on what special
equipment has been installed on
your car. Chevrolet does not
rec
ommend towing any trailer unless
the
car is properly equipped. Infor
mation on trailer hauling capabili
ties, special equipment required,
and optional equipment offered by child
must stand,
he should
stand
on the floor directly be
hind the front seat. This will
Chevrolet
is available from your
Chevrolet Dealer
or by writing:
Chevrolet
Motor Division, Detroit,
Michigan
48202 (or in Canada
by writing to General Motors of
Canada Limited, Owner Relations
Department,
Oshawa, Ontario).
To assist in attaining good han
dling of the car-trailer combina
tion, it is important that the trailer
tongue load be maintained
at ap
proximately 10% of the loaded
trailer weight. Tongue loads
can be
adjusted by proper distribution of
the load in the trailer,
and can be
checked by weighing separately the
loaded trailer and then the tongue.
When towing trailers, tires should
be inflated to the highest
infla
tion pressures shown on the placard
affixed to the left front door. The
11
help minimize the possibility of
injury from frontal impacts in
the event of an accident.
allowable passenger
and cargo
load, also shown
on the same plac
ard, is reduced by an amount equal
to the trailer tongue load on the
trailer hitch.
Maintenance
More frequent vehicle mainte
nance is required when using your
car to pull a trailer. Change the:
• Automatic transmission fluid
each
12,000 miles,
• Rear axle fluid each 12,000
miles,
• Engine oil each 60 days or 3,000
miles, whichever occurs first,
• Positive crankcase ventilation
valve each 12 months
or 12,000
miles, whichever occurs first.
• See index for important informa
tion on belts, cooling system care
and automatic brake adjustment.
Page 17 of 85
Downloaded from www.Manualslib.com manuals search engine STEERING COLUMN CONTROLS
Anti-Theft Steering
Column Lock
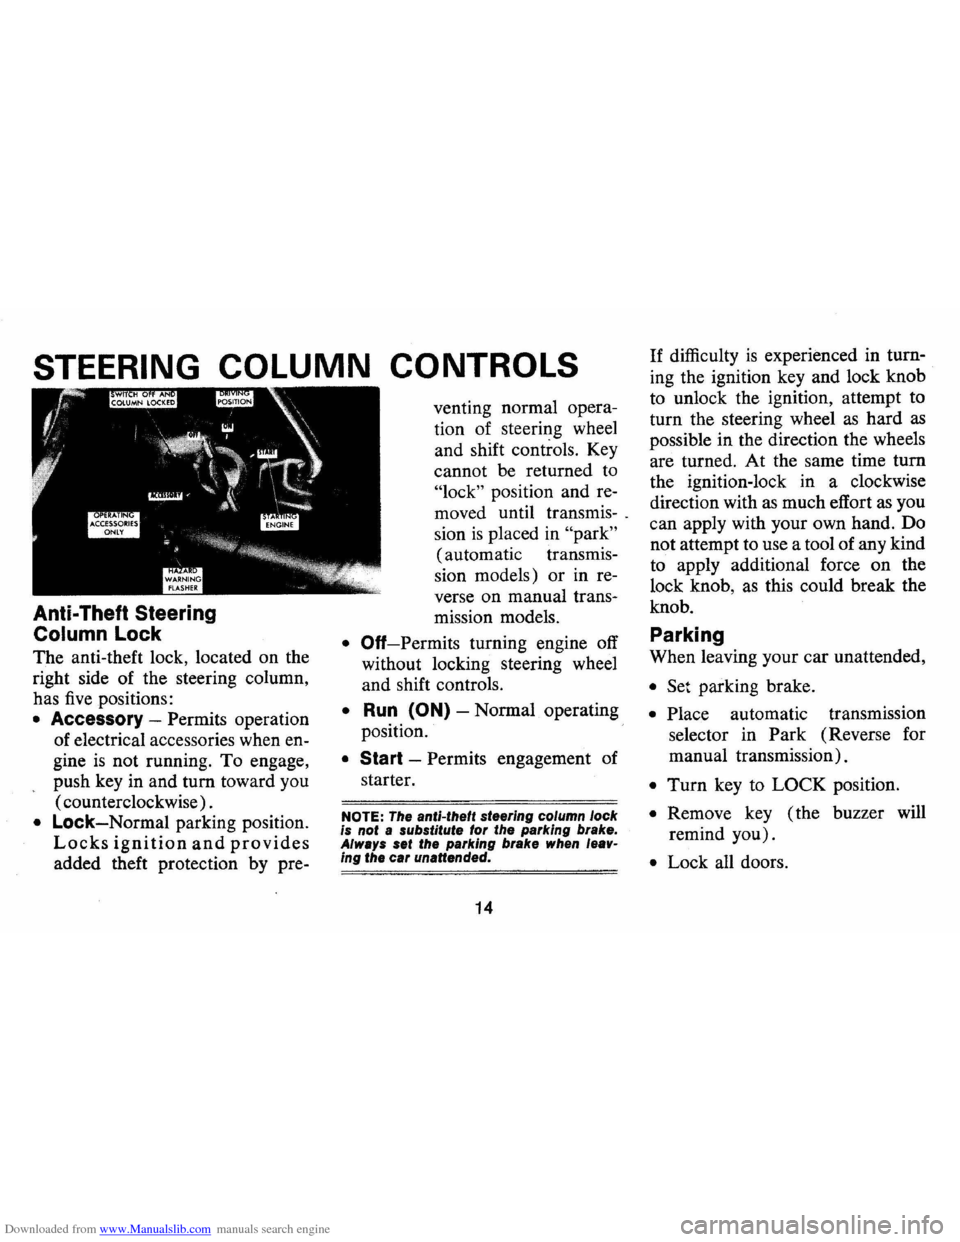
The anti-theft lock, located on the
right side of the steering column,
has
five positions:
• Accessory -Permits operation
of electrical accessories when en
gine
is not running. To engage,
push key in and turn toward you
( counterclockwise) .
• Lock-Normal parking position.
Locks ignition and provides
added theft protection by pre- venting
normal opera
tion of steering wheel
and shift controls. Key
cannot be returned to
"lock" position and re
moved until transmis-.
sion
is placed in "park"
(automatic transmis
sion models) or in re
verse on manual trans-
mission models.
• Off-Permits turning engine off
without locking steering wheel
and shift controls.
• Run (ON) -Normal operating
position.
• Start -Permits engagement of
starter.
NOTE: The anti-theft steering column lock
is not a substitute for the parking brake.
Always set the parking brake when leav
ing the car unattended.
14
If difficulty is experienced in turn
ing the ignition key and lock knob
to unlock the ignition, attempt to
turn the steering wheel
as hard as
possible in the direction the wheels
are turned. At the same time turn
the ignition-lock in a clockwise
direction with
as much effort as you
can apply with your own hand. Do
not attempt to use a tool of any kind
to apply additional force on the
lock knob,
as this could break the
knob.
Parking
When leaving your car unattended,
• Set parking brake.
• Place automatic transmission
selector in Park (Reverse for
manual transmission).
• Turn key to LOCK position.
• Remove key ( the buzzer will
remind you).
• Lock all doors.
Page 18 of 85
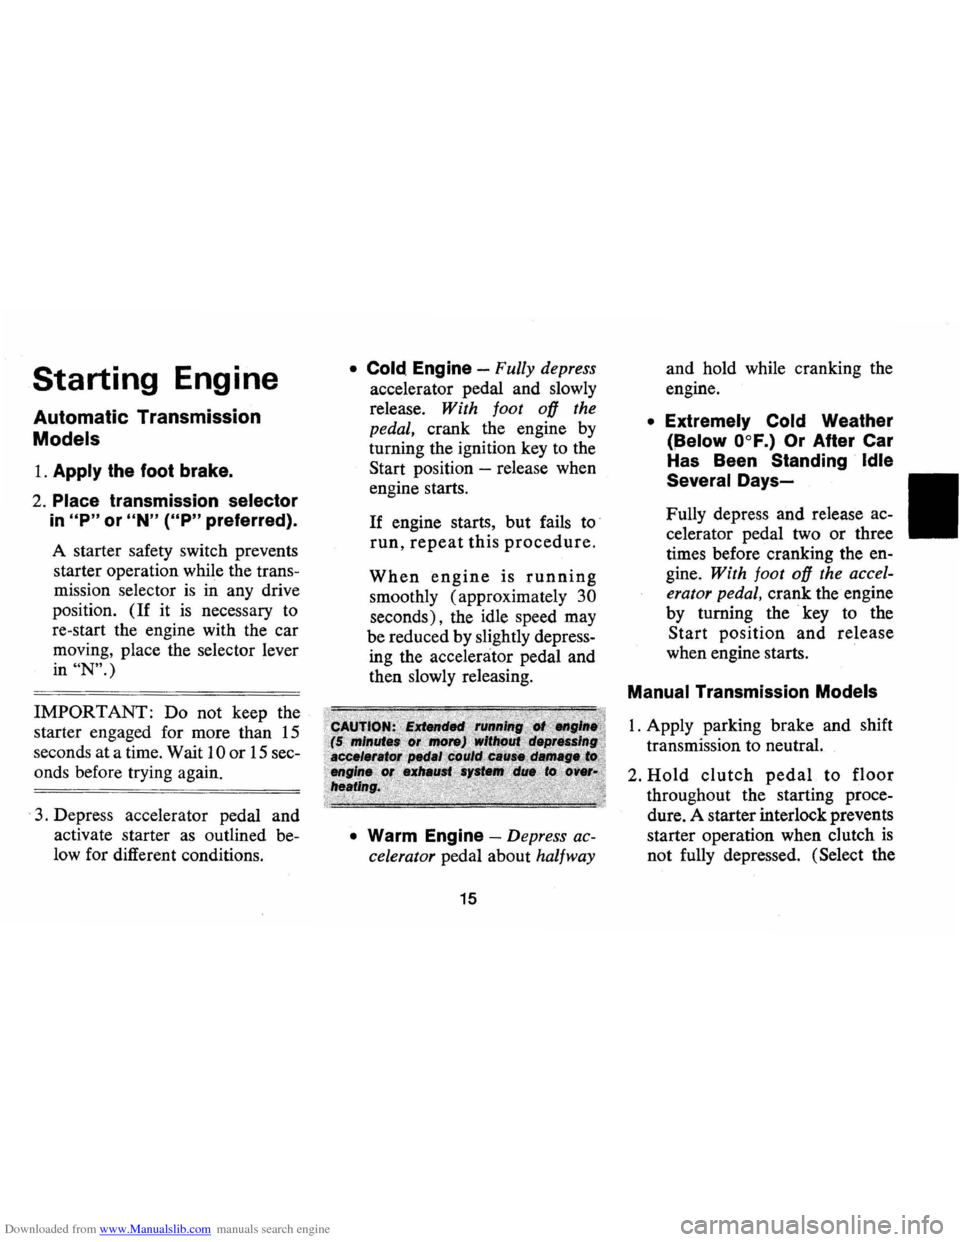
Downloaded from www.Manualslib.com manuals search engine Starting Engine
Automatic Transmission
Models
1. Apply the foot brake.
2. Place transmission selector
in "P" or "N" ("P" preferred).
A starter safety switch prevents
starter operation while the trans
mission selector
is in any drive
position.
(If it is necessary to
re-start the engine with the car
moving, place the selector lever
in
"N".)
IMPORTANT: Do not keep the
starter engaged for more than
15
seconds at a time. Wait 10 or 15 sec
onds before trying again.
.
3. Depress accelerator pedal and
activate starter
as outlined be
low for different conditions.
• Cold. Engine -Fully depress
accelerator pedal and slowly
release.
With foot oD the
pedal,
crank the engine by
turning the ignition key to the
Start position -release when
engine starts.
If engine starts, but fails to'
run, repeat this procedure.
When engine is running
smoothly (approximately 30
seconds), the idle speed may
be reduced by slightly depress
ing the accelerator pedal and
then slowly releasing.
• Warm Engine -Depress ac
celerator
pedal about halfway
15
and hold while cranking the
engine.
• Extremely Cold Weather
(~elow O°F.) Or After Car
Has Been Standing '
Idle
Several
Days-
Fully depress and release ac
celerator pedal two
or three
times before cranking the en
gine.
With foot oD the accel
erator pedal,
crank the engine
by turning the key to the
Start position and release
when engine starts. .
Manual Transmission Models
1. Apply parking brake and shift
transmission to neutral.
2.
Hold clutch pedal to floor
throughout the starting proce
dure. A starter interlock prevents
starter operation when clutch
is
not fully depressed. (Select the
Page 20 of 85
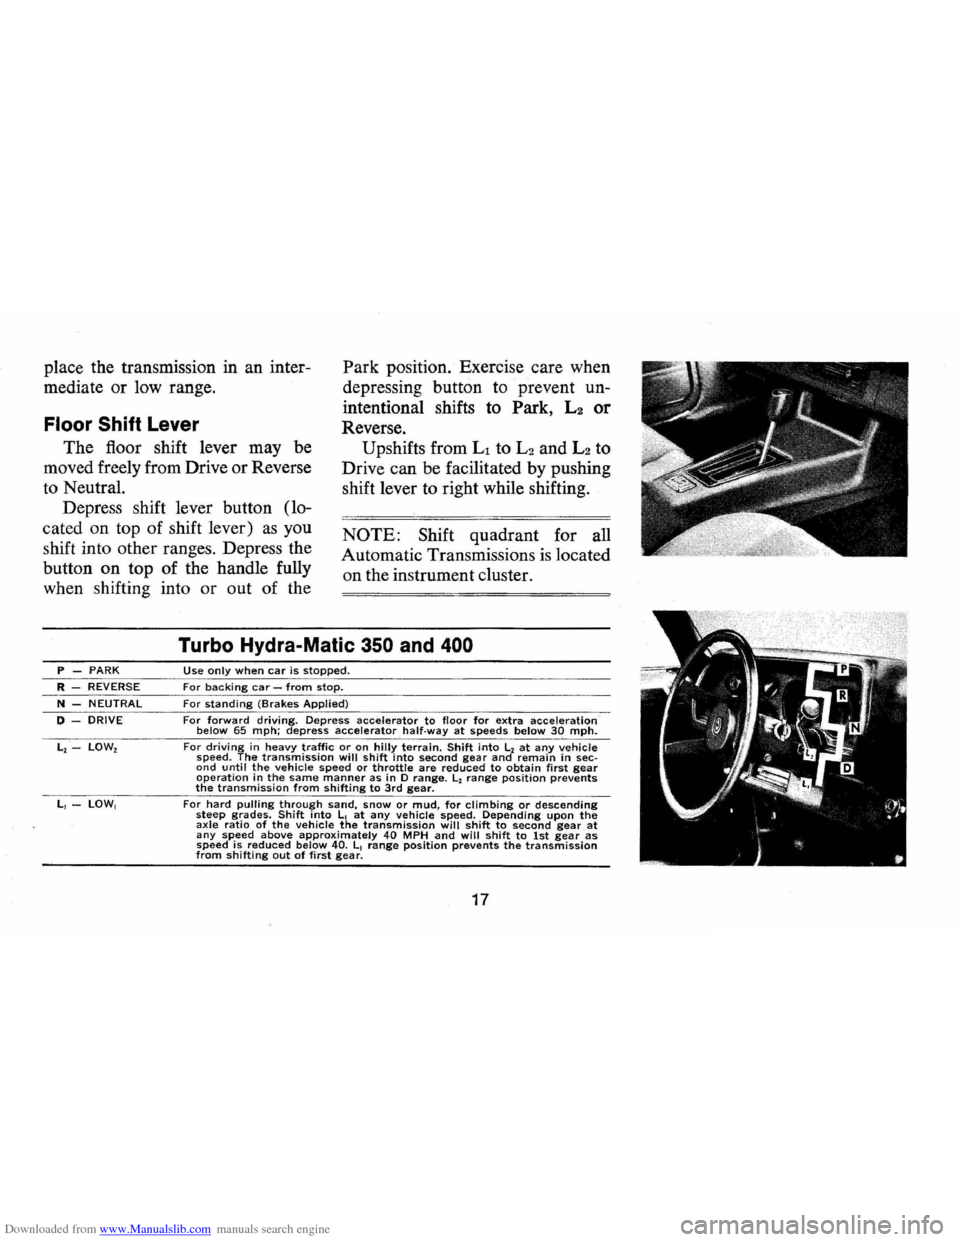
Downloaded from www.Manualslib.com manuals search engine place the transmission in an inter
mediate or low range. Park position. Exercise care when
depressing button to prevent
un
intentional shifts to Park, L2 or
Reverse. Floor Shift Lever
The floor shift lever may be
moved freely from Drive or Reverse
to Neutral. Upshifts
from Ll to L2 and L2 to
Drive can be facilitated by pushing
shift lever to right while shifting.
Depress shift lever button (lo
cated on top of shift lever)
as you
shift into other ranges. Depress the
button on top of the handle fully
when shifting into or out of the NOTE: Shift quadrant for all
Automatic Transmissions
is located
on the instrument cluster.
P -PARK R -REVERSE
N -NEUTRAL
D -DRIVE
L, -LOW,
Turbo Hydra-Malic 350 and 400
Use only when car is stopped.
For backing car -from stop. For standing (Brakes Applied)
For forward driving. Depress accelerator to floor for extra acceleration below 65 mph; depress accelerator half·way at speeds below 30 mph. For driving in heavy traffic or on hilly terrain. Shift into L, at any vehicle speed. The transmission will shift into second gear and remain in sec· ond until the vehicle speed or throttle are reduced to obtain first gear operation in the same manner as in D range. L, range position prevents the transmission from shifting to 3rd gear.
For hard pulling through sand, snow or mud, for climbing or descending steep grades. Shift into L, at any vehicle speed. Depending upon the axle ratio of the vehicle the transmission will shift to second gear at any speed above approximately 40 MPH and will shift to 1st gear as speed is reduced below 40. L, range position prevents the transmission from shifting out of first gear.
17