1971 CHEVROLET CAMARO engine oil
[x] Cancel search: engine oilPage 13 of 88
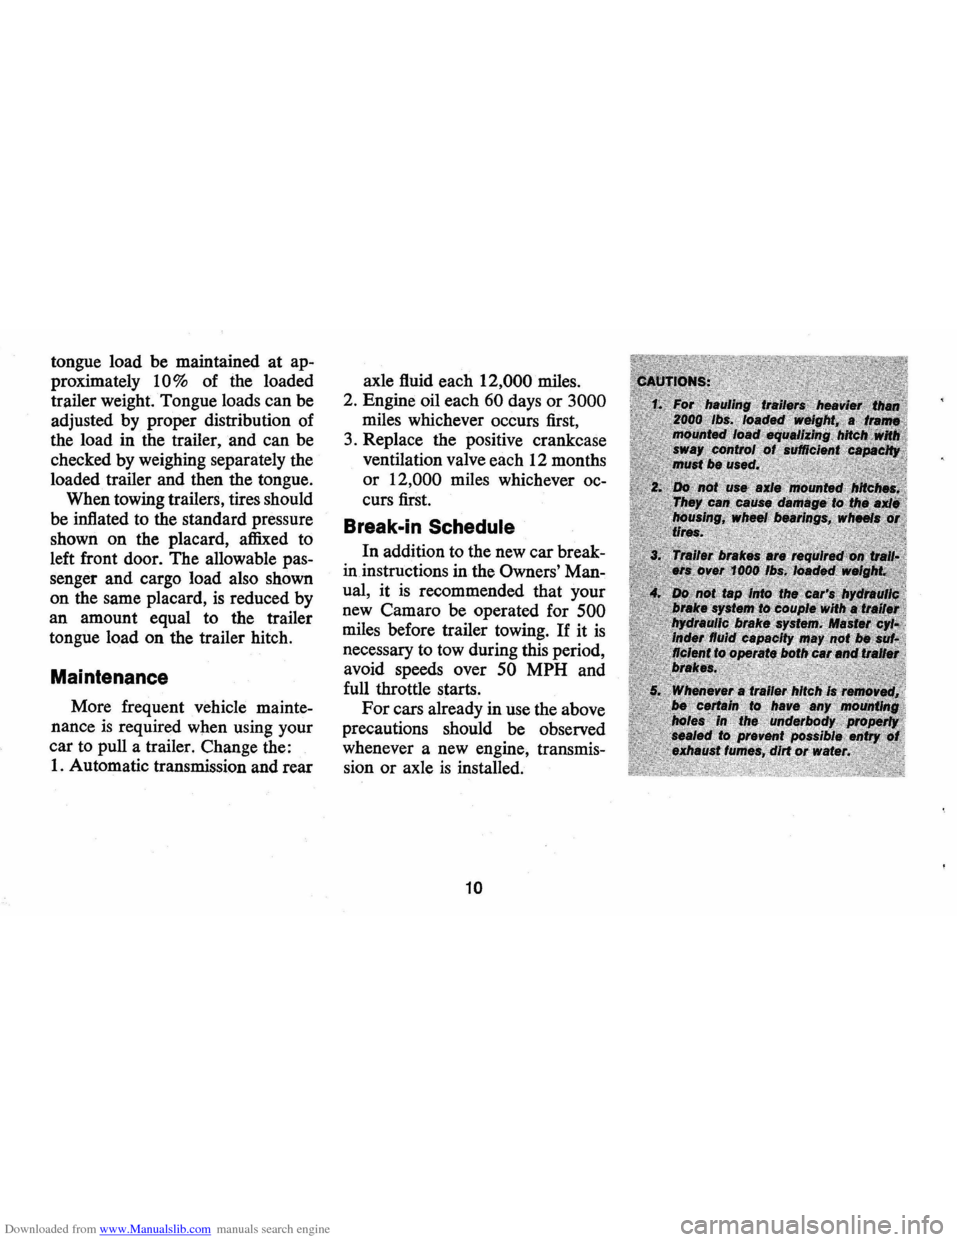
Downloaded from www.Manualslib.com manuals search engine tongue load be maintained at ap
proximately
10% of the loaded
trailer weight. Tongue loads can be
adjusted by proper distribution of
the load in the trailer, and can be
checked by weighing separately the
loaded trailer and then the tongue.
When towing trailers, tires should
be inflated to the standard pressure
shown
on the placard, affixed to
left front door. The allowable pas
senger and cargo load also shown
on the same placard,
is reduced by
an amount equal to the trailer
tongue load on the trailer hitch.
Maintenance
More frequent vehicle mainte
nance
is required when using your
car to pull a trailer. Change the:
1. Automatic transmission and rear axle
fluid each
12,000 miles.
2. Engine oil each
60 days or 3000
miles whichever occurs first,
3. Replace the positive crankcase
ventilation valve each 12 months
or 12,000 miles whichever oc
curs first.
Break .. in Schedule
In addition to the new car break
in instructions in the
Owners' Man
ual,
it is recommended that your
new Camaro be operated for
500
miles before trailer towing. If it is
necessary to tow during this period,
avoid speeds over
50 MPH and
full throttle starts.
For cars already in use the above
precautions should be observed
whenever a new engine, transmis
sion
or axle is installed.
10
Page 23 of 88

Downloaded from www.Manualslib.com manuals search engine Instruments
The instruments, gauges and in
dicator lights conveniently grouped
in the instrument cluster are de
signed to tell you at a glance many
important things about the per
formance of your car. The follow
ing information will enable you to
more quickly understand and prop
erly interpret these instruments.
Fuel Gauge
This electrically operated gauge
registers correctly when the igni
tion switch
is in the "on" position.
When the ignition switch
is turned
BRAKE WARNING liGHT
"off", the needle will not necessar
ily return to the empty mark but
may stop at any point on the dial.
Oil Pressure Indicator Light
This light will be on when the
ignition switch
is turned on and
should go out after the engine
is
started. Occasionally the light may
be seen to flicker momentarily, but
this will do no harm. However, if
the light remains on during normal
driving speeds the engine should be
stopped until the cause of the trou
ble can be located and corrected.
20
Driving the car with low oil pres
sure can cause serious engine
damage.
Page 26 of 88
Downloaded from www.Manualslib.com manuals search engine kJ
2530 35404550
15 55
10 60
5 65 RPM/IOO 70 llllD
Optional Instruments and Gauges
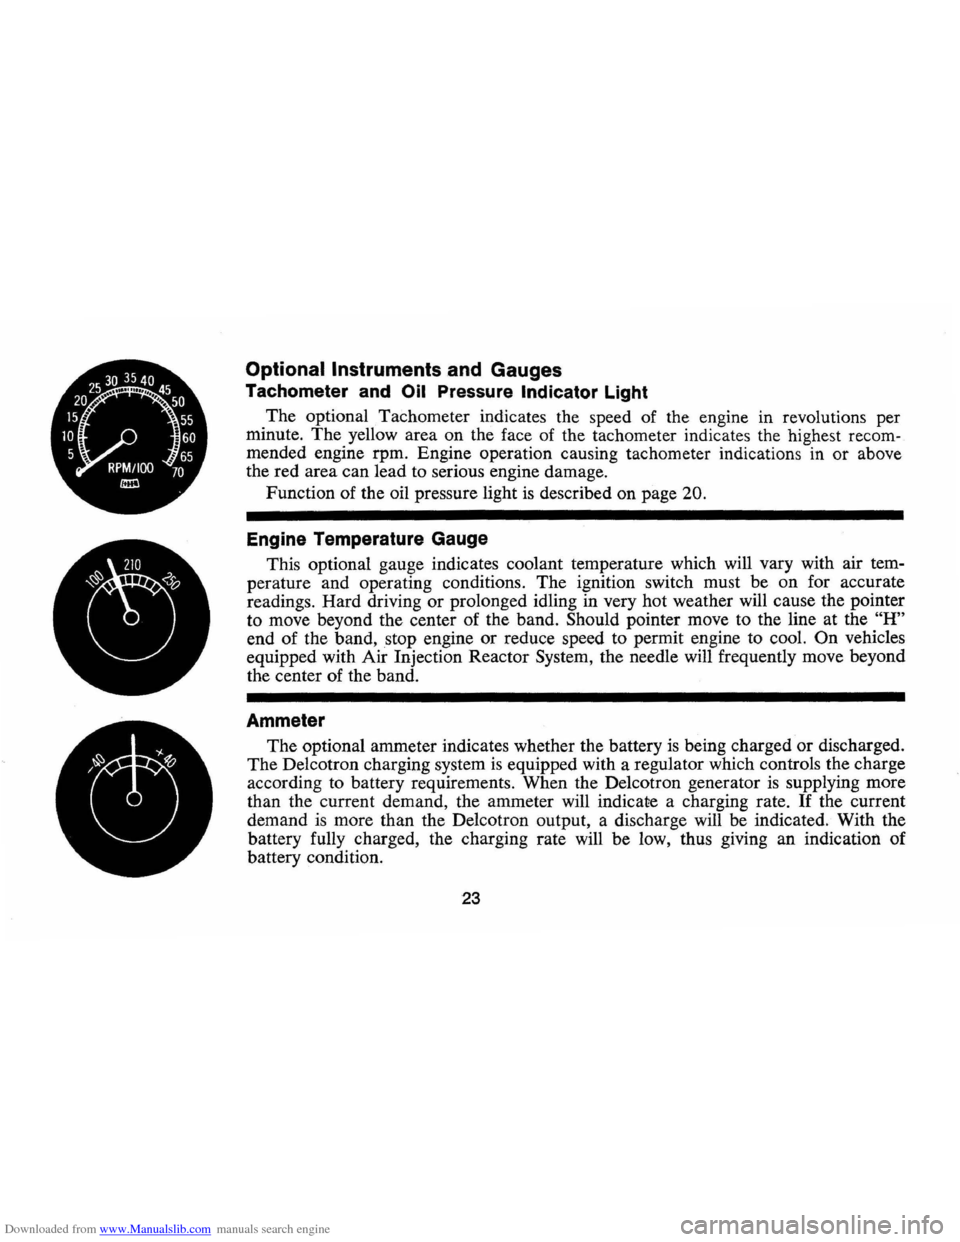
Tachometer and Oil Pressure Indicator Light
The optional Tachometer indicates the speed of the engine in revolutions per
minute.
The yellow area on the face of the tachometer indicates the highest recom
mended engine rpm. Engine operation causing tachometer indications in or above
the red area can lead to serious engine damage.
Function of the oil pressure light is described on page
20.
Engine Temperature Gauge
This optional gauge indicates coolant temperature which will vary with air tem
perature and operating conditions. The ignition switch must be on for accurate
readings. Hard driving
or prolonged idling in very hot weather will cause the pointer
to move beyond the center of the band.
Should pointer move to the line at the "H"
end of the band, stop engine or reduce speed to permit engine to cool. On vehicles
equipped with Air Injection Reactor System, the needle will frequently move beyond
the center of the band.
Ammeter
The optional ammeter indicates whether the battery is being charged or discharged.
The Delcotron charging system is equipped with a regulator which controls the charge
according to battery requirements. When the Delcotron generator
is supplying more
than the current demand, the ammeter will indicate a charging rate.
If the current
demand
is more than the Delcotron output, a discharge will be indicated. With the
battery fully charged, the charging rate will be low, thus giving an indication of
battery condition.
23
Page 27 of 88

Downloaded from www.Manualslib.com manuals search engine Clock
Reset the clock, if your car is so
equipped, by pulling out the knob
and turning the hands clockwise
if
slow, counterclockwise if fast. This
will, if the clock error
is five min
utes
or more, automatically com
pensate for time gain or lag.
Sev
eral resettings, several days apart,
may be needed to properly adjust
the clock mechanism. Have your
clock cleaned and oiled by a com
petent clock serviceman at least
every two years.
Cigarette Lighter
The accessory cigarette lighter is
located on the instrument panel
face. To operate, push it in. When
it becomes heated, it automatically
pops out ready for
use.
Windshield Wiper
and Washer
The windshield wiping system
operates at two speeds and
is de
signed to wipe clear designated areas
of the windshield under most
inclement weather conditions. The
windshield wipers work electrically
and are not affected by engine op
eration.
Push the control lever to the
right
to start the electric windshield
wiper. The two-speed electric wiper
has both a
"low" and a "high" speed
position.
Pressing the control will send a
measured amount of water or other
cleaning agent onto the windshield
and will also cause the wiper lever
to move, thus starting the wiper
motor. The wiper will then con
tinue to operate until manually
turned off at the wiper lever.
Fill the washer jar only
% full
during the winter to allow for ex
pansion if the temperature should
fall low enough to freeze the
so
lution.
• Check washer fluid level regu
larly-do it frequently when the
24
weather is bad.
• Use GM OPTIKLEEN to pre
vent freezing damage, and to
provide better cleaning.
• Do not use radiator anti-freeze in
windshield washer; it could
cause paint damage.
• In cold weather, warm the wind
shield with defrosters before
us
ing washer-to help prevent ic
ing that may seriously obscure
vision.
Air Vents
The air vents in each kick panel
admit air from the vent grille just
ahead of the windshield. Control
knobs open and close the vents .
The amount of air entering the
car through this system
is depend
ent upon vehicle speed.
Four Season Air Conditioning
equipped cars have no kick panel
vents since the vents are a part of
the air conditioning system. The
lever beside each instrument panel
Page 30 of 88
Downloaded from www.Manualslib.com manuals search engine "
Selector (Upper Lever)
This lever provides a selection of
systems available to handle various
heating and cooling requirements
throughout the year. The positions
of the Selector lever are separated
into four (4) major operational
groups
"Off", IIAir Conditioning",
IIVent" and IIHeating". The "Air
Conditioning" and IIHeating"
groups have several positions which
improve the effectiveness of
the
system for various demands.
Fan
The fan lever has four (4) posi
tions from Lo at the top to High at
the bottom. Blower speed
is auto
matically maintained when the
ignition switch
is in the "ON" posi
tion, regardless of the position of
the selector lever. The blower re
mains
ON with the Selector lever
in the
OFF position and the igni
tion switch
ON in order to purge moisture
from the evaporator core
and distributor ducts, thereby help
ing to prevent inadvertent flash
fogging of the windows when the
system
is turned on.
Selector Lever Operation
uOFF" -Shuts the entire system off
but blower automatically remains
operative.
uMAX"-Air from the passenger
compartment is recirculated
through the system and discharged
from the upper outlets when the
temperature lever
is in "Max." cold.
(If the liTem perature" lever is
moved warmer, the system will
automatically
go on outside air.)
The
IIMax." position is used when
maximum cooling
is required under
conditions of high temperature and
humidity.
uNORMAL" -Outside air is passed
through the system and discharged
through the
Ale outlets. This posi-
27
tion is recommended for most air
conditioning situations because of
reduced blower noise and reduction
of cigarette smoke within the
ve
hicle.
uBI-LEVEL"-Outside air is passed
through the system and discharged
from both the upper and lower out
lets. This position
is recommended
for sunny cooler weather where
warm air
is required on the feet
with cooler air above to provide
comfortable breath level. Temper
ature may be adjusted
as desired.
(<> BI-Level position)
NOTE: This position will clear
fogged windows rapidly due to the
dehumidifying effect of the cooling
coils when the outside temperature
is above 30°F.
UVENT" -Air flow and tempera
ture control are the same
as "BI
Level"
except that the compressor
Page 36 of 88
Downloaded from www.Manualslib.com manuals search engine SAFETY CHECKS
Your Camaro not only conforms to all U.S. Fed
eral Motor Vehicle
Safety Standards applicable at
time of manufacture, but also incorporates other im
portant General Motors safety features. Even with
these safety features, however, continued safe and
dependable operation depends greatly upon regular
vehicle maintenance.
This section discusses the various components and
systems of your vehicle that should be checked regu-
CHECK OFF EACH ITEM UNDER MIlEAGE AS SERVICE IS PERFORMED. Brakes and Power Steering -Check all lines and hoses. Check condition of brake linings and parking brake adjustment. Chassis lube and check all fluid levels,· Check condition of front and rear suspension and steerine system. Exhaust System -Check condition of system and underbody. Tires and Wheels-Check condition. (Check tire pressure at least monthly.) Engine -Change oil.· Check condition 01 all belts. -Replace oil filter (at 1st oil change and tllen every 2nd chanie). -Check air cleaner every 12,000 miles; replace every 24,000 miles. .-Replace PCV valve. -Service exhaust emission control systems (see Owner's Manual). -Change toolanl every Iwo years. Throttle linkage -Check operation and condition . Headlights -Aim. Transmission (Automatic)-Change fluid and service filter. 0 ,', III · 0
33
larly to help maintain continued safe and dependable
vehicle operation.
Some checks should be made by
your dealer or service station, and can be done con
veniently while your vehicle
is in the shop for other
regular maintenance services.
Other checks can be
made easily by owners.
CHECKS TO BE PERFORMED BY YOUR
DEALER OR SERVICE STATION
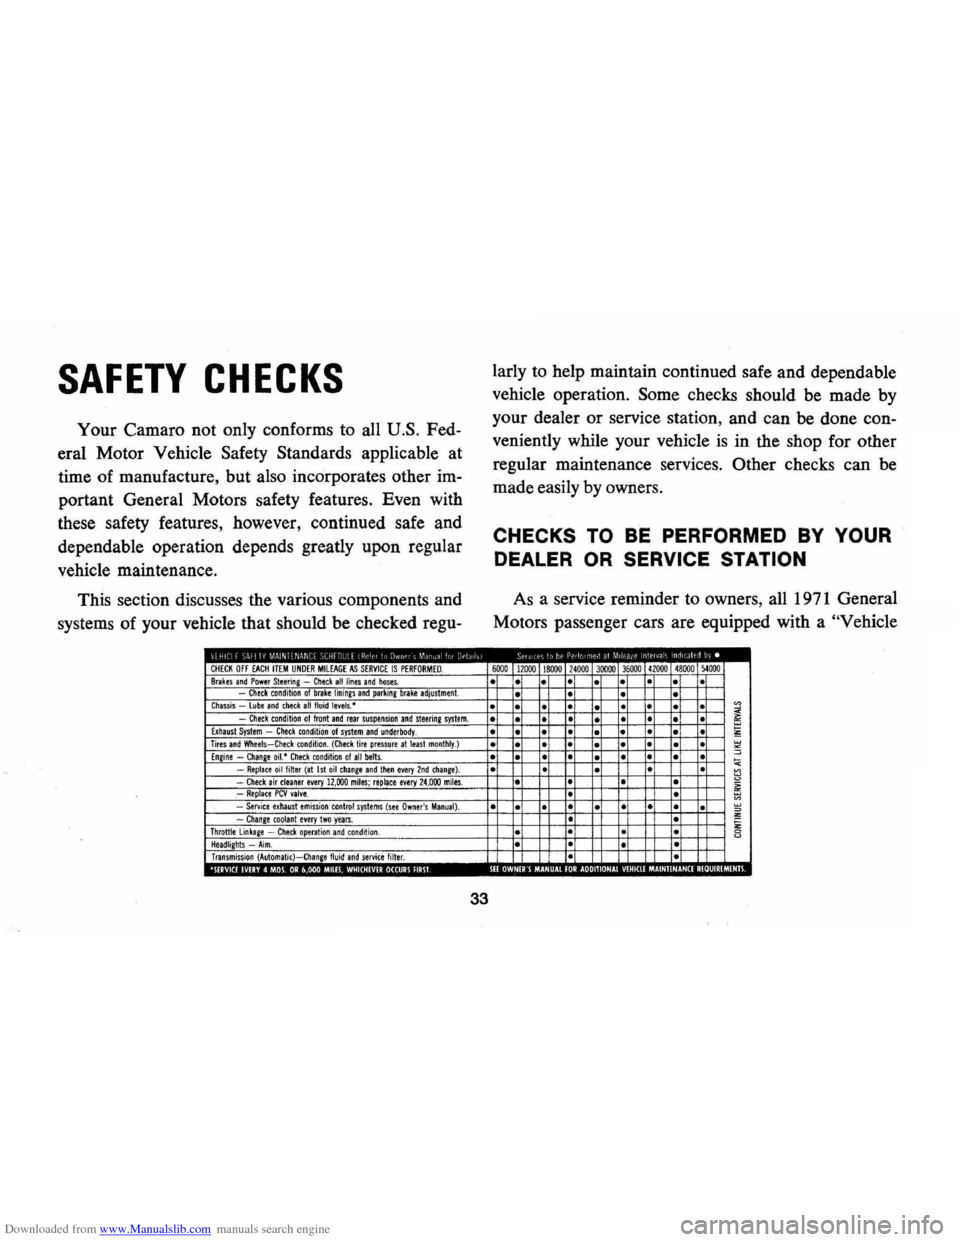
As a service reminder to owners, all 1971 General
Motors passenger cars are equipped with a
"Vehicle
6000 12000 18000 24000 30000 36000 41000 48000 )4000
• •
• •
• • • •
• • •
• •
• • • • • • •
• • • • • • • • • • •
• • • •
• • •
• •
• • • •
• • • • • • •
• • • • •
• •
• •
• • •
• •
• • • • •
• • • • • •
•
• • •
· • · •
• • • • •
• 0 o· 00 0 ·
0
Page 37 of 88
Downloaded from www.Manualslib.com manuals search engine Safety Maintenance Schedule" on the inside of the
glove box door
as illustrated.
The schedule lists the various safety checks to be
performed at regularly scheduled intervals,
as well
as some of the other important vehicle maintenance
requirements. You are urged to check
off each item
on the schedule after the operation has been per
formed. Following are further details on the safety
check items:
Checks To Be Made At Oil Change Intervals
(4 months or 6,000 miles, whichever comes
first)
• Brake Lines and Hoses -Check for proper at
tachments, leaks, cracks, chafing, deterioration,
etc. Any questionable parts noted should be re
placed or repaired immediately.
• Fluid Levels-Check level of fluid in brake master
cylinder, power steering pump, radiator, engine,
axle and transmission. Any significant
loss could
mean that a malfunction
is developing in the sys
tem and corrective action should be taken imme
diately.
On cars with disc brakes, a low fluid level
in the front brake master cylinder reservoir could
34
also be an indicator that disc brake pads need
replacing.
• Front and Rear Suspension and Steering Sys
tem-Check for damaged or missing parts, or parts
showing visible signs of excessive wear or lack of
lubrication. Questionable parts should be replaced
by a qualified mechanic without delay.
• Exhaust System -Check complete exhaust sys
tem and nearby body areas and trunk lid for
broken, damaged, missing or mispositioned parts,
open seams, holes, loose connections
or other de
terioration which could permit exhaust fumes to
seep into the trunk or passenger compartment. Any
defects should be corrected immediately. To help
insure continued integrity, exhaust system pipes
rearward of the
muffler must be replaced whenever
a new
muffler is installed.
• Tires and Wheels -Check tires for excessive
wear, nails, cuts or other damage. Make certain
wheels are not bent
~nd wheel nuts are tight. Un
even or abnormal tire wear may indicate the need
for alignment service. Check tire inflation pressure
at least monthly, or more often
if daily visual
inspection indicates the need.
Page 40 of 88

Downloaded from www.Manualslib.com manuals search engine lights, turn signals, backup lamps, and hazard
warning flashers. Have someone observe operation
of each light while you activate the controls.
• Starter Safety Switch (Automatic Transmis
sion Cars)
CAUTION: Before making the following check, be sure to have a clear distance ahead and behind the car, set the parking brake and firmly apply the foot brake. Do not depress accelerator pedal. Be prepared to turn ott ignition switch immediately if engine should start.
Check starter safety switch by placing the transmis
sion in each of the driving gears while attempting to
start the engine. The starter should operate only in the
Park ("P") or Neutral ("N") positions.
• Starter Interlock (Manual Transmission Cars)
-To check a manual transmission equipped car,
depress the clutch halfway, place the transmission
in neutral, and attempt to start.
The starter should
operate only when clutch
is fully depressed.
• Transmission Shift Indicator-Check to be sure
shift indicator accurately indicates the shift posi
tion selected.
• Horn-Blow the horn occasionally to be sure that
it works.
37
• Seat Back LatcheS-Check to see that seat bac k
latches are holding by pulling forward on the seat
back top.
• Rearview Mirrors and Sun Visors-Check that
friction joints are properly adjusted so mirrors and
sun visors stay in the selected position.
• Door LatcheS-Check for positive closing, la tch
ing and locking.
• Hood Latches-Check to make sure hood closes
firmly . Check also for broken , d amaged or missing
parts which might prevent secure latching.
• Fluid LeakS-Check for fuel, water, oil or other
fluid leaks by observing the ground beneath the
vehicle after it has been parked for a while . (Water
dripping from air conditioning system after use
is
normal). If gasoline fumes are noticed at any time,
the cause should be determined
and corrected with
out delay because of the possibility of fire.
• Exhaust System-See engine exhaust gas caution
at beginning of starting and operating section of
this manual for suggested driver observations and
checks.