1965 CHEVROLET CORVAIR stop start
[x] Cancel search: stop startPage 5 of 56
Downloaded from www.Manualslib.com manuals search engine OPERATING INSTRUCTIONS
Sound design and precIsion manufacturing methods
will permit you to operate your new Corvair without
adhering to a formal "break-in" schedule. However,
during the first few hundred miles of driving you can,
by observing a few simple precautions, add to the future
performance and economy of your car.
It is recommended that your speed during the first
500 miles be confined to a maximum of 60 MPH, but
do not drive for extended periods at anyone constant
speed, either fast or slow. During this period, avoid full
Proper maintenance and wise operation will com
bine to help you achieve maximum fuel economy with
your Corvair. Your Authorized Chevrolet Dealer can
properly tune and maintain your car but wise operation
is your responsibility. Give the car sufficient warm-up
throttle starts and unnecessary, quick abrupt stops.
Gentle braking during the first few hundred miles of
operation will result in longer brake life and better
future performance. Avoid unnecessary, hard stops espe
cially during the first 200 miles of operation since brake
misuse during this period will destroy much future brake
efficiency.
Always drive at a moderate speed until the engine
has completely warmed up.
time, do not make "Full Throttle" starts or unnecessary
skidding stops, and drive at reasonable speeds and as
steady as traffic permits to gain the benefits of all the
economy built into your Corvair.
CAUTION: Carbon monoxide is a poisonous gas produced by the engine of any car. It is odor
less,
so you cannot detect its presence. Be safe. Never start or run engine in a closed garage,
and do not sit in a parked car with engine running unless windows are open.
2
Page 7 of 56
Downloaded from www.Manualslib.com manuals search engine WARM-UP
Never race engine or drive at high speeds until
engine has had a chance to warm up. Driving with
moderate accelerator pedal application will prevent
stalling and hesitation, especially during cold weather.
Failure to allow sufficient warm up time can cause un
necessary wear to engine, axle or transmission parts
because of inadequate lubrication.
The three-speed and optional four-speed trans
missions
are operated in basically the same manner. Shift
patterns differ, of course, as illustrated in the two
illustrations on
page 5.
1 st GEAR (LOW)-Depress clutch pedal, shift into 1 st
gear, slowly release clutch pedal while pressing on
accelerator. As car gains speed, depress clutch pedal,
release accelerator and move gearshift into 2nd gear.
2nd GEAR-Release clutch pedal and depress accelerator
gearshift lever into 3rd gear.
3rd GEAR (HIGH)-Slowly release clutch pedal and de
press accelerator pedal. This is the cruising gear for
all normal driving with the 3-speed transmission.
With the
4-speed transmission 3rd gear will provide
more response
and higher performance for driving
in heavy traffic.
4th
GEAR (HIGH-4-speed transmission only)
Shift into 4th gear in the same manner for normal
cruising with the 4-speed transmission.
NOTE: Whenever the vehicle begins to labor in
any gear, depress the clutch pedal and shift to
the next lower gear.
;. TO STOP-Release the accelerator and depress the
brake pedal. As car slows down, depress the clutch
pedal and move the gearshift lever into neutral.
NEUTRAL-For use when starting or idling engine.
REVERSE-Operate as for 1 st gear but always at a
slow speed.
Page 9 of 56
Downloaded from www.Manualslib.com manuals search engine more economical cruising gear in the shortest possible
time. Hard acceleration for fast starts will cause the trans
mission to remain in low gear for a considerably longer
period.
When driving at speeds below 45 mph, the transmis
sion may be shifted back into low range for extra acceler
ation for passing by depressing the accelerator pedal
fully. The transmission will automatically shift back into cruising
gear when the accelerator pedal is momentarily
released.
PUSHING TO START
• Turn off all
electrical loads such as radio, heater and,
if possible, lights until the engine starts.
• Turn on key and move selector lever to neutral. At
20 to 25 mph move lever to l.
• When engine starts, move selector lever to D.
NOTE: Never tow to start.
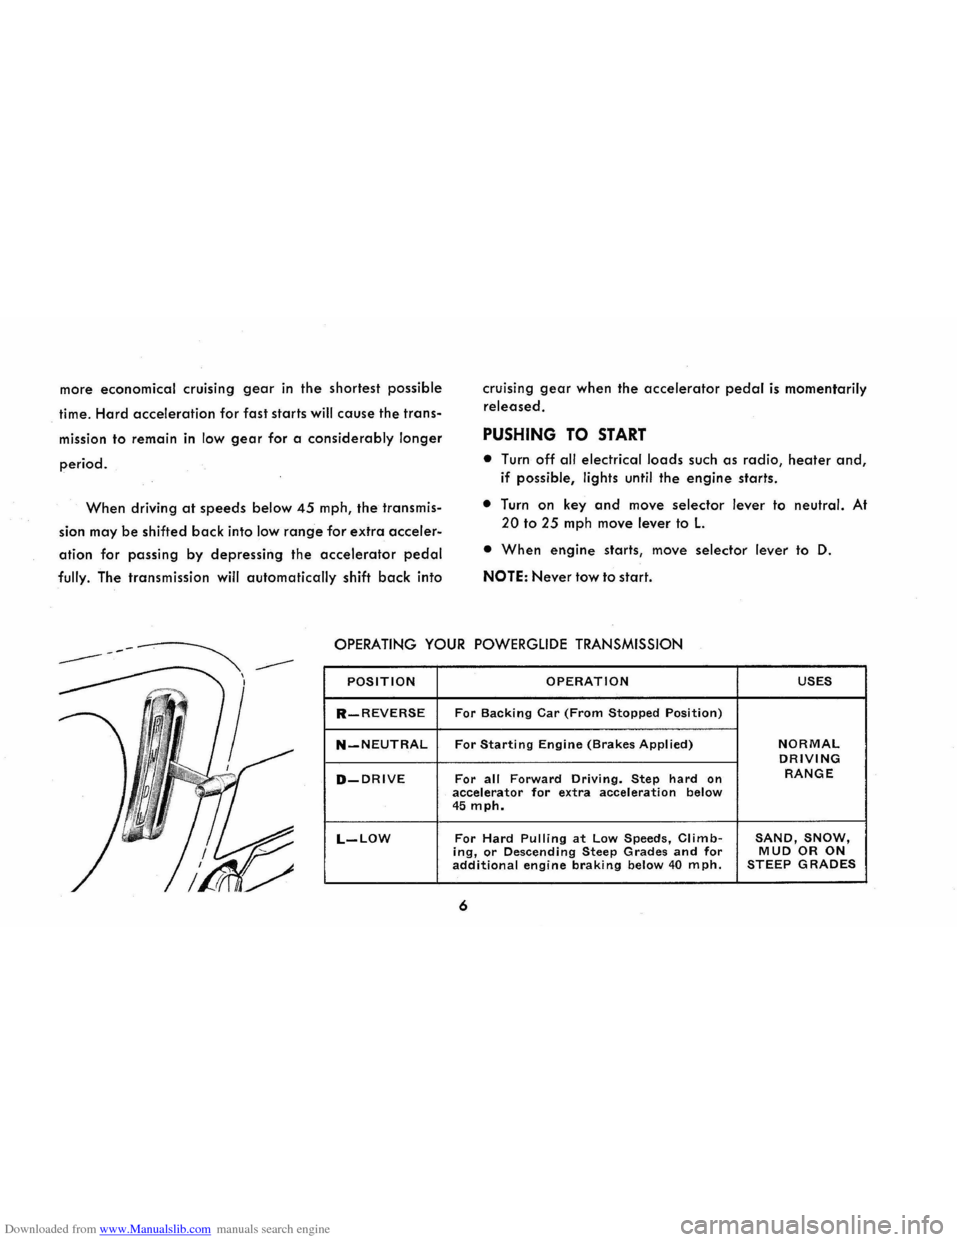
OPERATING YOUR POWERGLIDE TRANSMISSION
POSITION OPERATION USES
R-REVERSE For Backing Car (From Stopped Position)
N-NEUTRAL For Starting Engine (Brakes Applied) NORMAL DRIVING
D-DRIVE For all Forward Driving. Step hard on RANGE
accelerator for extra acceleration below 45 mph.
L-LOW For Hard Pulling at Low Speeds, Climb-SAND, SNOW, ing, or Descending Steep Grades and for MUD OR ON additional engine braking below 40 mph. STEEP GRADES
6
Page 10 of 56
Downloaded from www.Manualslib.com manuals search engine TOWING
• Place selector lever in neutral.
• If transmission or axle are malfunctioning, tow with
rear wheels raised.
• When towing any vehicle on its front wheels, the
steering wheel should be secured to maintain a
straight forward position .
• Never tow faster than 50 mph.
ROCKING CAR
When stuck in mud, sand or snow, you may rock
the car by depressing the accelerator slightly and shift
ing the selector lever between Rand D. Avoid excessive
engine speed while performing this operation.
PARKING CAR
It is important that when your Corvair is parked the
parking brake be fully engaged. Do not count on the
transmission to hold the car. Always engage the parking
brake when parked.
POWERGLIDE DRIVING CAUTIONS
• Always engage parking brake when parked.
• Do not accelerate engine in L, 0, or R with
the brakes engaged. This can cause damage
by overheating transmission.
• Do not hold car on an upgrade by accelerat
ing engine. Use brakes.
• Use low position for hard pulls at low
speed, climbing or descending steep grades
and for push starting.
• Always stop car before shifting to reverse.
DRIVING WITH POSITRACTION REAR AXLE
The Positraction rear axle gives you constant driv
ing force on both r~ar wheels; especially helpful in the
winter and during other slippery driving conditions.
In normal use, light throttle application will supply
7
maximum traction. When starting with one rear wheel
on an excessively slippery surface, slight application of
the parking brake may be necessary to gain maximum
traction.
Page 12 of 56
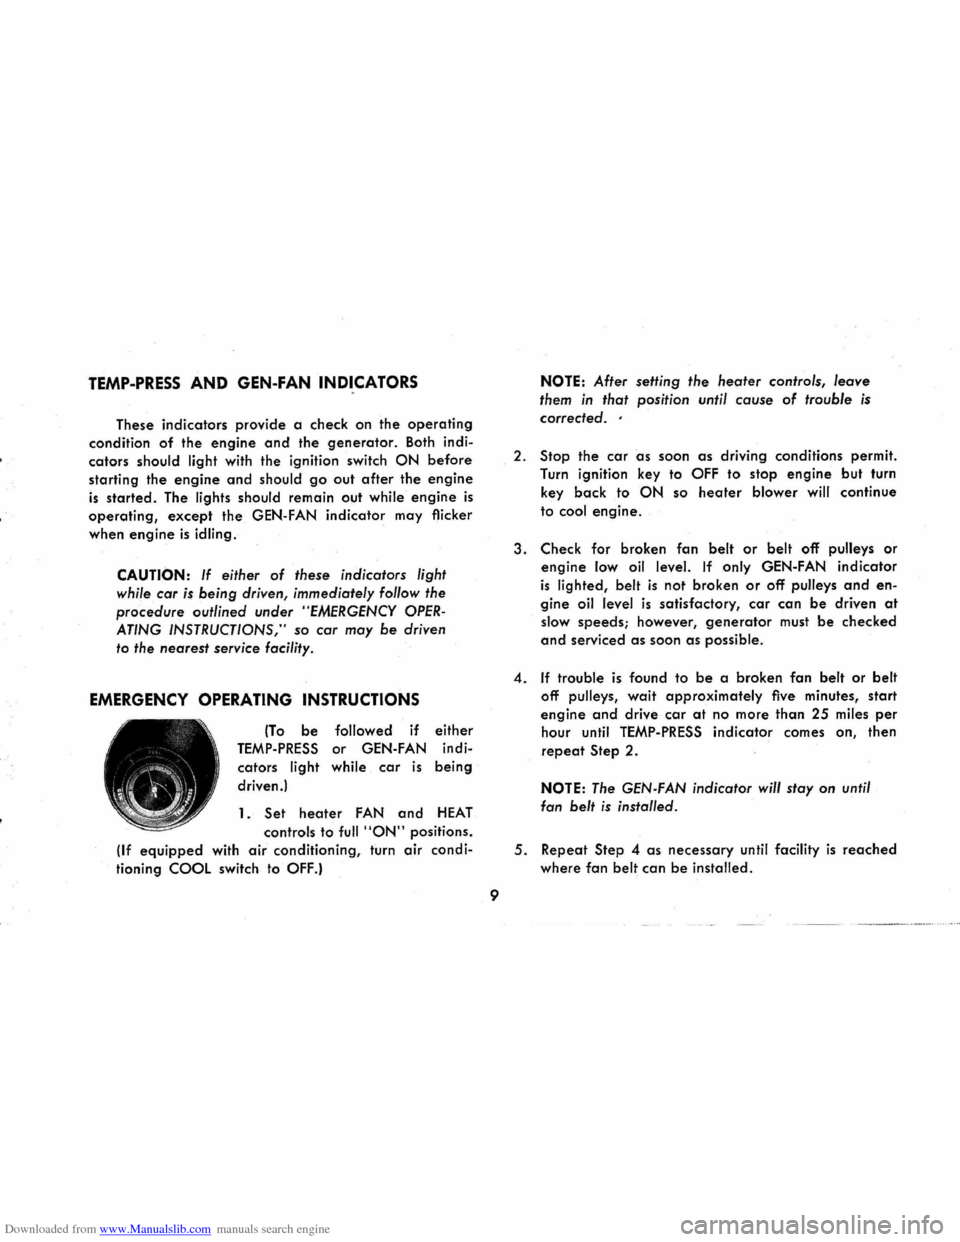
Downloaded from www.Manualslib.com manuals search engine TEMP-PRESS AND GEN-FAN INDICATORS
These indicators provide a check on the operating
condition of the engine and the generator. Both indi
cators should light with the ignition switch ON before
starting the engine and should go out after the engine
is started. The lights should remain out while engine is
operating, except the GEN-FAN indicator may flicker
when
engine is idling.
CAUTION: If either of these indicators light
while car is
being driven, immediately follow the
procedure outlined under "EMERGENCY OPER
ATING INSTRUCTIONS," so car may be driven
to
the nearest service facility.
EMERGENCY OPERATING INSTRUCTIONS
(To be followed if either
TEMP-PRESS or GEN-FAN indi
cators light while car is being
driven.)
1.
Set heater FAN and HEAT
controls to full "ON" positions.
(If
equipped with air conditioning, turn air condi
tioning COOL switch to OFF.)
9
NOTE: After setting the heater controls, leave
them in that position until cause of trouble is
corrected ..
2. Stop the car as soon as driving conditions permit.
Turn ignition key to
OFF to stop engine but turn
key
back to ON so heater blower will continue
to cool engine.
3. Check for broken fan belt or belt off pulleys or
engine low oil level. If only GEN-FAN indicator
is lighted, belt is not broken or off pulleys and en
gine oil level is satisfactory, car can be driven at
slow speeds; however, generator must be checked
and serviced as soon as possible.
4. If trouble is found to be a broken fan belt or belt
off pulleys, wait approximately five minutes, start
engine and drive car at no more than 25 miles per
hour until TEMP-PRESS indicator comes on, then
repeat Step 2.
NOTE: The GEN-FAN indicator will stay on until
fan
belt is installed .
5. Repeat Step 4 as necessary until facility is reached
where fan belt can be installed.
Page 36 of 56
Downloaded from www.Manualslib.com manuals search engine you use an oil which, according to the label on the can
is (1) intended for service MS and (2) passes car makers'
tests or meets General Motors Standard GM 4745-M .
Oils conforming to these types contain detergent addi
tives. Your serviceman will be pleased to assist you in
selecting the proper oil for your car.
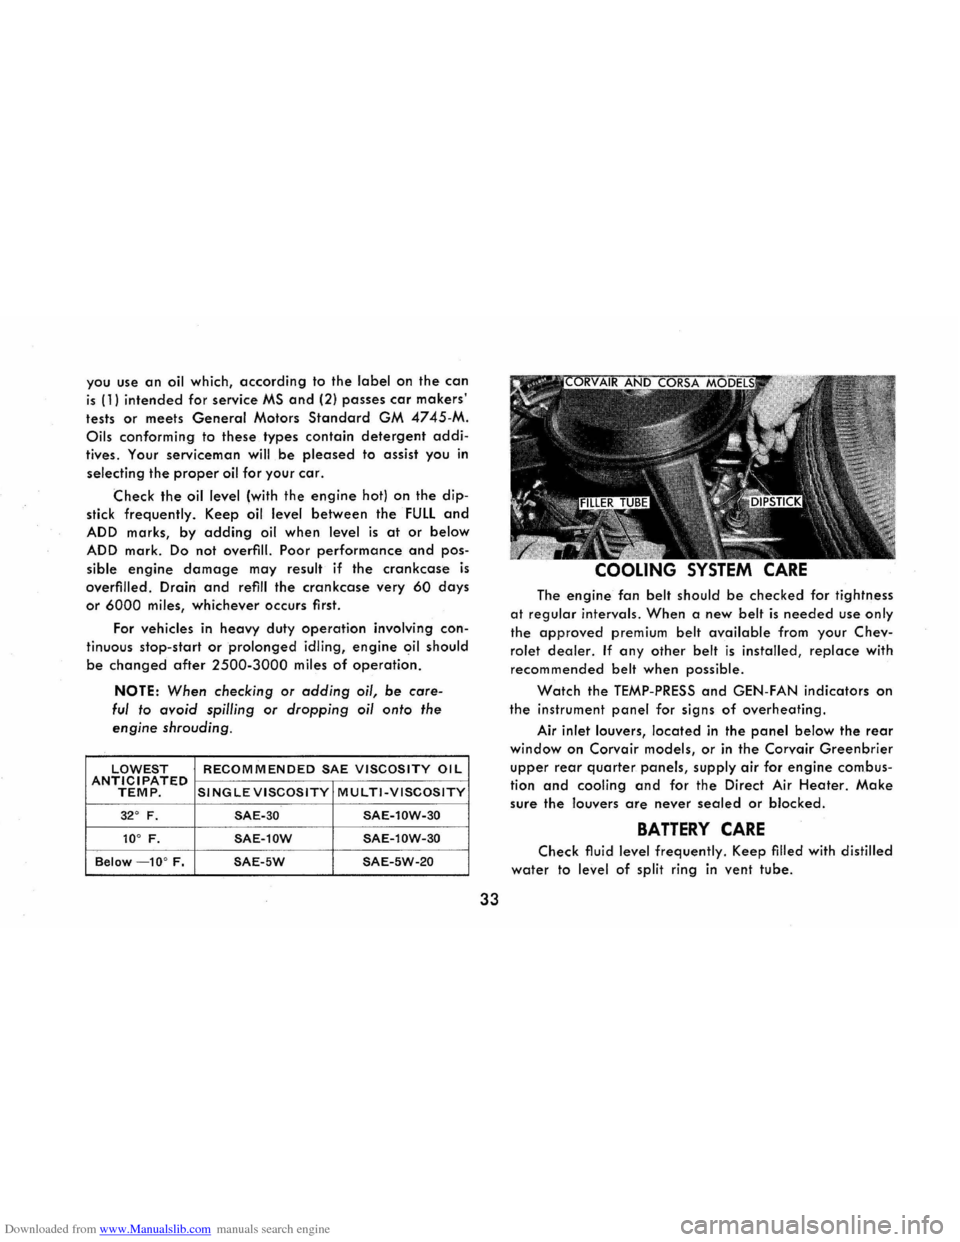
Check the oil level (with the engine hot) on the dip
stick frequently. Keep oil level between the FULL and
ADD marks, by adding oil when level is at or below
ADD mark. Do not overfill. Poor performance and pos
sible engine damage may result if the crankcase is
overfilled. Drain and refill the crankcase very 60 days
or 6000 miles, whichever occurs first.
For vehicles
in heavy duty operation involving con
tinuous stop-
start or prolonged idling, engine oil should
be changed after 2500-3000 miles of operation.
NOTE: When checking or adding oil, be care
ful to avoid spilling or dropping oil onto the
engine shrouding.
LOWEST RECOMMENDED SAE VISCOSITY OIL ANTICIPATED TEMP. SINGLE VISCOSITY MULTI-VISCOSITY
32° F. SAE-30 SAE-l0W-30
10° F. SAE-l0W SAE-l0W-30
Below -10° F. SAE-5W SAE-5W-20
33
COOLING SYSTEM CARE
The engine fan belt should be checked for tightness
at regular intervals. When a new belt is needed use only
the approved premium belt available from your Chev
rolet dealer. If any other belt is installed, replace with
recommended belt when possible .
Watch the TEMP-PRESS and GEN-FAN indicators on
the instrument panel for signs of overheating.
Air inlet louvers, located in the panel below the rear
window on Corvair models, or in the Corvair Greenbrier
upper rear quarter panels, supply air for engine combus
tion
and cooling and for the Direct Air Heater. Make
sure the louvers are never sealed or blocked.
BATTERY CARE
Check fluid level frequently. Keep filled with distilled
water to level of split ring in vent tube.
Page 37 of 56
Downloaded from www.Manualslib.com manuals search engine TIRE CARE
Keep your tires inflated to the recommended pres
sures.
Over-inflation can adversely affect riding comfort,
quietness and tire life while under-inflation affects vehicle
handling and tire life.
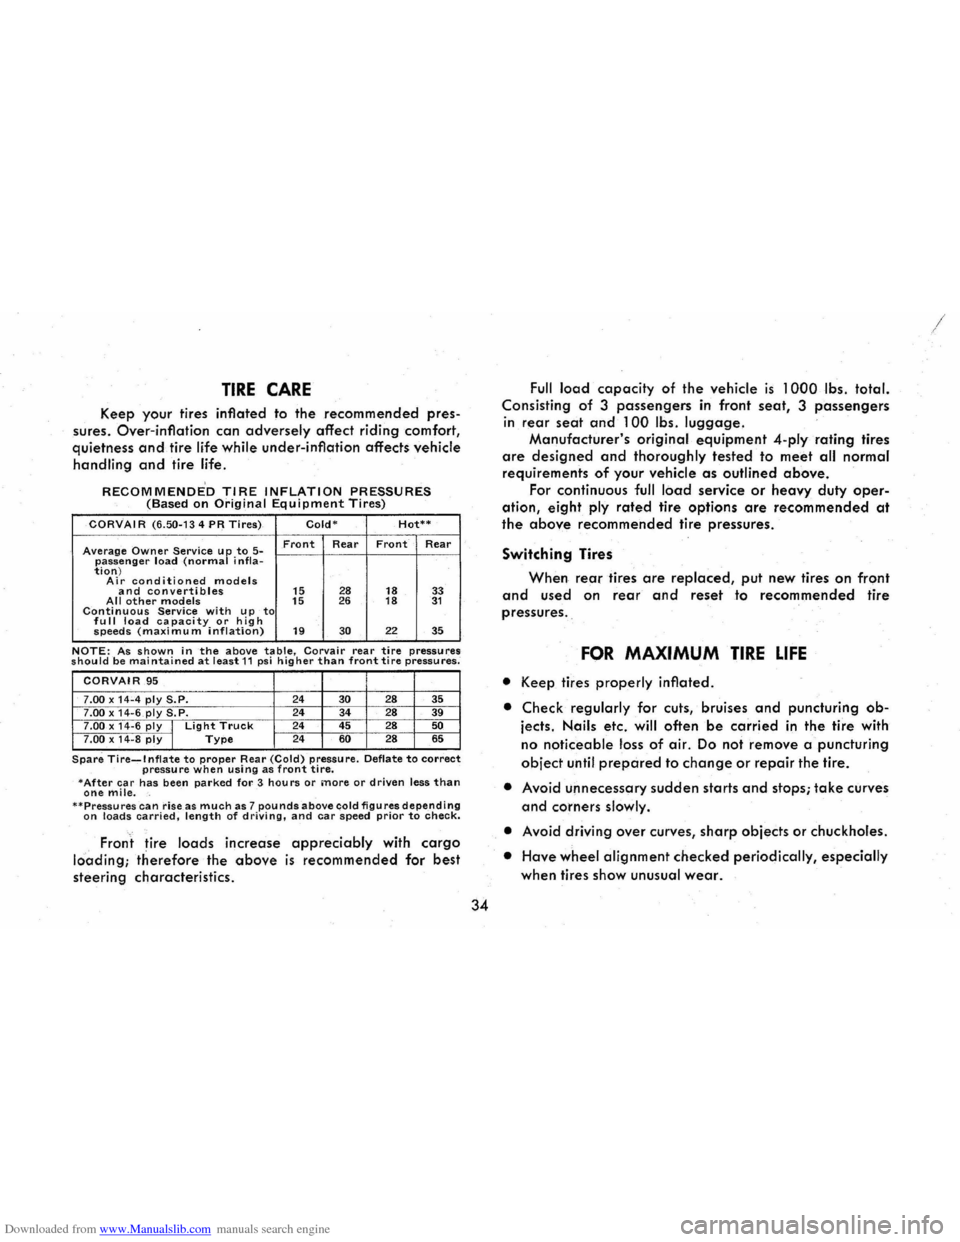
RECOMMENDED TIRE INFLATION PRESSURES (Based on Original Equipment Tires)
CORVAIR (6.50-134 PR Tires) Cold-Hot**
Average Owner Service up to 5-Front Rear Front Rear
passenger load (normal i nfla-tion) Air conditioned models and convertibles 15 28 18 33 All other models 15 26 18 31 Continuous Service with up to fu II load ca pacity or h ig h speeds (maximu m inflation) 19 30 22 35
NOTE: As shown in the above table, Corvair rear tire pressures should be maintained at least 11 psi higher than front tire pressures;
CORVAIR .95
7.00 x 14"4 ply S.P. 24 30 28 35 7.00 x 14-6 ply S.P. 24
34 28 39 7.00 x 14-6 ply I Light Truck 24
45 28 50
7 .00 x 14 -8 ply I Type 24 60 28 65
Spare Tire...,.lnflate to proper Rear (Cold) pressure. Deflate to correct pressure when using as front tire. -After car has been parked for 3 hours or more or driven less than one mile. --Pressures can riseas much as 7 pounds above cold figures depending on loads carried, length of driving, and car speed prior to check.
, Fron t tire loads increase appreciably with cargo
lci'ading; therefore the above is recommended for best
steering characteristics.
34
Full load capacity of the vehicle is 1 OOOlbs. total.
Consisting of 3 passengers in front seat, 3 passengers
in
rear seat and 100 Ibs . luggage.
Manufacturer's original equipment 4-plyrating tires
are designed and thoroughly tested to meet all normal
requirements of your vehicle as outlined above.
For continuous full load service or heavy duty oper
ation, eight ply rated tire options are recommended at
the above recommended tire pressures.
Switching Tires
When rear tires are replaced, put new tires on front
and used on rear and reset to recommended tire
pressures. ,
FOR MAXIMUM TIRE LIFE
• Ke.ep tires properly inflated.
• Check regularly for cuts, bruises and puncturing ob
jects. Nails etc. will often be carried in the tire with
no noticeable loss of air. Do not remove a puncturing
object until prepared to change or repair the tire.
• Avoid unnecessary sudden starts and stops; take curves
and corners slowly.
•
Avoid driving over curves, sharp objects or chuckholes.
•
Have wheel alignment checked periodically, especially
when tires show unusual wear.