1965 CHEVROLET CORVAIR manual transmission
[x] Cancel search: manual transmissionPage 6 of 56
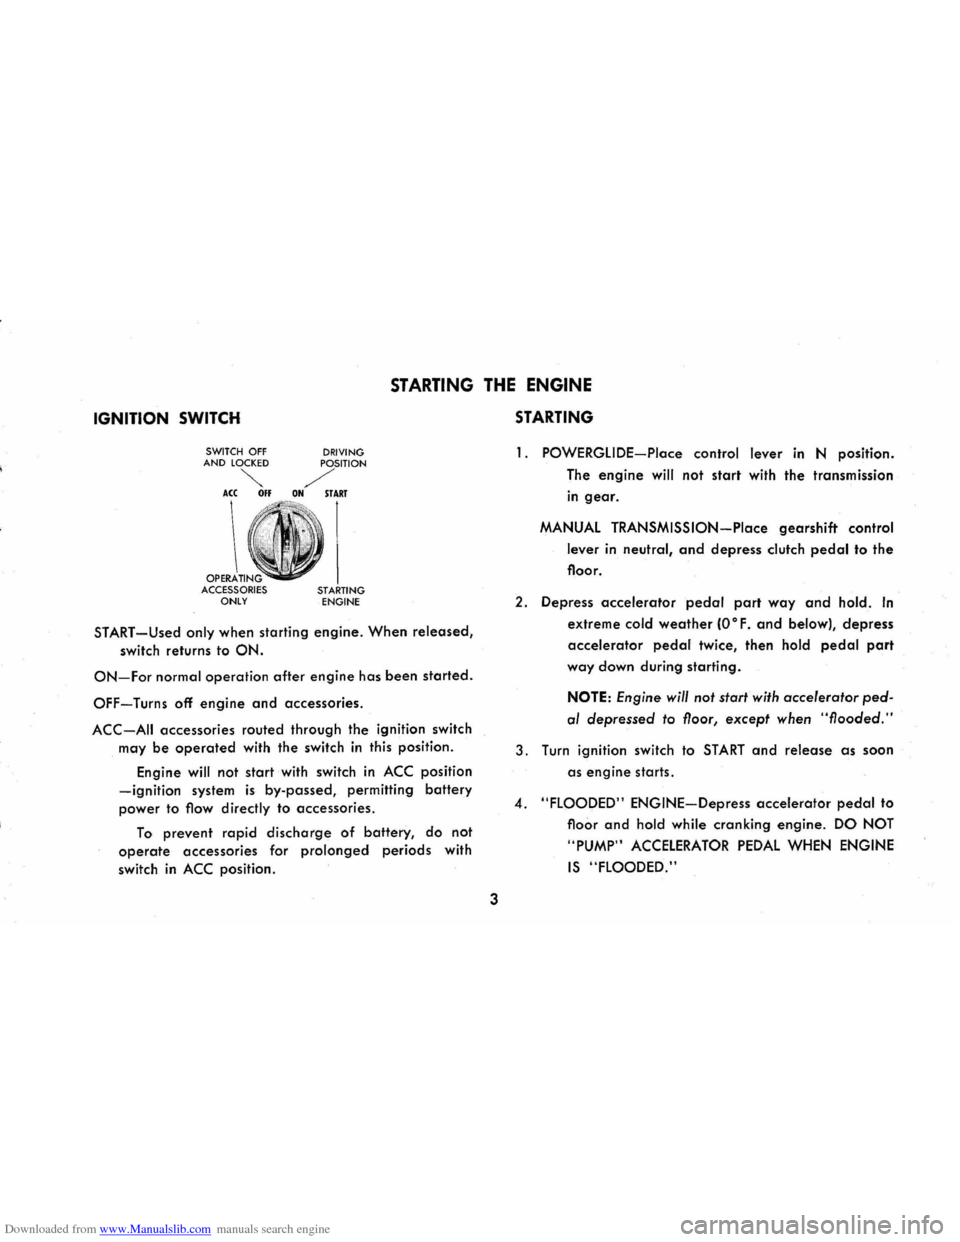
Downloaded from www.Manualslib.com manuals search engine IGNITION SWITCH
STARTING THE ENGINE
STARTING
SWITCH OFF AND LOCKED
~ ACC 011
OPERATI ACCESSORIES ONLY
DRIVING
POSITION
/' ON START
STARTING ENGINE
START -Used only when starting engine. When released,
switch returns to ON.
ON-For normal operation after engine has been started.
OFF-Turns off engine and accessories.
ACC-AII accessories routed through the ignition switch
may
be operated with the switch in this position.
Engine
will not start with switch in ACC position
-ignition system is by-passed, permitting battery
power to flow directly to accessories .
To prevent rapid discharge of battery, do not
operate accessories for prolonged periods with
switch
in ACC position.
3
1. POWERGLIDE-Place control lever in N position.
The
engine will not start with the transmission
in gear.
MANUAL TRANSMISSION-Place gearshift control
lever
in neutral, and depress clutch pedal to the
floor.
2. Depress
accelerator pedal part way and hold. In'
extreme cold weather (O°F. and below), depress
accelerator pedal twice, then hold pedal part
way down during starting.
NOTE:
Engine will not start with accelerator ped
al depressed to floor, except when "flooded."
3. Turn ignition switch to START and release as soon
as engine starts.
4. "FLOODED" ENGINE-Depress accelerator pedal to
floor and hold while cranking engine. DO NOT
"PUMP"
ACCELERATOR PEDAL WHEN ENGINE
IS "FLOODED."
Page 7 of 56
Downloaded from www.Manualslib.com manuals search engine WARM-UP
Never race engine or drive at high speeds until
engine has had a chance to warm up. Driving with
moderate accelerator pedal application will prevent
stalling and hesitation, especially during cold weather.
Failure to allow sufficient warm up time can cause un
necessary wear to engine, axle or transmission parts
because of inadequate lubrication.
The three-speed and optional four-speed trans
missions
are operated in basically the same manner. Shift
patterns differ, of course, as illustrated in the two
illustrations on
page 5.
1 st GEAR (LOW)-Depress clutch pedal, shift into 1 st
gear, slowly release clutch pedal while pressing on
accelerator. As car gains speed, depress clutch pedal,
release accelerator and move gearshift into 2nd gear.
2nd GEAR-Release clutch pedal and depress accelerator
gearshift lever into 3rd gear.
3rd GEAR (HIGH)-Slowly release clutch pedal and de
press accelerator pedal. This is the cruising gear for
all normal driving with the 3-speed transmission.
With the
4-speed transmission 3rd gear will provide
more response
and higher performance for driving
in heavy traffic.
4th
GEAR (HIGH-4-speed transmission only)
Shift into 4th gear in the same manner for normal
cruising with the 4-speed transmission.
NOTE: Whenever the vehicle begins to labor in
any gear, depress the clutch pedal and shift to
the next lower gear.
;. TO STOP-Release the accelerator and depress the
brake pedal. As car slows down, depress the clutch
pedal and move the gearshift lever into neutral.
NEUTRAL-For use when starting or idling engine.
REVERSE-Operate as for 1 st gear but always at a
slow speed.
Page 8 of 56
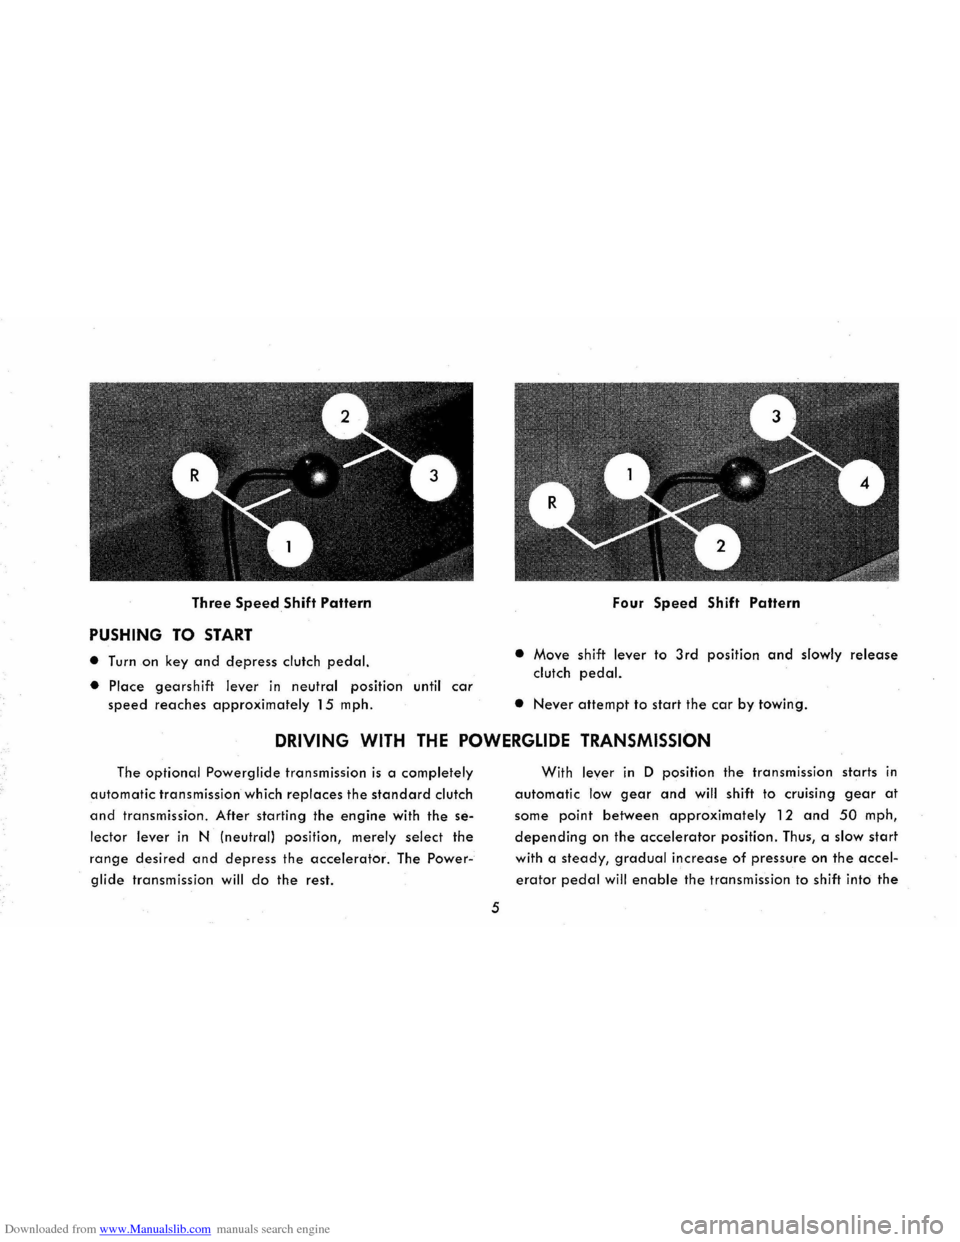
Downloaded from www.Manualslib.com manuals search engine Three Speed Shift Pattern
PUSHING TO START
• Turn on key and depress clutch pedal.
• Place gearshift lever in neutral position until car
speed reaches approximately 15 mph.
Four Speed Shift Pattern
• Move shift lever to 3rd position and slowly release
clutch pedal.
• Never attempt to start the car by towing.
DRIVING WITH THE POWERGLIDE TRANSMISSION
The optional Powerglide transmission is a completely
automatic transmission which replaces the standard clutch
and transmission. After starting the engine with the se
lector lever in N (neutral) position, merely select the
range desired and depress the accelerator. The Power
glide transmission will do the rest.
5
With lever in D position the transmission starts in
automatic low gear and will shift to cruising gear at
some point between approximately 12 and 50 mph,
depending on the accelerator position. Thus, a slow start
with a steady, gradual increase of pressure on the accel
erator pedal will enable the transmission to shift into the
Page 9 of 56
Downloaded from www.Manualslib.com manuals search engine more economical cruising gear in the shortest possible
time. Hard acceleration for fast starts will cause the trans
mission to remain in low gear for a considerably longer
period.
When driving at speeds below 45 mph, the transmis
sion may be shifted back into low range for extra acceler
ation for passing by depressing the accelerator pedal
fully. The transmission will automatically shift back into cruising
gear when the accelerator pedal is momentarily
released.
PUSHING TO START
• Turn off all
electrical loads such as radio, heater and,
if possible, lights until the engine starts.
• Turn on key and move selector lever to neutral. At
20 to 25 mph move lever to l.
• When engine starts, move selector lever to D.
NOTE: Never tow to start.
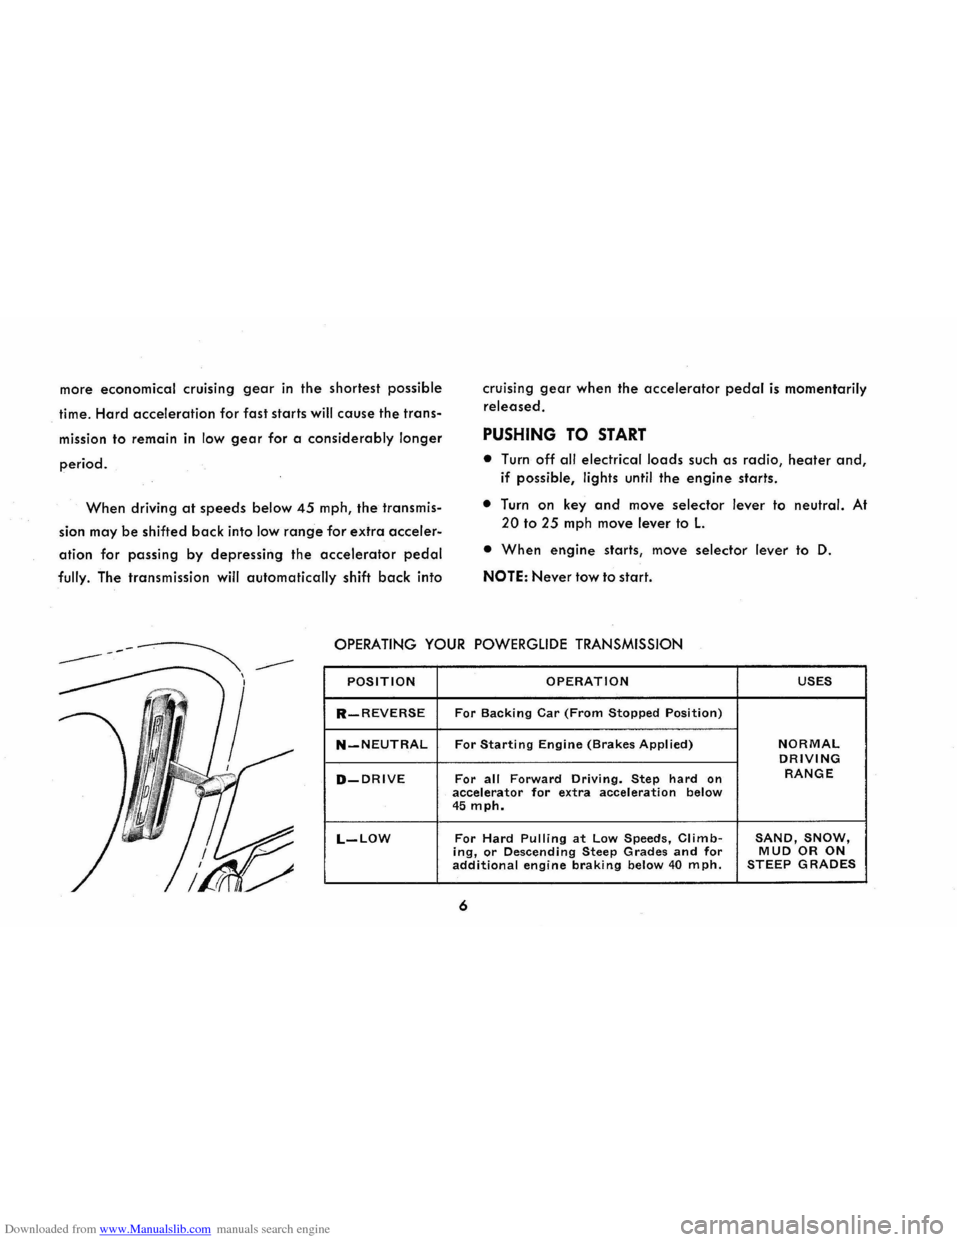
OPERATING YOUR POWERGLIDE TRANSMISSION
POSITION OPERATION USES
R-REVERSE For Backing Car (From Stopped Position)
N-NEUTRAL For Starting Engine (Brakes Applied) NORMAL DRIVING
D-DRIVE For all Forward Driving. Step hard on RANGE
accelerator for extra acceleration below 45 mph.
L-LOW For Hard Pulling at Low Speeds, Climb-SAND, SNOW, ing, or Descending Steep Grades and for MUD OR ON additional engine braking below 40 mph. STEEP GRADES
6
Page 10 of 56
Downloaded from www.Manualslib.com manuals search engine TOWING
• Place selector lever in neutral.
• If transmission or axle are malfunctioning, tow with
rear wheels raised.
• When towing any vehicle on its front wheels, the
steering wheel should be secured to maintain a
straight forward position .
• Never tow faster than 50 mph.
ROCKING CAR
When stuck in mud, sand or snow, you may rock
the car by depressing the accelerator slightly and shift
ing the selector lever between Rand D. Avoid excessive
engine speed while performing this operation.
PARKING CAR
It is important that when your Corvair is parked the
parking brake be fully engaged. Do not count on the
transmission to hold the car. Always engage the parking
brake when parked.
POWERGLIDE DRIVING CAUTIONS
• Always engage parking brake when parked.
• Do not accelerate engine in L, 0, or R with
the brakes engaged. This can cause damage
by overheating transmission.
• Do not hold car on an upgrade by accelerat
ing engine. Use brakes.
• Use low position for hard pulls at low
speed, climbing or descending steep grades
and for push starting.
• Always stop car before shifting to reverse.
DRIVING WITH POSITRACTION REAR AXLE
The Positraction rear axle gives you constant driv
ing force on both r~ar wheels; especially helpful in the
winter and during other slippery driving conditions.
In normal use, light throttle application will supply
7
maximum traction. When starting with one rear wheel
on an excessively slippery surface, slight application of
the parking brake may be necessary to gain maximum
traction.
Page 15 of 56
Downloaded from www.Manualslib.com manuals search engine FOOT CONTROLS
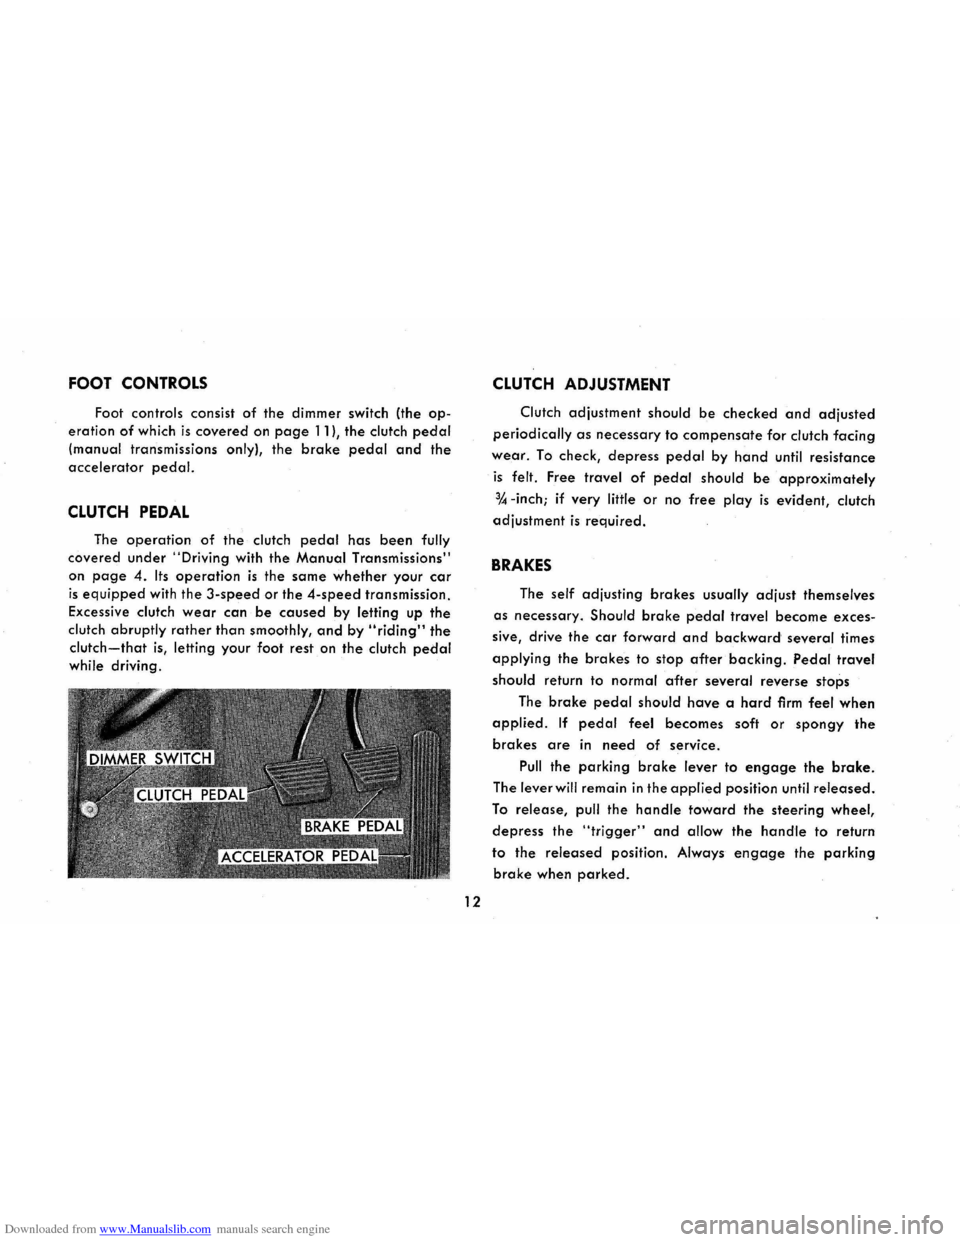
Foot controls consist of the dimmer switch (the op
eration of which is covered on page 11), the clutch pedal
(manual transmissions only), the brake pedal and the
accelerator pedal.
CLUTCH PEDAL
The operation of the clutch pedal has been fully
covered under "Driving with the Manual Transmissions"
on
page 4. Its operation is the same whether your car
is equipped with the 3-speed or the 4-speed transmission.
Excessive clutch
wear can be caused by letting up the
clutch abruptly rather than smoothly, and by "riding" the
clutch-that is, letting your foot rest on the clutch pedal
while driving.
12
CLUTCH ADJUSTMENT
Clutch adjustment should be checked and adjusted
periodically as necessary to compensate for clutch facing
wear. To check, depress pedal by hand until resistance
is felt. Free travel of pedal should be approximately
% -inch; if very little or no free play is evident, clutch
adjustment
is required.
BRAKES
The self adjusting brakes usually adjust themselves
as necessary. Should brake pedal travel become exces
sive, drive
the car forward and backward several times
applying the brakes to stop after backing. Pedal travel
should
return to normal after several reverse stops
The
brake pedal should have a hard firm feel when
applied. If pedal feel becomes soft or spongy the
brakes are in need of service.
Pull the parking brake lever to engage the brake.
The lever will remain in the applied position until released.
To release, pull the handle toward the steering wheel,
depress the "trigger" and allow the handle to return
to the released position. Always engage the parking
brake when parked.
Page 41 of 56
Downloaded from www.Manualslib.com manuals search engine CHASSIS LUBRICANT
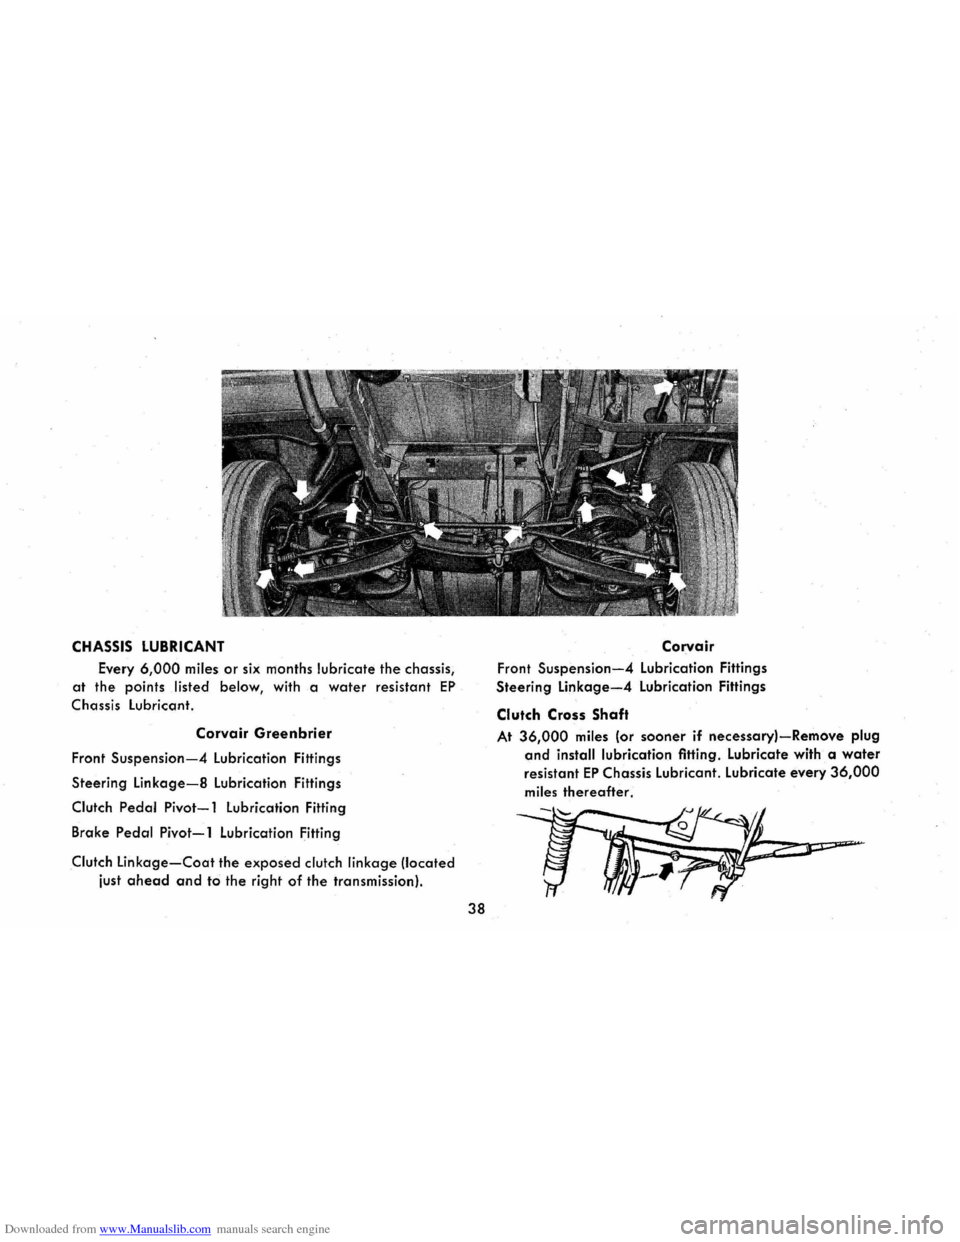
Every 6,000 miles or six months lubricate the chassis,
at the points listed below, with a water resistant EP
Chassis lubricant.
Corvair Greenbrier
Front Suspension-4 lubrication Fittings
Steering
Linkage-8 Lubrication Fittings
Clutch Pedal Pivot-1 Lubrication Fitting
Brake
Pedal Pivot-1 Lubrication Fitting
Clutch Linkage-Coat the exposed clutch linkage !located
iust
ahead and to the right of the transmission}.
38
Cor:vair
Front Suspension-4 lubrication Fittings
Steering
Linkage-4 Lubrication Fittings
Clutch Cross Shaft
At 36,000 miles (or sooner if necessary}-Remove plug
and install lubrication fitting. Lubricate with a water
resistant EP Chassis lubricant. lubricate every 36,000
miles thereafter.
~ ..... o.J .. .~-
--,.
Page 44 of 56
Downloaded from www.Manualslib.com manuals search engine TRANSMISSION-POWERGLIDE
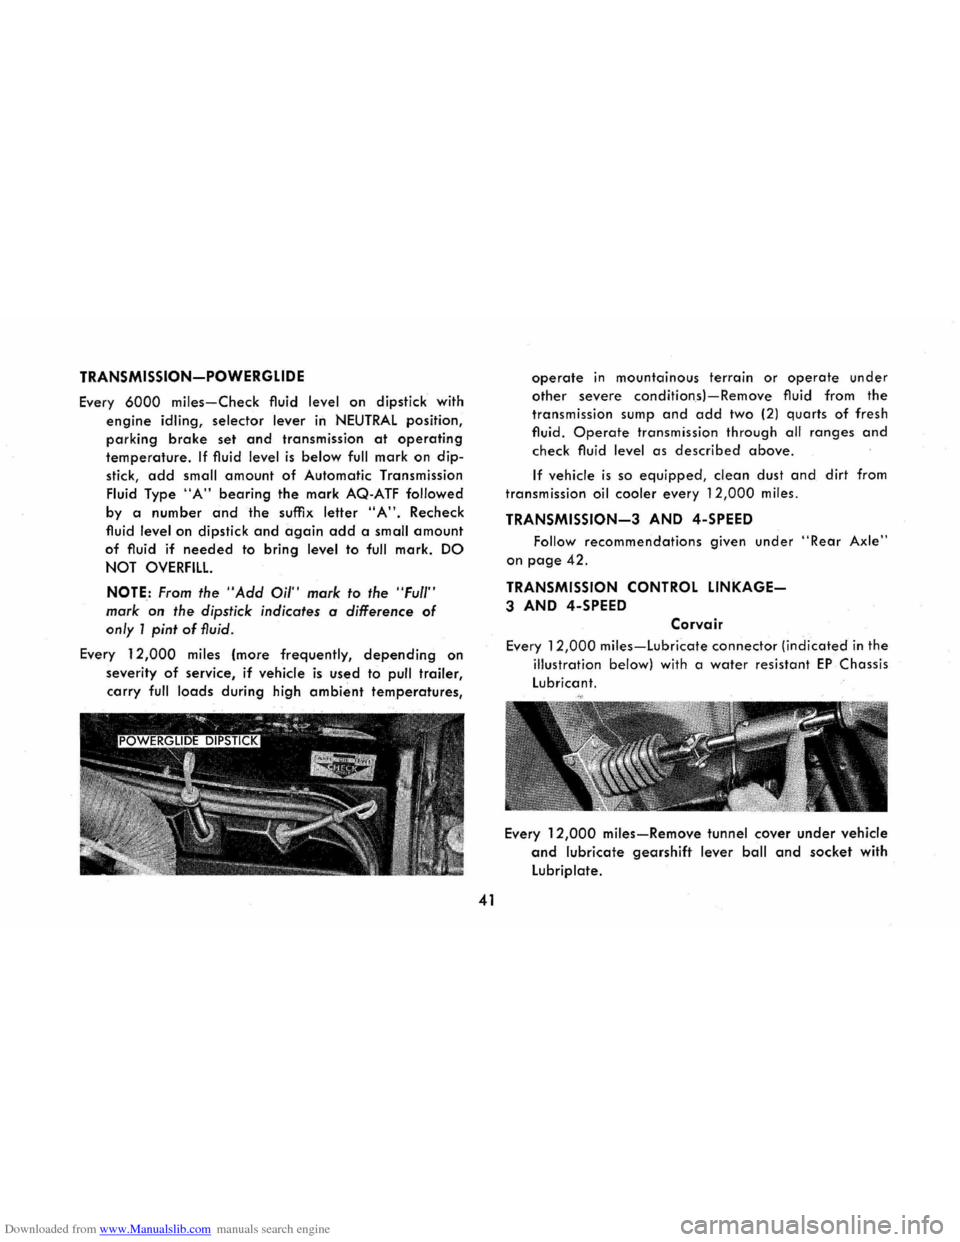
Every 6000 miles-Check fluid level on dipstick with
engine idling, selector lever in NEUTRAL position,
parking brake set and transmission at operating
temperature. If fluid level is below full mark on dip
stick,
add small amount of Automatic Transmission
Fluid Type
"A" bearing the mark AQ-ATF followed
by a
number and the suffix letter "A". Recheck
fluid
level on dipstick and again add a small amount
of fluid if needed to bring level to full mark. DO
NOT
OVERFILL.
NOTE: From the "Add Oil" mark to the "Ful/' ,
mark on the dipstick indicates a difference of
only 1 pint of fluid.
Every 1
2,000 miles (more frequently, depending on
severity of service, if vehicle is used to pull trailer,
carry full loads during high ambient temperatures,
41
operate in mountainous terrain or operate under
other severe condition .sl-Remove fluid from the
transmission sump and add two (2) quarts of fresh
fluid.
Operate transmission through all ranges and
check fluid level as described above.
If vehicle is so equipped, clean dust and dirt from
transmission oil cooler every 12,000 miles.
TRANSMISSION-3 AND 4-SPEED
Follow recommendations given under "Rear Axle"
on page 42.
TRANSMISSION CONTROL LINKAGE-
3 AND 4-SPEED
Corvair
Every 12,000 miles-Lubricate connector (indicated in the
illustration below) with a water resistant EP Chassis
Lubricant.
Every
12,000 miles-Remove tunnel cover under vehicle
and lubricate gearshift lever ball and socket with
Lubriplate.