1965 CHEVROLET CORVAIR oil type
[x] Cancel search: oil typePage 34 of 56
Downloaded from www.Manualslib.com manuals search engine Cleaning White Sidewall Tires
Use soap, warm water or a tire cleaner and a stiff
brush
to remove road grime and dirt from white sidewall
tires. A flne grade of steel wool will remove severe curb
scrapes.
Do not use gasoline, kerosene or any oil product
which would discolor or deteriorate the rubber.
CAUTION: Some white sidewall cleaners will cause
serious
damage to aluminum trim. Use caution
when cleaning tires with this
type of cleaner.
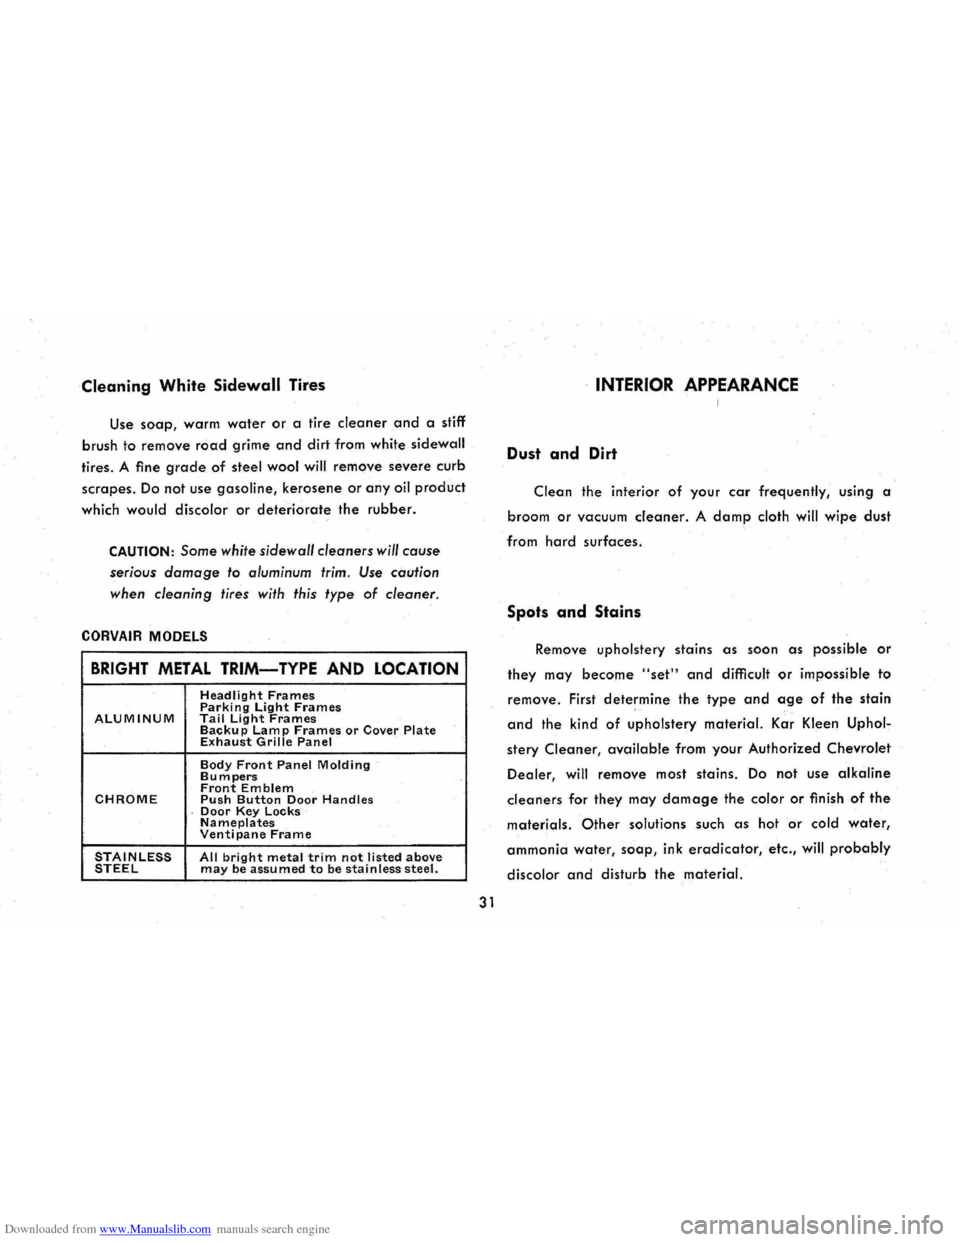
CORVAIR MODELS
BRIGHT METAL TRIM-TYPE AND LOCATION
Headlight Frames Parking light Frames ALUMINUM Tail light Frames Backup Lamp Frames or Cover Plate Exhaust Grille Panel
Body Front .Panel Molding Bumpers Front Emblem CHROME Push Button Door Handles Door Key Locks Nameplates Venti pane Frame
STAINLESS All bright metal trim not listed above STEEL may be assumed to be stainless steel.
31
INTERIOR APPEARANCE
Dust and Dirt
Clean the interior of your car frequently, using a
broom or vacuum cleaner. A damp cloth will wipe dust
from hard surfaces.
Spots and Stains
Remove upholstery stains as soon as possible or
they may become "set" and difficult or impossible to
remove . First determine the type and age of the stain
and the kind of upholstery material. Kar Kleen Uphol
stery Cleaner, available from your Authorized Chevrolet
Dealer, will remove most stains. Do not use alkaline
cleaners for they may damage the color or flnish of the
materials. Other solutions such as hot or cold water,
ammonia water, soap, ink eradicator, etc., will probably
discolor and disturb the material.
Page 36 of 56
Downloaded from www.Manualslib.com manuals search engine you use an oil which, according to the label on the can
is (1) intended for service MS and (2) passes car makers'
tests or meets General Motors Standard GM 4745-M .
Oils conforming to these types contain detergent addi
tives. Your serviceman will be pleased to assist you in
selecting the proper oil for your car.
Check the oil level (with the engine hot) on the dip
stick frequently. Keep oil level between the FULL and
ADD marks, by adding oil when level is at or below
ADD mark. Do not overfill. Poor performance and pos
sible engine damage may result if the crankcase is
overfilled. Drain and refill the crankcase very 60 days
or 6000 miles, whichever occurs first.
For vehicles
in heavy duty operation involving con
tinuous stop-
start or prolonged idling, engine oil should
be changed after 2500-3000 miles of operation.
NOTE: When checking or adding oil, be care
ful to avoid spilling or dropping oil onto the
engine shrouding.
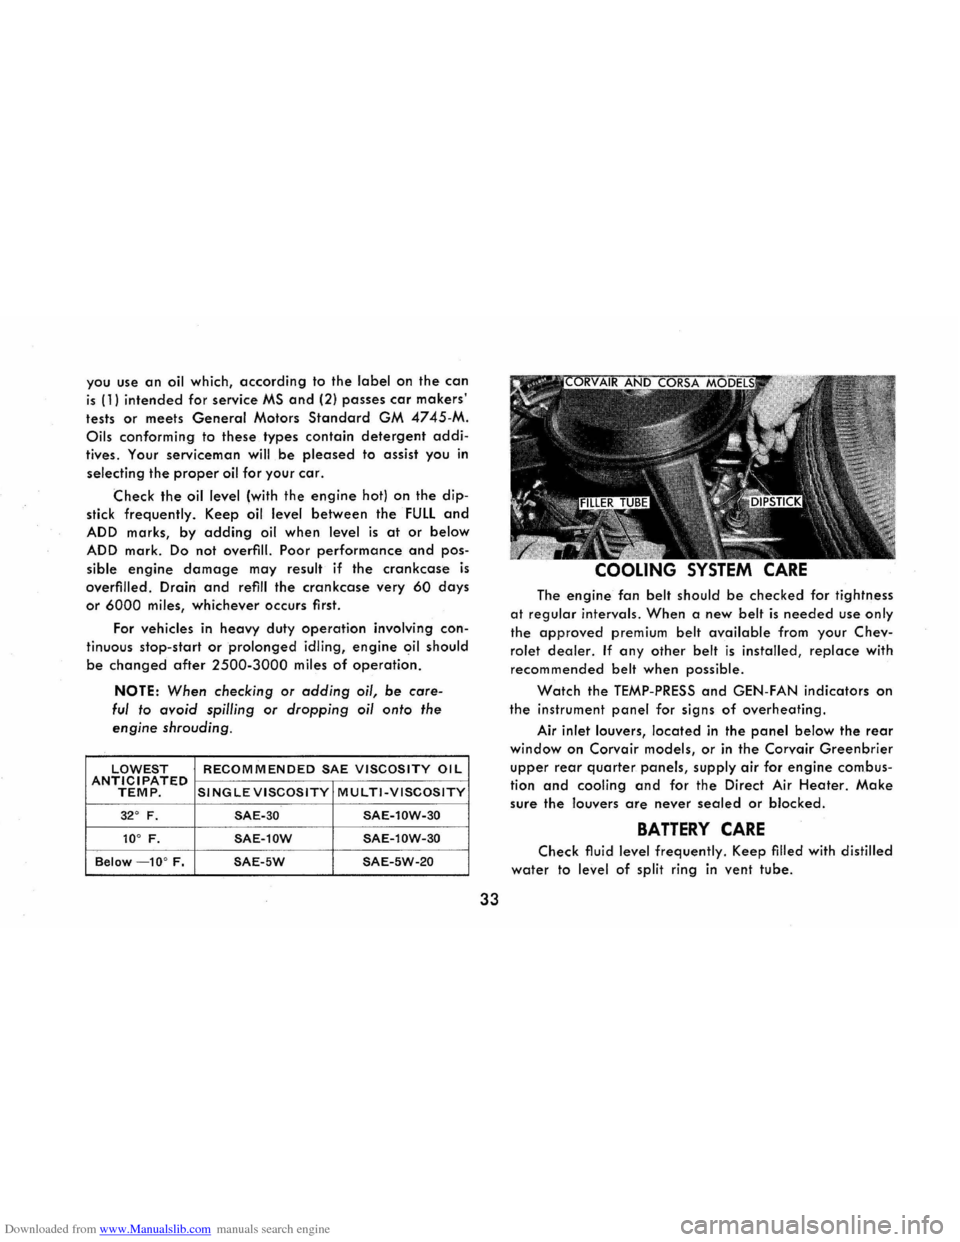
LOWEST RECOMMENDED SAE VISCOSITY OIL ANTICIPATED TEMP. SINGLE VISCOSITY MULTI-VISCOSITY
32° F. SAE-30 SAE-l0W-30
10° F. SAE-l0W SAE-l0W-30
Below -10° F. SAE-5W SAE-5W-20
33
COOLING SYSTEM CARE
The engine fan belt should be checked for tightness
at regular intervals. When a new belt is needed use only
the approved premium belt available from your Chev
rolet dealer. If any other belt is installed, replace with
recommended belt when possible .
Watch the TEMP-PRESS and GEN-FAN indicators on
the instrument panel for signs of overheating.
Air inlet louvers, located in the panel below the rear
window on Corvair models, or in the Corvair Greenbrier
upper rear quarter panels, supply air for engine combus
tion
and cooling and for the Direct Air Heater. Make
sure the louvers are never sealed or blocked.
BATTERY CARE
Check fluid level frequently. Keep filled with distilled
water to level of split ring in vent tube.
Page 40 of 56
Downloaded from www.Manualslib.com manuals search engine PERIODIC MAINTENANCE AND LUBRICATION
The time or mileage intervals on the following pages
are intended as a general guide for establishing regular
maintenance and lubrication periods for your Corvair.
Sustained heavy duty or high speed operations or oper
ation under adverse conditions may necessitate more
frequent servicing. For specific recommendations for con
ditions under which you use your vehicle, consult your
authorized Chevrolet Dealer.
37
ENGINE OIL CHANGE*
See "Engine Lubrication" in previous pages.
OIL FILTER*
Change the filter element every 6000 miles or every
six months, whichever occurs first.
CRANKCASE VENTILA T10N*
Valve Type (Air Conditioned Models)-Test at every
oil change, replace as required.
Fixed Orifice Type-Check at every oil change,
clean every
12,000 miles.
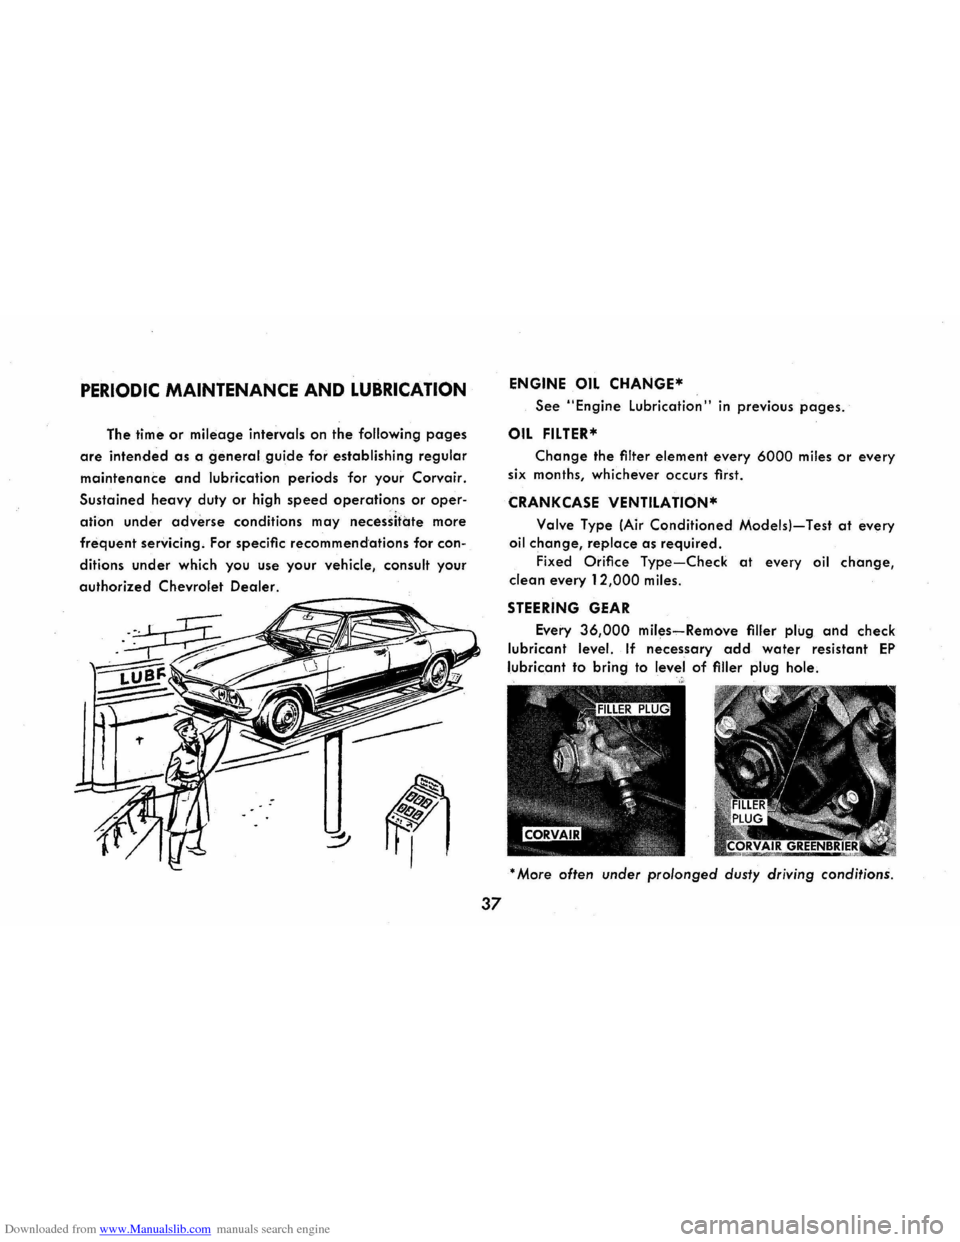
STEERING GEAR
Every 36,000 miles-Remove filler plug and check
lubricant level. If necessary add water resistant EP
lubricant to bring to level of filler plug hole.
* More often under prolonged dusty driving conditions.
Page 42 of 56
Downloaded from www.Manualslib.com manuals search engine FAN BELT
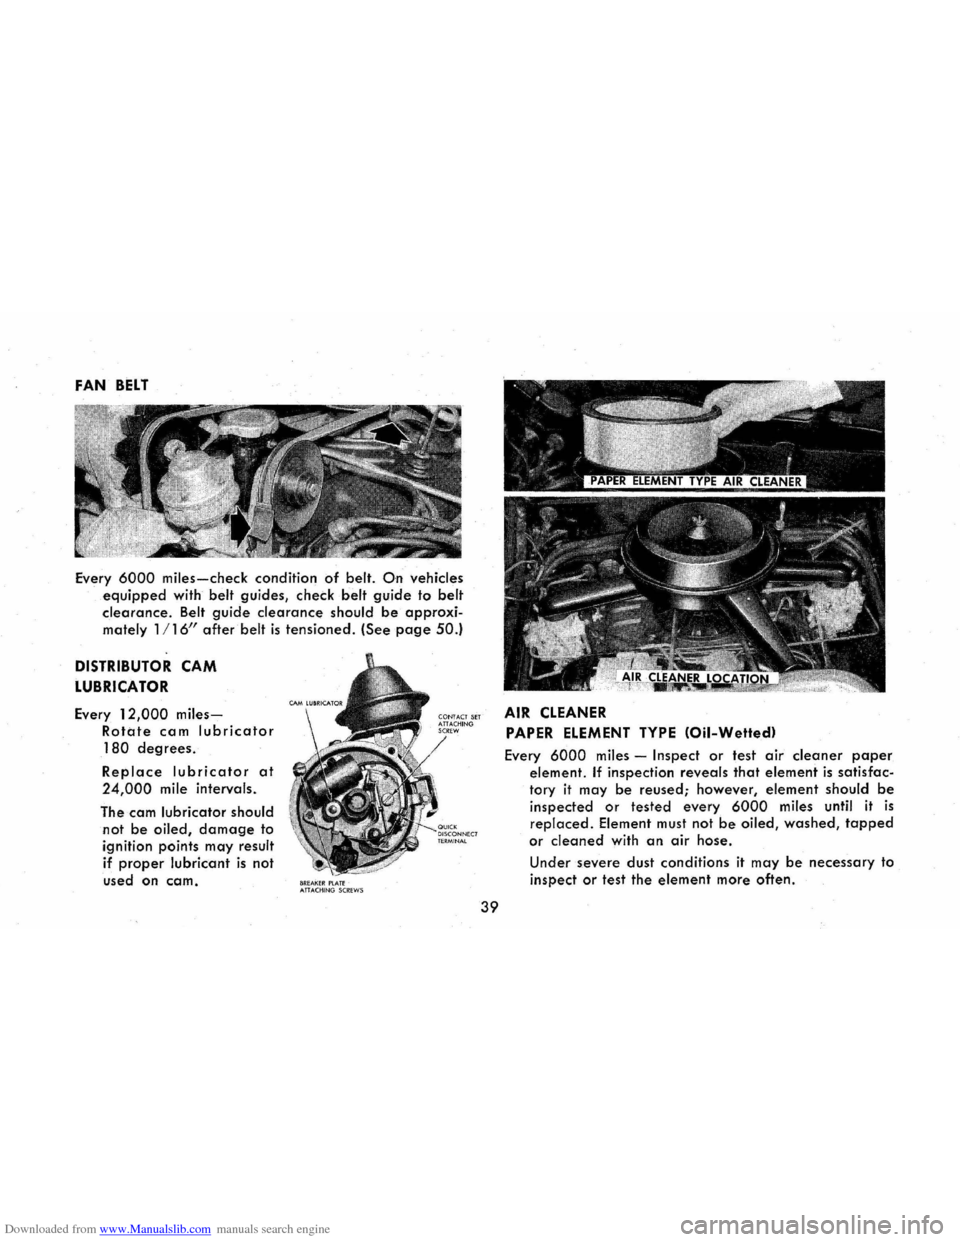
Every 6000 miles-check condition of belt. On vehicles
. equipped with belt guides, check belt guide to belt
clearance. Belt guide clearance should be approxi
mately 1/ 16/1 after belt is tensioned. (Seepage 50.)
DISTRIBUTOR CAM
LUBRICATOR
Every 12,000 miles-
Rotate cam lubricator
180 degrees.
Replace lubricator at
24,000 mile intervals .
The cam lubricator should
not be oiled, damage to
ignition points
may result
if proper lubricant is not
used on cam.
8R:EAKER PlATE "nACHlNG SCREWS
39
AIR CLEANER
PAPER ELEMENT TYPE (Oil-Wetted)
Every 6000 miles -Inspect or test air cleaner paper
element. If inspection reveals that element is satisfac
tory it may
be reused ; however, element should be
inspected or tested every 6000 miles until it is
replaced. Element must not be oiled, washed, tapped
or cleaned with an air hose.
Under severe dust conditions
it may be necessary to
inspect
or test the element more often.
Page 44 of 56
Downloaded from www.Manualslib.com manuals search engine TRANSMISSION-POWERGLIDE
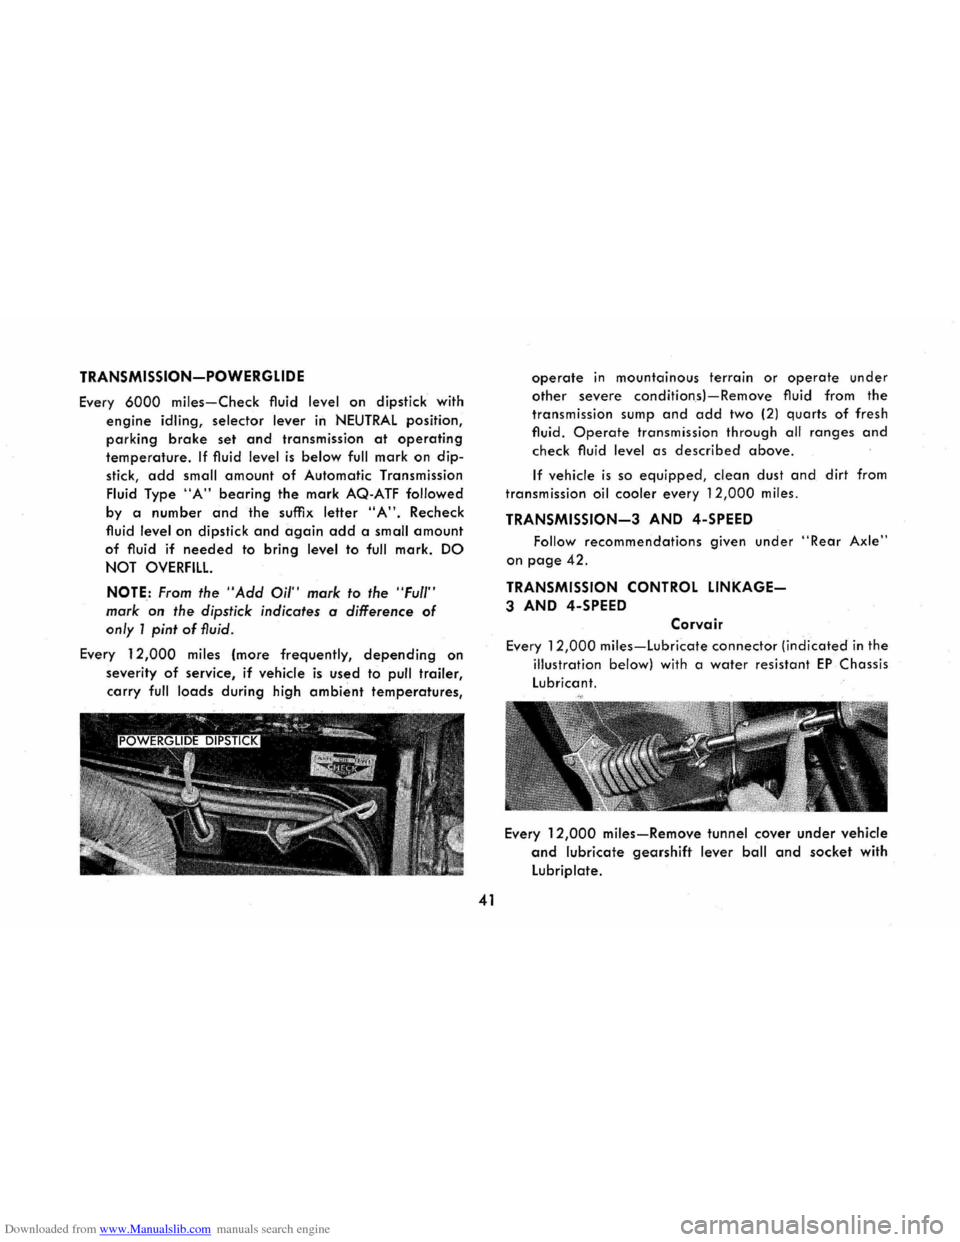
Every 6000 miles-Check fluid level on dipstick with
engine idling, selector lever in NEUTRAL position,
parking brake set and transmission at operating
temperature. If fluid level is below full mark on dip
stick,
add small amount of Automatic Transmission
Fluid Type
"A" bearing the mark AQ-ATF followed
by a
number and the suffix letter "A". Recheck
fluid
level on dipstick and again add a small amount
of fluid if needed to bring level to full mark. DO
NOT
OVERFILL.
NOTE: From the "Add Oil" mark to the "Ful/' ,
mark on the dipstick indicates a difference of
only 1 pint of fluid.
Every 1
2,000 miles (more frequently, depending on
severity of service, if vehicle is used to pull trailer,
carry full loads during high ambient temperatures,
41
operate in mountainous terrain or operate under
other severe condition .sl-Remove fluid from the
transmission sump and add two (2) quarts of fresh
fluid.
Operate transmission through all ranges and
check fluid level as described above.
If vehicle is so equipped, clean dust and dirt from
transmission oil cooler every 12,000 miles.
TRANSMISSION-3 AND 4-SPEED
Follow recommendations given under "Rear Axle"
on page 42.
TRANSMISSION CONTROL LINKAGE-
3 AND 4-SPEED
Corvair
Every 12,000 miles-Lubricate connector (indicated in the
illustration below) with a water resistant EP Chassis
Lubricant.
Every
12,000 miles-Remove tunnel cover under vehicle
and lubricate gearshift lever ball and socket with
Lubriplate.
Page 46 of 56
Downloaded from www.Manualslib.com manuals search engine BODY LUBRICATION POINTS
Most body lube points do not need frequent, heavy
lubrication. However, periodic checks
of certain points
on the Corvair body,
and lubrication when needed will
eliminate annoying squeaks and noises. Be careful not
to over-lubricate.
Wipe off all surplus lubricant.
The following items should
be lubricated periodically:
1. Door
Hinges-Wipe off dirt and apply lubriplate.
2. Door lock Striker-Wipe off dirt and apply stick
type lubricant.
3. Top lift Cylinder
Rods-Clean and lubricate with
G.M. Hydraulic Brake Fluid.
4. Door
Jamb Switch-Apply lubriplate.
5. Front and Rear Compartment lid lock-Apply lubri
plate.
6. Front Compartment lid Torque Rods-Apply G.M .
lubriplate to bearing points.
43
7. Gas Tank Filler Door Hinge-Apply dripiess oil.
8 . Glove
Box Door Hinge-Apply dripless oil.
9. Rear Folding Seat Back Support link Assembly and
Filler Panel Hinge-Apply dripless oil to bearing
points.
The following should
be lubricated whenever acces
sible.
10. Door Outside Handle lock Cylinder Shaft-Apply
lubriplate.
11. Door Window Regulator and Cams-Apply lubri
plate.
12. Door
lock Parts-Apply lubriplate.
13. Door locking Mechanism-Apply lubriplate.
14 . Front
and Rear Compartment Hinges-Apply G.M.
lubriplate.
Page 54 of 56
Downloaded from www.Manualslib.com manuals search engine INDEX
Page
Air Cleaner .............................. 39
Air Conditioning . . . . . . . . . . . . . . . . . . . . .. 15 & 40
Air Recirculating Cover Plate. . . . . . . . . . . . . . . . .. 15
Air Vents . . . . . . . . . . . . . . . . . . . . . . . . . . . . . . .. 17
Ash Tray ............................ 17 & 26
Battery .............................. 33 & 42
Body Lubrication .......................... 43
Brake Main Cylinder. . . . . . . . . . . . . . . . . . . . . . .. 40
Brake-Parking ........................... 12
Brakes
.................................. 12
Bright Metal Parts
Protection . . . . . . . . . . . . . . . . . . . . . . . . . .
.. 30
Type and Location .................... 31
Chassis Lubrication. . . . . . . . . . . . . . . . . . . . . . . .. 38
Cigarette Lighter ............... . . . . . . . . . .. 17
Circuit Breaker ........................... , 45
Cleaning Hints
Exterior
Appearance ................... 30
Interior Appearance ................... 31
Clutch Adjustment ......................... , 12
Clutch Cross
Shaft......... . . . . . . . . . . . . . . .. 38
Clutch Pedal ............................. 12
Clutch Pulleys
& Cables .................... , 40
Cooling System ........................... 33
Crankcase Ventilation ...................... 37
51
Page
Cylinder Head Temperature Gauge . . . . . . . . . . .. 23
Dimmer Switch ........................... 11
Distributor ............................... 39
Doors and Locks ..... . . . . . . . . . . . . . . . .. 18 & 26
Rear ........................... 19 & 27
Side ................................ 27
Driving for Economy. . . . . . . . . . . . . . . . . . . . . . .. 2
Engine
Oil Cooler ......................... 40
Engine Compartment ................... 21 & 26
Engine Lubrication ......................... 32
Front Suspension .......................... 38
Front Wheel Bearings ...................... 40
Fuel Filter . . . . . . . . . . . . . . . . . . . . . . . . . . . . . . .. 42
Fuel Gauge .............................. 8
Fuses ................................... 45
Gas Cap . . . . . . . . . . . . . . . . . . . . . . . . . . .. 21 & 29
Generator ............................... 39
Gen-Fan Indicator ...................... 9 & 23
Heater
Direct
Air. . . . . . . . . . . . . . . . . . . . . . . . . . .. 14
Gasoline
.......................... . .
Ignition
Switch ........................... .
Jacking the
Car .......................... .
Keys
.................................. .
Light Control Knob
........................ .
Lighting
System Trouble Checks ............... .
24
3
36
18
10
11