2024 PEUGEOT 308 ECO mode
[x] Cancel search: ECO modePage 31 of 280
29
Dashboard instruments
1It is possible to view data for the last 30, 60 or
180 minutes by clicking on the corresponding
value on the left of the graph.
Charging
This page allows you to programme deferred
charging.
For more information on Charging the traction
battery, refer to the corresponding section.
e-SAVE (Rechargeable hybrid)
The e-SAVE function makes it possible to
reserve all or part of the electrical energy of the
traction battery to be used later during a journey
(e.g.
passing through an urban area or an area
reserved for electric vehicles).
►
Activate
the function by pressing Set e
- SAVE,
then select the electric range to be reserved
(6 miles (10 km), 12 miles (20 km) or the full
range Maximum).
Activation of the function is confirmed by the lighting of this indicator lamp on the
instrument panel and the indication of the energy
reserve in miles or kms.
►
T
o use the energy reserve, choose the
Electric driving mode in the mode selector.
If the requested range exceeds the
available range (not recommended), the
internal combustion engine starts to recharge
the traction battery up to the requested
threshold. This leads to excessive fuel
consumption.
i-Toggles
This system is an additional touch screen
associated with the PEUGEOT i-Connect
Advanced. It is designed to provide a
personalised display of shortcuts to applications
or presets.
By default, it directs you to the main applications:
Media, Climate, Navigation, Phone, Mirror
Screen, etc.
The shortcuts can be replaced by: radio preset,
temperature preset, pre-selected destination,
pre-selected contact, pre-selected smartphone,
etc.
For more information on
Personalisation -
i-T
oggles, refer to the corresponding section for
the Audio equipment and telematics systems.
If the vehicle is exposed to sunlight for an
extended period, the touch screen can
become very hot.
Wait a few minutes before using the system.
Remotely operable
additional functions
(Rechargeable hybrid or
Electric)
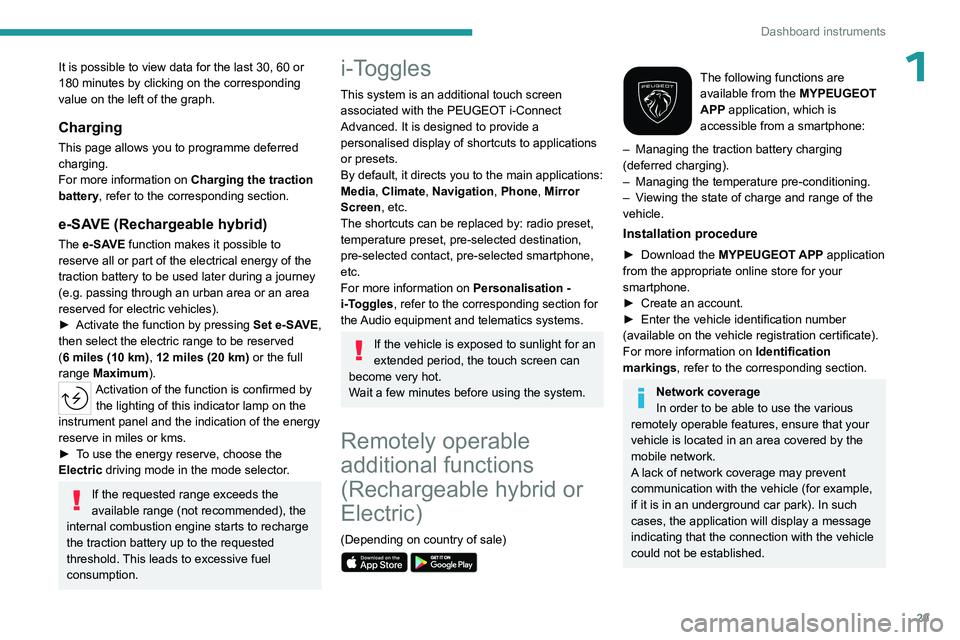
(Depending on country of sale)
The following functions are
available from the MYPEUGEOT
APP application, which is
accessible from a smartphone:
–
Managing the traction battery charging
(deferred charging).
–
Managing the temperature pre-conditioning.
–
V
iewing the state of charge and range of the
vehicle.
Installation procedure
► Download the MYPEUGEOT APP application
from the appropriate online store for your
smartphone.
►
Create an account.
►
Enter the vehicle identification number
(available on the vehicle registration certificate).
For more information on Identification
markings
, refer to the corresponding section.
Network coverage
In order to be able to use the various
remotely operable features, ensure that your
vehicle is located in an area covered by the
mobile network.
A lack of network coverage may prevent
communication with the vehicle (for example,
if it is in an underground car park). In such
cases, the application will display a message
indicating that the connection with the vehicle
could not be established.
Page 46 of 280
44
Access
Pay particular attention to children when
operating the windows.
Be aware of passengers and/or other persons
present when closing windows remotely using
the electronic key.
Do not put your head or arms through the
open windows when the vehicle is moving -
risk of serious injury!
Sunroof
The sunroof consists of a movable glass panel
that slides over the roof and a blind that can
be opened independently. Opening the sunroof
automatically opens the blind.
►
T
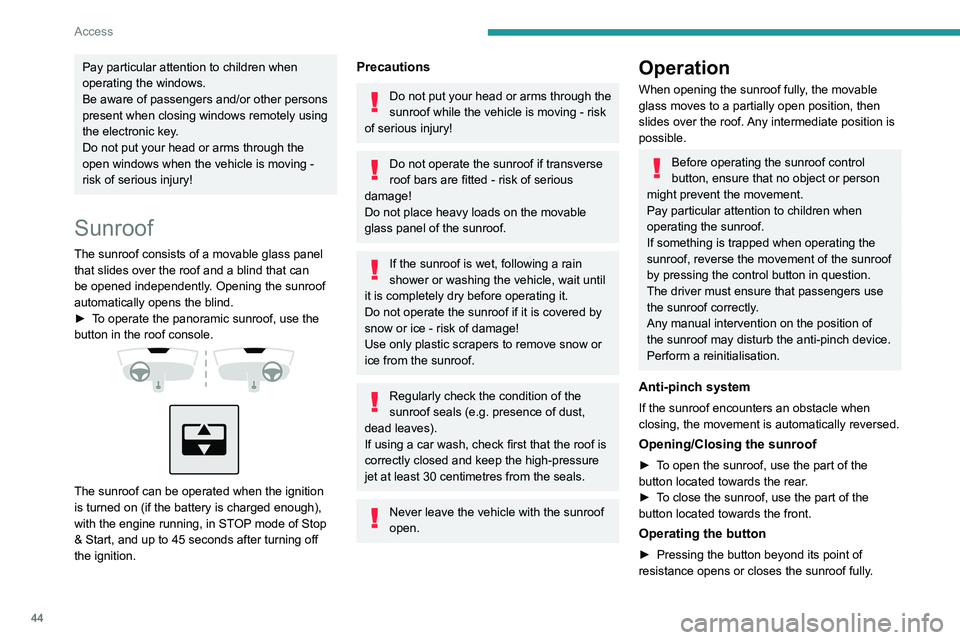
o operate the panoramic sunroof, use the
button in the roof console.
The sunroof can be operated when the ignition
is turned on (if the battery is charged enough),
with the engine running, in STOP mode of Stop
& Start, and up to 45 seconds after turning off
the ignition.
Precautions
Do not put your head or arms through the
sunroof while the vehicle is moving - risk
of serious injury!
Do not operate the sunroof if transverse
roof bars are fitted - risk of serious
damage!
Do not place heavy loads on the movable
glass panel of the sunroof.
If the sunroof is wet, following a rain
shower or washing the vehicle, wait until
it is completely dry before operating it.
Do not operate the sunroof if it is covered by
snow or ice - risk of damage!
Use only plastic scrapers to remove snow or
ice from the sunroof.
Regularly check the condition of the
sunroof seals (e.g. presence of dust,
dead leaves).
If using a car wash, check first that the roof is
correctly closed and keep the high-pressure
jet at least 30 centimetres from the seals.
Never leave the vehicle with the sunroof
open.
Operation
When opening the sunroof fully, the movable
glass moves to a partially open position, then
slides over the roof. Any intermediate position is
possible.
Before operating the sunroof control
button, ensure that no object or person
might prevent the movement.
Pay particular attention to children when
operating the sunroof.
If something is trapped when operating the
sunroof, reverse the movement of the sunroof
by pressing the control button in question.
The driver must ensure that passengers use
the sunroof correctly.
Any manual intervention on the position of
the sunroof may disturb the anti-pinch device.
Perform a reinitialisation.
Anti-pinch system
If the sunroof encounters an obstacle when
closing, the movement is automatically reversed.
Opening/Closing the sunroof
► To open the sunroof, use the part of the
button located towards the rear.
►
T
o close the sunroof, use the part of the
button located towards the front.
Operating the button
► Pressing the button beyond its point of
resistance opens or closes the sunroof fully .
Page 52 of 280
50
Ease of use and comfort
The system status is memorised when the
ignition is switched off.
With i-Toggles
Activation/Deactivation
In the Seats touch screen application,
select the Seats tab.
►
Select the driver or passenger seat.
The corresponding page is displayed with the
last memorised settings.
If the settings are suitable, press to
activate/deactivate the function in the
Seats application.
If no action is taken, the display returns to its
initial state.
The function status is not memorised when the
ignition is switched off.
Changing settings
► In the Seats page, select the seat concerned.
► Select an intensity from the three preset
levels: "
1" (Low), "2" (Normal) or "3" (High).
The settings are memorised when the ignition is
switched off.
Do not use the function when the seat
is not occupied.
Reduce the heating intensity as soon as
possible.
When the seat and passenger compartment
have reached a satisfactory temperature,
switch the function off; reducing electrical
consumption in turn decreases energy
consumption.
Prolonged use of heated seats is not
recommended for people with sensitive
skin.
There is a risk of burns for people whose
perception of heat is impaired (e.g.
illness,
taking medication).
To keep the heated pad intact and to prevent
a short circuit:
–
Do not place heavy or sharp objects on the
seat.
–
Do not kneel or stand on the seat.
–
Do not spill liquids onto the seat.
–
Never use the heating function if the seat
is damp.
Multipoint massage
System with a choice of type of massage and
adjustment of its intensity.
This system operates with the engine running, as
well as in STOP mode of the
Stop & Start.
Activation/Deactivation
In the Seats touch screen application,
select the Massage tab.
►
Select the driver or passenger seat.
The corresponding page is displayed with the
last memorised settings.
If the settings are suitable, press to
activate/deactivate the function in the
Seats application.
If no action is taken, the display returns to its
initial state.
The function status is not memorised when the
ignition is switched off.
Changing settings
► In the Massage page, select the seat
concerned.
►
Select a massage intensity from the three
preset levels: "
1" (Low), "2" (Normal) or "3"
(High).
►
Select another type of massage from those
offered.
The modifications are taken into account
immediately and memorised when the ignition is
switched off.
Once activated, the system starts a one hour
massage cycle, made up of sequences of 6
minutes of massage followed by 3 minutes at
rest.
The system stops automatically at the end of the
cycle.
Page 57 of 280

55
Ease of use and comfort
3Heating and Ventilation
Air intake
The air circulating in the passenger compartment
is filtered and originates either from the
exterior, via the grille located at the base of the
windscreen, or from the inside in air recirculation
mode.
Controls
Depending on version, certain controls
are accessible in the Climate touch
screen application and/via the control panel on
the centre console.
Air distribution
1. Windscreen demisting/de-icing vents
2. Front side window demisting/de-icing vents
3.Adjustable and closable side air vents
4. Adjustable and closable central air vents
5. Air outlets to the front footwells
6. Air outlets to the rear footwells
7. Adjustable and closable air vents
Advice
Using the ventilation and air
conditioning system
►
T
o ensure that air is distributed evenly,
keep the external air intake grilles at the base
of the windscreen, the nozzles, the vents, the
air outlets and the air extractor in the boot
free from obstructions.
►
Do not cover the sunshine sensor located
on the dashboard; this sensor is used to
regulate the automatic air conditioning
system.
►
Operate the air conditioning system for at
least 5 to 10 minutes once or twice a month to
keep it in good working order
.
►
If the system does not produce cold air
,
switch it off and contact a PEUGEOT dealer
or a qualified workshop.
When towing a large load on a steep gradient
in high temperatures, switching off the air
conditioning increases the available engine
power, enhancing the towing capacity.
Avoid driving for too long with the ventilation off or with prolonged operation
of interior air recirculation. Risk of misting and
deterioration of the air quality!
If the interior temperature is very high
after the vehicle has stood for a long
time in the sunshine, air the passenger
compartment for a few moments.
Put the air flow control at a setting high
enough to quickly change the air in the
passenger compartment.
Condensation created by the air
conditioning results in a discharge of
water underneath the vehicle. This is perfectly
normal.
Servicing the ventilation and air
conditioning system
►
Ensure that the passenger compartment
filter is in good condition and have the filter
elements replaced regularly
.
We recommend using a composite passenger
compartment filter. Its specific active additive
helps protect against polluting gases and bad
smells.
►
T
o ensure correct operation of the
air conditioning system, have it checked
according to the recommendations in the
Manufacturer’s service schedule.
Page 58 of 280

56
Ease of use and comfort
Stop & Start / e-Auto mode
The heating and air conditioning systems
only operate when the engine is running.
T
emporarily deactivate the corresponding
system to maintain a comfortable temperature
in the passenger compartment.
For more information, refer to the
corresponding section.
Rechargeable hybrid vehicles
Intensive use of the air conditioning
reduces the vehicle range in Electric mode.
Electric vehicles
Selecting the ECO driving mode reduces
electrical energy consumption, but restricts
the performance of the heating and air
conditioning systems, although it does not
deactivate them.
Ventilation with the ignition on
When the ignition is switched on, the ventilation
system and the air flow 2 and air distribution
3 settings in the passenger compartment are
activated, for a period which depends on the
battery charge.
This function does not include the air
conditioning system.
Dual-zone automatic air
conditioning
This system automatically controls the activation
of the air conditioning system, regulating the
temperature, air flow and air distribution inside
the passenger compartment.
This system works with the engine running, but
access to the ventilation and its controls remains
possible with the ignition on.
Press the Climate application button to
display the system controls page.
Without i-Toggles
With i-Toggles
1. Temperature adjustment
2. Air flow adjustment
3. Air distribution adjustment
4. Air conditioning on/off
5. Automatic air conditioning on/off and setting
(AUTO SOFT/AUTO NORMAL/AUTO
FAST)
6. Driver/front passenger temperature
synchronisation
7. AQS function only or Clean Cabin
(depending on version).
8. Front demisting/de-icing
9. Interior air recirculation
10. Maximum A/C (depending on version)
11 . Rear screen demisting/de-icing
12. Switching the system off
Temperature adjustment
The driver and front passenger can each choose
their own temperature setting.
The value indicated corresponds to a level of
comfort and not to a precise temperature.
Depending on version:
►
T
urn one of the knobs 1 towards + or - to
increase or decrease the value.
Page 59 of 280

57
Ease of use and comfort
3► Press one of the buttons 1 (+ or -) or drag
vertically to increase or decrease the value.
It is possible to go beyond the minimum and
maximum values by selecting respectively Low
or High.
It is recommended that you avoid a difference of
more than 3°C in the settings for left and right.
Temperature
synchronisation
The driver side temperature setting is applied to
the passenger side.
►
Press button
6-SYNC to activate/deactivate
the function.
The function is automatically deactivated if the
passenger uses their temperature adjustment
buttons.
Automatic air conditioning
This automatic mode ensures optimum
management of the passenger compartment
temperature, air flow and air distribution, based
on the selected comfort level.
►
Press button
5-AUTO to activate/deactivate
the automatic mode of the air conditioning
system.
The indicator lamp in the button lights up
when the air conditioning system is operating
automatically.
The intensity of the automatic air conditioning
is modulated by choosing one of the following
settings:
– AUTO SOFT : provides soft and quiet
operation by limiting air flow.
–
AUT
O NORMAL: offers the best compromise
between a comfortable temperature and quiet
operation (default setting).
–
AUT
O FAST: provides dynamic and efficient
air distribution.
To change the AUTO mode, press button
5-AUTO successively.
To ensure passenger comfort in the rear seats,
favour settings AUTO NORMAL and AUTO
FAST.
In cold weather with the engine cold, the
air flow is increased gradually until the
comfort setting has been reached, in order to
limit the delivery of cold air into the passenger
compartment.
On entering the vehicle, if the interior
temperature is much colder or warmer than
the comfort setting requested, there is no
need to alter the value displayed to more
quickly reach the required level of comfort.
The system automatically corrects the
temperature difference as quickly as possible.
Automatic air conditioning manual settings
It is possible to manually adjust one or more
of these functions, while the system retains
automatic control of the other functions:
–
air flow
.
– air distribution.
The indicator lamp in the " AUT
O” button goes
out if a setting is changed.
►
Press button
5-AUTO again to reactivate
automatic air conditioning.
Adjusting the air flow
Depending on version:
► Press one of the buttons 2 (fan) to decrease
or increase the air flow.
►
Press one of the buttons
2 (fan) or drag
horizontally to increase or decrease air flow.
It is also possible to directly press one of the
values.
Switching off the air conditioning
system
When the air flow is reduced to a minimum,
ventilation stops.
“OFF" is displayed alongside the fan.
Adjusting the air distribution
► Press the buttons 3 to adjust the air flow
distribution inside the passenger compartment.
Windscreen and side windows
Central and side air vents
Footwells
A symbol is activated to display the presence of
blown air in the direction indicated.
Page 70 of 280
68
Ease of use and comfort
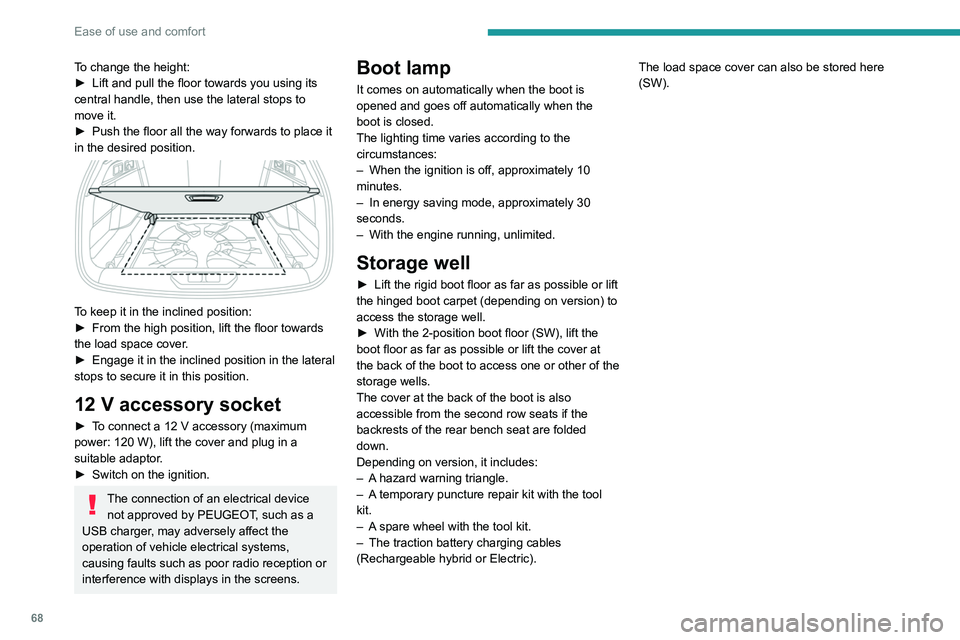
To change the height:
► Lift and pull the floor towards you using its
central handle, then use the lateral stops to
move it.
►
Push the floor all the way forwards to place it
in the desired position.
To keep it in the inclined position:
► From the high position, lift the floor towards
the load space cover
.
►
Engage it in the inclined position in the lateral
stops to secure it in this position.
12 V accessory socket
► To connect a 12 V accessory (maximum
power: 120 W), lift the cover and plug in a
suitable adaptor.
►
Switch on the ignition.
The connection of an electrical device not approved by PEUGEOT, such as a
USB charger, may adversely affect the
operation of vehicle electrical systems,
causing faults such as poor radio reception or
interference with displays in the screens.
Boot lamp
It comes on automatically when the boot is
opened and goes off automatically when the
boot is closed.
The lighting time varies according to the
circumstances:
–
When the ignition is off, approximately 10
minutes.
–
In energy saving mode, approximately 30
seconds.
–
With the engine running, unlimited.
Storage well
► Lift the rigid boot floor as far as possible or lift
the hinged boot carpet (depending on version) to
access the storage well.
►
With the 2-position boot floor (SW), lift the
boot floor as far as possible or lift the cover at
the back of
the boot to access one or other of the
storage wells.
The cover at the back of the boot is also
accessible from the second row seats if the
backrests of the rear bench seat are folded
down.
Depending on version, it includes:
–
A
hazard warning triangle.
–
A
temporary puncture repair kit with the tool
kit.
–
A
spare wheel with the tool kit.
–
The traction battery charging cables
(Rechargeable hybrid or Electric). The load space cover can also be stored here
(SW).
Page 71 of 280
69
Lighting and visibility
4Exterior lighting control
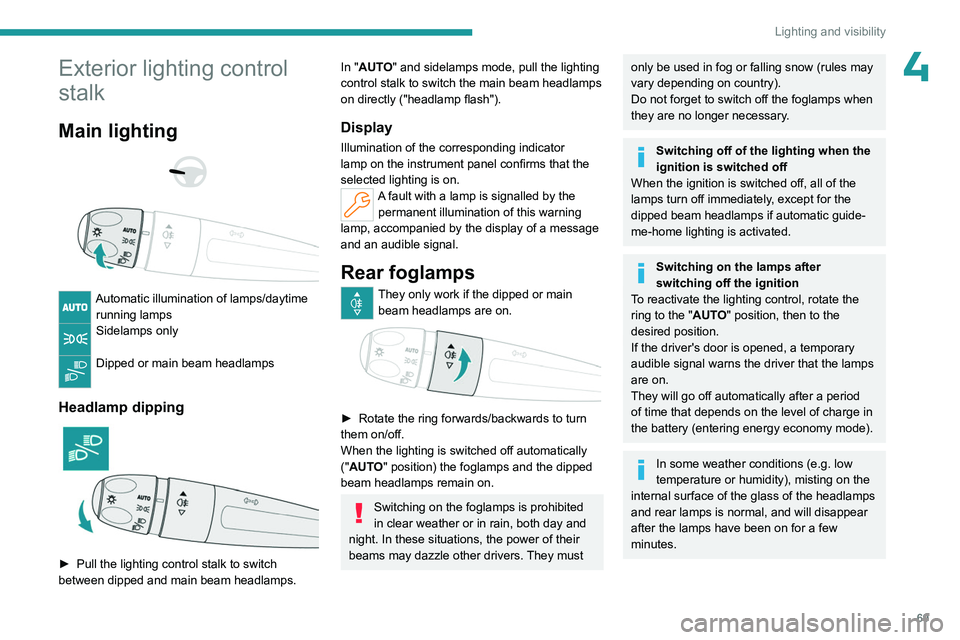
stalk
Main lighting
Automatic illumination of lamps/daytime running lamps
Sidelamps only
Dipped or main beam headlamps
Headlamp dipping
► Pull the lighting control stalk to switch
between dipped and main beam headlamps.
In "AUTO" and sidelamps mode, pull the lighting
control stalk to switch the main beam headlamps
on directly ("headlamp flash").
Display
Illumination of the corresponding indicator
lamp on the instrument panel confirms that the
selected lighting is on.
A fault with a lamp is signalled by the permanent illumination of this warning
lamp, accompanied by the display of a message
and an audible signal.
Rear foglamps
They only work if the dipped or main beam headlamps are on.
► Rotate the ring forwards/backwards to turn
them on/off.
When the lighting is switched off automatically
("
AUTO" position) the foglamps and the dipped
beam headlamps remain on.
Switching on the foglamps is prohibited
in clear weather or in rain, both day and
night. In these situations, the power of their
beams may dazzle other drivers. They must
only be used in fog or falling snow (rules may
vary depending on country).
Do not forget to switch off the foglamps when
they are no longer necessary.
Switching off of the lighting when the
ignition is switched off
When the ignition is switched off, all of the
lamps turn off immediately, except for the
dipped beam headlamps if automatic guide-
me-home lighting is activated.
Switching on the lamps after
switching off the ignition
To reactivate the lighting control, rotate the
ring to the "AUTO" position, then to the
desired position.
If the driver's door is opened, a temporary
audible signal warns the driver that the lamps
are on.
They will go off automatically after a period
of time that depends on the level of charge in
the battery (entering energy economy mode).
In some weather conditions (e.g. low
temperature or humidity), misting on the
internal surface of the glass of the headlamps
and rear lamps is normal, and will disappear
after the lamps have been on for a few
minutes.