2024 FORD F650/750 brake light
[x] Cancel search: brake lightPage 179 of 386
Brake support: Helps reduce the impactspeed by preparing the brakes for rapidbraking. The system does notautomatically apply the brakes. If you pressthe brake pedal, the system could applyadditional braking up to maximum brakingforce, even if you lightly press the brakepedal.
Active braking: May activate if the systemdetermines that a collision is imminent.The system may help the driver reduceimpact damage or avoid the crashcompletely.
Note:If you perceive pre-collision assistalerts as being too frequent, then you canreduce the alert sensitivity, though themanufacturer recommends using thehighest sensitivity setting where possible.Setting lower sensitivity would lead to fewerand later system warnings.
Distance Indication and Alert
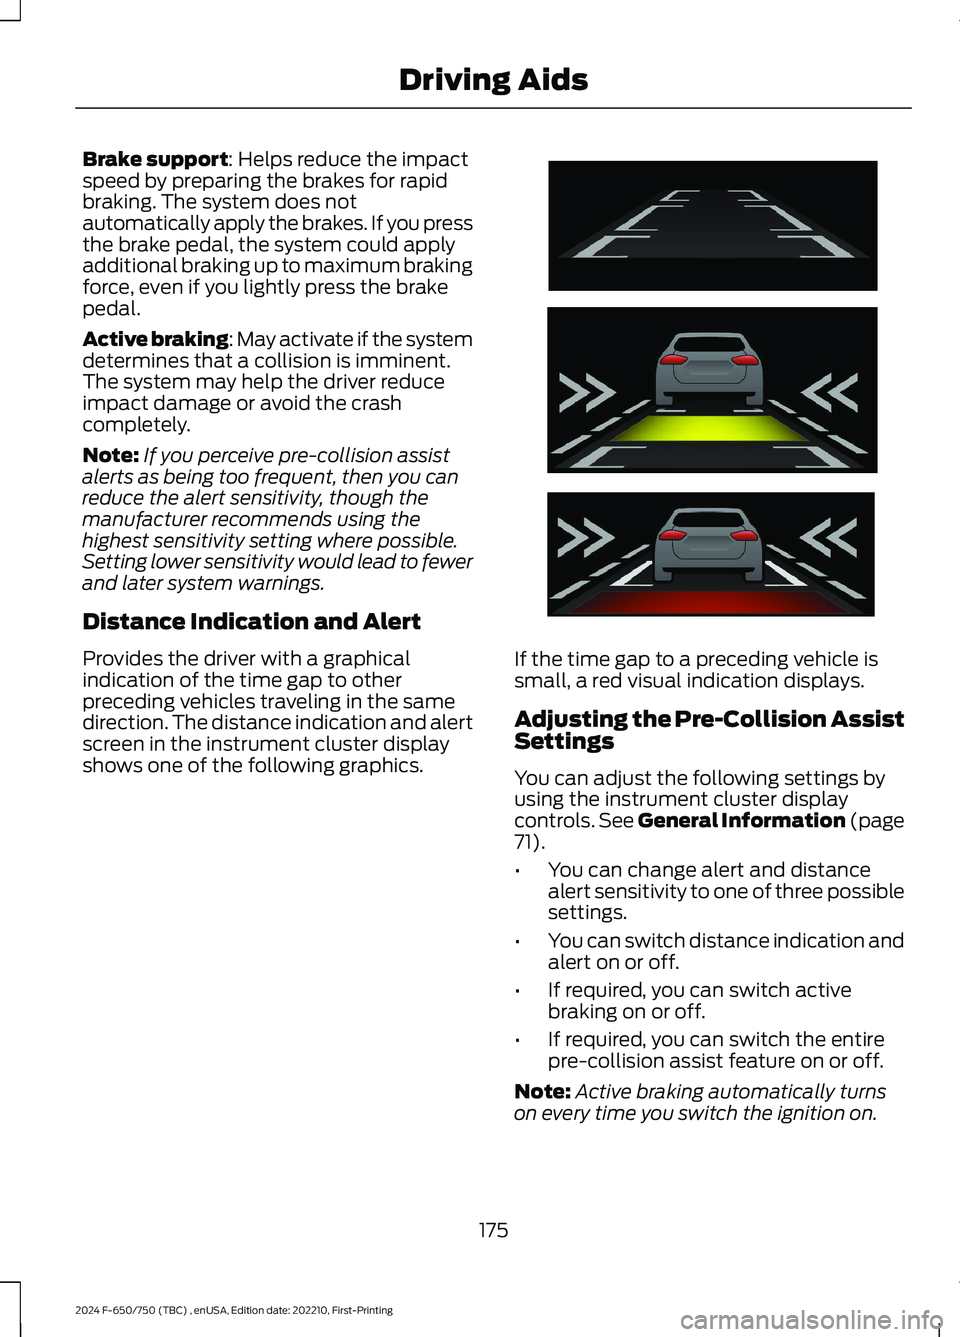
Provides the driver with a graphicalindication of the time gap to otherpreceding vehicles traveling in the samedirection. The distance indication and alertscreen in the instrument cluster displayshows one of the following graphics.
If the time gap to a preceding vehicle issmall, a red visual indication displays.
Adjusting the Pre-Collision AssistSettings
You can adjust the following settings byusing the instrument cluster displaycontrols. See General Information (page71).
•You can change alert and distancealert sensitivity to one of three possiblesettings.
•You can switch distance indication andalert on or off.
•If required, you can switch activebraking on or off.
•If required, you can switch the entirepre-collision assist feature on or off.
Note:Active braking automatically turnson every time you switch the ignition on.
175
2024 F-650/750 (TBC) , enUSA, Edition date: 202210, First-PrintingDriving AidsE254791
Page 183 of 386
AIR SUSPENSION
Note:Do not operate your vehicle withoutair in the suspension springs. Operating yourvehicle without air in the suspension springsdamages the suspension, degrades rideperformance and may cause propertydamage.
The air suspension system automaticallyadjusts to different loads to maintain aconstant frame height, allows for ease ofvehicle loading, provides improved vehicleride, and increased driver comfort.
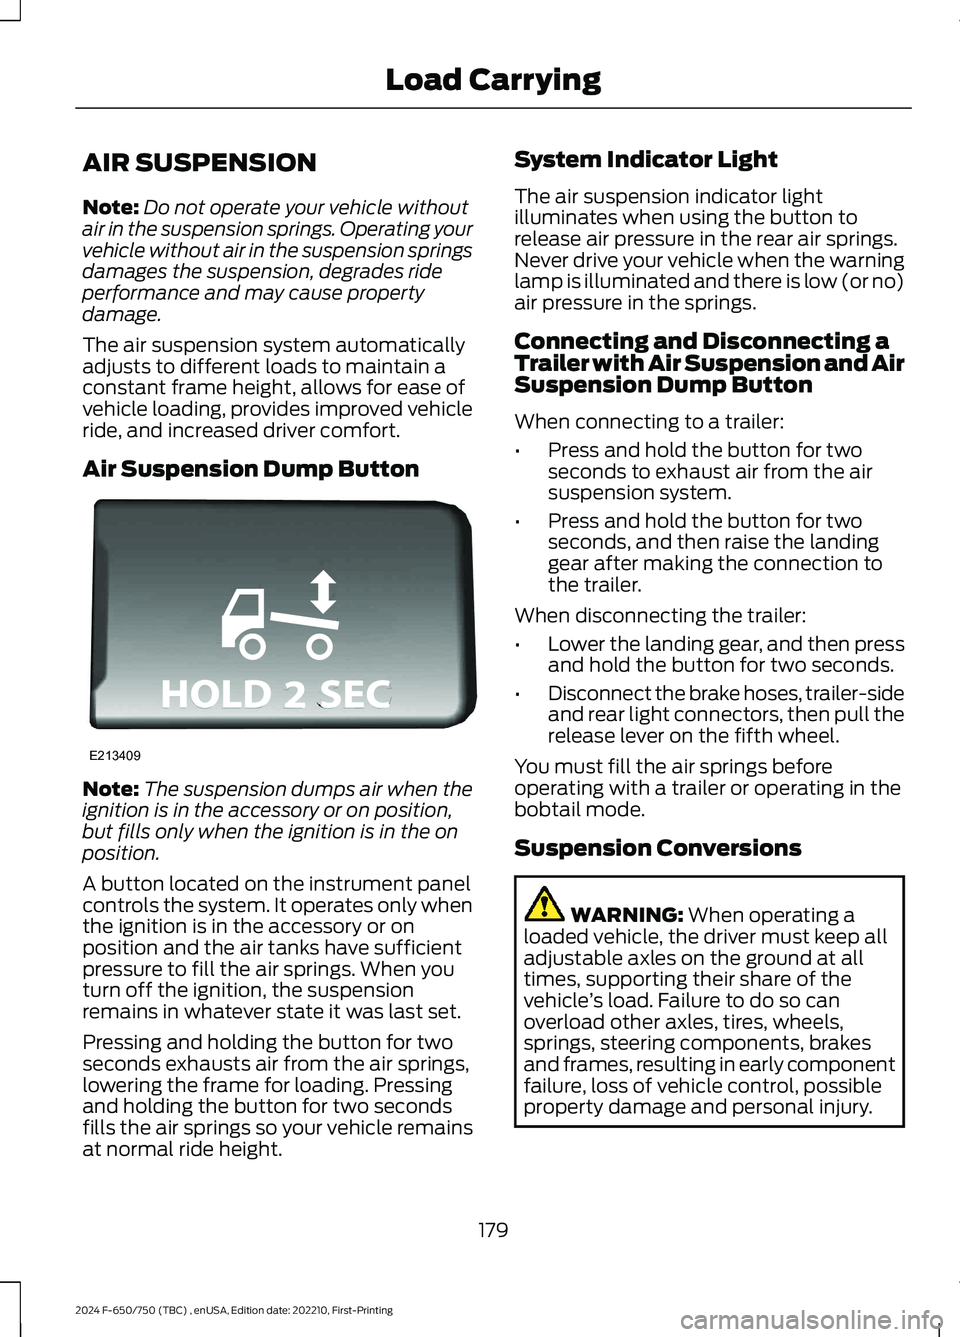
Air Suspension Dump Button
Note:The suspension dumps air when theignition is in the accessory or on position,but fills only when the ignition is in the onposition.
A button located on the instrument panelcontrols the system. It operates only whenthe ignition is in the accessory or onposition and the air tanks have sufficientpressure to fill the air springs. When youturn off the ignition, the suspensionremains in whatever state it was last set.
Pressing and holding the button for twoseconds exhausts air from the air springs,lowering the frame for loading. Pressingand holding the button for two secondsfills the air springs so your vehicle remainsat normal ride height.
System Indicator Light
The air suspension indicator lightilluminates when using the button torelease air pressure in the rear air springs.Never drive your vehicle when the warninglamp is illuminated and there is low (or no)air pressure in the springs.
Connecting and Disconnecting aTrailer with Air Suspension and AirSuspension Dump Button
When connecting to a trailer:
•Press and hold the button for twoseconds to exhaust air from the airsuspension system.
•Press and hold the button for twoseconds, and then raise the landinggear after making the connection tothe trailer.
When disconnecting the trailer:
•Lower the landing gear, and then pressand hold the button for two seconds.
•Disconnect the brake hoses, trailer-sideand rear light connectors, then pull therelease lever on the fifth wheel.
You must fill the air springs beforeoperating with a trailer or operating in thebobtail mode.
Suspension Conversions
WARNING: When operating aloaded vehicle, the driver must keep alladjustable axles on the ground at alltimes, supporting their share of thevehicle’s load. Failure to do so canoverload other axles, tires, wheels,springs, steering components, brakesand frames, resulting in early componentfailure, loss of vehicle control, possibleproperty damage and personal injury.
179
2024 F-650/750 (TBC) , enUSA, Edition date: 202210, First-PrintingLoad CarryingE213409
Page 185 of 386

TOWING A TRAILER
WARNING: Do not exceedthe GVWR or the GAWRspecified on the certificationlabel.
WARNING: Towing trailersbeyond the maximumrecommended gross trailerweight exceeds the limit of thevehicle and could result in enginedamage, transmission damage,structural damage, loss ofvehicle control, vehicle rolloverand personal injury.
Your vehicle may have electricalitems, such as fuses or relays,related to towing. See Fuses(page 202).
Your vehicle's load capacitydesignation is by weight, not byvolume, so you cannot necessarilyuse all available space whenloading a vehicle.
Towing a trailer places an extraload on your vehicle's engine,transmission, axle, brakes, tiresand suspension. Inspect thesecomponents periodically during,and after, any towing operation.
Load Placement
To help minimize how trailermovement affects your vehiclewhen driving:
•Load the heaviest items closestto the trailer floor.
•Load the heaviest itemscentered between the left andright side trailer tires.
•Load the heaviest items abovethe trailer axles or just slightlyforward toward the trailertongue. Do not allow the finaltrailer tongue weight to goabove or below 10-15% of theloaded trailer weight.
When driving with a trailer orpayload, a slight takeoff vibrationor shudder may be present due tothe increased payload weight.Additional information regardingproper trailer loading and settingyour vehicle up for towing islocated in another chapter of thismanual. See Load Limit (page178).
You can also find information inthe RV & Trailer Towing Guideavailable at your authorizeddealer, or online.
RV & Trailer Towing Guide Online
http://www.fleet.ford.com/towing-guides/Website
181
2024 F-650/750 (TBC) , enUSA, Edition date: 202210, First-PrintingTowing
Page 187 of 386
ESSENTIAL TOWING CHECKS
See Load limits in the Load Carryingchapter for load specification terms foundon the tire label and Safety Compliancelabel and instructions on calculating yourvehicle's load.
Remember to account for the trailertongue weight as part of your vehicle loadwhen calculating the total vehicle weight.
Hitches
Do not use a hitch that either clamps ontothe bumper or attaches to the axle. Youmust distribute the load in your trailer sothat 10-15% of the total weight of thetrailer is on the tongue.
Safety Chains
Note:Do not attach safety chains to thebumper.
Always connect the safety chains to theframe or hook retainers of your vehiclehitch.
To connect the safety chains, cross thechains under the trailer tongue and allowenough slack for turning tight corners. Donot allow the chains to drag on the ground.
Trailer Brakes
WARNING: Do not connect atrailer's hydraulic brake system directlyto your vehicle's brake system. Yourvehicle may not have enough brakingpower and your chances of having acollision greatly increase.
Electric brakes and manual, automatic orsurge-type trailer brakes are safe if youinstall them properly and adjust them tothe manufacturer's specifications. Thetrailer brakes must meet local and federalregulations.
The rating for the tow vehicle's brakingsystem operation is at the gross vehicleweight rating, not the gross combinedweight rating.
Trailer Lamps
WARNING: Never connect anytrailer lamp wiring to the vehicle's taillamp wiring; this may damage theelectrical system resulting in fire. Contactyour authorized dealer as soon aspossible for assistance in proper trailertow wiring installation. Additionalelectrical equipment may be required.
Trailer lamps are required on most towedvehicles. Make sure all running lights, brakelights, turn signals and hazard lights areworking.
Before Towing a Trailer
Practice turning, stopping and backing upto get the feel of your vehicle-trailercombination before starting on a trip.When turning, make wider turns so thetrailer wheels clear curbs and otherobstacles.
When Towing a Trailer
•Check your hitch, electrical connectionsand trailer wheel lug nuts thoroughlyafter you have traveled 50 mph(80 km/h).
•When stopped in congested or heavytraffic during hot weather, place thetransmission in park (P) or neutral (N)to aid engine and transmission coolingand to help air conditioningperformance.
•Turn off the speed control with heavyloads or in hilly terrain. The speedcontrol may turn off automaticallywhen you are towing on long, steepgrades.
183
2024 F-650/750 (TBC) , enUSA, Edition date: 202210, First-PrintingTowing
Page 188 of 386
•Shift to a lower gear when driving downa long or steep hill. Do not apply thebrakes continuously, as they mayoverheat and become less effective.
•If your transmission is equipped withthe Tow/Haul feature, use this featurewhen towing. This provides enginebraking and helps eliminate excessivetransmission shifting for optimum fueleconomy and transmission cooling.
•Allow more distance for stopping witha trailer attached. Anticipate stops andbrake gradually.
FIFTH WHEEL OPERATION (IF
EQUIPPED)
WARNING: Failure to follow thefifth wheel manufacturer’s instructionsfor hooking and unhooking as well assliding the fifth wheel could result in anaccident, personal injury or death.
WARNING: When the tractor andtrailer are parked unattended, the trailerbrake hand control should never be usedto apply the brake, since air may leakfrom the system, allowing vehiclemovement, resulting in possible propertydamage, personal injury or death.
Before hook-up, make sure:
•The fifth wheel jaws are fully open.
•The fifth wheel is fully tilted back toprevent body damage when the tractoris backed under a trailer.
•You block the trailer wheels and adjustand apply the trailer spring brakes.Never chase a trailer.
•The brake hoses and light cords areclear of the fifth wheel.
Hook-up
1.Back the tractor squarely under thetrailer, engaging the fifth-wheel jawson the kingpin. Always back up slowly;make sure the trailer is neither too highnor too low. Avoid backing under thetrailer from an angle.
2.Connect the service and emergencybrake hoses and trailer light connector.
3.Inspect the jaws of the fifth wheel tobe sure they have fully closed on thetrailer kingpin and the trailer plate isresting securely on the fifth wheel.
4.Make sure the coupler release lever isin the locked position.
5.Charge the trailer brake system. Setthe trailer brakes, with either the handvalve or tractor protection valve. Pullagainst the trailer for an extra check ofproper hook-up. Do not pull hardenough to damage or strain theequipment.
6.Set the tractor parking brakes and fullyraise the trailer landing gear.
7.Check the operation of all trailer lightsand correct any lights that may befaulty.
Un-hook
1.Try to keep the tractor and trailer in astraight line.
2.Apply the parking brakes.
3.Lower the trailer landing gear, makingsure it is on solid, level ground. Theweight of the trailer is to be on thelanding gear.
4.Block the trailer wheels.
5.Disconnect the brake hoses and lightcords. Be sure hoses and cords areclear.
6.Pull coupler release lever to disengagethe fifth wheel jaws.
184
2024 F-650/750 (TBC) , enUSA, Edition date: 202210, First-PrintingTowing
Page 191 of 386
ECONOMICAL DRIVING
Your fuel economy is affected by severalthings, such as how you drive, theconditions you drive under, and how youmaintain your vehicle.
You may improve your fuel economy bykeeping these things in mind:
•Accelerate and slow down in a smooth,moderate fashion.
•Drive at steady speeds withoutstopping.
•Anticipate stops; slowing down mayeliminate the need to stop.
•Close the windows for high-speeddriving.
•Drive at reasonable speeds. Travelingat 55 mph (90 km/h) uses 15% lessfuel than traveling at 65 mph(105 km/h).
•Keep the tires properly inflated and useonly the recommended size.
•Use the recommended engine oil.
•Perform all regularly scheduledmaintenance.
Avoid these actions; they reduce your fueleconomy:
•Sudden accelerations or hardaccelerations.
•Warm up your vehicle on coldmornings.
•Use the air conditioner.
•Use the speed control in hilly terrain.
•Rest your foot on the brake pedal whiledriving.
•Carry unnecessary weight.Approximately 1 mpg [0.4 km/L] is lostfor every 400 lb (180 kg) of weightcarried.
•Driving with the wheels out ofalignment.
Conditions
•Adding certain accessories to yourvehicle may reduce fuel economy. Forexample bug deflectors, rollbars, lightbars, running boards, ski racks orluggage racks.
•Using fuel blended with alcohol maylower fuel economy.
•Fuel economy may decrease with lowertemperatures during the first 5–10 mi(12–16 km) of driving.
•Driving on flat terrain offers improvedfuel economy as compared to drivingon hilly terrain.
•Transmissions give their best fueleconomy when operated in the topcruise gear and with steady pressureon the gas pedal.
COLD WEATHER
PRECAUTIONS - 6.7L DIESEL
Winter Grille Cover (If Equipped)
The winter grille cover enhances heaterperformance and will reduce the amountof time it takes to warm the inside of yourvehicle in extremely cold conditions below-0.4°F (-18°C).
The winter grille cover installs over theoutside of the front grille and restricts theair flowing to the engine compartment bycovering the radiator grille openings.
187
2024 F-650/750 (TBC) , enUSA, Edition date: 202210, First-PrintingDriving Hints
Page 193 of 386
DRIVING THROUGH WATER
WARNING: Do not drive throughflowing or deep water as you may losecontrol of your vehicle.
Note:Driving through standing water cancause vehicle damage.
Note:Engine damage can occur if waterenters the air filter.
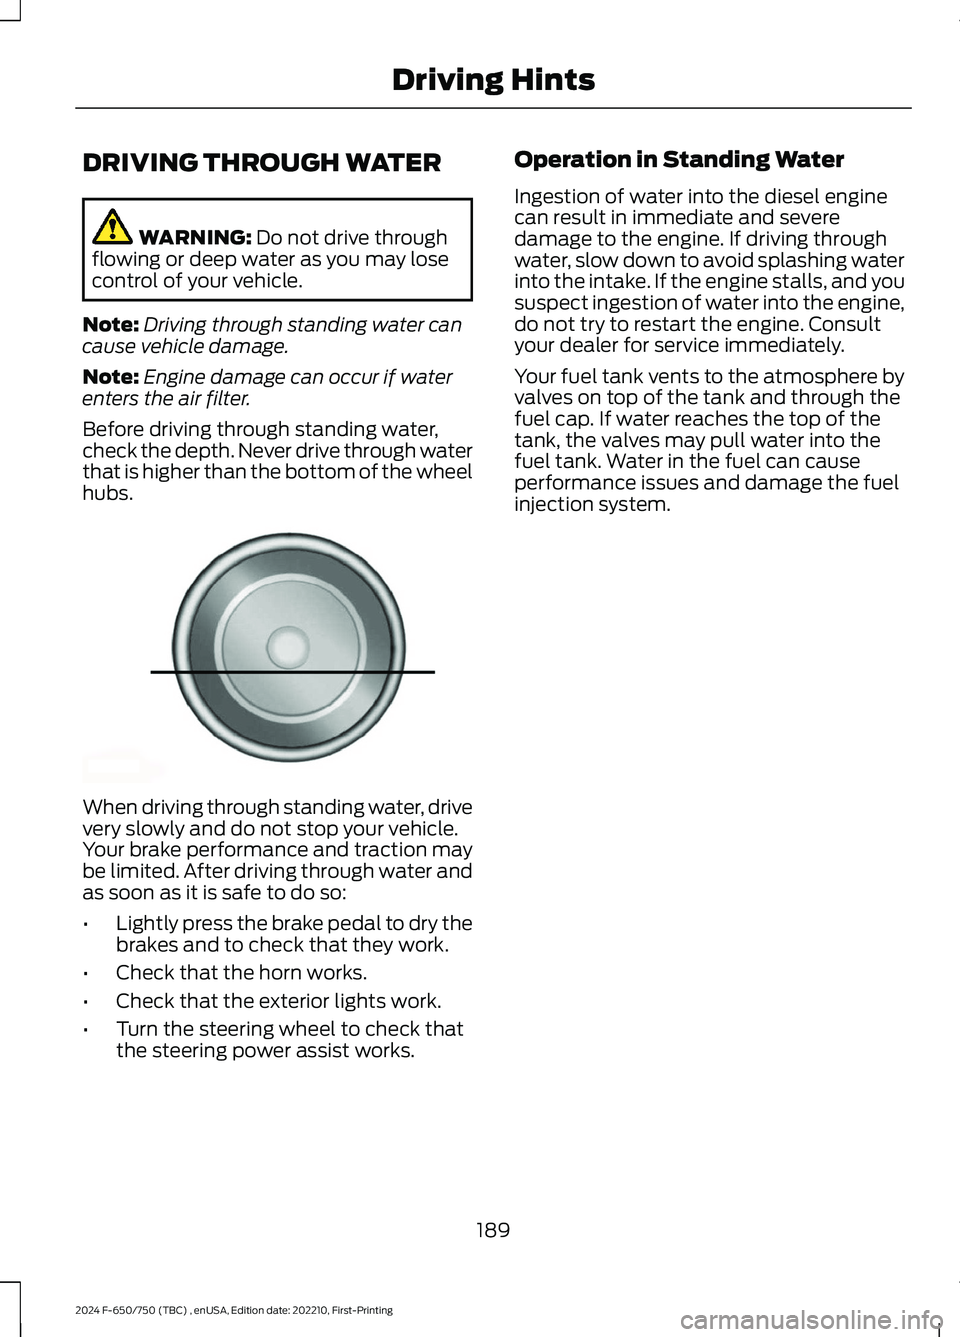
Before driving through standing water,check the depth. Never drive through waterthat is higher than the bottom of the wheelhubs.
When driving through standing water, drivevery slowly and do not stop your vehicle.Your brake performance and traction maybe limited. After driving through water andas soon as it is safe to do so:
•Lightly press the brake pedal to dry thebrakes and to check that they work.
•Check that the horn works.
•Check that the exterior lights work.
•Turn the steering wheel to check thatthe steering power assist works.
Operation in Standing Water
Ingestion of water into the diesel enginecan result in immediate and severedamage to the engine. If driving throughwater, slow down to avoid splashing waterinto the intake. If the engine stalls, and yoususpect ingestion of water into the engine,do not try to restart the engine. Consultyour dealer for service immediately.
Your fuel tank vents to the atmosphere byvalves on top of the tank and through thefuel cap. If water reaches the top of thetank, the valves may pull water into thefuel tank. Water in the fuel can causeperformance issues and damage the fuelinjection system.
189
2024 F-650/750 (TBC) , enUSA, Edition date: 202210, First-PrintingDriving HintsE176913
Page 218 of 386
Engine compartment (with engine off)
Inspect for glazing, fraying or cracking. There should be nomore than 5-7 cracks per rib, per 1 in (2.5 cm)Belts (fan, alternator,water pump and airconditioningcompressor)
Inspect for signs of fluid puddles or dripping fluid on theground under the engine, or the underside of the engine.Fluid leaks
Inspect for debris that may have collected on the HVAC airinlet grille or inside the exterior module as this may reducesystem performance.
HVAC air inlet
Engine starting (with parking brake applied)
Before entering the cab, verify that the vehicle is equippedwith spare electrical fuses (if used), three red reflectivetriangles, a properly charged and rated fire extinguisher andwheel chocks.
Safety and emergencyequipment
Walk around the vehicle and verify all steps and grab handles,inside and out (as well as behind), are tight and clean. Useextreme caution and a three-point stance at all times.
Inspect door latches for proper closing, latching and locking.
Set the parking brake. Make sure the gearshift lever is inneutral (N) or park (P) (if equipped with a park position).Starting the engine
Diesel engine: Turn the key to the on position. Turn the keyto start when the wait to start indicator light in the instrumentcluster turns off.
Gasoline engine: Turn the key to start, and then release itas soon as the engine starts.
Verify pressure builds to normal operating range.Engine oil pressure
A tone indicating low air pressure should sound immediatelyafter the engine starts but before the compressor has built-up pressure. The tone should stop when the air pressurereaches 70 psi (483 kPa). Let the air pressure build togoverned cutout pressure, which should occur between115–130 psi (793–896 kPa).
Low air pressure warningtone (if equipped with anair compressor)
Press the accelerator and verify that it operates smoothly,without any binding or irregular feel. Release the pedal andverify the engine returns to idle speed immediately.
Accelerator
214
2024 F-650/750 (TBC) , enUSA, Edition date: 202210, First-PrintingVehicle Inspection Guide