2024 FORD F650/750 wheel
[x] Cancel search: wheelPage 28 of 386

INSTRUMENT PANEL
Direction indicators. See Direction Indicators (page 58). Wiper lever. SeeWindshield Wipers (page 54).A
Information display control. See Information Display Control (page 53).B
Instrument cluster. See General Information (page 71).C
Gearshift lever. See Automatic Transmission (page 130).D
Hazard flasher switch. See Hazard Flashers (page 190).E
Audio unit. See Audio System (page 315).F
Climate controls. See Climate Control (page 86).G
Auxiliary switches. See Auxiliary Switches (page 321).H
Ignition. See Ignition Switch (page 101).I
Horn. See Horn (page 53).J
Steering wheel adjustment. See Adjusting the Steering Wheel (page 52).K
Cruise control. See Cruise Control (page 158).L
Lighting control. See Lighting Control (page 55).M
24
2024 F-650/750 (TBC) , enUSA, Edition date: 202210, First-PrintingAt a GlanceE307565
Page 56 of 386
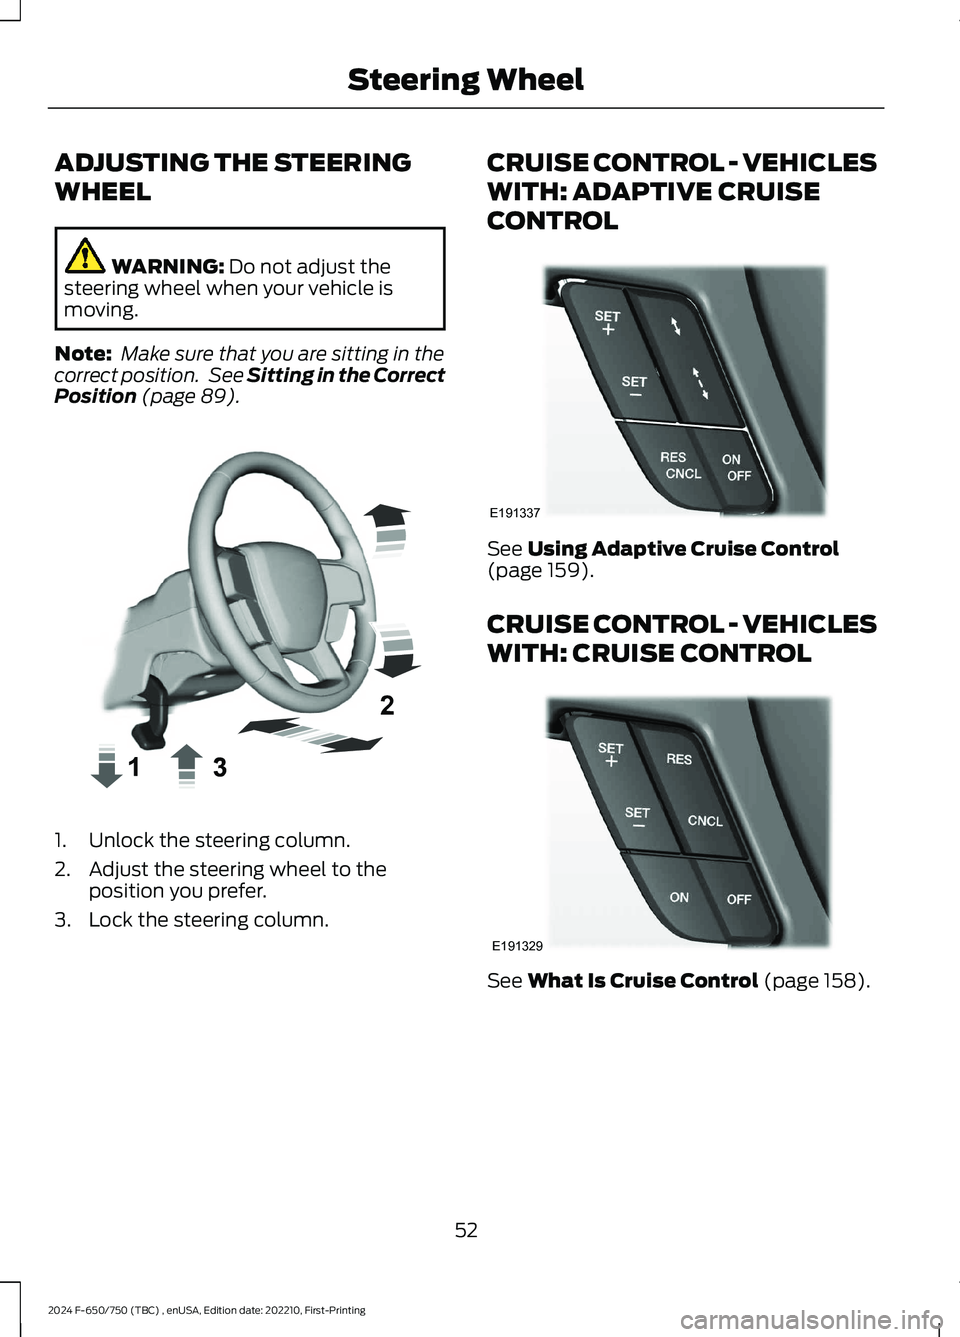
ADJUSTING THE STEERING
WHEEL
WARNING: Do not adjust thesteering wheel when your vehicle ismoving.
Note: Make sure that you are sitting in thecorrect position. See Sitting in the CorrectPosition (page 89).
1.Unlock the steering column.
2.Adjust the steering wheel to theposition you prefer.
3.Lock the steering column.
CRUISE CONTROL - VEHICLES
WITH: ADAPTIVE CRUISE
CONTROL
See Using Adaptive Cruise Control(page 159).
CRUISE CONTROL - VEHICLES
WITH: CRUISE CONTROL
See What Is Cruise Control (page 158).
52
2024 F-650/750 (TBC) , enUSA, Edition date: 202210, First-PrintingSteering WheelE359744 E191337 E191329
Page 57 of 386
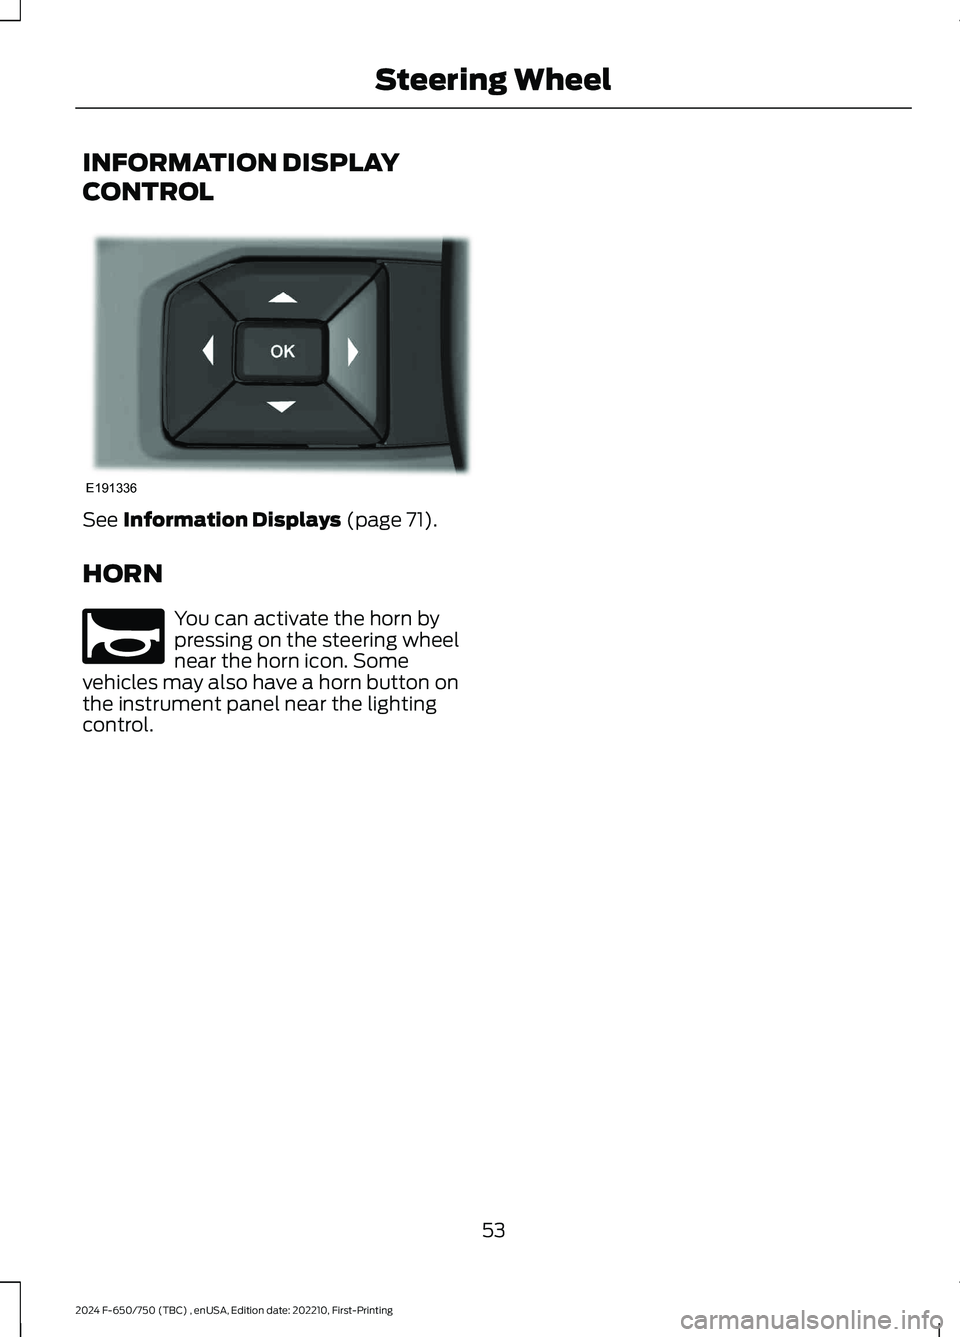
INFORMATION DISPLAY
CONTROL
See Information Displays (page 71).
HORN
You can activate the horn bypressing on the steering wheelnear the horn icon. Somevehicles may also have a horn button onthe instrument panel near the lightingcontrol.
53
2024 F-650/750 (TBC) , enUSA, Edition date: 202210, First-PrintingSteering WheelE191336 E270945
Page 86 of 386
Lane Departure Warning System
ActionMessage
The system has detected a condition thathas caused the system to be temporarilyunavailable. If the message continues todisplay, have the system checked as soonas possible.
Front Camera Temporarily Not Available
The system has detected a condition thatrequires you to clean the windshield in orderfor it to operate properly.
Front Camera Low Visibility Clean Screen
The system requires service, have thesystem checked as soon as possible.Front Camera Malfunction Service Required
The system requests you to keep yourhands on the steering wheel.Keep Hands on Steering Wheel
Maintenance
ActionMessage
Stop your vehicle as soon as safely possibleand turn off the engine. Check the oil level,if the warning stays on or continues to comeon with your engine running, have yourvehicle checked as soon as possible.
Low Engine Oil Pressure
The engine oil life is low and needs to bechanged soon.Change Engine Oil Soon
The engine oil life is low and needs to bechanged immediately.Oil Change Required
The brake fluid level is low, have the systemchecked as soon as possible.Brake Fluid Level Low
The brake system requires service. Stopyour vehicle in a safe place. Have thesystem checked as soon as possible.
Check Brake System
Your vehicle is still in transport or factorymode. This may not allow some featuresto operate properly. Have your vehiclechecked as soon as possible.
Factory Mode Contact Dealer
Transport Mode Contact Dealer
The powertrain requires service.See Manual
82
2024 F-650/750 (TBC) , enUSA, Edition date: 202210, First-PrintingInformation Displays
Page 93 of 386
SITTING IN THE CORRECT
POSITION
WARNING: Do not recline theseatback as this can cause the occupantto slide under the safety belt, resultingin serious injury in the event of a crash.
WARNING: Do not place objectshigher than the seatback to reduce therisk of serious injury in the event of acrash or during heavy braking.
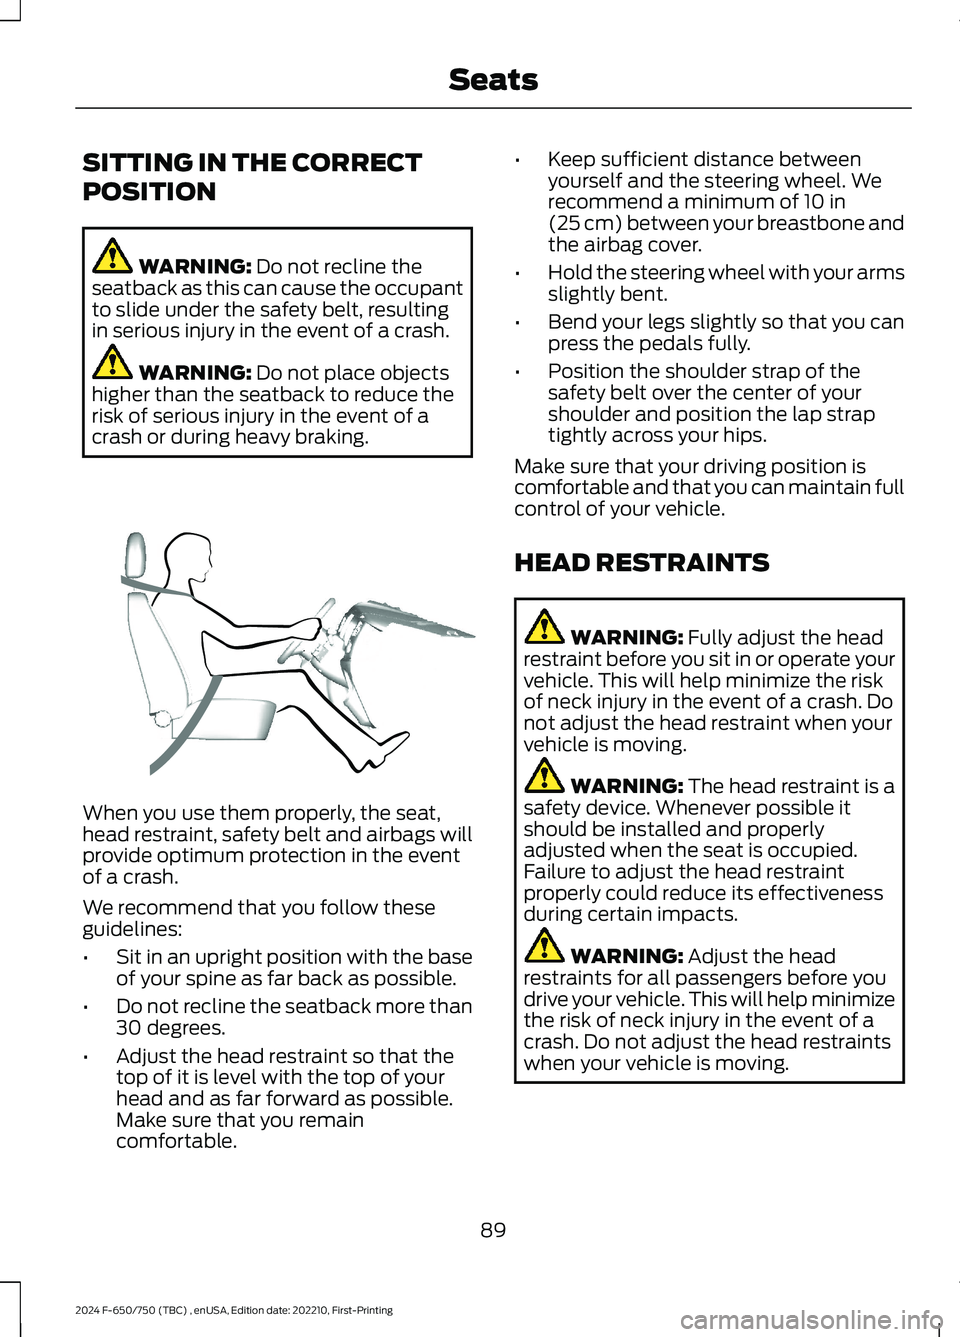
When you use them properly, the seat,head restraint, safety belt and airbags willprovide optimum protection in the eventof a crash.
We recommend that you follow theseguidelines:
•Sit in an upright position with the baseof your spine as far back as possible.
•Do not recline the seatback more than30 degrees.
•Adjust the head restraint so that thetop of it is level with the top of yourhead and as far forward as possible.Make sure that you remaincomfortable.
•Keep sufficient distance betweenyourself and the steering wheel. Werecommend a minimum of 10 in(25 cm) between your breastbone andthe airbag cover.
•Hold the steering wheel with your armsslightly bent.
•Bend your legs slightly so that you canpress the pedals fully.
•Position the shoulder strap of thesafety belt over the center of yourshoulder and position the lap straptightly across your hips.
Make sure that your driving position iscomfortable and that you can maintain fullcontrol of your vehicle.
HEAD RESTRAINTS
WARNING: Fully adjust the headrestraint before you sit in or operate yourvehicle. This will help minimize the riskof neck injury in the event of a crash. Donot adjust the head restraint when yourvehicle is moving.
WARNING: The head restraint is asafety device. Whenever possible itshould be installed and properlyadjusted when the seat is occupied.Failure to adjust the head restraintproperly could reduce its effectivenessduring certain impacts.
WARNING: Adjust the headrestraints for all passengers before youdrive your vehicle. This will help minimizethe risk of neck injury in the event of acrash. Do not adjust the head restraintswhen your vehicle is moving.
89
2024 F-650/750 (TBC) , enUSA, Edition date: 202210, First-PrintingSeatsE68595
Page 125 of 386
WARNING: Only refill the dieselexhaust fluid tank in a well ventilatedarea. When you remove the dieselexhaust fluid tank filler cap or a dieselexhaust fluid container cap, ammoniavapors may escape. Ammonia vaporscan be irritating to skin, eyes and mucousmembranes. Inhaling ammonia vaporscan cause burning to the eyes, throat andnose and cause coughing and wateryeyes.
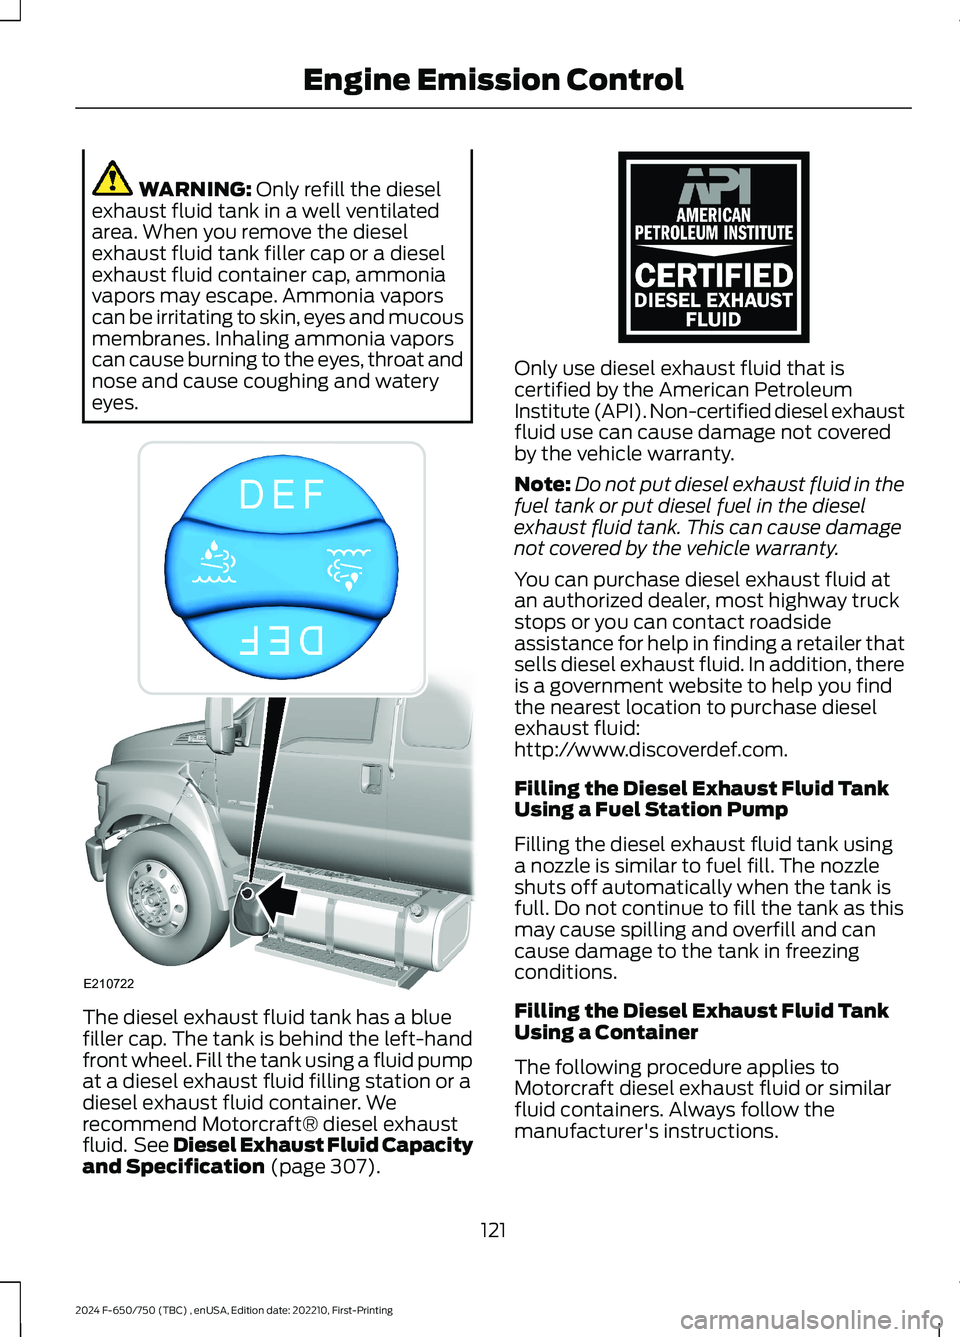
The diesel exhaust fluid tank has a bluefiller cap. The tank is behind the left-handfront wheel. Fill the tank using a fluid pumpat a diesel exhaust fluid filling station or adiesel exhaust fluid container. Werecommend Motorcraft® diesel exhaustfluid. See Diesel Exhaust Fluid Capacityand Specification (page 307).
Only use diesel exhaust fluid that iscertified by the American PetroleumInstitute (API). Non-certified diesel exhaustfluid use can cause damage not coveredby the vehicle warranty.
Note:Do not put diesel exhaust fluid in thefuel tank or put diesel fuel in the dieselexhaust fluid tank. This can cause damagenot covered by the vehicle warranty.
You can purchase diesel exhaust fluid atan authorized dealer, most highway truckstops or you can contact roadsideassistance for help in finding a retailer thatsells diesel exhaust fluid. In addition, thereis a government website to help you findthe nearest location to purchase dieselexhaust fluid:http://www.discoverdef.com.
Filling the Diesel Exhaust Fluid TankUsing a Fuel Station Pump
Filling the diesel exhaust fluid tank usinga nozzle is similar to fuel fill. The nozzleshuts off automatically when the tank isfull. Do not continue to fill the tank as thismay cause spilling and overfill and cancause damage to the tank in freezingconditions.
Filling the Diesel Exhaust Fluid TankUsing a Container
The following procedure applies toMotorcraft diesel exhaust fluid or similarfluid containers. Always follow themanufacturer's instructions.
121
2024 F-650/750 (TBC) , enUSA, Edition date: 202210, First-PrintingEngine Emission ControlE210722 E163354
Page 132 of 386
Information Display Procedure
Start your vehicle engine and when it hasreached the normal operating temperature,arrow through the display to get to theDiesel Particulate Filter Status on theTruck Info tab. Exhaust Filter XX%/FULLdisplays. Operator commandedregeneration can only be initiated whenFULL See Information Display Control(page 53). If a message advising that theexhaust filter is full appears in theinformation display, press and hold the OKbutton to initiate Exhaust Cleaning. Ifsuccessful, a second prompt appearsregarding exhaust position required toinitiate operator commanded regeneration.Be sure to understand each prompt. If youare not sure what is being asked by eachprompt, contact an authorized dealer. Ifthe exhaust system meets the positionrequirements then press and hold the OKbutton to fully activate the OperatorCommanded Regeneration. The displayconfirms the operation has started andwhen it has finished.
You can also drive to clean the filter.
When the system is at the pointof oversaturation, the serviceengine warning lamp illuminatesand a message appears in the informationdisplay. You cannot initiate filter cleaning.You must have your vehicle checked assoon as possible.
Once operator commanded regenerationstarts, engine speed increases toapproximately 1200 rpm and the coolingfan speed may increase. You will hear achange in audible sound due to enginespeed and cooling fan speed increases.
It is not necessary to open the hood on theengine compartment. Once operatorcommanded regeneration completes, theengine speed returns to normal idling. Theexhaust system remains very hot forseveral minutes even after regeneration is
complete. Do not reposition the vehicleover materials that could burn until theexhaust system has had sufficient time tocool. Depending on the amount of sootcollected by the diesel particulate filter,ambient temperature and altitude,operator commanded regeneration lastsapproximately 30 minutes.
Operator Commanded Regenerationwith Automatic Regeneration Control(If Equipped)
If your vehicle is operated with significantstationary operation, low speed drivecycles less than 25 mph (40 km/h), shortdrive cycles, drive time less than 15 minutesor the vehicle does not fully warm up,passive and active regeneration may notsufficiently clean the diesel particulatefilter system. You can switch off automaticregeneration until better driving conditionsare available, for example steady highspeed driving. You can then switchautomatic regeneration back on to cleanthe diesel particulate filter.
Switching Automatic RegenerationControl On and Off
To switch operator commandedregeneration on and off, use theinformation display control on the steeringwheel. See Information Display Control(page 53). Scroll through the Settings tabto ensure there is a check in the box nextto Auto Regeneration, this means it isactive. To deactivate Auto Regeneration,uncheck the box. A message appears “AutoExhaust Cleaning Off” along with an iconindicating that Auto Exhaust Cleaning isdisabled. The icon stays illuminated untilyou switch Auto Exhaust Cleaning back onby checking the box.
128
2024 F-650/750 (TBC) , enUSA, Edition date: 202210, First-PrintingEngine Emission ControlE67028
Page 134 of 386

AUTOMATIC TRANSMISSION
WARNING: Apply the parkingbrake, shift into park (P), switch theignition off and remove the key beforeyou leave your vehicle. Failure to followthis instruction could result in personalinjury or death.
WARNING: Do not apply the brakepedal and accelerator pedalsimultaneously. Applying both pedalssimultaneously for more than a fewseconds limits vehicle performance,which may result in difficulty maintainingspeed in traffic and could lead to seriousinjury.
Understanding the Shift Positionsof Your Automatic Transmission
6-Speed Transmissions
10-Speed Transmissions
Putting your vehicle in or out of gear:
1.Fully press the brake pedal.
2.Move the gearshift lever into thepreferred gear.
3.When you finish driving, come to acomplete stop.
4.Move the gearshift lever and securelylatch it in park (P) or neutral (N).
The instrument cluster displays the currentgear.
Park (P)
If your transmission has a park (P) position,this position locks the transmission andprevents the rear wheels from turning.
Reverse (R)
With the gearshift lever in reverse (R), yourvehicle moves backward. Always come toa complete stop before shifting into andout of reverse (R).
Neutral (N)
With the gearshift lever in neutral (N), youcan start your vehicle and it is free to roll.Hold the brake pedal down when in thisposition.
Drive (D)
Drive (D) is the normal driving position forthe best fuel economy. The overdrivefunction allows automatic upshifts anddownshifts through gears one through six.
Manual (M)
With the gearshift lever in manual (M), thedriver can change gears up or down aspreferred. By moving the gearshift leverfrom drive (D) to manual (M), you nowhave control of selecting the gear youprefer using the buttons on the shift lever.See Understanding Your SelectShiftAutomatic™ Transmission later in thissection.
130
2024 F-650/750 (TBC) , enUSA, Edition date: 202210, First-PrintingTransmissionE163183 E308145