2024 FORD F650/750 buttons
[x] Cancel search: buttonsPage 53 of 386

LOCKING AND UNLOCKING
You can use the power door lock controlor the remote control to lock and unlockyour vehicle.
Power Door Locks (If Equipped)
The power door lock control is on the driverand front passenger door panels.
Unlock.A
Lock.B
Remote Control (If Equipped)
Unlocking the Doors (Two-StageUnlock)
Press the button to unlock thedriver door.
Press the button again withinthree seconds to unlock all doors. Thedirection indicators flash.
Press and hold both the lock and unlockbuttons on the remote control for fourseconds to disable or enable two-stageunlocking. Disabling two-stage unlockingallows all vehicle doors to unlock with onepress of the button. The directionindicators flash twice to indicate a changeto the unlocking mode. The unlockingmode applies to the remote control.
Locking the Doors
Press the button to lock all thedoors. The direction indicatorsflash.
Press the button again within threeseconds to confirm that all the doors lock.The doors lock again, the horn sounds andthe direction indicators flash if all the doorslock.
Mislock
If any door is open or if the hood is open onvehicles with an anti-theft alarm or remotestart, the horn sounds twice and the lampsdo not flash.
Smart Unlocks (If Equipped)
This feature helps prevent you from lockingyourself out of your vehicle if your key isstill in the ignition.
When you open the driver door and lockyour vehicle with the power door lockcontrol, all the doors lock, then unlock ifyour key is still in the ignition.
You can still lock your vehicle with the keyin the ignition by:
•Using the manual lock on the door.
•Locking the driver door with a key.
•Using the lock button on the remotecontrol.
Autolock
Autolock locks all the doors when all of thefollowing occur:
•All doors are closed.
•The ignition is on.
•The vehicle reaches a speed greaterthan 12 mph (20 km/h).
49
2024 F-650/750 (TBC) , enUSA, Edition date: 202210, First-PrintingDoors and LocksABE163049 E138629 E138623
Page 60 of 386

Flashing the Headlamp High Beam
Slightly pull the lever toward you andrelease it to flash the headlamps.
AUTOLAMPS
WARNING: The system does notrelieve you of your responsibility to drivewith due care and attention. You mayneed to override the system if it does notturn the headlamps on in low visibilityconditions, for example daytime fog.
Autolamps turn the headlamps on in lowlight situations or when the wipers operate.
Switch the lighting control to theautolamps position.
The headlamps remain on for a period oftime after you switch the ignition off. Usethe information display controls to adjustthe period of time that the headlampsremain on.
Note: If you switch the autolamps on, youcannot switch the high beams on until thesystem turns the low beams on.
Windshield Wiper ActivatedHeadlamps
When you switch the autolamps on, theheadlamps turn on within 10 seconds ofswitching the wipers on. They turn offapproximately 60 seconds after you switchthe windshield wipers off.
The headlamps do not turn on with thewipers:
•During a single wipe.
•When using the windshield washers.
•If the wipers are in intermittent mode.
Note:If you switch the autolamps and theautowipers on, the headlamps turn on whenthe windshield wipers continuously operate.
INSTRUMENT LIGHTING
DIMMER
The instrument lighting dimmer buttonsare on the lighting control.
Repeatedly press one of thebuttons to adjust the brightness.
HEADLAMP EXIT DELAY
After you switch the ignition off, you canswitch the headlamps on by pulling thedirection indicator lever toward you. Youwill hear a short tone. The headlamps willswitch off automatically after threeminutes with any door open or 30 secondsafter the last door has been closed. Youcan cancel this feature by pulling thedirection indicator lever toward you againor switching the ignition on.
56
2024 F-650/750 (TBC) , enUSA, Edition date: 202210, First-PrintingLightingE311233 E291299 E296433
Page 75 of 386
GENERAL INFORMATION
WARNING: Driving while distractedcan result in loss of vehicle control, crashand injury. We strongly recommend thatyou use extreme caution when using anydevice that may take your focus off theroad. Your primary responsibility is thesafe operation of your vehicle. Werecommend against the use of anyhand-held device while driving andencourage the use of voice-operatedsystems when possible. Make sure youare aware of all applicable local lawsthat may affect the use of electronicdevices while driving.
Note:Trailer options are not available ifyour vehicle speed is greater than 3 mph(5 km/h).
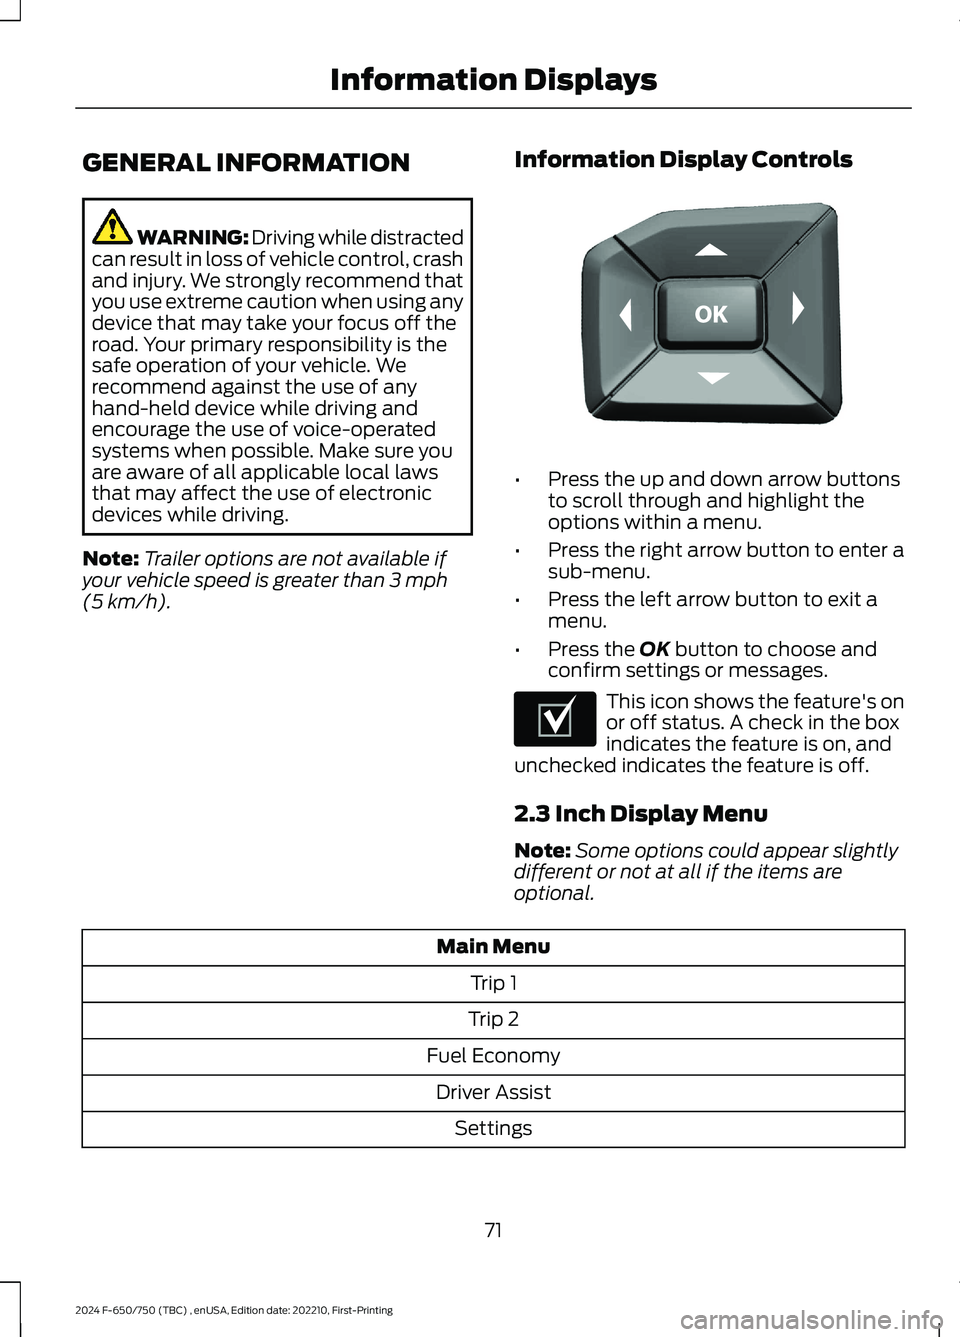
Information Display Controls
•Press the up and down arrow buttonsto scroll through and highlight theoptions within a menu.
•Press the right arrow button to enter asub-menu.
•Press the left arrow button to exit amenu.
•Press the OK button to choose andconfirm settings or messages.
This icon shows the feature's onor off status. A check in the boxindicates the feature is on, andunchecked indicates the feature is off.
2.3 Inch Display Menu
Note:Some options could appear slightlydifferent or not at all if the items areoptional.
Main Menu
Trip 1
Trip 2
Fuel Economy
Driver Assist
Settings
71
2024 F-650/750 (TBC) , enUSA, Edition date: 202210, First-PrintingInformation DisplaysE184451 E204495
Page 94 of 386
Note:Adjust the seat backrest to an uprightdriving position before adjusting the headrestraint. Adjust the head restraint so thatthe top of it is level with the top of your headand as far forward as possible. Make surethat you remain comfortable. If you areextremely tall, adjust the head restraint toits highest position.
Front Seat Adjustable Head Restraint(If Equipped)
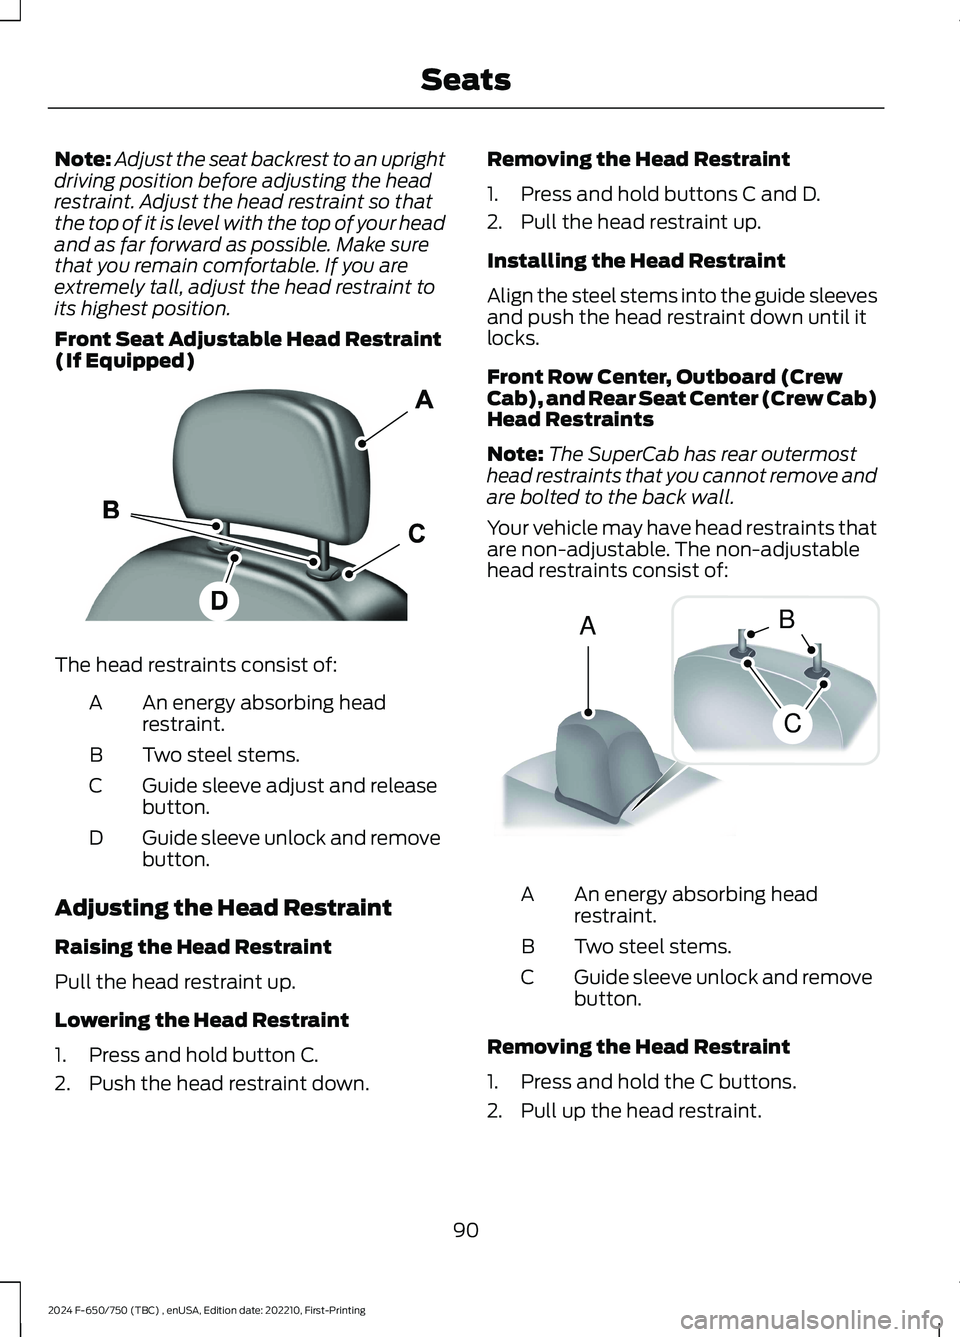
The head restraints consist of:
An energy absorbing headrestraint.A
Two steel stems.B
Guide sleeve adjust and releasebutton.C
Guide sleeve unlock and removebutton.D
Adjusting the Head Restraint
Raising the Head Restraint
Pull the head restraint up.
Lowering the Head Restraint
1.Press and hold button C.
2.Push the head restraint down.
Removing the Head Restraint
1.Press and hold buttons C and D.
2.Pull the head restraint up.
Installing the Head Restraint
Align the steel stems into the guide sleevesand push the head restraint down until itlocks.
Front Row Center, Outboard (CrewCab), and Rear Seat Center (Crew Cab)Head Restraints
Note:The SuperCab has rear outermosthead restraints that you cannot remove andare bolted to the back wall.
Your vehicle may have head restraints thatare non-adjustable. The non-adjustablehead restraints consist of:
An energy absorbing headrestraint.A
Two steel stems.B
Guide sleeve unlock and removebutton.C
Removing the Head Restraint
1.Press and hold the C buttons.
2.Pull up the head restraint.
90
2024 F-650/750 (TBC) , enUSA, Edition date: 202210, First-PrintingSeatsE138642 ACB E162872
Page 134 of 386

AUTOMATIC TRANSMISSION
WARNING: Apply the parkingbrake, shift into park (P), switch theignition off and remove the key beforeyou leave your vehicle. Failure to followthis instruction could result in personalinjury or death.
WARNING: Do not apply the brakepedal and accelerator pedalsimultaneously. Applying both pedalssimultaneously for more than a fewseconds limits vehicle performance,which may result in difficulty maintainingspeed in traffic and could lead to seriousinjury.
Understanding the Shift Positionsof Your Automatic Transmission
6-Speed Transmissions
10-Speed Transmissions
Putting your vehicle in or out of gear:
1.Fully press the brake pedal.
2.Move the gearshift lever into thepreferred gear.
3.When you finish driving, come to acomplete stop.
4.Move the gearshift lever and securelylatch it in park (P) or neutral (N).
The instrument cluster displays the currentgear.
Park (P)
If your transmission has a park (P) position,this position locks the transmission andprevents the rear wheels from turning.
Reverse (R)
With the gearshift lever in reverse (R), yourvehicle moves backward. Always come toa complete stop before shifting into andout of reverse (R).
Neutral (N)
With the gearshift lever in neutral (N), youcan start your vehicle and it is free to roll.Hold the brake pedal down when in thisposition.
Drive (D)
Drive (D) is the normal driving position forthe best fuel economy. The overdrivefunction allows automatic upshifts anddownshifts through gears one through six.
Manual (M)
With the gearshift lever in manual (M), thedriver can change gears up or down aspreferred. By moving the gearshift leverfrom drive (D) to manual (M), you nowhave control of selecting the gear youprefer using the buttons on the shift lever.See Understanding Your SelectShiftAutomatic™ Transmission later in thissection.
130
2024 F-650/750 (TBC) , enUSA, Edition date: 202210, First-PrintingTransmissionE163183 E308145
Page 136 of 386
Understanding Your SelectShift™Automatic Transmission
Your vehicle has a SelectShift automatictransmission gearshift lever. SelectShiftautomatic transmission gives you theability to change gears up or down, withouta clutch.
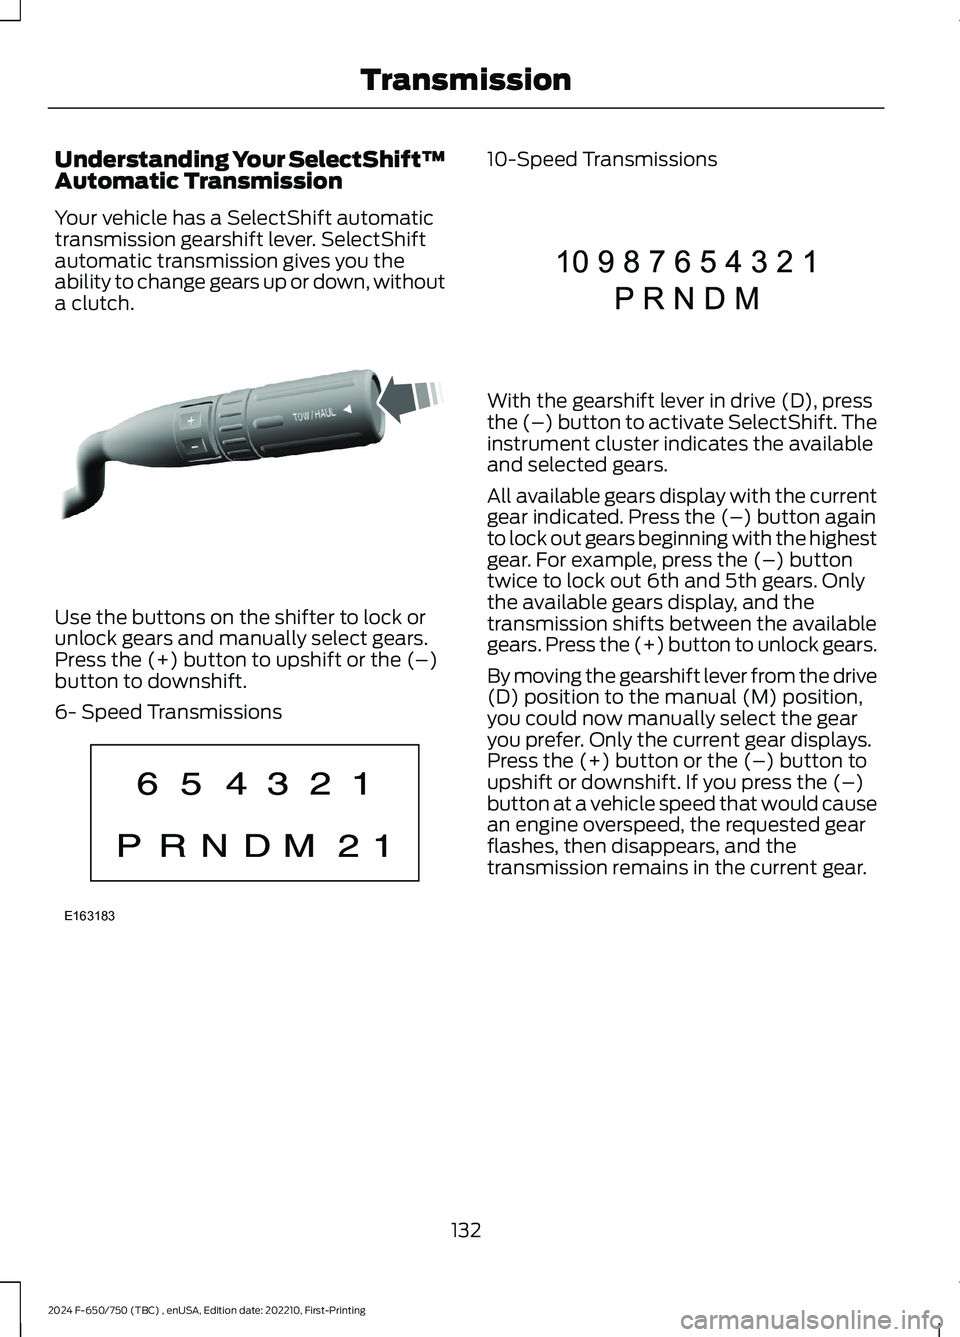
Use the buttons on the shifter to lock orunlock gears and manually select gears.Press the (+) button to upshift or the (–)button to downshift.
6- Speed Transmissions
10-Speed Transmissions
With the gearshift lever in drive (D), pressthe (–) button to activate SelectShift. Theinstrument cluster indicates the availableand selected gears.
All available gears display with the currentgear indicated. Press the (–) button againto lock out gears beginning with the highestgear. For example, press the (–) buttontwice to lock out 6th and 5th gears. Onlythe available gears display, and thetransmission shifts between the availablegears. Press the (+) button to unlock gears.
By moving the gearshift lever from the drive(D) position to the manual (M) position,you could now manually select the gearyou prefer. Only the current gear displays.Press the (+) button or the (–) button toupshift or downshift. If you press the (–)button at a vehicle speed that would causean engine overspeed, the requested gearflashes, then disappears, and thetransmission remains in the current gear.
132
2024 F-650/750 (TBC) , enUSA, Edition date: 202210, First-PrintingTransmissionE318028 E163183 E308145
Page 320 of 386
Accessing the Sound Settings
Press the button to adjust thesound settings. You can alsoactivate and set the sensitivityof the adaptive or speed compensatedvolume.
Accessing the System Settings
Press the button.
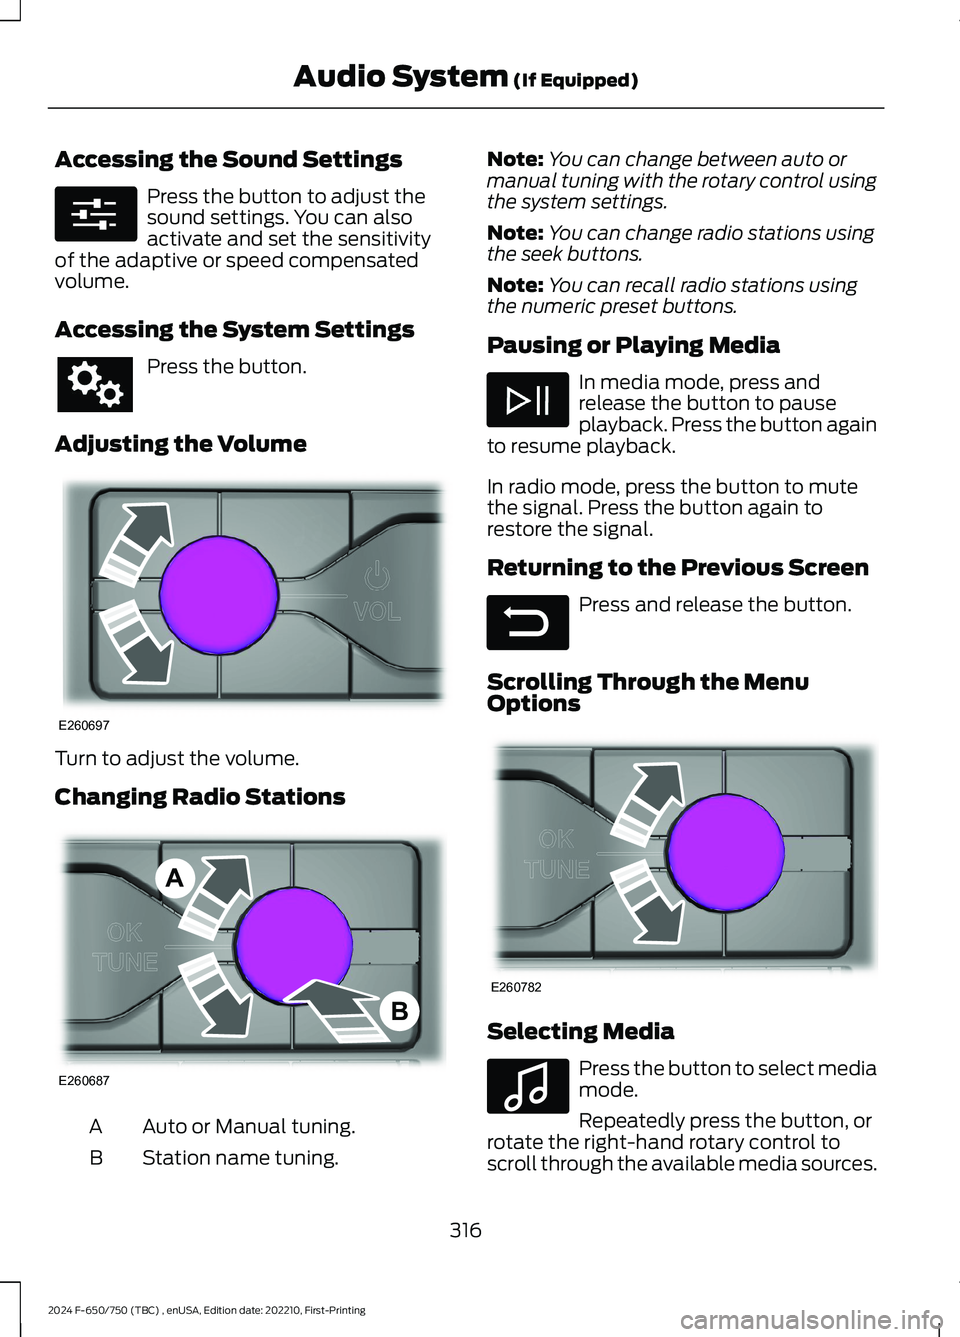
Adjusting the Volume
Turn to adjust the volume.
Changing Radio Stations
Auto or Manual tuning.A
Station name tuning.B
Note:You can change between auto ormanual tuning with the rotary control usingthe system settings.
Note:You can change radio stations usingthe seek buttons.
Note:You can recall radio stations usingthe numeric preset buttons.
Pausing or Playing Media
In media mode, press andrelease the button to pauseplayback. Press the button againto resume playback.
In radio mode, press the button to mutethe signal. Press the button again torestore the signal.
Returning to the Previous Screen
Press and release the button.
Scrolling Through the MenuOptions
Selecting Media
Press the button to select mediamode.
Repeatedly press the button, orrotate the right-hand rotary control toscroll through the available media sources.
316
2024 F-650/750 (TBC) , enUSA, Edition date: 202210, First-PrintingAudio System (If Equipped)E280315 E260697 E260687AB E281480 E260782 E100027
Page 321 of 386
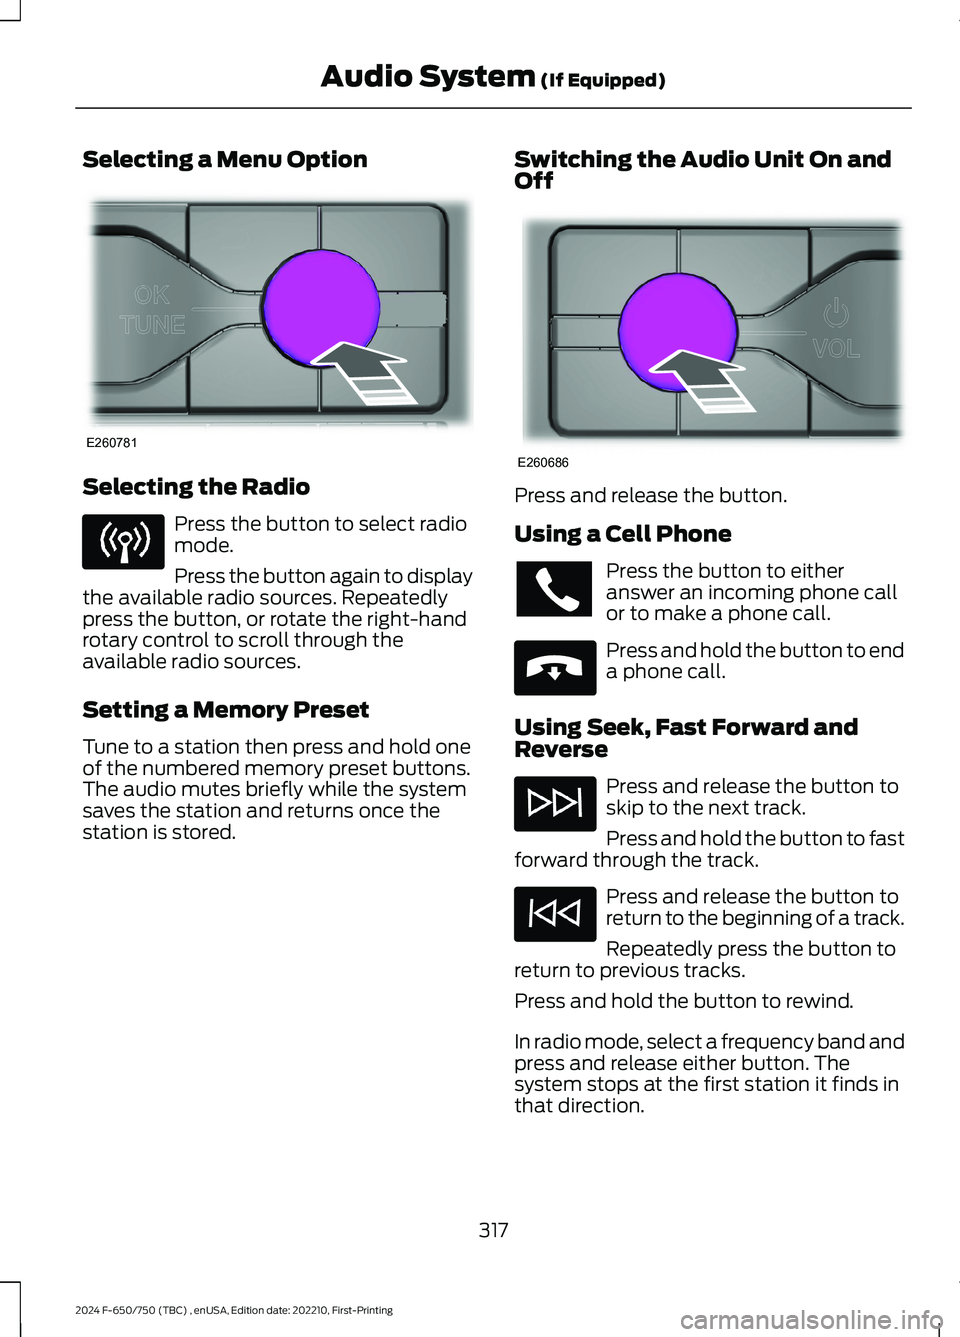
Selecting a Menu Option
Selecting the Radio
Press the button to select radiomode.
Press the button again to displaythe available radio sources. Repeatedlypress the button, or rotate the right-handrotary control to scroll through theavailable radio sources.
Setting a Memory Preset
Tune to a station then press and hold oneof the numbered memory preset buttons.The audio mutes briefly while the systemsaves the station and returns once thestation is stored.
Switching the Audio Unit On andOff
Press and release the button.
Using a Cell Phone
Press the button to eitheranswer an incoming phone callor to make a phone call.
Press and hold the button to enda phone call.
Using Seek, Fast Forward andReverse
Press and release the button toskip to the next track.
Press and hold the button to fastforward through the track.
Press and release the button toreturn to the beginning of a track.
Repeatedly press the button toreturn to previous tracks.
Press and hold the button to rewind.
In radio mode, select a frequency band andpress and release either button. Thesystem stops at the first station it finds inthat direction.
317
2024 F-650/750 (TBC) , enUSA, Edition date: 202210, First-PrintingAudio System (If Equipped)E260781 E260686 E265040