2024 CHEVROLET SILVERADO storage
[x] Cancel search: storagePage 179 of 433
Chevrolet Silverado 2500 HD/3500 HD Owner Manual (GMNA-Localizing-U.
S./Canada/Mexico-16908339) - 2024 - CRC - 12/5/22
Infotainment System 177
Climate and Air Quality
Adjusts different climate settings.
Collision/Detection Systems
Adjusts different driver assistance system
settings.
Comfort and Convenience
Adjusts different comfort and convenience
settings.
Lighting
Adjusts different lighting settings.
Power Door Locks
Adjusts different door lock settings.
Remote Lock, Unlock, and Start
Adjusts different remote lock settings.
Ride Height
Adjusts different ride height settings.
Power Assist Steps
Adjusts different running board settings.
Seating Position
Adjusts different seat settings.
Suspension
Adjusts different suspension settings.Trailering
Adjusts different trailering settings.
Teen Driver
See
Teen Driver 0179.
Valet Mode
This will lock the infotainment system and
steering wheel controls. It may also limit
access to vehicle storage locations,
if equipped.
To enable valet mode: 1. Enter a four-digit code on the keypad.
2. Select Enter to go to the confirmation screen.
3. Re-enter the four-digit code.
Touch Lock or Unlock to lock or unlock the
system. Touch Back to go back to the
previous menu.
Settings (Uplevel Radio)
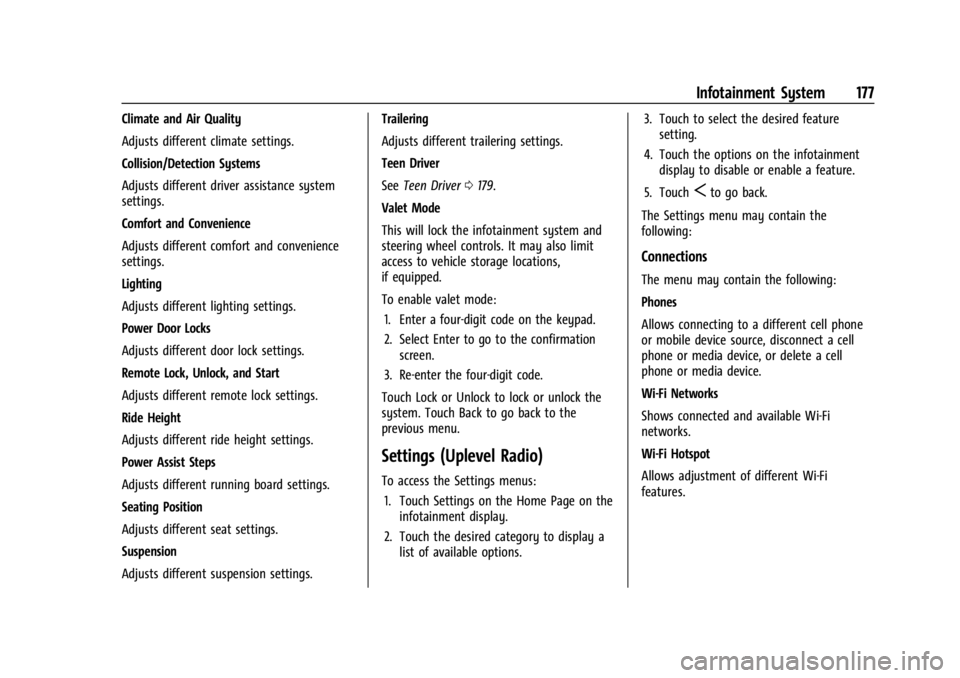
To access the Settings menus: 1. Touch Settings on the Home Page on the infotainment display.
2. Touch the desired category to display a list of available options. 3. Touch to select the desired feature
setting.
4. Touch the options on the infotainment display to disable or enable a feature.
5. Touch
Sto go back.
The Settings menu may contain the
following:
Connections
The menu may contain the following:
Phones
Allows connecting to a different cell phone
or mobile device source, disconnect a cell
phone or media device, or delete a cell
phone or media device.
Wi-Fi Networks
Shows connected and available Wi-Fi
networks.
Wi-Fi Hotspot
Allows adjustment of different Wi-Fi
features.
Page 181 of 433

Chevrolet Silverado 2500 HD/3500 HD Owner Manual (GMNA-Localizing-U.
S./Canada/Mexico-16908339) - 2024 - CRC - 12/5/22
Infotainment System 179
Location Services
Touch to view the Location Services screen.
App permissions
Touch to view the Permission manager
screen.
GM Privacy Statement
Touch to view the GM Privacy Statement
screen.
Google legal
Touch to view the Google legal screen.
Storage
This menu shows the storage info on the
infotainment system.
Security
This menu allows adjustment of the
infotainment security settings.
System
The menu may contain the following:
Language
This will set the display language used on
the infotainment display.Keyboard & speech
Touch to change keyboard and speech
settings.
Reset Options
Touch to change reset settings.
About
Touch to view the infotainment system
software information.
Legal Information
Touch to view legal and license information.
Updates
This menu allows adjustment of the vehicle
update settings.
Google
This menu allows adjustment of the Google
settings.
Teen Driver
If equipped, this allows multiple keys to be
registered for beginner drivers to encourage
safe driving habits. When the vehicle is
started with a Teen Driver key, it will
automatically activate certain safety
systems, allow setting of some features, and
limit the use of others. The Report Card willrecord vehicle data about driving behavior
that can be viewed later. When the vehicle
is started with a registered key, the Driver
Information Center (DIC) displays a message
that Teen Driver is active.
To access:
1. Touch Settings on the Home Page, then touch Vehicle, and then Teen Driver.
2. Create a Personal Identification Number (PIN) by choosing a four-digit PIN.
Re-enter the PIN to confirm. To change
the PIN, touch Change PIN.
The PIN is required to:
.Set up/Add or remove keys.
.Change Teen Driver settings.
.Change or clear the Teen Driver PIN.
.Access or delete Report Card data.
Set up/Add keys to activate Teen Driver and
assign restrictions to the key:
Any vehicle key can be registered, up to a
maximum of eight keys. Label the key to
tell it apart from the other keys.
For a pushbutton start system: 1. Start the vehicle.
Page 270 of 433
Chevrolet Silverado 2500 HD/3500 HD Owner Manual (GMNA-Localizing-U.
S./Canada/Mexico-16908339) - 2024 - CRC - 12/12/22
268 Driving and Operating
Warning (Continued)
.Keep children away from the fuel
pump and never let children
pump fuel.
.Before touching the fill nozzle, touch a
metallic object to discharge static
electricity from your body.
.Fuel can spray out if the fill nozzle is
inserted too quickly. This spray can
happen if the tank is nearly full, and is
more likely in hot weather. Insert the
fill nozzle slowly and wait for any hiss
noise to stop before beginning to
flow fuel.
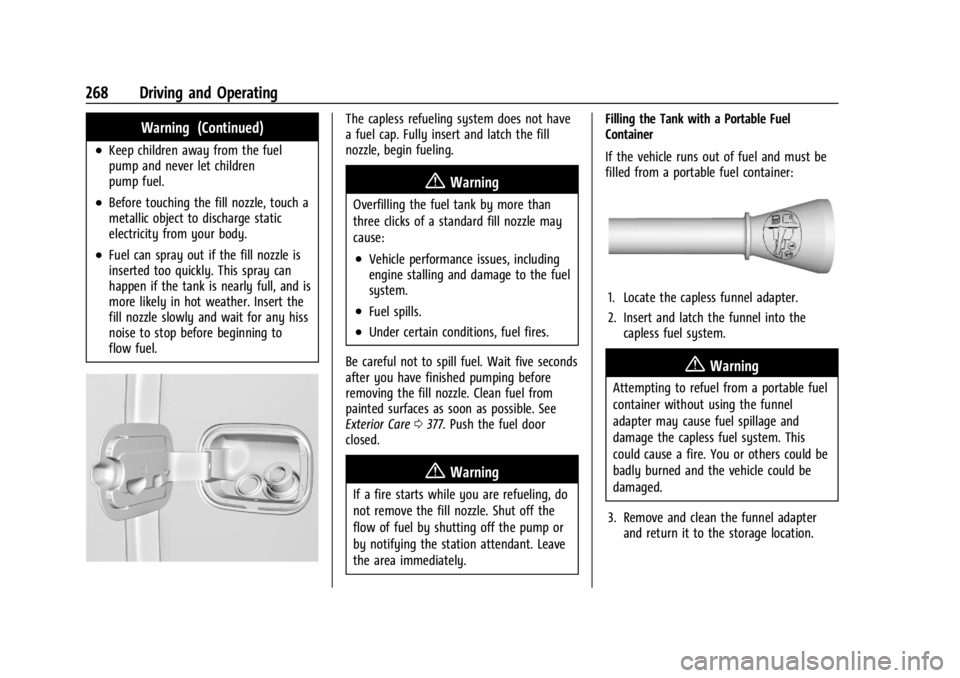
The capless refueling system does not have
a fuel cap. Fully insert and latch the fill
nozzle, begin fueling.
{Warning
Overfilling the fuel tank by more than
three clicks of a standard fill nozzle may
cause:
.Vehicle performance issues, including
engine stalling and damage to the fuel
system.
.Fuel spills.
.Under certain conditions, fuel fires.
Be careful not to spill fuel. Wait five seconds
after you have finished pumping before
removing the fill nozzle. Clean fuel from
painted surfaces as soon as possible. See
Exterior Care 0377. Push the fuel door
closed.
{Warning
If a fire starts while you are refueling, do
not remove the fill nozzle. Shut off the
flow of fuel by shutting off the pump or
by notifying the station attendant. Leave
the area immediately. Filling the Tank with a Portable Fuel
Container
If the vehicle runs out of fuel and must be
filled from a portable fuel container:
1. Locate the capless funnel adapter.
2. Insert and latch the funnel into the
capless fuel system.
{Warning
Attempting to refuel from a portable fuel
container without using the funnel
adapter may cause fuel spillage and
damage the capless fuel system. This
could cause a fire. You or others could be
badly burned and the vehicle could be
damaged.
3. Remove and clean the funnel adapter and return it to the storage location.
Page 323 of 433
Chevrolet Silverado 2500 HD/3500 HD Owner Manual (GMNA-Localizing-U.
S./Canada/Mexico-16908339) - 2024 - CRC - 12/5/22
Vehicle Care 321
installed. Add or remove fluid, as necessary,
only when work is done on the brake
hydraulic system.
{Warning
If too much brake fluid is added, it can
spill on the engine and burn, if the
engine is hot enough. You or others could
be burned, and the vehicle could be
damaged. Add brake fluid only when
work is done on the brake hydraulic
system.
When the brake fluid falls to a low level,
the brake warning light comes on. See Brake
System Warning Light 0119.
Brake fluid absorbs water over time which
degrades the effectiveness of the brake fluid.
Replace brake fluid at the specified intervals
to prevent increased stopping distance. See
Maintenance Schedule 0388.
What to Add
Use only GM approved DOT 4 brake fluid
from a clean, sealed container. See
Recommended Fluids and Lubricants 0392.
{Warning
The wrong or contaminated brake fluid
could result in damage to the brake
system. This could result in the loss of
braking leading to a possible injury.
Always use the proper GM approved
brake fluid.
Caution
If brake fluid is spilled on the vehicle's
painted surfaces, the paint finish can be
damaged. Immediately wash off any
painted surface.
Battery - North America
The original equipment battery is
maintenance free. Do not remove the cap
and do not add fluid.
Refer to the replacement number shown on
the original battery label when a new
battery is needed. See Engine Compartment
Overview 0307 for battery location.
{Warning
WARNING: Battery posts, terminals and
related accessories can expose you to
chemicals including lead and lead
compounds, which are known to the
State of California to cause cancer and
birth defects or other reproductive harm.
Wash hands after handling. For more
information go to
www.P65Warnings.ca.gov.
See California Proposition 65 Warning 01.
Vehicle Storage
{Warning
Batteries have acid that can burn you and
gas that can explode. You can be badly
hurt if you are not careful. Always wear
eye protection. See Jump Starting - North
America 0370 for tips on working
around a battery without getting hurt.
Infrequent Usage: Remove the black,
negative (−) cable from the battery to keep
the battery from running down.
Page 324 of 433
Chevrolet Silverado 2500 HD/3500 HD Owner Manual (GMNA-Localizing-U.
S./Canada/Mexico-16908339) - 2024 - CRC - 12/5/22
322 Vehicle Care
Extended Storage: Remove the black,
negative (−) cable from the battery or use a
battery trickle charger.
Negative Battery Cable Disconnection
{Warning
Before disconnecting the negative battery
cable, turn off all features, turn the
ignition off, and remove the key,
if equipped, from the vehicle. If this is
not done, you or others could be injured,
and the vehicle could be damaged.
Caution
If the battery is disconnected with the
ignition on or the vehicle in Retained
Accessory Power (RAP), the OnStar
back-up battery will be permanently
discharged and will need to be replaced.
1. Make sure the lamps, features, and accessories are turned off.
2. Turn the vehicle off and remove the key, if equipped.
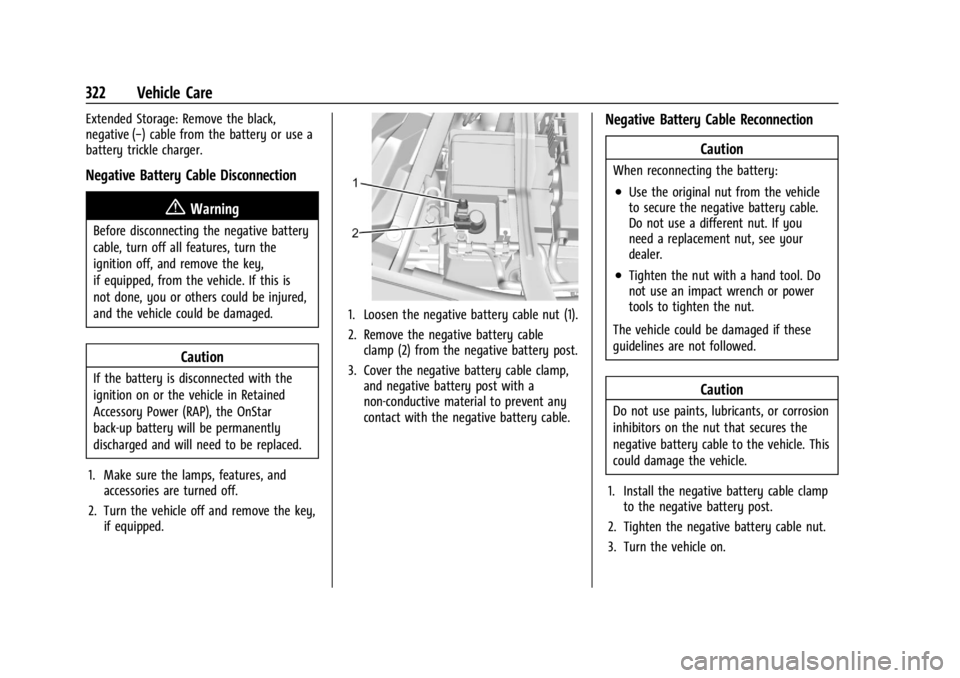
1. Loosen the negative battery cable nut (1).
2. Remove the negative battery cableclamp (2) from the negative battery post.
3. Cover the negative battery cable clamp, and negative battery post with a
non-conductive material to prevent any
contact with the negative battery cable.
Negative Battery Cable Reconnection
Caution
When reconnecting the battery:
.Use the original nut from the vehicle
to secure the negative battery cable.
Do not use a different nut. If you
need a replacement nut, see your
dealer.
.Tighten the nut with a hand tool. Do
not use an impact wrench or power
tools to tighten the nut.
The vehicle could be damaged if these
guidelines are not followed.
Caution
Do not use paints, lubricants, or corrosion
inhibitors on the nut that secures the
negative battery cable to the vehicle. This
could damage the vehicle.
1. Install the negative battery cable clamp to the negative battery post.
2. Tighten the negative battery cable nut.
3. Turn the vehicle on.
Page 356 of 433
Chevrolet Silverado 2500 HD/3500 HD Owner Manual (GMNA-Localizing-U.
S./Canada/Mexico-16908339) - 2024 - CRC - 12/5/22
354 Vehicle Care
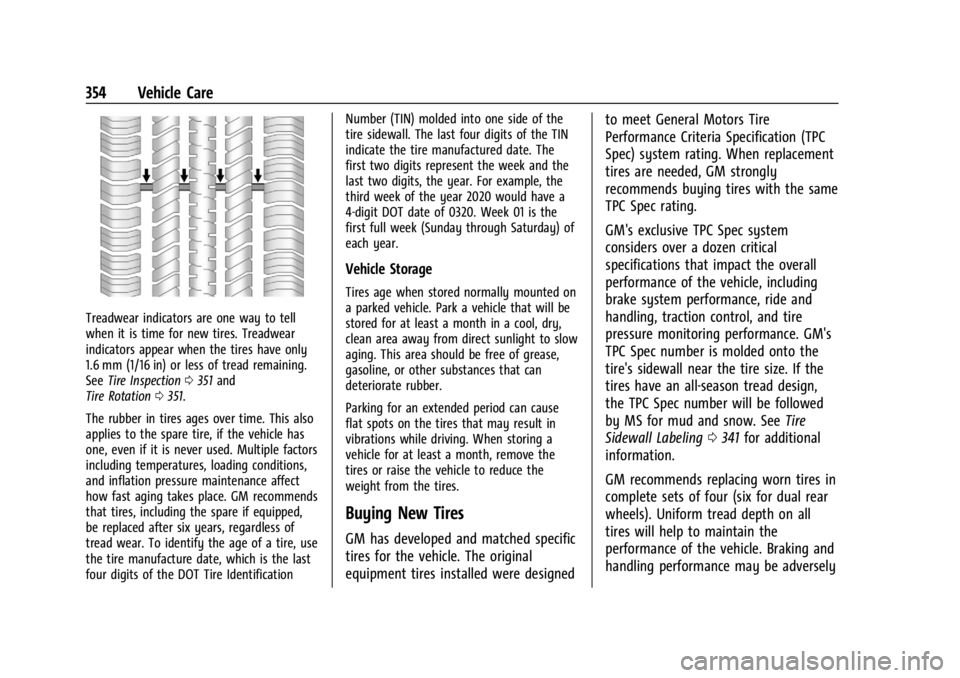
Treadwear indicators are one way to tell
when it is time for new tires. Treadwear
indicators appear when the tires have only
1.6 mm (1/16 in) or less of tread remaining.
SeeTire Inspection 0351 and
Tire Rotation 0351.
The rubber in tires ages over time. This also
applies to the spare tire, if the vehicle has
one, even if it is never used. Multiple factors
including temperatures, loading conditions,
and inflation pressure maintenance affect
how fast aging takes place. GM recommends
that tires, including the spare if equipped,
be replaced after six years, regardless of
tread wear. To identify the age of a tire, use
the tire manufacture date, which is the last
four digits of the DOT Tire Identification Number (TIN) molded into one side of the
tire sidewall. The last four digits of the TIN
indicate the tire manufactured date. The
first two digits represent the week and the
last two digits, the year. For example, the
third week of the year 2020 would have a
4-digit DOT date of 0320. Week 01 is the
first full week (Sunday through Saturday) of
each year.
Vehicle Storage
Tires age when stored normally mounted on
a parked vehicle. Park a vehicle that will be
stored for at least a month in a cool, dry,
clean area away from direct sunlight to slow
aging. This area should be free of grease,
gasoline, or other substances that can
deteriorate rubber.
Parking for an extended period can cause
flat spots on the tires that may result in
vibrations while driving. When storing a
vehicle for at least a month, remove the
tires or raise the vehicle to reduce the
weight from the tires.
Buying New Tires
GM has developed and matched specific
tires for the vehicle. The original
equipment tires installed were designed
to meet General Motors Tire
Performance Criteria Specification (TPC
Spec) system rating. When replacement
tires are needed, GM strongly
recommends buying tires with the same
TPC Spec rating.
GM's exclusive TPC Spec system
considers over a dozen critical
specifications that impact the overall
performance of the vehicle, including
brake system performance, ride and
handling, traction control, and tire
pressure monitoring performance. GM's
TPC Spec number is molded onto the
tire's sidewall near the tire size. If the
tires have an all-season tread design,
the TPC Spec number will be followed
by MS for mud and snow. See
Tire
Sidewall Labeling 0341 for additional
information.
GM recommends replacing worn tires in
complete sets of four (six for dual rear
wheels). Uniform tread depth on all
tires will help to maintain the
performance of the vehicle. Braking and
handling performance may be adversely
Page 362 of 433
Chevrolet Silverado 2500 HD/3500 HD Owner Manual (GMNA-Localizing-U.
S./Canada/Mexico-16908339) - 2024 - CRC - 12/5/22
360 Vehicle Care
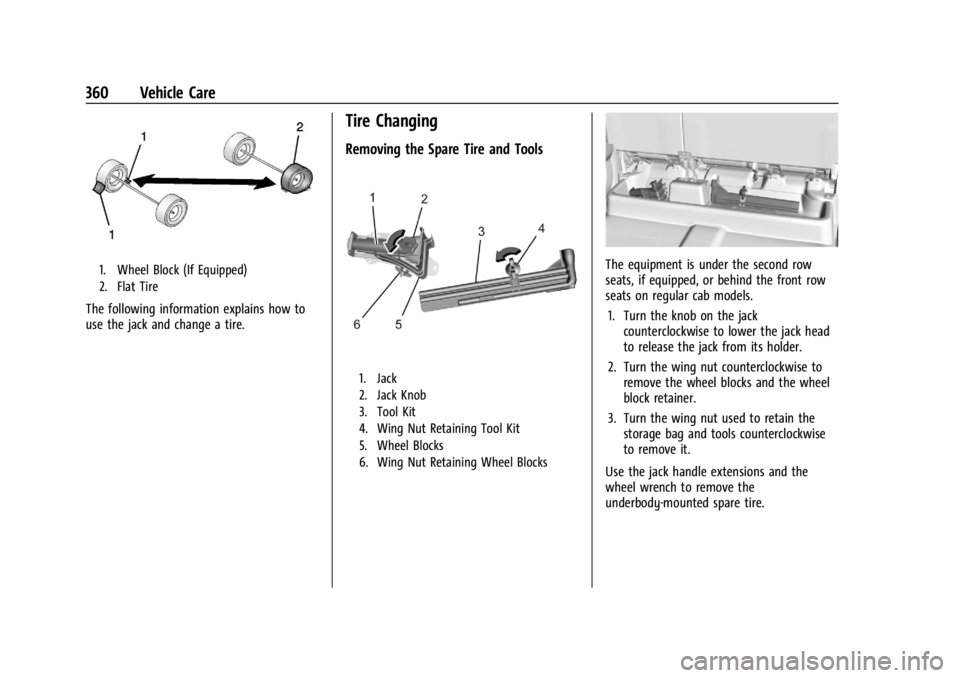
1. Wheel Block (If Equipped)
2. Flat Tire
The following information explains how to
use the jack and change a tire.
Tire Changing
Removing the Spare Tire and Tools
1. Jack
2. Jack Knob
3. Tool Kit
4. Wing Nut Retaining Tool Kit
5. Wheel Blocks
6. Wing Nut Retaining Wheel Blocks
The equipment is under the second row
seats, if equipped, or behind the front row
seats on regular cab models.1. Turn the knob on the jack counterclockwise to lower the jack head
to release the jack from its holder.
2. Turn the wing nut counterclockwise to remove the wheel blocks and the wheel
block retainer.
3. Turn the wing nut used to retain the storage bag and tools counterclockwise
to remove it.
Use the jack handle extensions and the
wheel wrench to remove the
underbody-mounted spare tire.
Page 369 of 433
Chevrolet Silverado 2500 HD/3500 HD Owner Manual (GMNA-Localizing-U.
S./Canada/Mexico-16908339) - 2024 - CRC - 12/5/22
Vehicle Care 367
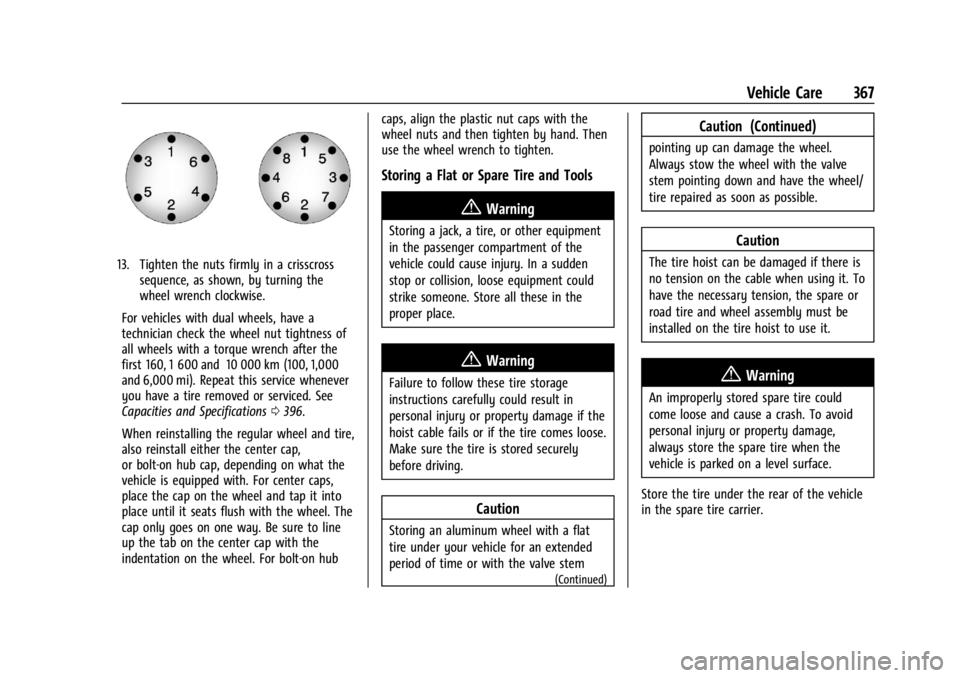
13. Tighten the nuts firmly in a crisscrosssequence, as shown, by turning the
wheel wrench clockwise.
For vehicles with dual wheels, have a
technician check the wheel nut tightness of
all wheels with a torque wrench after the
first 160, 1 600 and 10 000 km (100, 1,000
and 6,000 mi). Repeat this service whenever
you have a tire removed or serviced. See
Capacities and Specifications 0396.
When reinstalling the regular wheel and tire,
also reinstall either the center cap,
or bolt-on hub cap, depending on what the
vehicle is equipped with. For center caps,
place the cap on the wheel and tap it into
place until it seats flush with the wheel. The
cap only goes on one way. Be sure to line
up the tab on the center cap with the
indentation on the wheel. For bolt-on hub caps, align the plastic nut caps with the
wheel nuts and then tighten by hand. Then
use the wheel wrench to tighten.
Storing a Flat or Spare Tire and Tools
{Warning
Storing a jack, a tire, or other equipment
in the passenger compartment of the
vehicle could cause injury. In a sudden
stop or collision, loose equipment could
strike someone. Store all these in the
proper place.
{Warning
Failure to follow these tire storage
instructions carefully could result in
personal injury or property damage if the
hoist cable fails or if the tire comes loose.
Make sure the tire is stored securely
before driving.
Caution
Storing an aluminum wheel with a flat
tire under your vehicle for an extended
period of time or with the valve stem
(Continued)
Caution (Continued)
pointing up can damage the wheel.
Always stow the wheel with the valve
stem pointing down and have the wheel/
tire repaired as soon as possible.
Caution
The tire hoist can be damaged if there is
no tension on the cable when using it. To
have the necessary tension, the spare or
road tire and wheel assembly must be
installed on the tire hoist to use it.
{Warning
An improperly stored spare tire could
come loose and cause a crash. To avoid
personal injury or property damage,
always store the spare tire when the
vehicle is parked on a level surface.
Store the tire under the rear of the vehicle
in the spare tire carrier.