2024 CHEVROLET SILVERADO EV warning light
[x] Cancel search: warning lightPage 277 of 429
Chevrolet Silverado EV Owner Manual (GMNA-Localizing-U.S./Canada-
16702912) - 2024 - CRC - 1/17/23
276 Driving and Operating
To turn LKA on and off, pressAon the
instrument panel to the left of the steering
wheel. If equipped, the indicator light on the
button comes on when LKA is on and turns
off when LKA is disabled. In some vehicles,
you must press the button for more than
three seconds to turn LKA off.
LKA is not available when Terrain Mode,
Snow/Ice Mode, or Off-Road Mode is
selected.
See Driver Mode Control 0209. See
Four-Wheel Steering 0210.
When attempting to enable LKA in any of
the above conditions, LKA UNAVAILABLE will
display.
When on,
Ais white, if equipped,
indicating that the system is not ready to
assist.
Ais green if LKA is ready to
assist. LKA may assist by gently turning the
steering wheel if the vehicle approaches a
detected lane marking.
Ais amber when
assisting. It may also provide a Lane
Departure Warning (LDW) alert by flashing
Aamber if the vehicle crosses a
detected lane marking. Additionally, there
may be three beeps, or the driver seat may
pulse three times, on the right or left,
depending on the lane departure direction. Take Steering
The LKA system does not continuously steer
the vehicle. If LKA does not detect active
driver steering, an alert and chime may be
provided. Steer the vehicle to dismiss. LKA
may become temporarily unavailable after
repeated take steering alerts.
When the System Does Not Seem to
Work Properly
The system performance may be
affected by:
.Close vehicles ahead.
.Sudden lighting changes, such as when
driving through tunnels.
.Banked roads.
.Roads with poor lane markings, such as
two-lane roads.
If the LKA system is not functioning
properly when lane markings are clearly
visible, cleaning the windshield may help.
A camera blocked message may display if
the camera is blocked. Some driver
assistance systems may have reduced
performance or not work at all. An LKA or
LDW unavailable message may display if the
systems are temporarily unavailable. This
message could be due to a blocked camera. The LKA system does not need service. Clean
the outside of the windshield behind the
rearview mirror.
LKA assistance and/or LDW alerts may occur
due to tar marks, shadows, cracks in the
road, temporary or construction lane
markings, or other road imperfections. This
is normal system operation; the vehicle does
not need service. Turn LKA off if these
conditions continue.
Surround Vision Recorder
If equipped, this system records the 360°
camera views to an SD card. Only images
are recorded, no sound. An SD card will be
needed for this system. The minimum
recommended SD card specifications are at
least 64GB with FAT32 file system, Class V30
or greater.
Page 281 of 429
Chevrolet Silverado EV Owner Manual (GMNA-Localizing-U.S./Canada-
16702912) - 2024 - CRC - 1/17/23
280 Driving and Operating
4. Plug in the AC charge cord into thevehicle charge port . Make sure the AC
vehicle plug is fully connected to the AC
charge port. If it is not properly
connected, the vehicle may not be
charged.
5. Verify that the Headlight Charging Status Indicator (CSI) illuminates on the
headlamps (if enabled), charge port light
turns on, and an audible chirp occurs.
See Charging Status Feedback 0283.
To End AC Charging 1. Unlock the charge cord from the vehicle by pressing the button on the top of the
charge cord plug. Unplug the charge cord
from the vehicle.
2. Close the charge port door by pressing firmly in the center until it latches.
3. Unplug the charge cord from the electrical outlet.
4. Place the charge cord into the storage case.
DC Charging
DC Charging Station Hardware
The vehicle can be charged using DC
charging equipment typically found at
service stations and other public locations. Check the charging station DC vehicle plug
for compatibility with the DC charge port on
this vehicle. This vehicle is compatible with a
Combined Charging System 1 (CCS1)
connector.
When recharging at a DC charge station, the
charging cable connected to the vehicle
must be less than 10 m (33 ft) in length to
meet functionality and regulatory
requirements.
{Warning
Do not use the charging station if the
handle has defects such as cracks,
exposed wires, burnt or missing pins,
or any other damage. A damaged handle
may result in personal injury and/or
damage to the vehicle, the charging port
or other property.
For maximum charging performance, and to
prevent charging interruptions or damage to
the high voltage battery and vehicle:
.Remove your hands from the charging
handle once it has been plugged in. If not
done, this can cause a charging
interruption.
.Ensure that the charge cord plug clicks. Follow the steps listed on the charging
station to perform a DC vehicle charge.
If for any reason DC charging does not
begin or is interrupted, check the DC
charging station display for messages.
Unplug the cord to restart the DC charging
process.
To Start DC Charging
1. Put the vehicle in P (Park).
2. Press the Electric Parking brake (EPB) switch. See Electric Parking Brake 0205.
3. Push the rearward edge of the charge port door and release to open the door.
In cold weather conditions, ice may form
around the charge port door. The charge
port door may not open on the first
attempt. Remove ice from the area and
repeat attempting to open the charge
port door.
Page 293 of 429
Chevrolet Silverado EV Owner Manual (GMNA-Localizing-U.S./Canada-
16702912) - 2024 - CRC - 1/17/23
292 Driving and Operating
the charging. If this error continues, stop
charging your vehicle. See your dealer for
service.
Charge Level Selection
Charge level selection can be made using
the Charging tab in the Energy Application
on the infotainment display. For instructions
to set cord limit settings for a charge
session, seeCharging0123.
{Warning
Using a charge level that exceeds the
electrical circuit or electrical outlet
capacity may start a fire or damage the
electrical circuit. Use the lowest charge
level until a qualified electrician inspects
the electrical circuit capacity. Use the
lowest charge level if the electrical circuit
or electrical outlet capacity is not known.
Troubleshooting
Disconnect the charge cord from the vehicle
and confirm that the attachment plug is not
too hot to grasp before removing. If it is not hot, manually reboot the charge
cord by unplugging and re-plugging the
attachment plug into the electrical outlet.
If the same fault reoccurs, test the charge
cord with a different electrical outlet.
The charge cord monitors temperature at
several locations and may reduce charging
power or interrupt charging if temperatures
become too high. The charge cord status
indicators illuminate and identify this fault.
In hot climates, move the charge cord away
from direct sunlight and/or hot surfaces
such as asphalt paving for approximately
30 minutes.
If there are signs of melting or scorching, do
not touch the charge cord or attachment
plug. Have a qualified electrician inspect and
repair the issue.
If there are no signs of damage, check how
firm the fit of the plug is. If the plug easily
pulls away from the electrical outlet, test
the plug on a known good electrical outlet.
If the fault condition returns, have your
charge cord inspected by your dealership.
If the fault does not return, stop using the
suspected circuit and have a qualified
electrician inspect and repair the issue.
Grounding Instructions
The charge circuit must be grounded. If the
charge circuit should malfunction or break
down, grounding provides a path of least
resistance for the electric current to reduce
the risk of electric shock. This product is
equipped with a cord that has an equipment
grounding conductor and a grounding plug.
The plug must be plugged into an
appropriate outlet that is properly installed
and grounded in accordance with all local
codes and ordinances.
{Warning
Improper connection of the charge cord
ground may cause electrical shock. Check
with a qualified electrician if there is
doubt as to whether the charge circuit is
properly grounded. Do not modify the
plug provided with the product. If it will
not fit the electrical outlet, have a proper
electrical outlet installed by a qualified
electrician.
FCC Information
See
Radio Frequency Statement 0404.
Page 307 of 429
Chevrolet Silverado EV Owner Manual (GMNA-Localizing-U.S./Canada-
16702912) - 2024 - CRC - 1/17/23
306 Driving and Operating
This symbol is on the Trailer Brake Control
Panel on vehicles with an ITBC system. The
power output to the trailer brakes is
proportional to the amount of vehicle
braking. This available power output to the
trailer brakes can be adjusted to a wide
range of trailering situations.
The ITBC system is integrated with the
vehicle brakes, Antilock Brake System (ABS),
and StabiliTrak/Electronic Stability Control
(ESC) systems. In trailering conditions that
cause the vehicle’s anti-lock brake or
StabiliTrak/ESC systems to activate, power
sent to the trailer's brakes will be
automatically adjusted to minimize trailer
wheel lock-up. This does not imply that the
trailer has StabiliTrak/ESC.
If the vehicle brakes, ABS, or StabiliTrak/ESC
systems are not functioning properly, the
ITBC system may not function fully or at all.
Make sure all of these systems are fully
operational to allow the ITBC system to
function properly.
The ITBC system is powered through the
vehicle's electrical system. Turning the
vehicle off will also turn off the ITBC
system. The ITBC system is fully functional
only when the vehicle is in ON/RUN.{Warning
Connecting a trailer that has an air brake
system may result in reduced or
complete loss of trailer braking, including
increased stopping distance or trailer
instability which could result in serious
injury, death, or property damage. Only
use the ITBC system with electric or
electric over hydraulic trailer brake
systems.
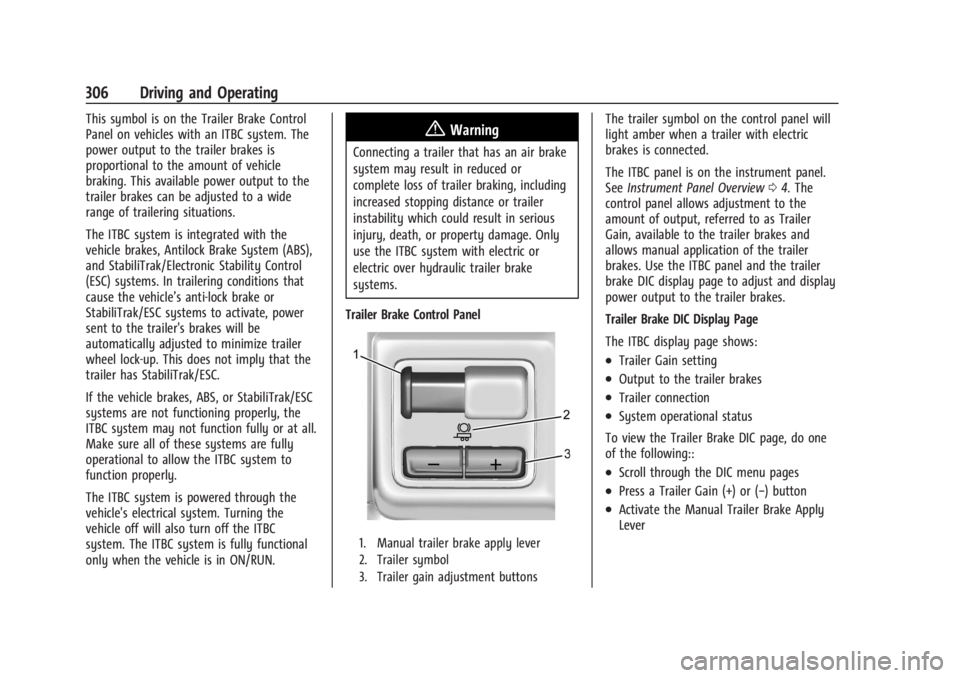
Trailer Brake Control Panel
1. Manual trailer brake apply lever
2. Trailer symbol
3. Trailer gain adjustment buttons
The trailer symbol on the control panel will
light amber when a trailer with electric
brakes is connected.
The ITBC panel is on the instrument panel.
See Instrument Panel Overview 04. The
control panel allows adjustment to the
amount of output, referred to as Trailer
Gain, available to the trailer brakes and
allows manual application of the trailer
brakes. Use the ITBC panel and the trailer
brake DIC display page to adjust and display
power output to the trailer brakes.
Trailer Brake DIC Display Page
The ITBC display page shows:
.Trailer Gain setting
.Output to the trailer brakes
.Trailer connection
.System operational status
To view the Trailer Brake DIC page, do one
of the following::
.Scroll through the DIC menu pages
.Press a Trailer Gain (+) or (−) button
.Activate the Manual Trailer Brake Apply
Lever
Page 310 of 429
Chevrolet Silverado EV Owner Manual (GMNA-Localizing-U.S./Canada-
16702912) - 2024 - CRC - 1/17/23
Driving and Operating 309
{Warning
Driving while the trailer braking system is
malfunctioning may increase loading on
the vehicle's braking system or lead to
trailer instability. Use caution. Drive
slowly and allow for increased stopping
distances.
A GM dealer may be able to diagnose and
repair problems with the trailer. However,
any diagnosis and repair of the trailer is not
covered under the vehicle warranty. Contact
your trailer dealer for assistance with trailer
repairs and trailer warranty information.
Trailer Sway Control (TSC)
Vehicles with StabiliTrak/Electronic Stability
Control (ESC) have a Trailer Sway Control
(TSC) feature. Trailer sway is unintended
side-to-side motion of a trailer while towing.
If the vehicle is towing a trailer and the TSC
detects that sway is increasing, the vehicle
brakes are selectively applied at each wheel,
to help reduce excessive trailer sway.
If equipped with the Integrated Trailer Brake
Control (ITBC) system, and the trailer has an
electric brake system, StabiliTrak may also
apply the trailer brakes.
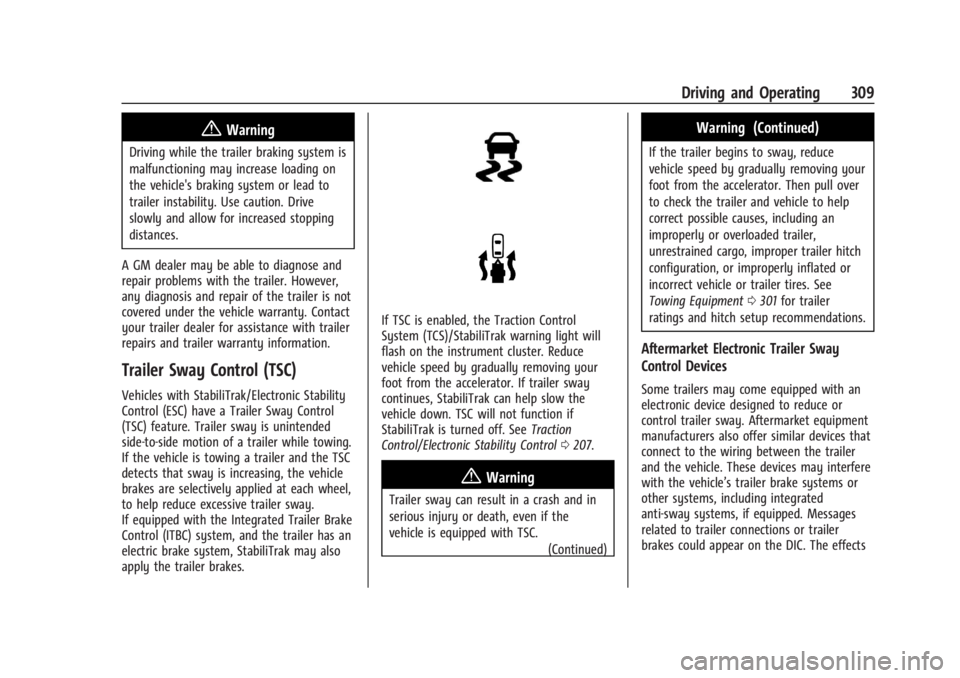
If TSC is enabled, the Traction Control
System (TCS)/StabiliTrak warning light will
flash on the instrument cluster. Reduce
vehicle speed by gradually removing your
foot from the accelerator. If trailer sway
continues, StabiliTrak can help slow the
vehicle down. TSC will not function if
StabiliTrak is turned off. See Traction
Control/Electronic Stability Control 0207.
{Warning
Trailer sway can result in a crash and in
serious injury or death, even if the
vehicle is equipped with TSC.
(Continued)
Warning (Continued)
If the trailer begins to sway, reduce
vehicle speed by gradually removing your
foot from the accelerator. Then pull over
to check the trailer and vehicle to help
correct possible causes, including an
improperly or overloaded trailer,
unrestrained cargo, improper trailer hitch
configuration, or improperly inflated or
incorrect vehicle or trailer tires. See
Towing Equipment0301 for trailer
ratings and hitch setup recommendations.
Aftermarket Electronic Trailer Sway
Control Devices
Some trailers may come equipped with an
electronic device designed to reduce or
control trailer sway. Aftermarket equipment
manufacturers also offer similar devices that
connect to the wiring between the trailer
and the vehicle. These devices may interfere
with the vehicle’s trailer brake systems or
other systems, including integrated
anti-sway systems, if equipped. Messages
related to trailer connections or trailer
brakes could appear on the DIC. The effects
Page 311 of 429
Chevrolet Silverado EV Owner Manual (GMNA-Localizing-U.S./Canada-
16702912) - 2024 - CRC - 1/17/23
310 Driving and Operating
of these aftermarket devices on vehicle
handling or trailer brake performance is not
known.
{Warning
Use of aftermarket electronic trailer sway
control devices could result in reduced
trailer brake performance, loss of trailer
brakes, or other malfunctions, and result
in a crash. You or others could be
seriously injured or killed. Before using
one of these devices:
.Ask the device or trailer manufacturer
if the device has been thoroughly
tested for compatibility with the
make, model, and year of your vehicle
and any optional equipment installed
on your vehicle.
.Before driving, check the trailer brakes
are working properly, if equipped.
Drive the vehicle with the trailer
attached on a level road surface that
is free of traffic at about 32-40 km/h
(20-25 mph) and fully apply the
manual trailer brake apply lever. Also,
check the trailer brake lamps and
other lamps are functioning correctly.(Continued)
Warning (Continued)
.If the trailer brakes are not operating
properly at any time, or if a DIC
message indicates problems with the
trailer connections or trailer brakes,
carefully pull the vehicle over to the
side of the road when traffic
conditions allow.
Trailer Tires
Special Trailer (ST) tires differ from vehicle
tires. Trailer tires are designed with stiff
sidewalls to help prevent sway and to
support heavy loads. These features can
make it difficult to determine if the trailer
tire pressures are low only based on a visual
inspection.
Always check all trailer tire pressures before
each trip when the tires are cool. Low trailer
tire pressure is a leading cause of trailer tire
blow-outs.
If the vehicle is equipped with a trailer tire
pressure monitoring system, see the trailer
tire pressure monitoring system description
and the trailering app. Trailer tires deteriorate over time. The trailer
tire sidewall will show the week and year
the tire was manufactured. Many trailer tire
manufacturers recommend replacing tires
more than six years old.
Overloading is another leading cause of
trailer tire blow-outs. Never load your trailer
with more weight than the tires are
designed to support. The load rating is
located on the trailer tire sidewall.
Always know the maximum speed rating for
the trailer tires before driving. This may be
significantly lower than the vehicle tire
speed rating. The speed rating may be on
the trailer tire sidewall. If the speed rating is
not shown, the default trailer tire speed
rating is 105 km/h (65 mph).
Trailering App
Trailer Light App
If equipped, the Trailering App is on the
infotainment home screen.
Page 312 of 429
Chevrolet Silverado EV Owner Manual (GMNA-Localizing-U.S./Canada-
16702912) - 2024 - CRC - 1/17/23
Driving and Operating 311
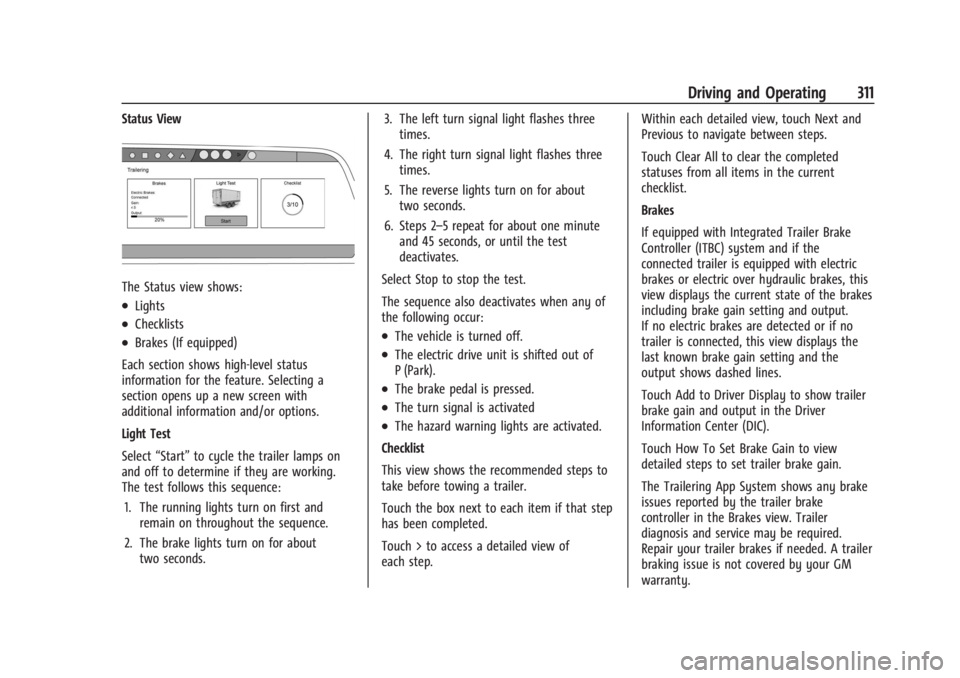
Status View
The Status view shows:
.Lights
.Checklists
.Brakes (If equipped)
Each section shows high-level status
information for the feature. Selecting a
section opens up a new screen with
additional information and/or options.
Light Test
Select “Start” to cycle the trailer lamps on
and off to determine if they are working.
The test follows this sequence:
1. The running lights turn on first and remain on throughout the sequence.
2. The brake lights turn on for about two seconds. 3. The left turn signal light flashes three
times.
4. The right turn signal light flashes three times.
5. The reverse lights turn on for about two seconds.
6. Steps 2–5 repeat for about one minute and 45 seconds, or until the test
deactivates.
Select Stop to stop the test.
The sequence also deactivates when any of
the following occur:.The vehicle is turned off.
.The electric drive unit is shifted out of
P (Park).
.The brake pedal is pressed.
.The turn signal is activated
.The hazard warning lights are activated.
Checklist
This view shows the recommended steps to
take before towing a trailer.
Touch the box next to each item if that step
has been completed.
Touch > to access a detailed view of
each step. Within each detailed view, touch Next and
Previous to navigate between steps.
Touch Clear All to clear the completed
statuses from all items in the current
checklist.
Brakes
If equipped with Integrated Trailer Brake
Controller (ITBC) system and if the
connected trailer is equipped with electric
brakes or electric over hydraulic brakes, this
view displays the current state of the brakes
including brake gain setting and output.
If no electric brakes are detected or if no
trailer is connected, this view displays the
last known brake gain setting and the
output shows dashed lines.
Touch Add to Driver Display to show trailer
brake gain and output in the Driver
Information Center (DIC).
Touch How To Set Brake Gain to view
detailed steps to set trailer brake gain.
The Trailering App System shows any brake
issues reported by the trailer brake
controller in the Brakes view. Trailer
diagnosis and service may be required.
Repair your trailer brakes if needed. A trailer
braking issue is not covered by your GM
warranty.
Page 317 of 429
Chevrolet Silverado EV Owner Manual (GMNA-Localizing-U.S./Canada-
16702912) - 2024 - CRC - 1/17/23
316 Driving and Operating
Light Test
Touch Start Light Test to cycle the trailer
lights on and off to determine if they are
working. The test follows this sequence:1. The running lights turn on first and remain on throughout the sequence.
2. The brake lights turn on for about two seconds.
3. The left turn signal light flashes three times.
4. The right turn signal light flashes three times.
5. The reverse lights turn on for about two seconds.
6. Steps 2–5 repeat for approximately one minute and 45 seconds, or until the
test deactivates.
Touch Stop to manually stop the test. The
test automatically ends after one minute
and 45 seconds.
The Light Test also deactivates when any of
the following occur:
.The vehicle is turned off.
.The vehicle is shifted out of P (Park).
.The brake pedal is pressed.
.The turn signal is activated.
.The hazard warning flashers are activated.
Tires
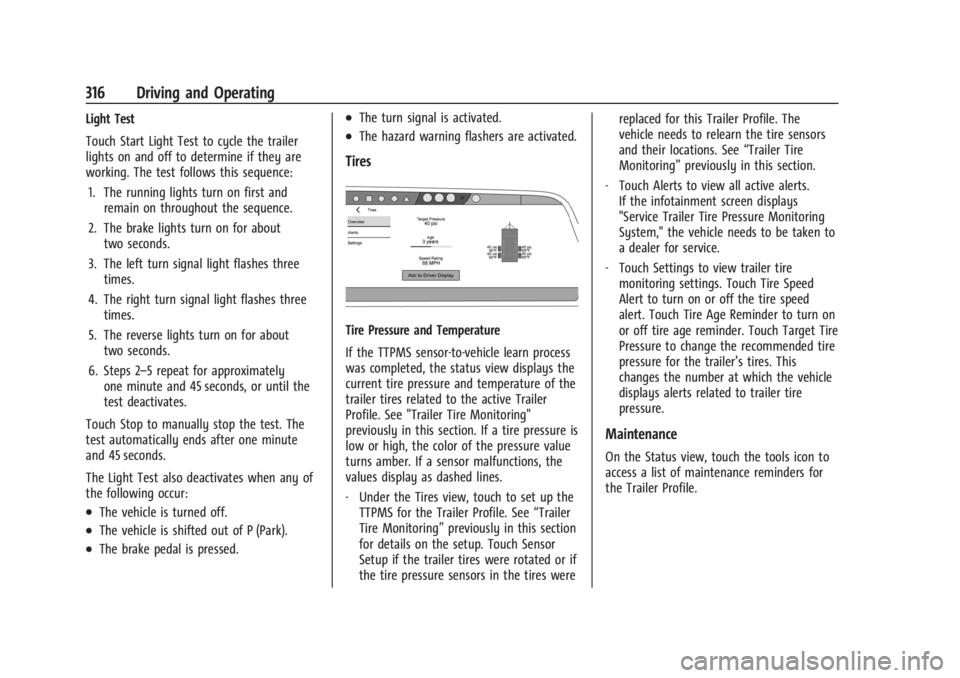
Tire Pressure and Temperature
If the TTPMS sensor-to-vehicle learn process
was completed, the status view displays the
current tire pressure and temperature of the
trailer tires related to the active Trailer
Profile. See "Trailer Tire Monitoring"
previously in this section. If a tire pressure is
low or high, the color of the pressure value
turns amber. If a sensor malfunctions, the
values display as dashed lines.
‐ Under the Tires view, touch to set up the
TTPMS for the Trailer Profile. See “Trailer
Tire Monitoring” previously in this section
for details on the setup. Touch Sensor
Setup if the trailer tires were rotated or if
the tire pressure sensors in the tires were replaced for this Trailer Profile. The
vehicle needs to relearn the tire sensors
and their locations. See
“Trailer Tire
Monitoring” previously in this section.
‐ Touch Alerts to view all active alerts.
If the infotainment screen displays
"Service Trailer Tire Pressure Monitoring
System," the vehicle needs to be taken to
a dealer for service.
‐ Touch Settings to view trailer tire
monitoring settings. Touch Tire Speed
Alert to turn on or off the tire speed
alert. Touch Tire Age Reminder to turn on
or off tire age reminder. Touch Target Tire
Pressure to change the recommended tire
pressure for the trailer’s tires. This
changes the number at which the vehicle
displays alerts related to trailer tire
pressure.
Maintenance
On the Status view, touch the tools icon to
access a list of maintenance reminders for
the Trailer Profile.