2024 CHEVROLET SILVERADO EV brake light
[x] Cancel search: brake lightPage 316 of 429
Chevrolet Silverado EV Owner Manual (GMNA-Localizing-U.S./Canada-
16702912) - 2024 - CRC - 1/17/23
Driving and Operating 315
.Maintenance
.Checklist
.Weight
.Brakes (if equipped)
Each section shows high level status
information for the feature. Selecting a
section opens up a new screen with
additional information and/or options.
Selecting the checklist, camera,
or maintenance icon opens up the
corresponding screen.
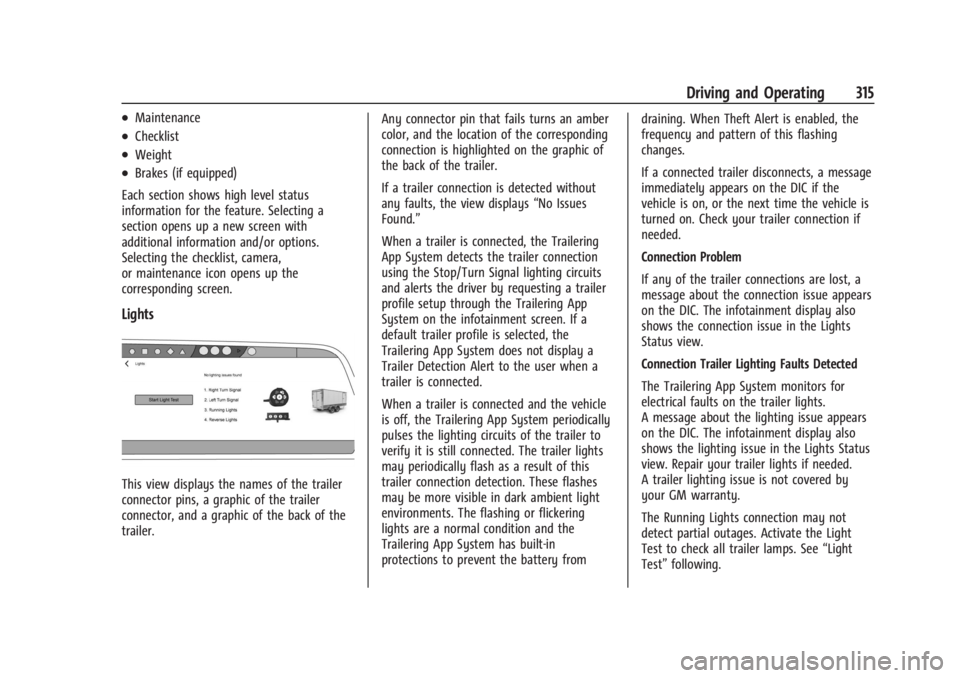
Lights
This view displays the names of the trailer
connector pins, a graphic of the trailer
connector, and a graphic of the back of the
trailer. Any connector pin that fails turns an amber
color, and the location of the corresponding
connection is highlighted on the graphic of
the back of the trailer.
If a trailer connection is detected without
any faults, the view displays
“No Issues
Found.”
When a trailer is connected, the Trailering
App System detects the trailer connection
using the Stop/Turn Signal lighting circuits
and alerts the driver by requesting a trailer
profile setup through the Trailering App
System on the infotainment screen. If a
default trailer profile is selected, the
Trailering App System does not display a
Trailer Detection Alert to the user when a
trailer is connected.
When a trailer is connected and the vehicle
is off, the Trailering App System periodically
pulses the lighting circuits of the trailer to
verify it is still connected. The trailer lights
may periodically flash as a result of this
trailer connection detection. These flashes
may be more visible in dark ambient light
environments. The flashing or flickering
lights are a normal condition and the
Trailering App System has built-in
protections to prevent the battery from draining. When Theft Alert is enabled, the
frequency and pattern of this flashing
changes.
If a connected trailer disconnects, a message
immediately appears on the DIC if the
vehicle is on, or the next time the vehicle is
turned on. Check your trailer connection if
needed.
Connection Problem
If any of the trailer connections are lost, a
message about the connection issue appears
on the DIC. The infotainment display also
shows the connection issue in the Lights
Status view.
Connection Trailer Lighting Faults Detected
The Trailering App System monitors for
electrical faults on the trailer lights.
A message about the lighting issue appears
on the DIC. The infotainment display also
shows the lighting issue in the Lights Status
view. Repair your trailer lights if needed.
A trailer lighting issue is not covered by
your GM warranty.
The Running Lights connection may not
detect partial outages. Activate the Light
Test to check all trailer lamps. See
“Light
Test” following.
Page 317 of 429
Chevrolet Silverado EV Owner Manual (GMNA-Localizing-U.S./Canada-
16702912) - 2024 - CRC - 1/17/23
316 Driving and Operating
Light Test
Touch Start Light Test to cycle the trailer
lights on and off to determine if they are
working. The test follows this sequence:1. The running lights turn on first and remain on throughout the sequence.
2. The brake lights turn on for about two seconds.
3. The left turn signal light flashes three times.
4. The right turn signal light flashes three times.
5. The reverse lights turn on for about two seconds.
6. Steps 2–5 repeat for approximately one minute and 45 seconds, or until the
test deactivates.
Touch Stop to manually stop the test. The
test automatically ends after one minute
and 45 seconds.
The Light Test also deactivates when any of
the following occur:
.The vehicle is turned off.
.The vehicle is shifted out of P (Park).
.The brake pedal is pressed.
.The turn signal is activated.
.The hazard warning flashers are activated.
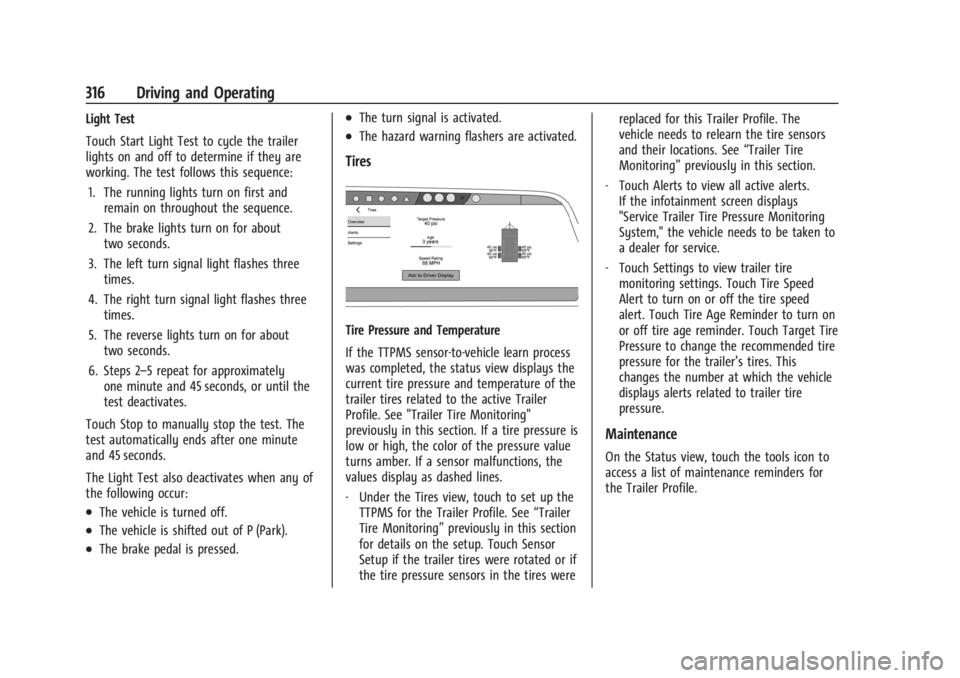
Tires
Tire Pressure and Temperature
If the TTPMS sensor-to-vehicle learn process
was completed, the status view displays the
current tire pressure and temperature of the
trailer tires related to the active Trailer
Profile. See "Trailer Tire Monitoring"
previously in this section. If a tire pressure is
low or high, the color of the pressure value
turns amber. If a sensor malfunctions, the
values display as dashed lines.
‐ Under the Tires view, touch to set up the
TTPMS for the Trailer Profile. See “Trailer
Tire Monitoring” previously in this section
for details on the setup. Touch Sensor
Setup if the trailer tires were rotated or if
the tire pressure sensors in the tires were replaced for this Trailer Profile. The
vehicle needs to relearn the tire sensors
and their locations. See
“Trailer Tire
Monitoring” previously in this section.
‐ Touch Alerts to view all active alerts.
If the infotainment screen displays
"Service Trailer Tire Pressure Monitoring
System," the vehicle needs to be taken to
a dealer for service.
‐ Touch Settings to view trailer tire
monitoring settings. Touch Tire Speed
Alert to turn on or off the tire speed
alert. Touch Tire Age Reminder to turn on
or off tire age reminder. Touch Target Tire
Pressure to change the recommended tire
pressure for the trailer’s tires. This
changes the number at which the vehicle
displays alerts related to trailer tire
pressure.
Maintenance
On the Status view, touch the tools icon to
access a list of maintenance reminders for
the Trailer Profile.
Page 319 of 429
Chevrolet Silverado EV Owner Manual (GMNA-Localizing-U.S./Canada-
16702912) - 2024 - CRC - 1/17/23
318 Driving and Operating
Custom Checklist Items
For each of the Trailer Profile checklists,
there is an option to create custom items to
view in the checklist. Custom checklist items
are displayed at the end of the default
checklist items.
Guest Trailer and No Trailer Connected
If a Guest Trailer Profile is active, or if no
trailer is connected, this view shows the
default checklist.
Weight
.Touch to turn on or off the GCW Alert.
.When on, an alert displays in the DIC
when the combined weight of the vehicle
and trailer exceed the vehicle's Gross
Combined Weight Raring (GCWR). For
more information on the Gross Combined
Weight (GCW) Alert, seeTrailer Towing
0 297.
Brakes
If equipped with Integrated Trailer Brake
Controller (ITBC) system and if the
connected trailer is equipped with electric
brakes or electric over hydraulic brakes, this
view displays the current state of the brakes
including brake gain setting and output.
If no electric brakes are detected or if no trailer is connected, this view displays the
last known brake gain setting and the
output shows dashed lines.
‐
Touch Add to Driver Display to show
trailer brake gain and output in the DIC.
‐ Touch How To Set Brake Gain to access
detailed steps to set trailer brake gain.
The Trailering App System shows any brake
issues reported by the trailer brake
controller in the Brakes view. Trailer
diagnosis and service may be required.
Repair your trailer brakes, if needed. Trailer
brake repairs are not covered by your GM
warranty.
See “Integrated Trailer Brake Control
System” section under Towing Equipment
0 301.
Guest Trailer Status View
If the Guest Trailer Profile is active, the
Status view shows:
.Lights
.Cameras
.Checklist
.Weight
.Brakes (if equipped) The Trailer Status view displays mileage
information. The mileage value resets when
the trailer is disconnected from the vehicle.
Accessory/No Trailer Status View
If the Accessory/No Trailer profile is active,
trailer status information is not available.
Trailers View
Touch the trailer profile icon in the Status
view to view, activate, create, edit, or delete
trailer profiles.
If a trailer is connected, touch the Trailer
Profile name to activate a Trailer Profile.
The Trailering App can save a maximum of
five trailer profiles
The Custom Trailer Profiles and Guest Trailer
are in order of the most frequently used.
The Accessory/No Trailer profile is shown
below the Custom Trailer Profiles and Guest
Trailer Profile.
Guest Trailer
If the Guest Trailer Profile is the active
Trailer Profile, trailer detection, lights/
connections status, theft, and the Tow/Haul
reminder alerts can be sent. The system
does not track total mileage, but the system
tracks trip mileage if the Guest Trailer
Page 324 of 429
Chevrolet Silverado EV Owner Manual (GMNA-Localizing-U.S./Canada-
16702912) - 2024 - CRC - 1/13/23
Vehicle Care 323
Vehicle Care
General Information
General Information . . . . . . . . . . . . . . . . . . . 324
California Perchlorate MaterialsRequirements . . . . . . . . . . . . . . . . . . . . . . . . 324
Accessories and Modifications . . . . . . . . . 324
Vehicle Checks
Doing Your Own Service Work . . . . . . . . 324
Underhood Compartment Overview . . . 325
Cooling System . . . . . . . . . . . . . . . . . . . . . . . . 327
Washer Fluid . . . . . . . . . . . . . . . . . . . . . . . . . . 328
Brakes . . . . . . . . . . . . . . . . . . . . . . . . . . . . . . . . . 328
Brake Fluid . . . . . . . . . . . . . . . . . . . . . . . . . . . . 329
Battery - North America . . . . . . . . . . . . . . . 330
Noise Control System (RST Only) . . . . . . 332
Wiper Blade Replacement . . . . . . . . . . . . . 333
Glass Replacement . . . . . . . . . . . . . . . . . . . . . 333
Windshield Replacement . . . . . . . . . . . . . . 334
Gas Strut(s) . . . . . . . . . . . . . . . . . . . . . . . . . . . 334
Headlamp Aiming
Front Headlamp Aiming . . . . . . . . . . . . . . . 335
Bulb Replacement
LED Lighting . . . . . . . . . . . . . . . . . . . . . . . . . . . 335
Electrical System
High Voltage Devices and Wiring . . . . . . 335
Electrical System Overload . . . . . . . . . . . . . 335 Fuses and Circuit Breakers . . . . . . . . . . . . . 337
Underhood Compartment Fuse
Block . . . . . . . . . . . . . . . . . . . . . . . . . . . . . . . . 337
Instrument Panel Fuse Block (Left) . . . . 340
Instrument Panel Fuse Block (Right) . . . 342
Wheels and Tires
Tires . . . . . . . . . . . . . . . . . . . . . . . . . . . . . . . . . . 344
All-Season Tires . . . . . . . . . . . . . . . . . . . . . . . . 345
Winter Tires . . . . . . . . . . . . . . . . . . . . . . . . . . . 345
Tire Sidewall Labeling . . . . . . . . . . . . . . . . . 346
Tire Designations . . . . . . . . . . . . . . . . . . . . . . 347
Tire Terminology and Definitions . . . . . . 347
Tire Pressure . . . . . . . . . . . . . . . . . . . . . . . . . . 349
Tire Pressure for High-Speed Operation . . . . . . . . . . . . . . . . . . . . . . . . . . . 350
Tire Pressure Monitor System . . . . . . . . . . 351
Tire Pressure Monitor Operation . . . . . . . 351
Tire Inspection . . . . . . . . . . . . . . . . . . . . . . . . . 355
Tire Rotation . . . . . . . . . . . . . . . . . . . . . . . . . . 356
When It Is Time for New Tires . . . . . . . . 357
Buying New Tires . . . . . . . . . . . . . . . . . . . . . 358
Different Size Tires and Wheels . . . . . . . 359
Uniform Tire Quality Grading . . . . . . . . . 359
Wheel Alignment and Tire Balance . . . . 360
Wheel Replacement . . . . . . . . . . . . . . . . . . . 360
Tire Chains . . . . . . . . . . . . . . . . . . . . . . . . . . . . 361
If a Tire Goes Flat . . . . . . . . . . . . . . . . . . . . . 362
Tire Sealant and Compressor Kit . . . . . . . 363
Storing the Tire Sealant and
Compressor Kit . . . . . . . . . . . . . . . . . . . . . . 368 Tire Changing . . . . . . . . . . . . . . . . . . . . . . . . . 369
Full-Size Spare Tire . . . . . . . . . . . . . . . . . . . . 374
Jump Starting
Jump Starting - North America . . . . . . . . 375
Towing the Vehicle
Transporting a Disabled Vehicle . . . . . . . 378
Recreational Vehicle Towing . . . . . . . . . . . 379
Appearance Care
Exterior Care . . . . . . . . . . . . . . . . . . . . . . . . . . 379
Interior Care . . . . . . . . . . . . . . . . . . . . . . . . . . 384
Floor Mats . . . . . . . . . . . . . . . . . . . . . . . . . . . . 387
Page 330 of 429
Chevrolet Silverado EV Owner Manual (GMNA-Localizing-U.S./Canada-
16702912) - 2024 - CRC - 1/13/23
Vehicle Care 329
Caution
Continuing to drive with worn-out brake
linings could result in costly brake
repairs.
Some driving conditions or climates can
cause a brake squeal when the brakes are
first applied, clearing up following several
applications. This does not mean something
is wrong with the brakes.
Properly torqued wheel nuts are necessary
to help prevent brake pulsation. When tires
are rotated, inspect brake linings for wear
and evenly tighten wheel nuts in the proper
sequence to torque specifications. See
Capacities and Specifications 0395.
Brake pads should be replaced as complete
axle sets.
Brake Pedal Travel
See your dealer if the brake pedal does not
return to normal height, or if there is a
rapid increase in pedal travel. This could be
a sign that brake service may be required.
Replacing Brake System Parts
Always replace brake system parts with
new, approved replacement parts. If this is
not done, the brakes may not work
properly. The braking performance can
change in many ways if the wrong brake
parts are installed or if parts are improperly
installed.
Brake Fluid
The brake master cylinder reservoir is filled
with GM approved DOT 4 brake fluid as
indicated on the reservoir cap. See
Underhood Compartment Overview 0325 for
the location of the reservoir.
Checking Brake Fluid
With the vehicle in P (Park) on a level
surface, the brake fluid level should be
between the minimum and maximum marks
on the brake fluid reservoir. There are only two reasons why the brake
fluid level in the reservoir may go down:
.Normal brake lining wear. When new
linings are installed, the fluid level goes
back up.
.A fluid leak in the brake hydraulic system.
Have the brake hydraulic system fixed.
With a leak, the brakes will not
work well.
Always clean the brake fluid reservoir cap
and the area around the cap before
removing it.
Do not top off the brake fluid. Adding fluid
does not correct a leak. If fluid is added
when the linings are worn, there will be too
much fluid when new brake linings are
installed. Add or remove fluid, as necessary,
only when work is done on the brake
hydraulic system.
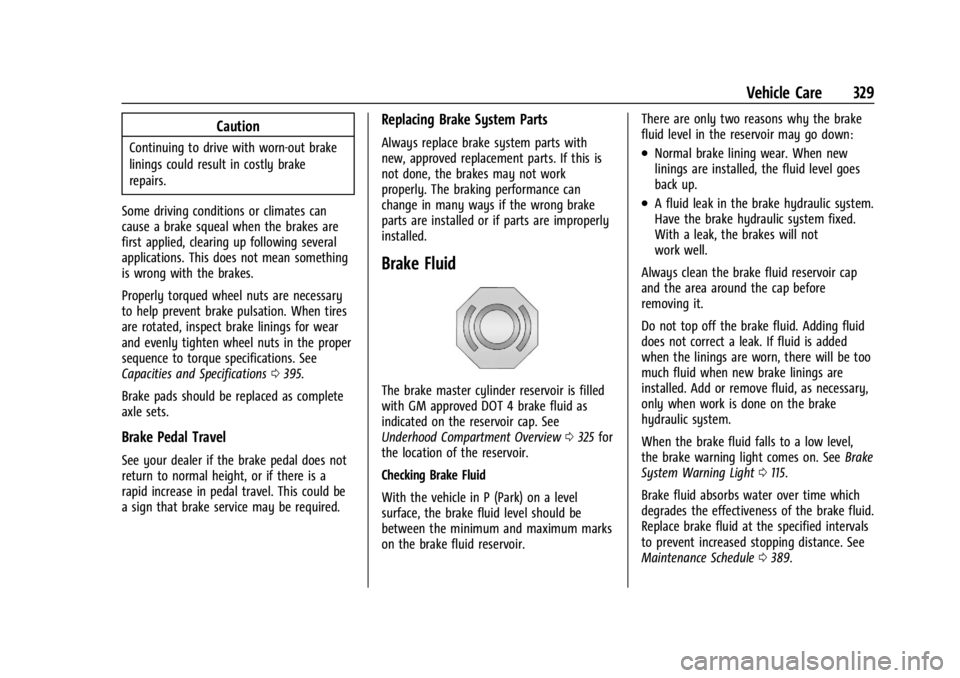
When the brake fluid falls to a low level,
the brake warning light comes on. See Brake
System Warning Light 0115.
Brake fluid absorbs water over time which
degrades the effectiveness of the brake fluid.
Replace brake fluid at the specified intervals
to prevent increased stopping distance. See
Maintenance Schedule 0389.
Page 354 of 429
Chevrolet Silverado EV Owner Manual (GMNA-Localizing-U.S./Canada-
16702912) - 2024 - CRC - 1/13/23
Vehicle Care 353
.The TPMS sensor matching process was
not done or not completed successfully
after rotating the tires. The malfunction
light and the DIC message should go off
after successfully completing the sensor
matching process. See "TPMS Sensor
Matching Process" later in this section.
.One or more TPMS sensors are missing or
damaged. The malfunction light and the
DIC message should go off when the
TPMS sensors are installed and the sensor
matching process is performed
successfully. See your dealer for service.
.Replacement tires or wheels do not match
the original equipment tires or wheels.
Tires and wheels other than those
recommended could prevent the TPMS
from functioning properly. SeeBuying
New Tires 0358.
.Operating electronic devices or being near
facilities using radio wave frequencies
similar to the TPMS could cause the TPMS
sensors to malfunction.
If the TPMS is not functioning properly it
cannot detect or signal a low tire pressure
condition. See your dealer for service if the
TPMS malfunction light and DIC message
come on and stay on.
Tire Fill Alert (If Equipped)
This feature provides visual and audible
alerts outside the vehicle to help when
inflating an underinflated tire to the
recommended cold tire pressure.
When the low tire pressure warning light
comes on: 1. Park the vehicle in a safe, level place.
2. Set the parking brake firmly.
3. Place the vehicle in P (Park).
4. Add air to the tire that is underinflated. The turn signal lamp will flash.
When the recommended pressure is
reached, the horn sounds once and the
turn signal lamp will stop flashing and
briefly turn solid.
Repeat these steps for all underinflated tires
that have illuminated the low tire pressure
warning light.
{Warning
Overinflating a tire could cause the tire
to rupture and you or others could be
injured. Do not exceed the maximum (Continued)
Warning (Continued)
pressure listed on the tire sidewall. See
Tire Sidewall Labeling0346 and
Vehicle Load Limits 0193.
If the tire is overinflated by more than
35 kPa (5 psi), the horn will sound multiple
times and the turn signal lamp will continue
to flash for several seconds after filling
stops. To release and correct the pressure,
while the turn signal lamp is still flashing,
briefly press the center of the valve stem.
When the recommended pressure is reached,
the horn sounds once.
If the turn signal lamp does not flash within
15 seconds after starting to inflate the tire,
the tire fill alert has not been activated or is
not working.
If the hazard warning flashers are on, the
tire fill alert visual feedback will not work
properly.
The TPMS will not activate the tire fill alert
properly under the following conditions:
.There is interference from an external
device or transmitter.
.The air pressure from the inflation device
is not sufficient to inflate the tire.
Page 360 of 429
Chevrolet Silverado EV Owner Manual (GMNA-Localizing-U.S./Canada-
16702912) - 2024 - CRC - 1/13/23
Vehicle Care 359
If the vehicle tires must be replaced
with a tire that does not have a TPC
Spec number, make sure they are the
same size, load range, speed rating, and
construction (radial) as the original
tires.
The Tire and Loading Information label
indicates the original equipment tires
on the vehicle. SeeVehicle Load Limits
0 193.
Different Size Tires and Wheels
If wheels or tires are installed that are a
different size than the original equipment
wheels and tires, vehicle performance,
including its braking, ride and handling
characteristics, stability, and resistance to
rollover may be affected. If the vehicle has
electronic systems such as antilock brakes,
rollover airbags, traction control, electronic
stability control, or All-Wheel Drive, the
performance of these systems can also be
affected.
{Warning
If different sized wheels are used, there
may not be an acceptable level of
performance and safety if tires not
recommended for those wheels are
selected. This increases the chance of a
crash and serious injury. Only use GM
specific wheel and tire systems developed
for the vehicle, and have them properly
installed by a GM certified technician.
See Buying New Tires 0358 and
Accessories and Modifications 0324.
Uniform Tire Quality Grading
The following information relates to the
system developed by the United States
National Highway Traffic Safety
Administration (NHTSA), which grades
tires by treadwear, traction, and
temperature performance. This applies
only to vehicles sold in the United
States. The grades are molded on the
sidewalls of most passenger car tires.
The Uniform Tire Quality Grading
(UTQG) system does not apply to deep
tread, winter tires, compact spare tires, tires with nominal rim diameters of
10 to 12 inches (25 to 30 cm), or to some
limited-production tires.
While the tires available on General
Motors passenger cars and light trucks
may vary with respect to these grades,
they must also conform to federal
safety requirements and additional
General Motors Tire Performance
Criteria (TPC) standards.
Quality grades can be found where
applicable on the tire sidewall between
tread shoulder and maximum section
width. For example:Treadwear 200 Traction AA Temperature A
All Passenger Car Tires Must Conform to
Federal Safety Requirements In Addition
To These Grades.
Treadwear
The treadwear grade is a comparative
rating based on the wear rate of the
tire when tested under controlled
conditions on a specified government
test course. For example, a tire graded
150 would wear one and one-half (1½)
Page 377 of 429
Chevrolet Silverado EV Owner Manual (GMNA-Localizing-U.S./Canada-
16702912) - 2024 - CRC - 1/13/23
376 Vehicle Care
Before you connect the cables, here are
some basic things you should know.
Positive (+) will go to the positive (+)
terminal. Negative (−) will go to the
negative (−) terminal on the battery
providing the jump start to the negative
grounding point for the discharged battery.
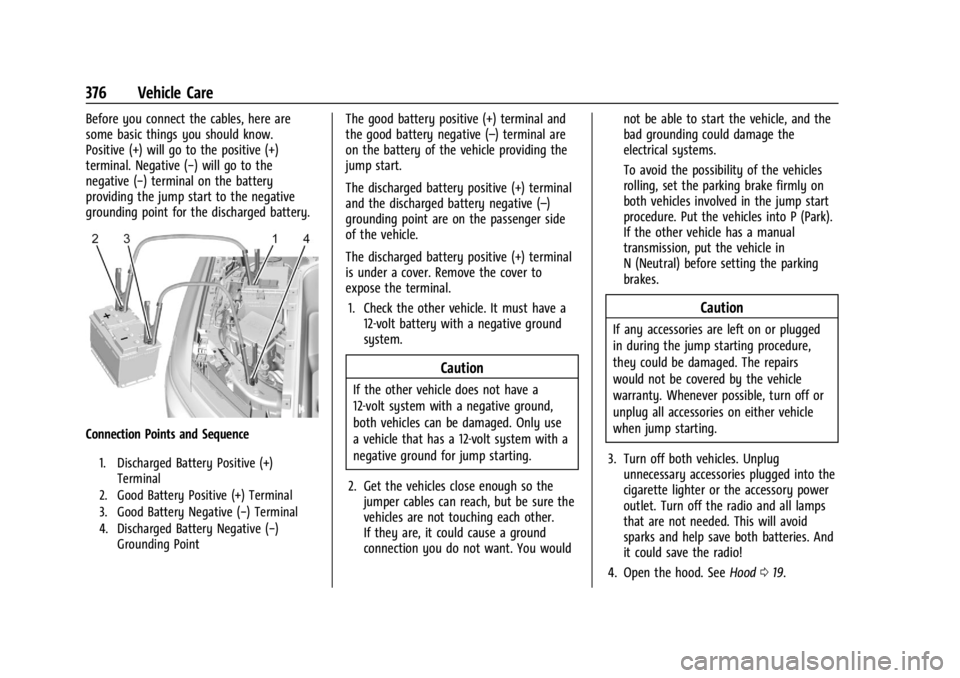
Connection Points and Sequence
1. Discharged Battery Positive (+)Terminal
2. Good Battery Positive (+) Terminal
3. Good Battery Negative (−) Terminal
4. Discharged Battery Negative (−) Grounding Point
The good battery positive (+) terminal and
the good battery negative (–) terminal are
on the battery of the vehicle providing the
jump start.
The discharged battery positive (+) terminal
and the discharged battery negative (–)
grounding point are on the passenger side
of the vehicle.
The discharged battery positive (+) terminal
is under a cover. Remove the cover to
expose the terminal.
1. Check the other vehicle. It must have a 12-volt battery with a negative ground
system.
Caution
If the other vehicle does not have a
12-volt system with a negative ground,
both vehicles can be damaged. Only use
a vehicle that has a 12-volt system with a
negative ground for jump starting.
2. Get the vehicles close enough so the jumper cables can reach, but be sure the
vehicles are not touching each other.
If they are, it could cause a ground
connection you do not want. You would not be able to start the vehicle, and the
bad grounding could damage the
electrical systems.
To avoid the possibility of the vehicles
rolling, set the parking brake firmly on
both vehicles involved in the jump start
procedure. Put the vehicles into P (Park).
If the other vehicle has a manual
transmission, put the vehicle in
N (Neutral) before setting the parking
brakes.
Caution
If any accessories are left on or plugged
in during the jump starting procedure,
they could be damaged. The repairs
would not be covered by the vehicle
warranty. Whenever possible, turn off or
unplug all accessories on either vehicle
when jump starting.
3. Turn off both vehicles. Unplug unnecessary accessories plugged into the
cigarette lighter or the accessory power
outlet. Turn off the radio and all lamps
that are not needed. This will avoid
sparks and help save both batteries. And
it could save the radio!
4. Open the hood. See Hood019.