2024 CHEVROLET SILVERADO EV door lock
[x] Cancel search: door lockPage 100 of 429

Chevrolet Silverado EV Owner Manual (GMNA-Localizing-U.S./Canada-
16702912) - 2024 - CRC - 1/13/23
Instruments and Controls 99
{Warning
In freezing weather, do not use the
washer until the windshield is warmed.
Otherwise the washer fluid can form ice
on the windshield, blocking your vision.
{Warning
Before driving the vehicle, always clear
snow and ice from the hood, windshield,
washer nozzles, roof, and rear of the
vehicle, including all lamps and windows.
Reduced visibility from snow and ice
buildup could lead to a crash.
Wiper Parking
If the vehicle is turned off while the wipers
are on LO, HI, or INT, they will
immediately stop.
If the windshield wiper lever is then moved
to OFF before the driver door is opened or
within 10 minutes, the wipers will restart
and move to the base of the windshield.
If the vehicle is turned off while the wipers
are performing wipes due to windshield
washing, the wipers continue to run until
they reach the base of the windshield.
Rain Sense
If equipped with Rain Sense and the feature
is turned on, a sensor near the top center of
the windshield detects the amount of water
on the windshield and controls the
frequency of the windshield wiper based on
the current sensitivity setting.
Keep this area of the windshield clear of
debris to allow for best system performance.
To turn the Rain Sense feature on or off, see
“Rain Sense Wipers” under Settings >
Vehicle > Comfort and Convenience > Rain
Sense > Enable/Disable.
If Rain Sense is enabled in Settings, turning
the wiper lever to INT will activate Rain
Sense.
Clock
Set the time and date using the
infotainment system. See "Time/Date" under
Settings 0166.
Power Outlets
Power Outlets 12-Volt Direct Current
The vehicle has two 12-volt outlets that can
be used to plug in electrical equipment, such
as a tablet or MP3 player. Lift the cover to access the outlet and
replace when not in use.
The power outlets are located:
.In the center console storage area under
the armrest
.In the eTrunk™
area
Center Console 12 Volt Power Outlet
Page 142 of 429
Chevrolet Silverado EV Owner Manual (GMNA-Localizing-U.S./Canada-
16702912) - 2024 - CRC - 1/13/23
Lighting 141
The high-beam headlamps remain on, under
the automatic control, until one of the
following situations occurs:
.The system detects an approaching
vehicle's headlamps.
.The system detects a preceding vehicle's
taillamps.
.The outside light is bright enough that
high-beam headlamps are not required.
.The vehicle speed drops below 20 km/h
(12 mph).
The high beams may not turn off
automatically if the system cannot detect
another vehicle's lamps because of any of
the following:
.The other vehicle's lamps are missing,
damaged, obstructed from view,
or otherwise undetected.
.The other vehicle's lamps are covered
with dirt, snow, and/or road spray.
.The other vehicle's lamps cannot be
detected due to dense exhaust, smoke,
fog, snow, road spray, mist, or other
airborne obstructions.
.The vehicle windshield is dirty, cracked,
or obstructed by something that blocks
the view of the light sensor.
.The vehicle is loaded such that the front
end points upward, causing the light
sensor to aim high and not detect
headlamps and taillamps.
.The vehicle is being driven on winding or
hilly roads.
The automatic high-beam headlamps may
need to be disabled if any of the above
conditions exist.
Exterior Lamps Off Reminder
A warning chime sounds if the driver door is
opened while the vehicle is off and the
exterior lamps are on.
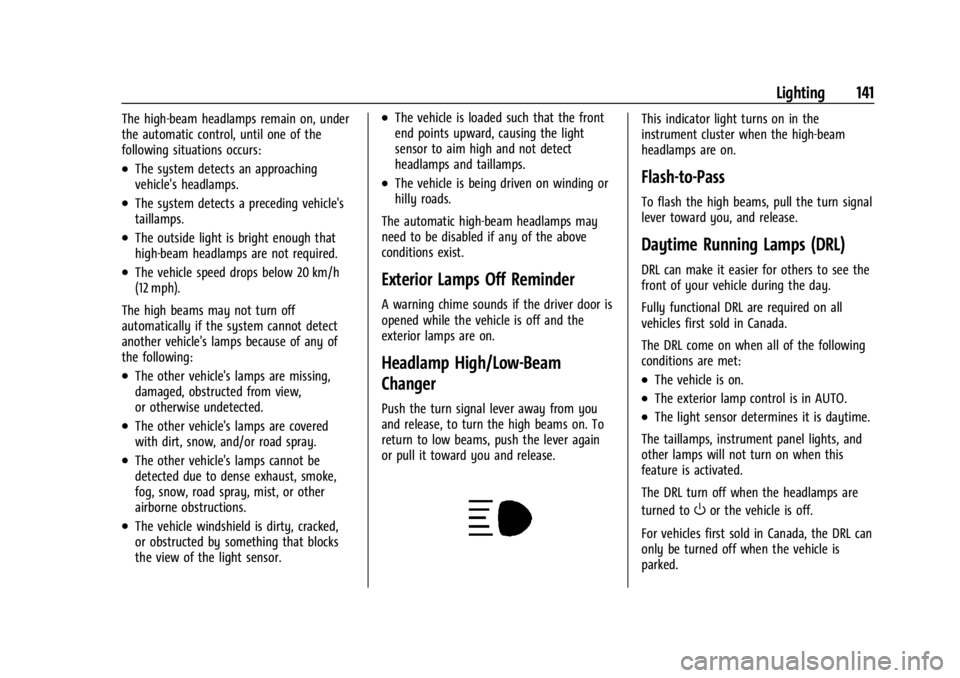
Headlamp High/Low-Beam
Changer
Push the turn signal lever away from you
and release, to turn the high beams on. To
return to low beams, push the lever again
or pull it toward you and release.
This indicator light turns on in the
instrument cluster when the high-beam
headlamps are on.
Flash-to-Pass
To flash the high beams, pull the turn signal
lever toward you, and release.
Daytime Running Lamps (DRL)
DRL can make it easier for others to see the
front of your vehicle during the day.
Fully functional DRL are required on all
vehicles first sold in Canada.
The DRL come on when all of the following
conditions are met:
.The vehicle is on.
.The exterior lamp control is in AUTO.
.The light sensor determines it is daytime.
The taillamps, instrument panel lights, and
other lamps will not turn on when this
feature is activated.
The DRL turn off when the headlamps are
turned to
Oor the vehicle is off.
For vehicles first sold in Canada, the DRL can
only be turned off when the vehicle is
parked.
Page 168 of 429
Chevrolet Silverado EV Owner Manual (GMNA-Localizing-U.S./Canada-
16702912) - 2024 - CRC - 1/13/23
Infotainment System 167
Wi-Fi Hotspot
Allows adjustment of different Wi-Fi
features.
Vehicle-to-Phone Sharing
Trusted Device
Allows for setting a phone as your trusted
device to establish a secure communication
channel between your phone and vehicle
that enables convenient features like instant
profile unlocking and account sign in. When
nearby, your trusted device is recognized
automatically via a unique Bluetooth
connection.
Vehicle
The menu may contain the following:
Teen Driver
SeeTeen Driver 0168.
Rear Seat Reminder
Allows for a chime and a message when the
rear door has been opened before or during
operation of the vehicle. Buckle to Drive
This feature can prevent shifting out of Park
when the driver, and if applicable the front
passenger, seat belt is not buckled. See
Buckle To Drive
053.
Climate and Air Quality
Adjusts different climate settings.
Collision/Detection Systems
Adjusts different driver assistance system
settings.
Comfort and Convenience
Adjusts different comfort and convenience
settings.
Lighting
Adjusts different lighting settings.
Power Door Locks
Adjusts different door lock settings.
Remote Lock, Unlock, and Start
Adjusts different remote lock settings.
Ride Height
Adjusts different ride height settings.
Power Assist Steps
Adjusts different running board settings. Seating Position
Adjusts different seating position settings.
Suspension
Adjusts different suspension settings.
Trailering
Adjusts different trailering settings.
Apps and Notifications
Shows a list of installed apps and the
permissions used.
Date / Time
Allows setting of the clock.
Display
Allows adjustment of the infotainment
display.
Sounds
Allows adjustment of the infotainment
system sounds.
Profiles and Accounts
Modifies the infotainment system’s profiles
and provides access to the accounts assigned
to the currently active profile.
Page 179 of 429
Chevrolet Silverado EV Owner Manual (GMNA-Localizing-U.S./Canada-
16702912) - 2024 - CRC - 1/13/23
178 Climate Controls
To close the front A/C vents, move the
sliding knobs to the full down position for
vertical slats or away from you for
horizontal slats.
To close the rear A/C vents, move the
sliding knobs to the full inboard position.
Operation Tips
.Clear away any ice, snow, or leaves from
air inlets at the base of the windshield
that could block airflow.
.Clear snow off the hood to improve
visibility and help decrease moisture
drawn into the vehicle.
.Keep the path under the front seats clear
of objects to help circulate the air inside
of the vehicle more effectively.
.Use of non-GM approved hood deflectors
can adversely affect system performance.
Check with your dealer before adding
equipment to the outside of the vehicle.
.Do not attach any devices to the air vent
slats. Doing so restricts airflow and may
cause damage to the air vents.
Maintenance
Passenger Compartment Air Filter
The filter reduces the dust, pollen, and other
airborne irritants from outside air that is
pulled into the vehicle.
The filter should be replaced as part of
routine scheduled maintenance. See
Maintenance Schedule0389. To find out
what type of filter to use, see Maintenance
Replacement Parts 0392.
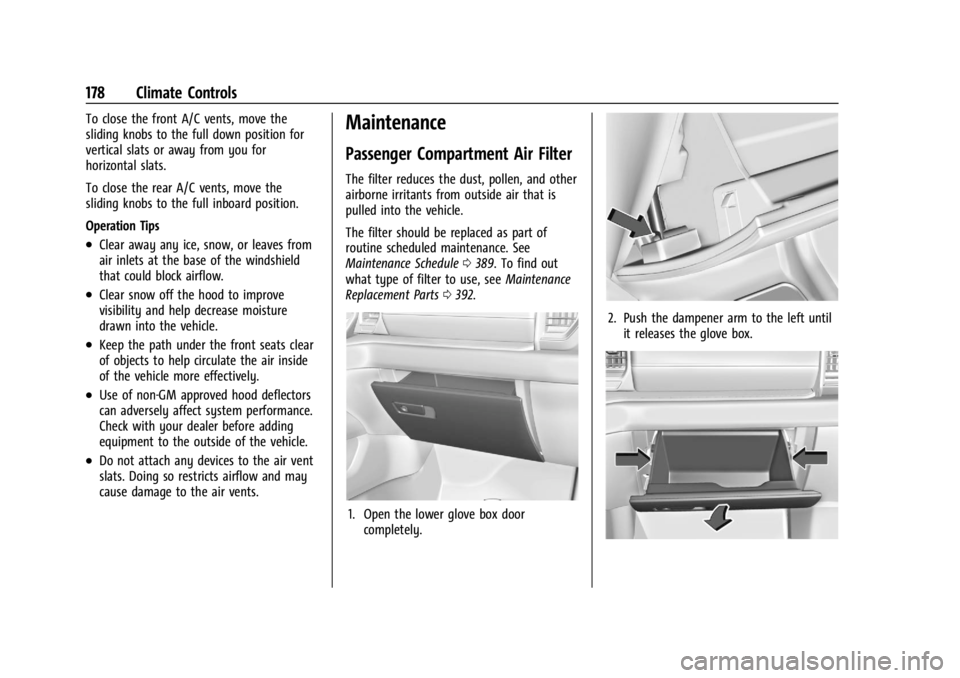
1. Open the lower glove box door
completely.
2. Push the dampener arm to the left untilit releases the glove box.
Page 258 of 429
Chevrolet Silverado EV Owner Manual (GMNA-Localizing-U.S./Canada-
16702912) - 2024 - CRC - 1/17/23
Driving and Operating 257
is applied, or the vehicle is shifted into
P (Park). To start driving away, press the
brakes and shift into D (Drive).
Certain vehicle conditions and driver
interferences may also cancel automatic
parking:
.The driver manually steers the vehicle.
.The maximum allowed speed is exceeded.
.There is a failure with the APA system.
.Electronic stability control or antilock
brakes are activated.
.The parking brake is applied.
.Driver unbuckles the seat belt and opens
the door.
System Limitations
Automatic Parking Assist has certain
limitations. The system cannot:
.Continue to operate if the maneuver
speed exceeds 5 km/h (3 mph).
.Detect whether a parking space is legal or
restricted.
.Detect pavement markings or lines.
.Park the vehicle closely lined up with the
vehicle next to it, particularly if the spot
is approached at an angle or if the
parking space is angled.
.Park exactly centered in a very large spot.
.Always detect short curbs.
.Operate while towing any trailer.
.Function the vehicle is raised or lowered
by air suspension,if equipped.
When the System Does Not Seem to Work
Properly
If the vehicle does not reverse into the
expected parking space, the system could be
maneuvering the vehicle into a previously
detected space.
Remote Auto Parking
If equipped, the vehicle can complete the
automatic parking maneuvers while the
driver authorizes the maneuver via the
myChevrolet app on a compatible mobile
phone outside of the vehicle. The driver can
also activate an automatic parallel or
perpendicular unparking maneuver via the
myChevrolet app. The driver must always be
prepared to cancel the automatic maneuver
if necessary.
Remote Auto Parking works the same way
and has the same limitations as the
standard APA feature described above. The
main difference is that you must instead
exit the vehicle and use the
myChevrolet app.
{Warning
When using the remote parking feature,
stay within a short distance and visually
monitor the vehicle until parking is
complete. Do not leave the vehicle
unsupervised during remote parking.
How to Activate Remote Auto Parking
To activate Remote Auto Parking, press
O
on the infotainment screen for the system
to begin searching for a parking space while
driving forward at no greater than
30 km/h (18 mph). APA searches for parking
spaces to the left or right of the vehicle up
to the sensors’ ranges of 1.5 m (5 ft). To
choose or change the parking mode or side,
make a selection in the infotainment
display.
After completely passing an eligible parking
spot, a beep sounds and a notification to
stop the vehicle is displayed in the driver
information center. Generally, Remote Auto
Parking selects the nearest empty parking
spot behind the vehicle, but under some
conditions may select a space that is further
back. Slow down and bring the vehicle to a
complete stop to begin.
Page 281 of 429
Chevrolet Silverado EV Owner Manual (GMNA-Localizing-U.S./Canada-
16702912) - 2024 - CRC - 1/17/23
280 Driving and Operating
4. Plug in the AC charge cord into thevehicle charge port . Make sure the AC
vehicle plug is fully connected to the AC
charge port. If it is not properly
connected, the vehicle may not be
charged.
5. Verify that the Headlight Charging Status Indicator (CSI) illuminates on the
headlamps (if enabled), charge port light
turns on, and an audible chirp occurs.
See Charging Status Feedback 0283.
To End AC Charging 1. Unlock the charge cord from the vehicle by pressing the button on the top of the
charge cord plug. Unplug the charge cord
from the vehicle.
2. Close the charge port door by pressing firmly in the center until it latches.
3. Unplug the charge cord from the electrical outlet.
4. Place the charge cord into the storage case.
DC Charging
DC Charging Station Hardware
The vehicle can be charged using DC
charging equipment typically found at
service stations and other public locations. Check the charging station DC vehicle plug
for compatibility with the DC charge port on
this vehicle. This vehicle is compatible with a
Combined Charging System 1 (CCS1)
connector.
When recharging at a DC charge station, the
charging cable connected to the vehicle
must be less than 10 m (33 ft) in length to
meet functionality and regulatory
requirements.
{Warning
Do not use the charging station if the
handle has defects such as cracks,
exposed wires, burnt or missing pins,
or any other damage. A damaged handle
may result in personal injury and/or
damage to the vehicle, the charging port
or other property.
For maximum charging performance, and to
prevent charging interruptions or damage to
the high voltage battery and vehicle:
.Remove your hands from the charging
handle once it has been plugged in. If not
done, this can cause a charging
interruption.
.Ensure that the charge cord plug clicks. Follow the steps listed on the charging
station to perform a DC vehicle charge.
If for any reason DC charging does not
begin or is interrupted, check the DC
charging station display for messages.
Unplug the cord to restart the DC charging
process.
To Start DC Charging
1. Put the vehicle in P (Park).
2. Press the Electric Parking brake (EPB) switch. See Electric Parking Brake 0205.
3. Push the rearward edge of the charge port door and release to open the door.
In cold weather conditions, ice may form
around the charge port door. The charge
port door may not open on the first
attempt. Remove ice from the area and
repeat attempting to open the charge
port door.
Page 282 of 429
Chevrolet Silverado EV Owner Manual (GMNA-Localizing-U.S./Canada-
16702912) - 2024 - CRC - 1/17/23
Driving and Operating 281
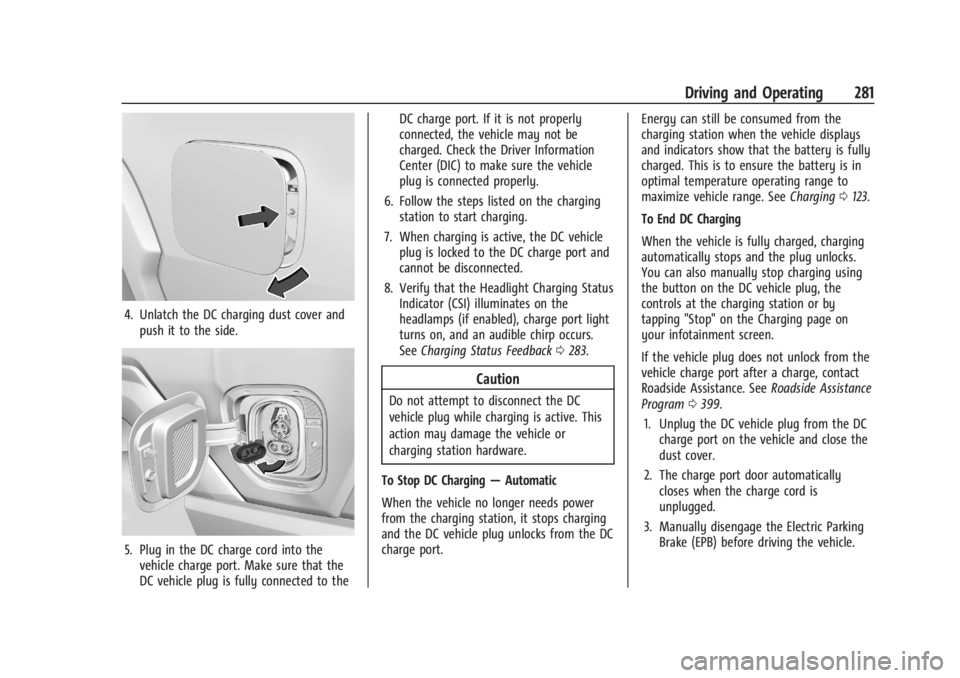
4. Unlatch the DC charging dust cover andpush it to the side.
5. Plug in the DC charge cord into thevehicle charge port. Make sure that the
DC vehicle plug is fully connected to the DC charge port. If it is not properly
connected, the vehicle may not be
charged. Check the Driver Information
Center (DIC) to make sure the vehicle
plug is connected properly.
6. Follow the steps listed on the charging station to start charging.
7. When charging is active, the DC vehicle plug is locked to the DC charge port and
cannot be disconnected.
8. Verify that the Headlight Charging Status Indicator (CSI) illuminates on the
headlamps (if enabled), charge port light
turns on, and an audible chirp occurs.
See Charging Status Feedback 0283.
Caution
Do not attempt to disconnect the DC
vehicle plug while charging is active. This
action may damage the vehicle or
charging station hardware.
To Stop DC Charging —Automatic
When the vehicle no longer needs power
from the charging station, it stops charging
and the DC vehicle plug unlocks from the DC
charge port. Energy can still be consumed from the
charging station when the vehicle displays
and indicators show that the battery is fully
charged. This is to ensure the battery is in
optimal temperature operating range to
maximize vehicle range. See
Charging0123.
To End DC Charging
When the vehicle is fully charged, charging
automatically stops and the plug unlocks.
You can also manually stop charging using
the button on the DC vehicle plug, the
controls at the charging station or by
tapping "Stop" on the Charging page on
your infotainment screen.
If the vehicle plug does not unlock from the
vehicle charge port after a charge, contact
Roadside Assistance. See Roadside Assistance
Program 0399.
1. Unplug the DC vehicle plug from the DC charge port on the vehicle and close the
dust cover.
2. The charge port door automatically closes when the charge cord is
unplugged.
3. Manually disengage the Electric Parking Brake (EPB) before driving the vehicle.
Page 341 of 429
Chevrolet Silverado EV Owner Manual (GMNA-Localizing-U.S./Canada-
16702912) - 2024 - CRC - 1/13/23
340 Vehicle Care
FusesUsage
F66 –
F67 EMB/GRILL LIGHT
F68 HDLP_LT
F69 MIDGATE LEFT MOTOR F70 EBCM 1 F71 DC/AC INV
F72 Spare
F73 –
F74 –
F75 Spare
F76 HDLP_RT F77 –
F78 MIDGATE CROSS BAR MOTOR 2
MIDGATE CROSS BAR
MOTOR 1
F79 PCV_PEEV_ALD FR RADAR/VIRTUAL KEY
F80 IECR 2 F81 IECL 1 Fuses
Usage
F82 –
F83 –
F84 V2LIM F85 Spare HVS (HIGH VOLTAGE
SERVICE DISCONNECT)
F86 HORN F87 FRT WSHR PMP
F88 –
F89 –
F90 –
F91 –Instrument Panel Fuse Block (Left)
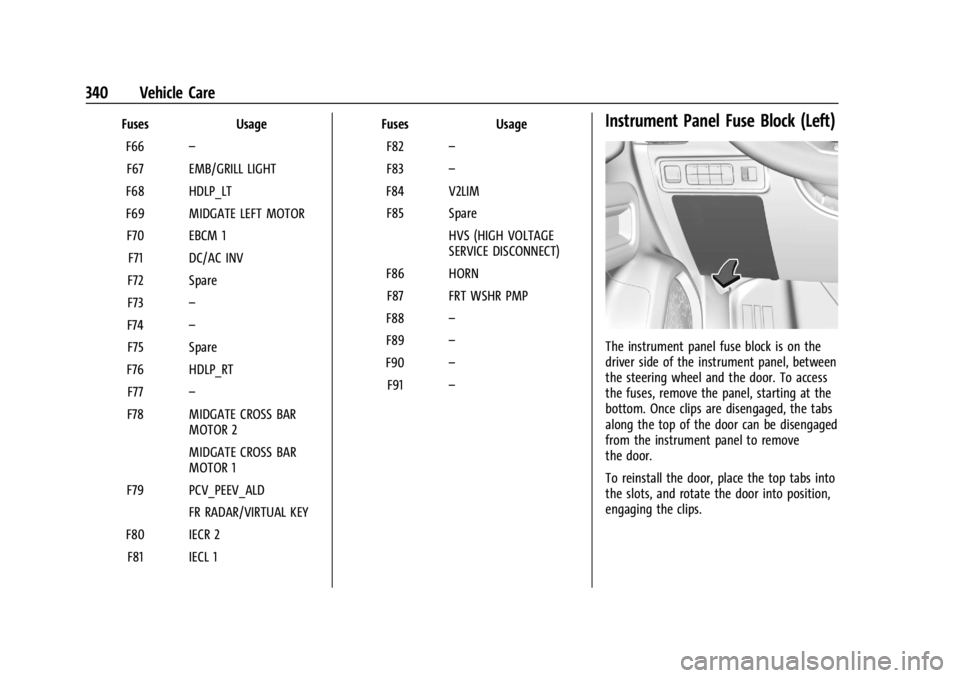
The instrument panel fuse block is on the
driver side of the instrument panel, between
the steering wheel and the door. To access
the fuses, remove the panel, starting at the
bottom. Once clips are disengaged, the tabs
along the top of the door can be disengaged
from the instrument panel to remove
the door.
To reinstall the door, place the top tabs into
the slots, and rotate the door into position,
engaging the clips.