2024 CHEVROLET SILVERADO EV maintenance
[x] Cancel search: maintenancePage 316 of 429
Chevrolet Silverado EV Owner Manual (GMNA-Localizing-U.S./Canada-
16702912) - 2024 - CRC - 1/17/23
Driving and Operating 315
.Maintenance
.Checklist
.Weight
.Brakes (if equipped)
Each section shows high level status
information for the feature. Selecting a
section opens up a new screen with
additional information and/or options.
Selecting the checklist, camera,
or maintenance icon opens up the
corresponding screen.
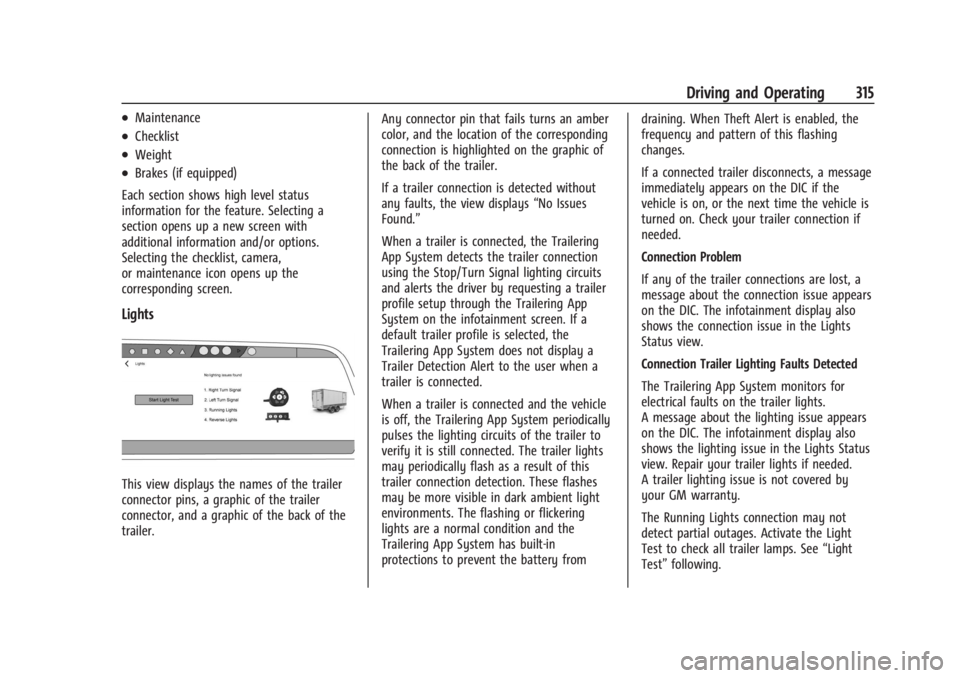
Lights
This view displays the names of the trailer
connector pins, a graphic of the trailer
connector, and a graphic of the back of the
trailer. Any connector pin that fails turns an amber
color, and the location of the corresponding
connection is highlighted on the graphic of
the back of the trailer.
If a trailer connection is detected without
any faults, the view displays
“No Issues
Found.”
When a trailer is connected, the Trailering
App System detects the trailer connection
using the Stop/Turn Signal lighting circuits
and alerts the driver by requesting a trailer
profile setup through the Trailering App
System on the infotainment screen. If a
default trailer profile is selected, the
Trailering App System does not display a
Trailer Detection Alert to the user when a
trailer is connected.
When a trailer is connected and the vehicle
is off, the Trailering App System periodically
pulses the lighting circuits of the trailer to
verify it is still connected. The trailer lights
may periodically flash as a result of this
trailer connection detection. These flashes
may be more visible in dark ambient light
environments. The flashing or flickering
lights are a normal condition and the
Trailering App System has built-in
protections to prevent the battery from draining. When Theft Alert is enabled, the
frequency and pattern of this flashing
changes.
If a connected trailer disconnects, a message
immediately appears on the DIC if the
vehicle is on, or the next time the vehicle is
turned on. Check your trailer connection if
needed.
Connection Problem
If any of the trailer connections are lost, a
message about the connection issue appears
on the DIC. The infotainment display also
shows the connection issue in the Lights
Status view.
Connection Trailer Lighting Faults Detected
The Trailering App System monitors for
electrical faults on the trailer lights.
A message about the lighting issue appears
on the DIC. The infotainment display also
shows the lighting issue in the Lights Status
view. Repair your trailer lights if needed.
A trailer lighting issue is not covered by
your GM warranty.
The Running Lights connection may not
detect partial outages. Activate the Light
Test to check all trailer lamps. See
“Light
Test” following.
Page 317 of 429
Chevrolet Silverado EV Owner Manual (GMNA-Localizing-U.S./Canada-
16702912) - 2024 - CRC - 1/17/23
316 Driving and Operating
Light Test
Touch Start Light Test to cycle the trailer
lights on and off to determine if they are
working. The test follows this sequence:1. The running lights turn on first and remain on throughout the sequence.
2. The brake lights turn on for about two seconds.
3. The left turn signal light flashes three times.
4. The right turn signal light flashes three times.
5. The reverse lights turn on for about two seconds.
6. Steps 2–5 repeat for approximately one minute and 45 seconds, or until the
test deactivates.
Touch Stop to manually stop the test. The
test automatically ends after one minute
and 45 seconds.
The Light Test also deactivates when any of
the following occur:
.The vehicle is turned off.
.The vehicle is shifted out of P (Park).
.The brake pedal is pressed.
.The turn signal is activated.
.The hazard warning flashers are activated.
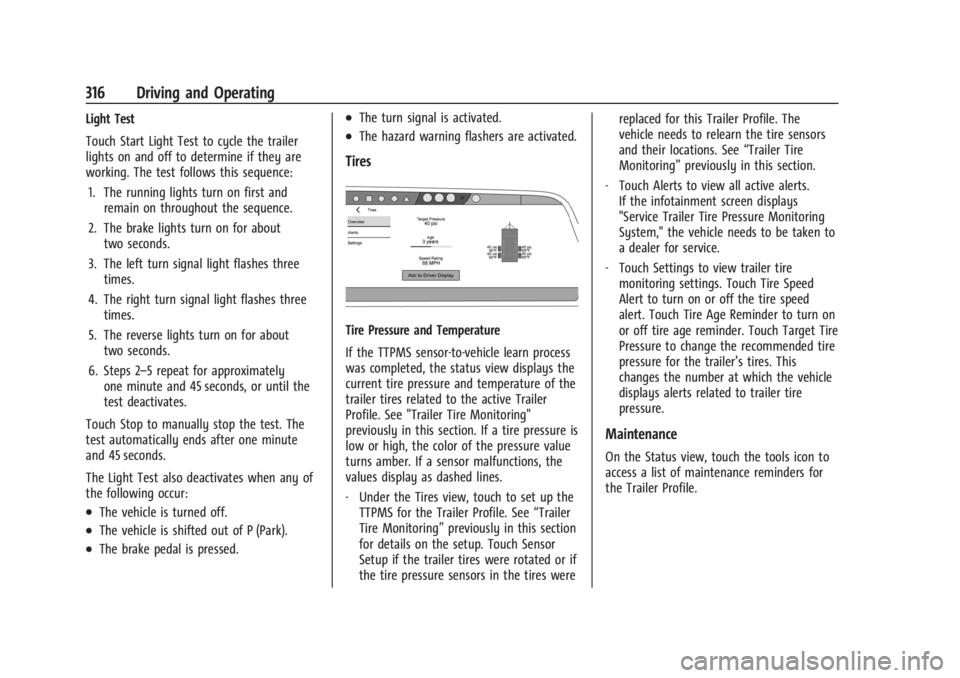
Tires
Tire Pressure and Temperature
If the TTPMS sensor-to-vehicle learn process
was completed, the status view displays the
current tire pressure and temperature of the
trailer tires related to the active Trailer
Profile. See "Trailer Tire Monitoring"
previously in this section. If a tire pressure is
low or high, the color of the pressure value
turns amber. If a sensor malfunctions, the
values display as dashed lines.
‐ Under the Tires view, touch to set up the
TTPMS for the Trailer Profile. See “Trailer
Tire Monitoring” previously in this section
for details on the setup. Touch Sensor
Setup if the trailer tires were rotated or if
the tire pressure sensors in the tires were replaced for this Trailer Profile. The
vehicle needs to relearn the tire sensors
and their locations. See
“Trailer Tire
Monitoring” previously in this section.
‐ Touch Alerts to view all active alerts.
If the infotainment screen displays
"Service Trailer Tire Pressure Monitoring
System," the vehicle needs to be taken to
a dealer for service.
‐ Touch Settings to view trailer tire
monitoring settings. Touch Tire Speed
Alert to turn on or off the tire speed
alert. Touch Tire Age Reminder to turn on
or off tire age reminder. Touch Target Tire
Pressure to change the recommended tire
pressure for the trailer’s tires. This
changes the number at which the vehicle
displays alerts related to trailer tire
pressure.
Maintenance
On the Status view, touch the tools icon to
access a list of maintenance reminders for
the Trailer Profile.
Page 318 of 429
Chevrolet Silverado EV Owner Manual (GMNA-Localizing-U.S./Canada-
16702912) - 2024 - CRC - 1/17/23
Driving and Operating 317
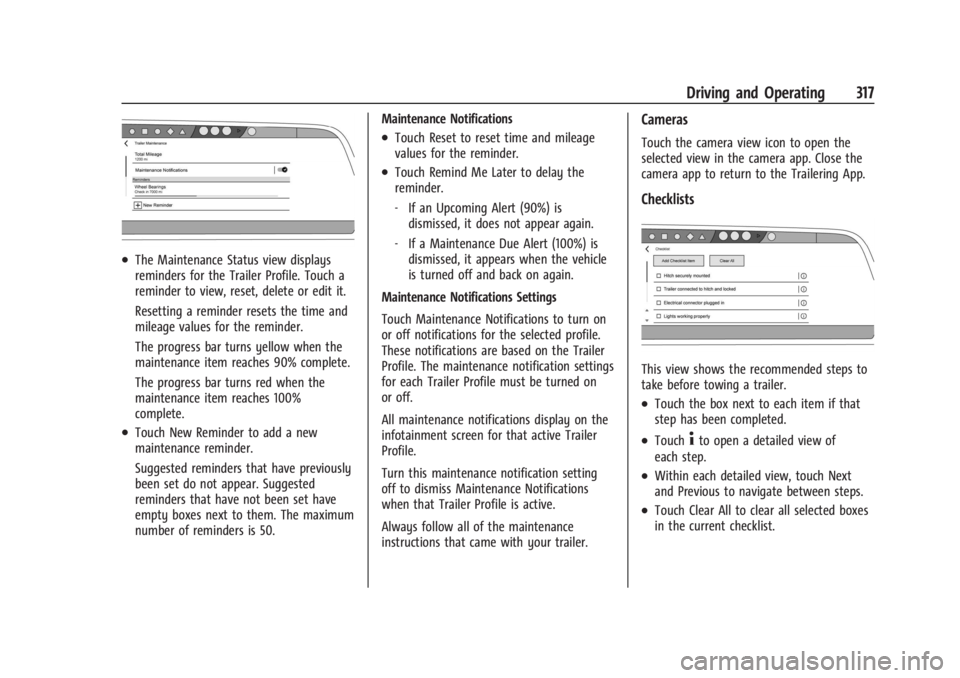
.The Maintenance Status view displays
reminders for the Trailer Profile. Touch a
reminder to view, reset, delete or edit it.
Resetting a reminder resets the time and
mileage values for the reminder.
The progress bar turns yellow when the
maintenance item reaches 90% complete.
The progress bar turns red when the
maintenance item reaches 100%
complete.
.Touch New Reminder to add a new
maintenance reminder.
Suggested reminders that have previously
been set do not appear. Suggested
reminders that have not been set have
empty boxes next to them. The maximum
number of reminders is 50.Maintenance Notifications
.Touch Reset to reset time and mileage
values for the reminder.
.Touch Remind Me Later to delay the
reminder.
‐
If an Upcoming Alert (90%) is
dismissed, it does not appear again.
‐ If a Maintenance Due Alert (100%) is
dismissed, it appears when the vehicle
is turned off and back on again.
Maintenance Notifications Settings
Touch Maintenance Notifications to turn on
or off notifications for the selected profile.
These notifications are based on the Trailer
Profile. The maintenance notification settings
for each Trailer Profile must be turned on
or off.
All maintenance notifications display on the
infotainment screen for that active Trailer
Profile.
Turn this maintenance notification setting
off to dismiss Maintenance Notifications
when that Trailer Profile is active.
Always follow all of the maintenance
instructions that came with your trailer.
Cameras
Touch the camera view icon to open the
selected view in the camera app. Close the
camera app to return to the Trailering App.
Checklists
This view shows the recommended steps to
take before towing a trailer.
.Touch the box next to each item if that
step has been completed.
.Touch4to open a detailed view of
each step.
.Within each detailed view, touch Next
and Previous to navigate between steps.
.Touch Clear All to clear all selected boxes
in the current checklist.
Page 320 of 429
Chevrolet Silverado EV Owner Manual (GMNA-Localizing-U.S./Canada-
16702912) - 2024 - CRC - 1/17/23
Driving and Operating 319
Profile is active. The Trailer Tire Pressure
Monitoring System or maintenance
reminders cannot be set up for a Guest
Trailer Profile. The Guest Trailer Profile
cannot be edited.
Accessory/No Trailer
If the Accessory/No Trailer Profile is active,
alerts are not sent and the system does not
track mileage. The Trailer Tire Pressure
Monitoring System or maintenance
reminders cannot be set up for the
Accessory/No Trailer Profile. The Accessory/
No Trailer profile cannot be edited.
No Trailer Connected
When there is no trailer connected, Trailer
Profiles cannot be activated but most
options can be edited.
Trailer Brake Gain Memory
The system can store the brake gain setting
of a Trailer Profile or a Guest Trailer Profile.
When a Trailer Profile or Guest Trailer Profile
is selected, and a brake gain setting is set
for that Trailer Profile, the system recalls the
stored brake gain value.If a Trailer Profile is already active and the
brake gain setting had been set for that
Trailer Profile, the system recalls the stored
brake gain value whenever the vehicle is
turned on.
If there was an error in setting the brake
gain for a Trailer Profile, there is a
notification. This pop-up does not appear if
the Guest Trailer Profile is active or if there
is no trailer connected.
Trailer brake gain should be set for a specific
trailering condition and must be adjusted
anytime vehicle loading, trailer loading,
or road surface conditions change.
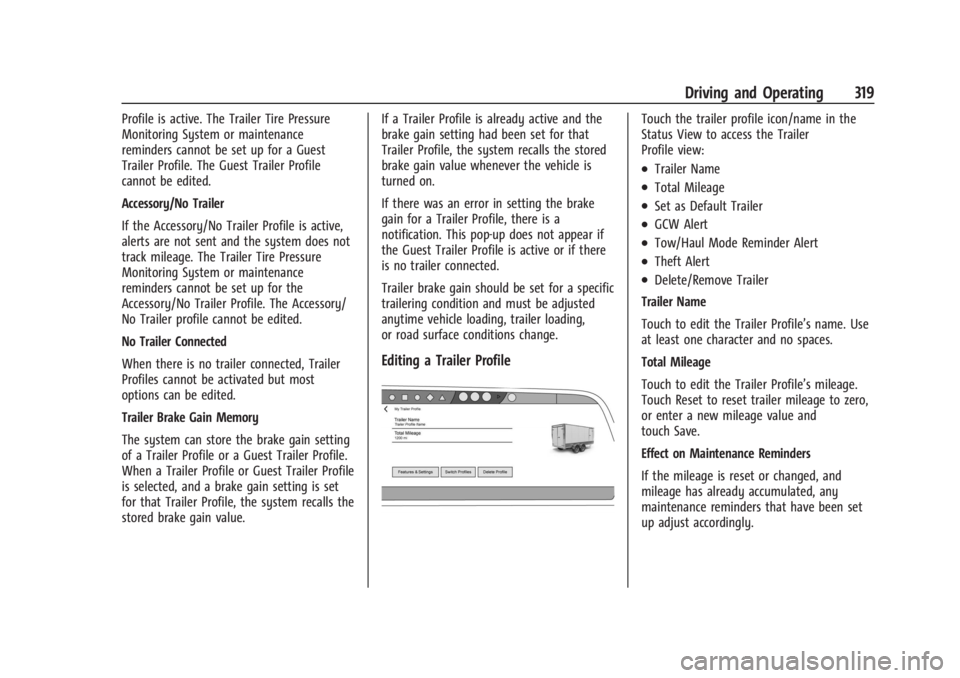
Editing a Trailer Profile
Touch the trailer profile icon/name in the
Status View to access the Trailer
Profile view:
.Trailer Name
.Total Mileage
.Set as Default Trailer
.GCW Alert
.Tow/Haul Mode Reminder Alert
.Theft Alert
.Delete/Remove Trailer
Trailer Name
Touch to edit the Trailer Profile’s name. Use
at least one character and no spaces.
Total Mileage
Touch to edit the Trailer Profile’s mileage.
Touch Reset to reset trailer mileage to zero,
or enter a new mileage value and
touch Save.
Effect on Maintenance Reminders
If the mileage is reset or changed, and
mileage has already accumulated, any
maintenance reminders that have been set
up adjust accordingly.
Page 322 of 429
Chevrolet Silverado EV Owner Manual (GMNA-Localizing-U.S./Canada-
16702912) - 2024 - CRC - 1/17/23
Driving and Operating 321
Conversions and Add-Ons
Add-On Electrical Equipment
{Warning
The Data Link Connector (DLC) is used for
vehicle service and Emission Inspection/
Maintenance testing. SeeService Vehicle
Soon Light (Propulsion System Failure)
0 115. A device connected to the DLC —
such as an aftermarket fleet or
driver-behavior tracking device —may
interfere with vehicle systems. This could
affect vehicle operation and cause a
crash. Such devices may also access
information stored in the vehicle’s
systems.
Caution
Some electrical equipment can damage
the vehicle or cause components to not
work and would not be covered by the
vehicle warranty. Always check with your
dealer before adding electrical equipment. Add-on equipment can drain the vehicle's
12-volt battery, even if the vehicle is not
operating.
When adding electrical equipment, it should
only be connected using the accessory
power outlets. The maximum power that
can be supplied by one accessory power
outlet or spread across all three is 200 watts
or 15 amps. Exceeding 200 watts or 15 amps
may cause erratic vehicle operation.
The vehicle has an airbag system. Before
attempting to add anything electrical to the
vehicle, see
Servicing the Airbag-Equipped
Vehicle 068 and
Adding Equipment to the Airbag-Equipped
Vehicle 068.
Auxiliary Switches
On-screen auxiliary switches, if equipped, are
quick-touch icons that appear within the
infotainment system, giving you easy access
to some of the features of certain
aftermarket accessories installed on the
vehicle (off-road lighting, light bars, etc.). To access the on-screen auxiliary switches,
select Controls > Aux Switches. Six on-screen
auxiliary switches are available.
Use of the on-screen switches requires
installation of an auxiliary switch interface
module, which is mounted under the hood.
See your dealer for purchase and installation
of the necessary components. When an
aftermarket accessory is installed onto the
vehicle, it should be hard-wired to the
auxiliary switch interface module to the
numbered connection that corresponds with
the numbered on-screen auxiliary switch.
See
Accessories and Modifications 0324.
If you touch an on-screen auxiliary switch
but the auxiliary switch interface module is
not installed or has no accessory wired at
that connection, a message “No accessory
connected to this switch” displays.
Customizing the On-Screen Auxiliary
Switches
After a purchased accessory is installed,
create a text label for the corresponding
on-screen auxiliary switch and choose an
icon to represent the installed accessory.
1. While the vehicle is in P (Park), touch the Controls icon on the infotainment
home page.
Page 326 of 429
Chevrolet Silverado EV Owner Manual (GMNA-Localizing-U.S./Canada-
16702912) - 2024 - CRC - 1/13/23
Vehicle Care 325
Warning (Continued)
High voltage components are identified
by labels. Do not remove, open, take
apart, or modify these components. High
voltage cable or wiring has orange
covering. Do not probe, tamper with, cut,
or modify high voltage cable or wiring.
{Warning
Unexpected wheel motion and/or
direction when one or more wheels are
off the ground for service work may
result in injury. The vehicle may:
.Allow the wheels to rotate
unexpectedly in either direction
regardless of mode selection.
.Allow the wheels to rotate in reaction
to attempts to rotate the tire(s)
manually.
.Resist attempts to rotate the wheels
manually.(Continued)
Warning (Continued)
Before lifting the vehicle to do your own
service work, turn the vehicle off or place
the vehicle in the Service Mode. To place
the vehicle in Service Mode, see “Service
Mode” underPower Modes 0197.
{Warning
It can be dangerous to work on your
vehicle if you do not have the proper
knowledge, service manual, tools,
or parts. Always follow owner’s manual
procedures and consult the service
manual for your vehicle before doing any
service work.
If doing some of your own service work, use
the proper service manual. It tells you much
more about how to service the vehicle than
this manual can. To order the proper service
manual, see Publication Ordering
Information 0404. This vehicle has an airbag system. Before
attempting to do your own service work,
see
Servicing the Airbag-Equipped Vehicle
0 68.
Keep a record with all parts receipts and list
the mileage and the date of any service
work performed. See Maintenance Records
0 393.
Underhood Compartment
Overview
There are several items you should check
periodically located under the hood.
For instructions on opening the hood, see
Hood 019.
{Warning
You or others could be injured if caught
in the path of the power hood. Make
sure there is no one in the way of the
hood as it is opening and closing.
Page 328 of 429
Chevrolet Silverado EV Owner Manual (GMNA-Localizing-U.S./Canada-
16702912) - 2024 - CRC - 1/13/23
Vehicle Care 327
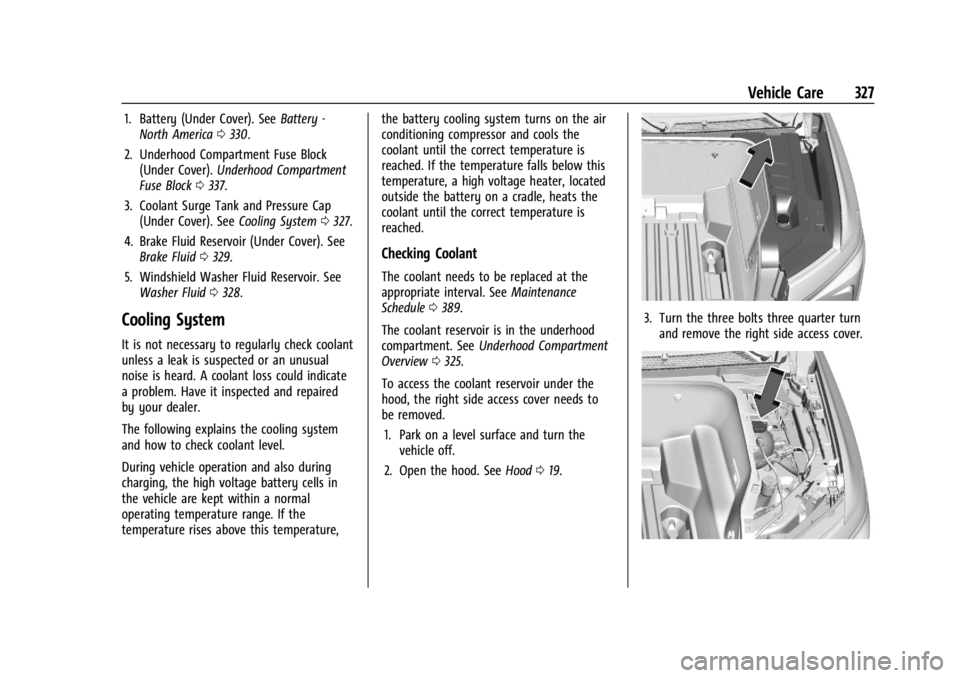
1. Battery (Under Cover). SeeBattery -
North America 0330.
2. Underhood Compartment Fuse Block (Under Cover). Underhood Compartment
Fuse Block 0337.
3. Coolant Surge Tank and Pressure Cap (Under Cover). See Cooling System0327.
4. Brake Fluid Reservoir (Under Cover). See Brake Fluid 0329.
5. Windshield Washer Fluid Reservoir. See Washer Fluid 0328.
Cooling System
It is not necessary to regularly check coolant
unless a leak is suspected or an unusual
noise is heard. A coolant loss could indicate
a problem. Have it inspected and repaired
by your dealer.
The following explains the cooling system
and how to check coolant level.
During vehicle operation and also during
charging, the high voltage battery cells in
the vehicle are kept within a normal
operating temperature range. If the
temperature rises above this temperature, the battery cooling system turns on the air
conditioning compressor and cools the
coolant until the correct temperature is
reached. If the temperature falls below this
temperature, a high voltage heater, located
outside the battery on a cradle, heats the
coolant until the correct temperature is
reached.
Checking Coolant
The coolant needs to be replaced at the
appropriate interval. See
Maintenance
Schedule 0389.
The coolant reservoir is in the underhood
compartment. See Underhood Compartment
Overview 0325.
To access the coolant reservoir under the
hood, the right side access cover needs to
be removed. 1. Park on a level surface and turn the vehicle off.
2. Open the hood. See Hood019.
3. Turn the three bolts three quarter turn
and remove the right side access cover.
Page 330 of 429
Chevrolet Silverado EV Owner Manual (GMNA-Localizing-U.S./Canada-
16702912) - 2024 - CRC - 1/13/23
Vehicle Care 329
Caution
Continuing to drive with worn-out brake
linings could result in costly brake
repairs.
Some driving conditions or climates can
cause a brake squeal when the brakes are
first applied, clearing up following several
applications. This does not mean something
is wrong with the brakes.
Properly torqued wheel nuts are necessary
to help prevent brake pulsation. When tires
are rotated, inspect brake linings for wear
and evenly tighten wheel nuts in the proper
sequence to torque specifications. See
Capacities and Specifications 0395.
Brake pads should be replaced as complete
axle sets.
Brake Pedal Travel
See your dealer if the brake pedal does not
return to normal height, or if there is a
rapid increase in pedal travel. This could be
a sign that brake service may be required.
Replacing Brake System Parts
Always replace brake system parts with
new, approved replacement parts. If this is
not done, the brakes may not work
properly. The braking performance can
change in many ways if the wrong brake
parts are installed or if parts are improperly
installed.
Brake Fluid
The brake master cylinder reservoir is filled
with GM approved DOT 4 brake fluid as
indicated on the reservoir cap. See
Underhood Compartment Overview 0325 for
the location of the reservoir.
Checking Brake Fluid
With the vehicle in P (Park) on a level
surface, the brake fluid level should be
between the minimum and maximum marks
on the brake fluid reservoir. There are only two reasons why the brake
fluid level in the reservoir may go down:
.Normal brake lining wear. When new
linings are installed, the fluid level goes
back up.
.A fluid leak in the brake hydraulic system.
Have the brake hydraulic system fixed.
With a leak, the brakes will not
work well.
Always clean the brake fluid reservoir cap
and the area around the cap before
removing it.
Do not top off the brake fluid. Adding fluid
does not correct a leak. If fluid is added
when the linings are worn, there will be too
much fluid when new brake linings are
installed. Add or remove fluid, as necessary,
only when work is done on the brake
hydraulic system.
When the brake fluid falls to a low level,
the brake warning light comes on. See Brake
System Warning Light 0115.
Brake fluid absorbs water over time which
degrades the effectiveness of the brake fluid.
Replace brake fluid at the specified intervals
to prevent increased stopping distance. See
Maintenance Schedule 0389.