2024 CHEVROLET SILVERADO EV maintenance
[x] Cancel search: maintenancePage 185 of 429
Chevrolet Silverado EV Owner Manual (GMNA-Localizing-U.S./Canada-
16702912) - 2024 - CRC - 1/17/23
184 Driving and Operating
Steering
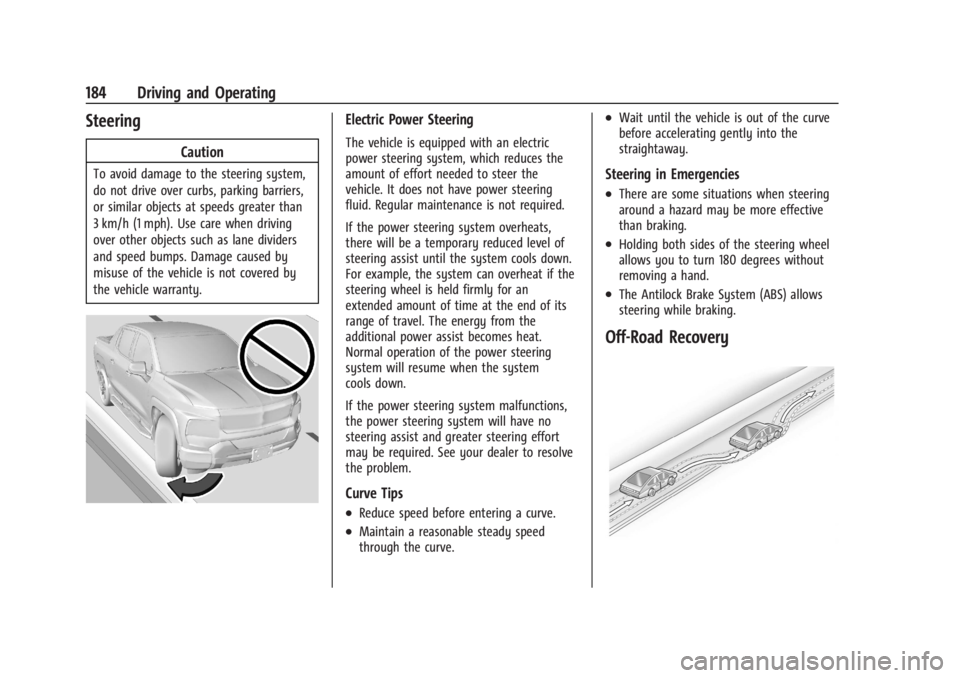
Caution
To avoid damage to the steering system,
do not drive over curbs, parking barriers,
or similar objects at speeds greater than
3 km/h (1 mph). Use care when driving
over other objects such as lane dividers
and speed bumps. Damage caused by
misuse of the vehicle is not covered by
the vehicle warranty.
Electric Power Steering
The vehicle is equipped with an electric
power steering system, which reduces the
amount of effort needed to steer the
vehicle. It does not have power steering
fluid. Regular maintenance is not required.
If the power steering system overheats,
there will be a temporary reduced level of
steering assist until the system cools down.
For example, the system can overheat if the
steering wheel is held firmly for an
extended amount of time at the end of its
range of travel. The energy from the
additional power assist becomes heat.
Normal operation of the power steering
system will resume when the system
cools down.
If the power steering system malfunctions,
the power steering system will have no
steering assist and greater steering effort
may be required. See your dealer to resolve
the problem.
Curve Tips
.Reduce speed before entering a curve.
.Maintain a reasonable steady speed
through the curve.
.Wait until the vehicle is out of the curve
before accelerating gently into the
straightaway.
Steering in Emergencies
.There are some situations when steering
around a hazard may be more effective
than braking.
.Holding both sides of the steering wheel
allows you to turn 180 degrees without
removing a hand.
.The Antilock Brake System (ABS) allows
steering while braking.
Off-Road Recovery
Page 187 of 429
Chevrolet Silverado EV Owner Manual (GMNA-Localizing-U.S./Canada-
16702912) - 2024 - CRC - 1/17/23
186 Driving and Operating
.Underbody Camera System: Provides a
view of the area underneath the vehicle
to avoid obstacles during off-roading
events. SeeSurround Vision System 0247.
Before Driving Your Vehicle Off-Road
Read all the information about
four-wheel-drive vehicles in this manual.
Know the local laws that apply to off-road
driving.
Have all necessary maintenance and service
work completed.
Charge the vehicle and check inflation
pressure in all tires, including the spare,
if equipped.
Loading the Vehicle for Off-Road Driving
Caution
Placing tall or oversized items near or
against the spoiler or the lamp above the
truck bed can result in vehicle damage.
To prevent vehicle damage, properly store
cargo in the truck bed away from the
spoiler and the lamp using the cargo
tie-downs.
{Warning
.Unsecured cargo on the load floor can
be tossed about when driving over
rough terrain. You or your passengers
can be struck by flying objects. Secure
the cargo properly.
.Keep cargo in the cargo area as far
forward and as low as possible. The
heaviest things should be on the floor,
forward of the rear axle.
.Heavy loads on the roof raise the
vehicle's center of gravity, making it
more likely to roll over. You can be
seriously or fatally injured if the
vehicle rolls over. Put heavy loads
inside the cargo area, not on the roof.
For more information about loading the
vehicle, see Vehicle Load Limits 0193 and
Tires 0344.
Environmental Concerns
Always use established trails, roads, and
areas that are reserved for public off-road
recreational driving. Obey all posted
regulations.
Do not damage shrubs, flowers, trees,
grasses, or disturb wildlife.
Driving on Hills
Driving safely on hills requires good
judgment and an understanding of what the
vehicle can and cannot do.
{Warning
Many hills are simply too steep for any
vehicle. Driving down hills can cause loss
of control. Driving across hills can cause a
rollover. You could be injured or killed.
Do not drive on steep hills.
Before driving on a hill, assess the
steepness, traction, and obstructions. If the
terrain ahead cannot be seen, get out of the
vehicle and walk the hill before driving
further.
When driving on hills:
.Use L (Low) mode and keep a firm grip on
the steering wheel.
.Maintain a slow speed.
{Warning
Driving to the top of a hill at high speed
can cause a crash. There could be a
drop-off, embankment, cliff, or even (Continued)
Page 190 of 429
Chevrolet Silverado EV Owner Manual (GMNA-Localizing-U.S./Canada-
16702912) - 2024 - CRC - 1/17/23
Driving and Operating 189
.After exiting the water, repeatedly and
gently apply the brakes to dry them off
and restore effectiveness.
If Something Goes Wrong
If during your off-road experience a warning
light or warning message displays on the
instrument cluster, or if the vehicle sustains
damage, stop driving as soon as it is safe to
do so. Correct the condition if possible
before continuing driving. If a warning light
or message appears, or if the condition
cannot be corrected, see your dealer. See
Vehicle Messages0135.
If the vehicle is operating with reduced
acceleration or reduced propulsion, stop
your off-road experience and drive slowly to
an accessible point for further assistance.
The vehicle should be taken to your dealer
for service as soon as possible. See
Propulsion Power Messages 0136 and
Propulsion Power is Limited Light 0115.
{Warning
A vehicle with driveline damage may roll
when shifted into P (Park). Always set
the Electric Parking Brake before
inspecting for driveline damage or when
(Continued)
Warning (Continued)
securing the vehicle on a flatbed tow
truck. SeeElectric Parking Brake 0205
and
Transporting a Disabled Vehicle 0378.
After Driving Your Vehicle Off-Road
Be sure to switch out of Off-Road Mode or
Terrain Mode to return to normal driving.
See Driver Mode Control 0209.
Remove any brush or debris that has
collected on the underbody or chassis,
or under the hood. Clean the lens of the
underbody camera. These accumulations can
be a fire hazard.
The extreme conditions of off-road driving
require more frequent maintenance service.
See "Severe Conditions Requiring More
Frequent Maintenance" and "Additional
Required Services —Severe Service" on
Maintenance Schedule 0389.
After operation in mud or sand, have the
brake linings cleaned and checked. These
substances can cause glazing and uneven
braking. Check the body structure, driveline, steering,
suspension, wheels, tires, and other vehicle
systems for damage, or have these
inspections done by your dealer.
{Warning
Lifting a vehicle and getting under it to
do maintenance or repairs is dangerous
without the appropriate safety equipment
and training. If a jack is provided with
the vehicle, it is designed only for
changing a flat tire. If it is used for
anything else, you or others could be
badly injured or killed if the vehicle slips
off the jack. If a jack is provided with the
vehicle, only use it for changing a
flat tire.
Driving on Wet Roads
Rain and wet roads can reduce vehicle
traction and affect your ability to stop and
accelerate. Always drive slower in these
types of driving conditions and avoid driving
through large puddles and deep-standing or
flowing water.
Page 200 of 429
Chevrolet Silverado EV Owner Manual (GMNA-Localizing-U.S./Canada-
16702912) - 2024 - CRC - 1/17/23
Driving and Operating 199
Service Mode
This mode is available for service and
diagnostics, and to verify the proper
operation of the service vehicle soon light as
may be required for inspection or
maintenance purposes.
To place the vehicle in Service Mode:1. Ensure the vehicle is off, the driver door is open, and the brake pedal is not
applied.
2. Press and release the accelerator pedal three times within five seconds, keeping
the accelerator pressed on the
third time.
The instrument cluster and infotainment
systems will operate normally, but the
vehicle will not be able to be driven. The
propulsion system will not be active in
Service Mode. Press the brake pedal to turn
the vehicle on or press
fon the
infotainment display to turn the vehicle off.
Caution
Placing the vehicle in Service Mode will
use the 12-volt battery. Do not use
Service Mode for an extended period,
or the vehicle may not start.
Shifting Into Park
To shift into P (Park):
1. Hold the brake pedal down and set the parking brake. See Electric Parking Brake
0 205.
2. Press the P (Park) switch at the end of the shift lever. See Electric Drive Unit
0 200.
3. The P indicator on the shift lever will turn red when the vehicle is in P (Park).
If the vehicle is shifted into P (Park) on a
hill, the Electric Parking Brake (EPB) may
apply automatically. The driver may not be
able to release the EPB using the EPB
switch. It should automatically release when
the vehicle is shifted out of P (Park).
Leaving the Vehicle with the Propulsion
System On
{Warning
It is dangerous to get out of the vehicle
if the vehicle is not in P (Park) with the
parking brake set. The vehicle can roll. (Continued)
Warning (Continued)
Do not leave the vehicle when the
propulsion system is on. If you have left
the propulsion system on, the vehicle can
move suddenly. You or others could be
injured. To be sure the vehicle will not
move, even when you are on fairly level
ground, always set the parking brake and
press the P (Park) button. SeeShifting
Into Park 0199.
If the vehicle must be left with the
propulsion system on, be sure that the
vehicle is in P (Park) with the EPB set, before
leaving the vehicle. After pressing the
P (Park) button, hold down the regular brake
pedal. If you cannot see the P (Park)
indicator in the instrument cluster, it means
that the vehicle has not shifted to P (Park).
Shifting out of Park
This vehicle is equipped with an electric
drive unit. To shift out of P (Park) the vehicle
must be on, the brake pedal applied, and
the charge cord unplugged.
Page 212 of 429
Chevrolet Silverado EV Owner Manual (GMNA-Localizing-U.S./Canada-
16702912) - 2024 - CRC - 1/17/23
Driving and Operating 211
Maximum vehicle speed may be limited if
the four-wheel steering system becomes
inoperable.
When towing a trailer the four-wheel
steering provides enhanced stability allowing
the trailer to follow the path of the tow
vehicle more closely, especially during lane
changes. SeeGeneral Towing Information
0 293 for more information on towing a
trailer.
Four-Wheel Steering Behavior at 0 MPH
The rear wheels may not steer to full travel
when the vehicle is stationary. Additional
travel may be achieved once the vehicle
begins to move.
Care should be taken to ensure the vehicle
path is clear of obstacles if the rear tires
steer once the vehicle is moving.
Limited-Slip Differential
If equipped, the limited-slip differential can
give more traction on snow, mud, ice, sand,
or gravel. It works like a standard axle most
of the time, but when traction is low, this
feature allows the drive wheel with the
most traction to move the vehicle. For
vehicles with the limited-slip differential, driven under severe conditions, the rear axle
fluid should be changed. See
Maintenance
Schedule 0389.
Air Suspension
If equipped, the Air Suspension feature
provides full time load leveling capability
along with the benefit of adjusting ride
height for increased convenience and
capability.
{Warning
To help avoid personal injury or death,
make sure the area underneath the
vehicle and inside the wheel wells is clear
when lowering the vehicle.
{Warning
To help avoid personal injury or death,
always select the lowest ride height for
the current driving conditions. Higher ride
heights raise the vehicle's center of
gravity, increasing the chance of a
rollover during extreme maneuvers.
{Warning
Heavy loads on the roof rack will make
the vehicle's center of gravity higher,
increasing the possibility of a rollover. To
avoid losing control of the vehicle, always
select the normal height setting and
avoid high speeds, sudden starts, sharp
turns, sudden braking, or abrupt
maneuvers when carrying cargo on the
roof rack.
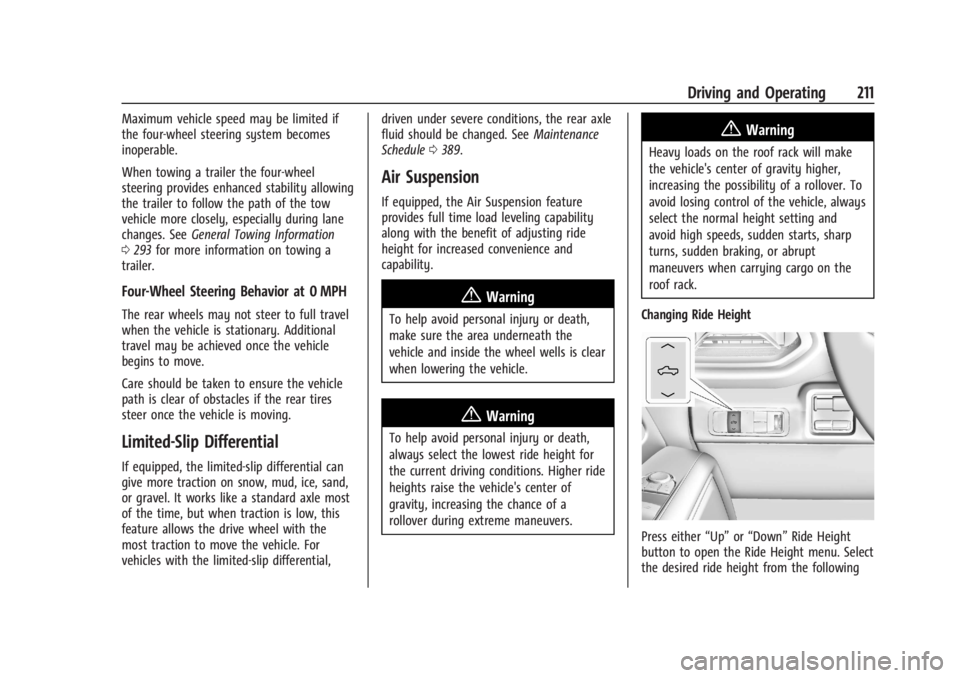
Changing Ride Height
Press either “Up”or“Down” Ride Height
button to open the Ride Height menu. Select
the desired ride height from the following
Page 298 of 429
Chevrolet Silverado EV Owner Manual (GMNA-Localizing-U.S./Canada-
16702912) - 2024 - CRC - 1/17/23
Driving and Operating 297
Pulling the Trailer from the Water1. Press and hold the brake pedal.
2. Start the vehicle and shift into D (Drive) or L (Low).
3. Release the parking brake.
4. Let up on the brake pedal.
5. Drive slowly until the tires are clear of the chocks.
6. Stop and have someone pick up and store the chocks.
7. Slowly pull the trailer from the water.
Caution
If the vehicle tires begin to spin and the
vehicle begins to slide toward the water,
remove your foot from the accelerator
pedal and apply the brake pedal. Seek
help to have the vehicle towed up
the ramp.
Maintenance when Trailer Towing
The vehicle needs service more often when
used to tow trailers. See Maintenance
Schedule 0389. It is especially important to
check the cooling system and brake system
before and during each trip. Check periodically that all nuts and bolts on
the trailer hitch are tight.
Trailer Towing
Caution
Towing a trailer improperly can damage
the vehicle and result in costly repairs
not covered by the vehicle warranty. To
tow a trailer correctly, follow the
directions in this section and see your
dealer for important information about
towing a trailer with the vehicle.
Trailering is different than just driving the
vehicle by itself. Trailering means changes in
handling, acceleration, braking, and
durability. Successful, safe trailering takes
correct equipment, and it has to be used
properly.
The following information has many
time-tested, important trailering tips and
safety rules. Many of these are important
for your safety and that of your passengers.
Read this section carefully before pulling a
trailer.
Trailer Weight
{Warning
Never exceed the towing capacity for
your vehicle.
Safe trailering requires monitoring the
weight, speed, altitude, road grades, outside
temperature, and how frequently the vehicle
is used to tow a trailer.
Trailer Weight Ratings
When towing a trailer, the combined weight
of the vehicle, vehicle contents, trailer, and
trailer contents must be below all of the
maximum weight ratings for the vehicle,
including:
.Gross Combined Weight Rating (GCWR)
.Gross Vehicle Weight Rating (GVWR)
.Maximum Trailer Weight Rating
.Maximum Trailer Tongue Weight Rating
.Gross Axle Weight Rating-Rear (GAWR-RR)
See “Weight-Distributing Hitch and
Adjustment” underTowing Equipment 0301
to determine if equalizer bars are required
to obtain the maximum trailer weight
rating.
Page 313 of 429
Chevrolet Silverado EV Owner Manual (GMNA-Localizing-U.S./Canada-
16702912) - 2024 - CRC - 1/17/23
312 Driving and Operating
See“Integrated Trailer Brake Control
System” section under Towing Equipment
0 301.
Trailering App
If equipped, the Trailering App is on the
Home Page of the infotainment home
screen.
If equipped, this feature allows profiles for
connected trailers to be created to view
status, to store and track trailer usage
information, and to set up towing assist
features.
The Trailering App welcome page appears
when the Trailering App is opened for the
first time from the infotainment home
screen.
When a trailer is electrically connected and
a trailer profile has not been created, there
is an option to create a profile, use a guest
profile, or select Accessory/No trailer.
When a trailer is electrically connected after
a Trailer Profile has been created, the trailer
detection pop-up appears with a list of all of
the custom Trailer Profiles made on the
vehicle. To load an existing Trailer Profile,
select one of the Trailer Profiles listed,
or load the Guest Trailer Profile by selecting GUEST TRAILER. Touching Accessory/No
trailer selects Accessory/No trailer as the
active Trailer Profile and dismisses the
pop-up.
Create a Trailer Profile
1. Touch Add Trailer on the trailer detection pop-up or touch + Add Trailer in the
Trailering App.
2. Follow the on-screen instructions to set up a profile.
3. After a profile is created, set up for additional trailer features may become
available, such as Tow/Haul mode
reminder, Trailer Tire Pressure
Monitoring System, maintenance
reminders, or camera views and guides.
Import a Trailer Profile 1. Touch Import on the trailer detection pop-up or touch Import in the
Trailering App.
2. Follow the on-screen instructions to import a profile.
3. After a profile is imported, it can be selected from the trailer list. The Tow/
Haul mode reminder, Brake Gain Setting
and Trailer Tire Pressure sensor learning,
if equipped, do not import.
Trailer Feature Setup
Tow/Haul Mode Reminder
To turn the Tow/Haul Mode Reminder
setting on, touch Yes. To turn it off,
touch No.
Trailer Tire Monitoring
If the TTPMS is detected, touch the Trailer
Tire Monitoring icon to set up trailer tire
monitoring.
1. Select trailer tire speed rating.
2. Enter trailer tire manufacturing date number.
3. Follow the on-screen instructions to complete the trailer tire sensor learn
process.
The trailer tire pressure sensors can transmit
up to 7 m (23 feet) from the hitch receiver of
the vehicle.
A trailer must be electrically connected to
the vehicle before starting the
sensor-to-vehicle learn process.
After selecting Start from the Learn Sensors
screen, use the Tool Method or the Manual
Method (described below) to learn each
TTPMS sensor, during which the current tire
number will be highlighted. The vehicle has
Page 314 of 429
Chevrolet Silverado EV Owner Manual (GMNA-Localizing-U.S./Canada-
16702912) - 2024 - CRC - 1/17/23
Driving and Operating 313
a maximum of two minutes to detect and
label each TTPMS sensor. After each sensor
is learned, a check mark appears next to the
tire, the vehicle horn sounds, the vehicle
brake lamps flash, and all working trailer
lamps flash.
The recommended tire pressure must be
entered for the trailer tires. An alert appears
when a trailer tire's pressure is high or low.
Tool Method: A TTPMS activation tool can
be purchased separately to learn the trailer
TTPMS sensor locations.
Manual Method: Without the TTPMS
activation tool, the air pressure can be
increased or decreased in each tire for
10 seconds. Do not exceed the maximum
inflation pressure found on the tire
sidewalls. Make sure to readjust tire
pressure to the recommended level when
the process is complete.
Sensor Learning Steps
To complete the sensor-to-vehicle learn
process:1. Touch Start on the Learn Sensors screen. The horn chirps twice and the Learning
Active screen appears on the
infotainment display. 2. Start with the driver side front
trailer tire.
3. Activate the tool near the valve stem or adjust the air pressure of this tire until
the horn chirps and all working vehicle
and trailer lights flash.
The process stops without saving the
sensor locations if this step takes more
than two minutes.
4. Move to the next tire and repeat Step 3 for each sensor. The horn chirps twice
when all sensors are completed.
5. Return to the vehicle to complete the setup.
Maintenance Reminders
To set up maintenance reminders, touch the
Trailer Maintenance icon. Follow the
on-screen prompts. The maximum number
of reminders is 50.
Camera Views and Guides
To set up the trailer camera and guideline
features, if equipped, touch the Camera
Views and Guides icon.
1. Select the number of axles on the trailer.
2. Select the wheel location on the trailer (inboard or outboard). 3. Enter the trailer dimensions as prompted.
Follow the on-screen instructions to
complete setup for available features.
Certain trailer features require a compatible
trailer profile be configured and selected.
A compatible trailer is a box-type trailer
(cargo, camper, etc.) with a conventional
hitch.
Transparent Trailer Setup
If equipped, the rear trailer camera must be
mounted on the trailer and electrically
connected to the vehicle before transparent
trailer feature can be used. See Assistance
Systems for Parking or Backing 0246.
Follow the on-screen instructions to enter
the trailer dimensions.
Trailer dimensions must be in range and
transparent trailer must be calibrated
before use.
.Trailer Length: Measure from center of
coupler to furthest rear point on the
trailer.
.Trailer Total Width: Measure from the left
most edge of trailer, including the wheels,
to the right most edge.