2024 CHEVROLET CORVETTE start stop button
[x] Cancel search: start stop buttonPage 6 of 362

Chevrolet Corvette Owner Manual (GMNA-Localizing-U.S./Canada/Mexico-
17272984) - 2024 - CRC - 2/20/23
Introduction 5
1.Air Vents 0153.
2. Turn Signal Lever. See Turn and
Lane-Change Signals 0112.
Exterior Lamp Controls 0109.
3. Manual Shift Paddles. See Manual Mode
0 187.
4. Instrument Cluster 081.
5. Windshield Wiper/Washer 075.
6. Volume Control Knob and Infotainment Home Button. See Overview0117.
7. Infotainment Display. See Using the
System 0120.
8. Alarm System Indicator Light. See Vehicle
Alarm System 022.
Light Sensor. See Automatic Headlamp
System 0111.
9. Dual Automatic Climate Control System
0150.
Driver and Passenger Heated and
Ventilated Seat Controls (If Equipped).
See Heated and Ventilated Front Seats
0 44. 10.
Traction Control/Electronic Stability
Control 0194.
Curb View Camera (If Equipped). See
Assistance Systems for Parking or Backing
0 215.
Front Lift System Control (If Equipped).
See Front Lift System 0205.
11. Driver Mode Control 0196.
12. Shift Switches. See Dual Clutch
Transmission 0184.
13. Hybrid Battery Charging (Charge+). See Driver Mode Control 0196.
Auto Stop Disable Switch. See Stop/Start
System 0180.
14. Keyless Ignition. See Ignition Positions
0 178.
15. Driver Information Center (DIC) Controls. SeeDriver Information Center (DIC) 099.
16. Heated Steering Wheel 075 (If
Equipped).
17. Bluetooth Controls. See Steering Wheel
Controls 0119.
Voice Recognition Controls. See Steering
Wheel Controls 0119. 18. Volume Control Buttons. See
Steering
Wheel Controls 0119.
19. Horn 075.
20. Favorites Select Buttons. Steering Wheel
Controls 0119.
21. Z-Mode Control. See Driver Mode Control
0 196.
Forward Collision Alert (FCA) System
0 218.
22. Cruise Control 0212.
23. Electric Parking Brake 0192.
24. Data Link Connector (DLC) (Out of View). SeeMalfunction Indicator Lamp (Check
Engine Light) 090.
25. Instrument Panel Illumination Control
0113.
26. Head-Up Display Controls (If Equipped). SeeHead-Up Display (HUD) 0102.
Page 9 of 362

Chevrolet Corvette Owner Manual (GMNA-Localizing-U.S./Canada/Mexico-
17272984) - 2024 - CRC - 2/20/23
8 Keys, Doors, and Windows
H:Press to lock both doors and the fuel
door. The turn signal indicators may flash
and/or the horn may sound on the second
press to indicate locking. To view available
settings from the infotainment screen, touch
Settings > Vehicle > Remote Lock, Unlock,
Start.
Pressing
Hmay also arm the
theft-deterrent system. See Vehicle Alarm
System 022.
If equipped with remote folding mirrors,
double pressing and holding
Hfor
one second may fold the mirrors. See
Folding Mirrors 025.
I:Press to unlock the driver door and the
fuel door. Press again within five seconds to
unlock both doors. When remotely unlocking
the vehicle at night, the headlamps and
taillamps may come on for about
30 seconds to light your approach to the
vehicle depending on the settings. To view
available settings from the infotainment
screen, touch Settings > Vehicle > Remote
Lock, Unlock, Start. The turn signal indicators
may flash to indicate unlocking.
Pressing
Iwill disarm the theft-deterrent
system. See Vehicle Alarm System 022.
If equipped with remote window operation,
double press
Iand hold for three seconds
to remotely open the windows, if enabled.
To view available settings from the
infotainment screen, touch Settings >
Vehicle > Remote Lock, Unlock, Start.
If equipped with remote folding mirrors,
double pressing and holding
Ifor
one second may unfold the mirrors. See
Folding Mirrors 025.
S:Press twice to start the engine from
outside the vehicle using the remote key.
See Remote Vehicle Start 012. The vehicle
can not be driven during a remote start. To drive the vehicle, press the brake pedal, then
press ENGINE START/STOP, with the remote
key in the vehicle.
7:
Press and release to initiate vehicle
locator. The exterior lamps flash and the
horn chirps three times. Press
7and hold
for approximately three seconds to sound
the panic alarm. The horn sounds and the
turn signal lamps flash for 30 seconds,
or until
7is pressed again or the vehicle is
started.
D: Press twice to release the hatch/
trunk. The vehicle must be in P (Park).
E: Press twice and continue holding
following the second press until the hood
releases. The vehicle must be in P (Park).
M: If equipped, press and releaseI,
then immediately press and hold
M
continuously to open the convertible top all
the way. Release the button to stop
movement. This button will only open the
convertible top.
If equipped, press and release
Hthen
immediately press and hold
Mto open
the engine compartment.
Page 10 of 362
Chevrolet Corvette Owner Manual (GMNA-Localizing-U.S./Canada/Mexico-
17272984) - 2024 - CRC - 2/20/23
Keys, Doors, and Windows 9
Convertible Top
.Do not try to start the vehicle while using
the remote key to open the convertible
top. Release both the remote key button
and ENGINE START/STOP and wait a few
seconds before starting the vehicle
normally.
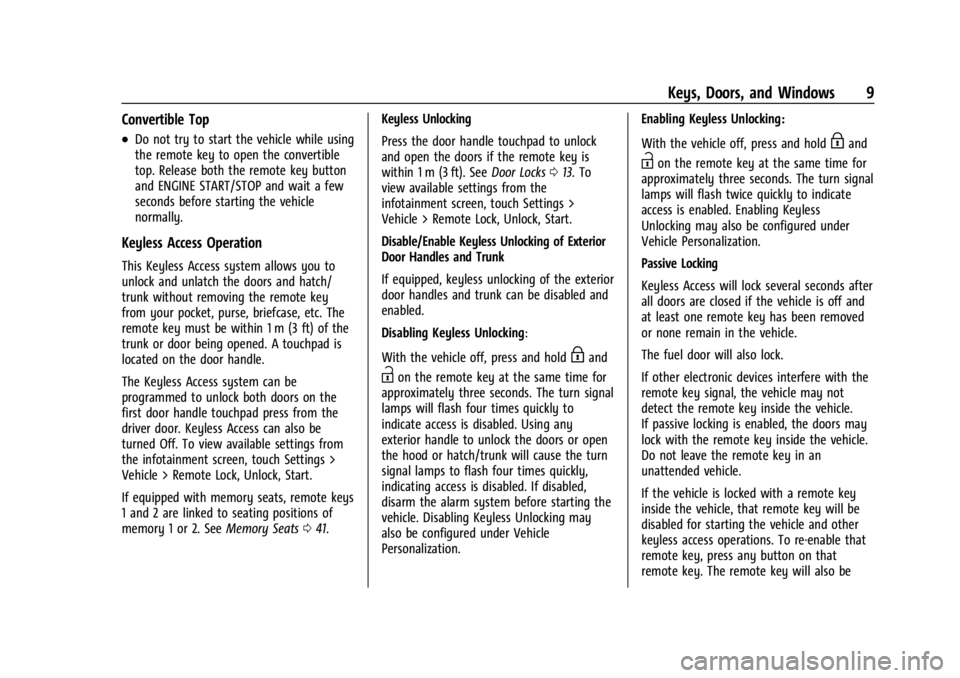
Keyless Access Operation
This Keyless Access system allows you to
unlock and unlatch the doors and hatch/
trunk without removing the remote key
from your pocket, purse, briefcase, etc. The
remote key must be within 1 m (3 ft) of the
trunk or door being opened. A touchpad is
located on the door handle.
The Keyless Access system can be
programmed to unlock both doors on the
first door handle touchpad press from the
driver door. Keyless Access can also be
turned Off. To view available settings from
the infotainment screen, touch Settings >
Vehicle > Remote Lock, Unlock, Start.
If equipped with memory seats, remote keys
1 and 2 are linked to seating positions of
memory 1 or 2. SeeMemory Seats041. Keyless Unlocking
Press the door handle touchpad to unlock
and open the doors if the remote key is
within 1 m (3 ft). See
Door Locks013. To
view available settings from the
infotainment screen, touch Settings >
Vehicle > Remote Lock, Unlock, Start.
Disable/Enable Keyless Unlocking of Exterior
Door Handles and Trunk
If equipped, keyless unlocking of the exterior
door handles and trunk can be disabled and
enabled.
Disabling Keyless Unlocking:
With the vehicle off, press and hold
Hand
Ion the remote key at the same time for
approximately three seconds. The turn signal
lamps will flash four times quickly to
indicate access is disabled. Using any
exterior handle to unlock the doors or open
the hood or hatch/trunk will cause the turn
signal lamps to flash four times quickly,
indicating access is disabled. If disabled,
disarm the alarm system before starting the
vehicle. Disabling Keyless Unlocking may
also be configured under Vehicle
Personalization. Enabling Keyless Unlocking:
With the vehicle off, press and hold
Hand
Ion the remote key at the same time for
approximately three seconds. The turn signal
lamps will flash twice quickly to indicate
access is enabled. Enabling Keyless
Unlocking may also be configured under
Vehicle Personalization.
Passive Locking
Keyless Access will lock several seconds after
all doors are closed if the vehicle is off and
at least one remote key has been removed
or none remain in the vehicle.
The fuel door will also lock.
If other electronic devices interfere with the
remote key signal, the vehicle may not
detect the remote key inside the vehicle.
If passive locking is enabled, the doors may
lock with the remote key inside the vehicle.
Do not leave the remote key in an
unattended vehicle.
If the vehicle is locked with a remote key
inside the vehicle, that remote key will be
disabled for starting the vehicle and other
keyless access operations. To re-enable that
remote key, press any button on that
remote key. The remote key will also be
Page 46 of 362
Chevrolet Corvette Owner Manual (GMNA-Localizing-U.S./Canada/Mexico-
17272984) - 2024 - CRC - 2/20/23
Seats and Restraints 45
If equipped with a heated steering wheel,
the auto heated steering wheel activation
will follow the heated seat auto activation
and the heated wheel indicator will follow
the state of the steering wheel heat.
Remote Start Heated and Ventilated Seats
During a remote start (if equipped), the
heated or ventilated seats can be turned on
automatically. When it is cold outside, the
heated seats turn on, and when it is hot
outside the ventilated seats turn on. The
heated and ventilated seat indicators and
heated steering wheel indicator may come
on during this operation. The heated or
ventilated seats are canceled when the
vehicle is turned on. Press the heated or
ventilated seat button to use the heated or
ventilated seats after the vehicle is started.
The temperature performance of an
unoccupied seat may be reduced. This is
normal.
To enable or disable remote start heated or
ventilated seats, select Settings > Vehicle >
Remote Lock, Unlock, and Start > Remote
Start Auto Heat Seats or Remote Start Auto
Cool Seats > ON or OFF. SeeRemote Vehicle
Start 012.Seat Belts
This section describes how to use seat belts
properly, and some things not to do.
{Warning
Do not let anyone ride where a seat belt
cannot be worn properly. In a crash,
if you or your passenger(s) are not
wearing seat belts, injuries can be much
worse than if you are wearing seat belts.
You can be seriously injured or killed by
hitting things inside the vehicle harder or
by being ejected from the vehicle. In
addition, anyone who is not buckled up
can strike other passengers in the vehicle.
It is extremely dangerous to ride in a
cargo area, inside or outside of a vehicle.
In a collision, passengers riding in these
areas are more likely to be seriously
injured or killed. Do not allow passengers
to ride in any area of the vehicle that is
not equipped with seats and seat belts.
Always wear a seat belt, and check that
all passenger(s) are restrained
properly too. This vehicle has indicators as a reminder to
buckle the seat belts. See
Seat Belt
Reminders 088.
Why Seat Belts Work
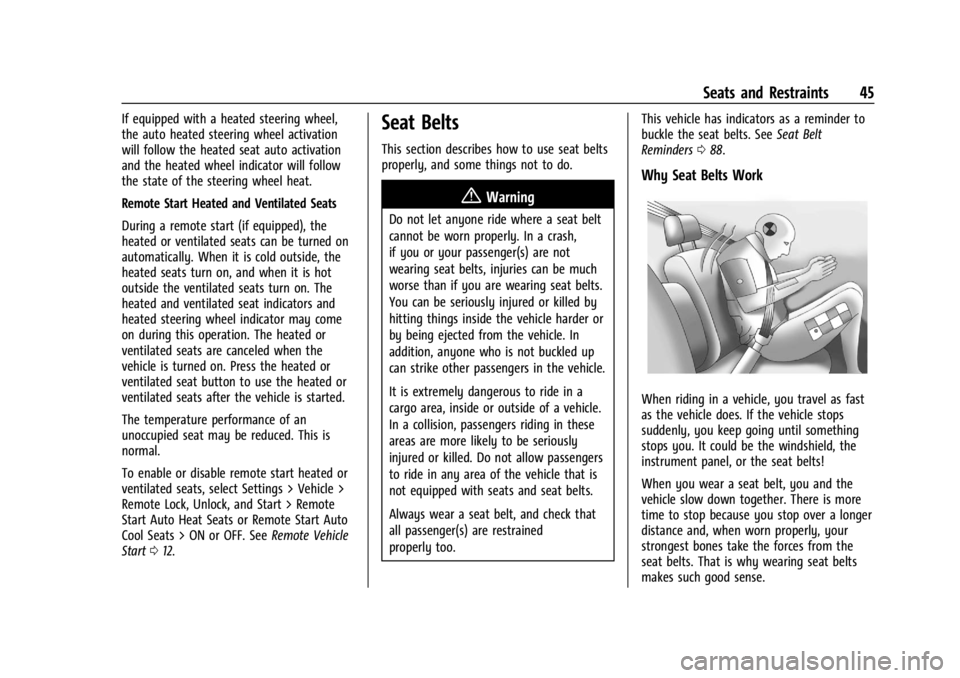
When riding in a vehicle, you travel as fast
as the vehicle does. If the vehicle stops
suddenly, you keep going until something
stops you. It could be the windshield, the
instrument panel, or the seat belts!
When you wear a seat belt, you and the
vehicle slow down together. There is more
time to stop because you stop over a longer
distance and, when worn properly, your
strongest bones take the forces from the
seat belts. That is why wearing seat belts
makes such good sense.
Page 107 of 362
Chevrolet Corvette Owner Manual (GMNA-Localizing-U.S./Canada/Mexico-
17272984) - 2024 - CRC - 2/20/23
106 Instruments and Controls
.Cruise Control
.Front Lift System
.Lighting and Bulb Replacement
.Wiper/Washer Systems
.Doors and Windows
.Seat Belts
.Airbag Systems
.Propulsion
.Tire Pressure
.Battery
Engine Power Messages
REDUCED ACCELERATION DRIVE
WITH CARE
This message displays when the vehicle's
propulsion power is reduced. A reduction in
propulsion power can affect the vehicle's
ability to accelerate. If this message is on,
but there is no observed reduction in
performance, proceed to your destination.
Under certain conditions the performance
may be reduced the next time the vehicle is
driven. The vehicle may be driven while this
message is on, but maximum acceleration
and speed may be reduced. Anytime this
message stays on, or displays repeatedly,
the vehicle should be taken to your dealer
for service as soon as possible.Under certain operating conditions,
propulsion will be disabled. Try restarting
after the ignition has been off for
two minutes.
Vehicle Speed Messages
SPEED LIMITED TO XXX KM/H (MPH)
This message shows that the vehicle speed
has been limited to the speed displayed. The
limited speed is a protection for various
propulsion and vehicle systems, such as
lubrication, thermal, brakes, suspension,
Teen Driver if equipped, or tires.
Universal Remote System
See
Radio Frequency Statement 0337.
Universal Remote System
Programming
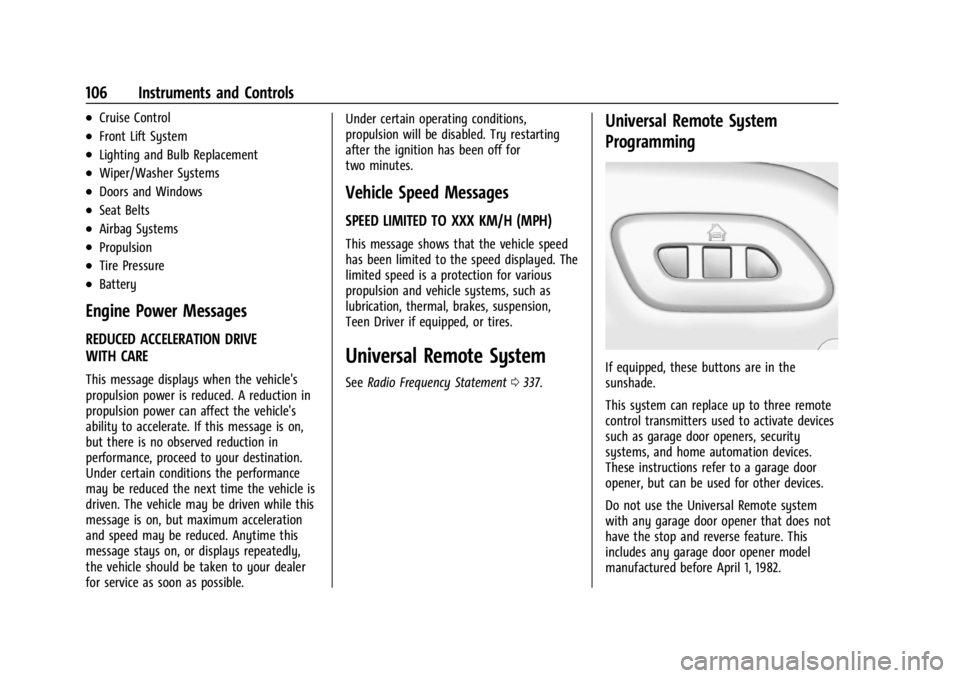
If equipped, these buttons are in the
sunshade.
This system can replace up to three remote
control transmitters used to activate devices
such as garage door openers, security
systems, and home automation devices.
These instructions refer to a garage door
opener, but can be used for other devices.
Do not use the Universal Remote system
with any garage door opener that does not
have the stop and reverse feature. This
includes any garage door opener model
manufactured before April 1, 1982.
Page 132 of 362
Chevrolet Corvette Owner Manual (GMNA-Localizing-U.S./Canada/Mexico-
17272984) - 2024 - CRC - 2/20/23
Infotainment System 131
.Comply with any notice and consent
requirements before capturing and/or
recording the voices or images of other
persons or before collecting other
personal data.
.Notify other drivers of your vehicle about
the above rules and require them to
comply.
.General Motors does not accept any
responsibility or liability in connection
with use that is not permitted.
.Law enforcement authorities may have
the right to seize video recordings and
use them as evidence of criminal/driving
offenses against you or third parties.
The PDR records video, audio, and vehicle
data. The forward facing video and cabin
audio are captured by a camera and
microphone located behind the rear view
mirror. The PDR video and data is stored on
a removable SD card located in the SD card
reader in the glove box. The video (MP4)
can be played back in the vehicle or the SD
card can be removed and played on a PC or
a mobile device, or the file can be viewed
and analyzed within Toolbox. See Toolbox
later in this section.
The recorded data is not stored anywhere
else and is only accessible from the SD card.
To optimize PDR performance, format the SD
card on a regular basis. Back up all
recordings on the SD card before formatting.
Formatting the SD card will delete all saved
recordings.
If a system error code appears on the
display, such as "System Error Code ####,”
please check the condition of the SD card.
It may need to be reformatted or replaced.
If the issue persists, please see your dealer.
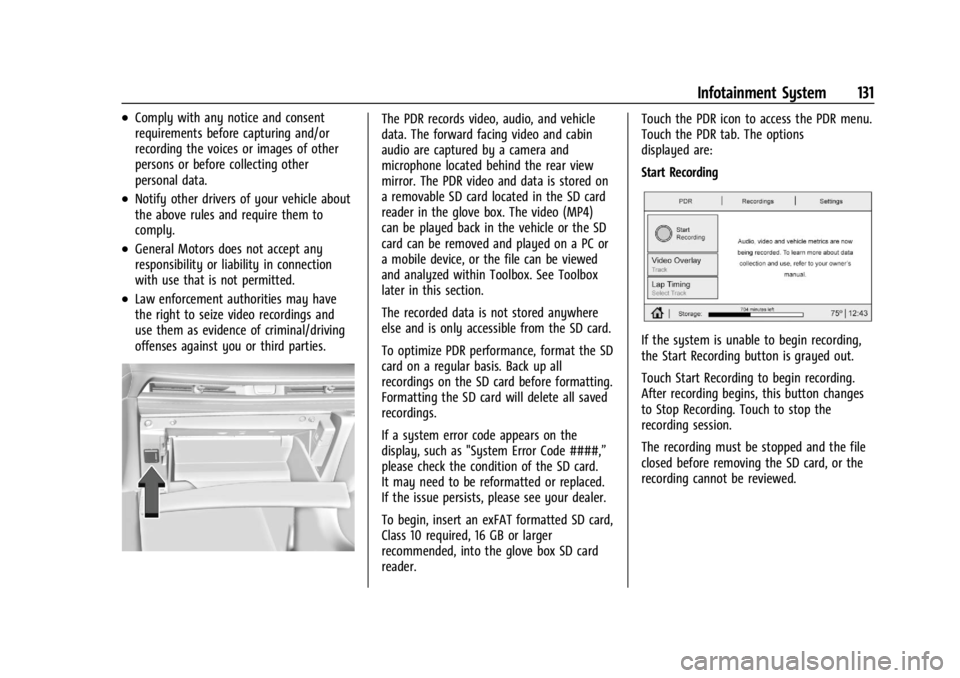
To begin, insert an exFAT formatted SD card,
Class 10 required, 16 GB or larger
recommended, into the glove box SD card
reader.Touch the PDR icon to access the PDR menu.
Touch the PDR tab. The options
displayed are:
Start Recording
If the system is unable to begin recording,
the Start Recording button is grayed out.
Touch Start Recording to begin recording.
After recording begins, this button changes
to Stop Recording. Touch to stop the
recording session.
The recording must be stopped and the file
closed before removing the SD card, or the
recording cannot be reviewed.
Page 145 of 362
Chevrolet Corvette Owner Manual (GMNA-Localizing-U.S./Canada/Mexico-
17272984) - 2024 - CRC - 2/20/23
144 Infotainment System
Google
This menu allows adjustment of the Google
settings.
Teen Driver
If equipped, this allows multiple keys to be
registered for beginner drivers to encourage
safe driving habits. When the vehicle is
started with a Teen Driver key, it will
automatically activate certain safety
systems, allow setting of some features, and
limit the use of others. The Report Card will
record vehicle data about driving behavior
that can be viewed later. When the vehicle
is started with a registered key, the Driver
Information Center (DIC) displays a message
that Teen Driver is active.
To access:1. Touch Settings on the Home Page, then touch Vehicle, and then Teen Driver.
2. Create a Personal Identification Number (PIN) by choosing a four-digit PIN.
Re-enter the PIN to confirm. To change
the PIN, touch Change PIN.
The PIN is required to:
.Set up/Add or remove keys.
.Change Teen Driver settings.
.Change or clear the Teen Driver PIN.
.Access or delete Report Card data.
Set up/Add keys to activate Teen Driver and
assign restrictions to the key:
Any vehicle key can be registered, up to a
maximum of eight keys. Label the key to
tell it apart from the other keys.
For a pushbutton start system: 1. Start the vehicle.
2. For automatic transmissions, the vehicle must be in P (Park). For manual
transmissions, the vehicle must be
stopped with the parking brake set.
3. From the Settings menu, touch Vehicle and then Teen Driver.
4. Enter the PIN.
5. Place the remote key you wish to register in the transmitter pocket. The
key does not need to be the one that
started the vehicle. See Remote Key
Operation 07for transmitter pocket
location.
6. From the Teen Driver menu, touch Setup Keys or Add/Remove Teen Driver Keys.
.If the remote key has not previously
been registered, the option to add
the key displays. Touch Add and a confirmation message displays. Teen
Driver restrictions will be applied
whenever this remote key is used to
operate the vehicle.
.If the remote key has already been
registered, the option to remove the
key displays. If Remove is touched,
the remote key is no longer
registered. A confirmation message
displays, and Teen Driver restrictions
will not be applied if this remote key
is used to operate the vehicle.
In vehicles with a pushbutton start system,
if a Teen Driver and a non-Teen Driver key
are both present at start up, the vehicle will
recognize the non-Teen Driver key to start
the vehicle. The Teen Driver settings will not
be active.
For a keyed ignition system: 1. Start the vehicle.
2. For automatic transmissions, the vehicle must be in P (Park). For manual
transmissions, the vehicle must be
stopped with the parking brake set.
3. From the Settings menu, touch Vehicle and then Teen Driver.
4. Enter the PIN.
Page 179 of 362
Chevrolet Corvette Owner Manual (GMNA-Localizing-U.S./Canada/Mexico-
17272984) - 2024 - CRC - 2/20/23
178 Driving and Operating
Ignition Positions
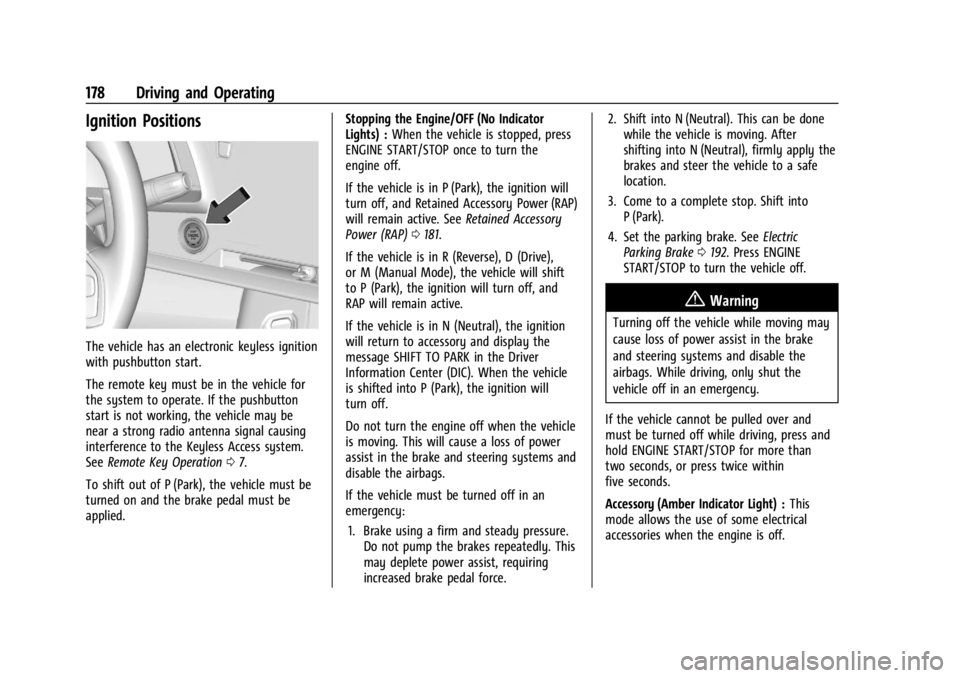
The vehicle has an electronic keyless ignition
with pushbutton start.
The remote key must be in the vehicle for
the system to operate. If the pushbutton
start is not working, the vehicle may be
near a strong radio antenna signal causing
interference to the Keyless Access system.
SeeRemote Key Operation 07.
To shift out of P (Park), the vehicle must be
turned on and the brake pedal must be
applied. Stopping the Engine/OFF (No Indicator
Lights) :
When the vehicle is stopped, press
ENGINE START/STOP once to turn the
engine off.
If the vehicle is in P (Park), the ignition will
turn off, and Retained Accessory Power (RAP)
will remain active. See Retained Accessory
Power (RAP) 0181.
If the vehicle is in R (Reverse), D (Drive),
or M (Manual Mode), the vehicle will shift
to P (Park), the ignition will turn off, and
RAP will remain active.
If the vehicle is in N (Neutral), the ignition
will return to accessory and display the
message SHIFT TO PARK in the Driver
Information Center (DIC). When the vehicle
is shifted into P (Park), the ignition will
turn off.
Do not turn the engine off when the vehicle
is moving. This will cause a loss of power
assist in the brake and steering systems and
disable the airbags.
If the vehicle must be turned off in an
emergency: 1. Brake using a firm and steady pressure. Do not pump the brakes repeatedly. This
may deplete power assist, requiring
increased brake pedal force. 2. Shift into N (Neutral). This can be done
while the vehicle is moving. After
shifting into N (Neutral), firmly apply the
brakes and steer the vehicle to a safe
location.
3. Come to a complete stop. Shift into P (Park).
4. Set the parking brake. See Electric
Parking Brake 0192. Press ENGINE
START/STOP to turn the vehicle off.
{Warning
Turning off the vehicle while moving may
cause loss of power assist in the brake
and steering systems and disable the
airbags. While driving, only shut the
vehicle off in an emergency.
If the vehicle cannot be pulled over and
must be turned off while driving, press and
hold ENGINE START/STOP for more than
two seconds, or press twice within
five seconds.
Accessory (Amber Indicator Light) : This
mode allows the use of some electrical
accessories when the engine is off.