2024 CHEVROLET CORVETTE change wheel
[x] Cancel search: change wheelPage 6 of 362

Chevrolet Corvette Owner Manual (GMNA-Localizing-U.S./Canada/Mexico-
17272984) - 2024 - CRC - 2/20/23
Introduction 5
1.Air Vents 0153.
2. Turn Signal Lever. See Turn and
Lane-Change Signals 0112.
Exterior Lamp Controls 0109.
3. Manual Shift Paddles. See Manual Mode
0 187.
4. Instrument Cluster 081.
5. Windshield Wiper/Washer 075.
6. Volume Control Knob and Infotainment Home Button. See Overview0117.
7. Infotainment Display. See Using the
System 0120.
8. Alarm System Indicator Light. See Vehicle
Alarm System 022.
Light Sensor. See Automatic Headlamp
System 0111.
9. Dual Automatic Climate Control System
0150.
Driver and Passenger Heated and
Ventilated Seat Controls (If Equipped).
See Heated and Ventilated Front Seats
0 44. 10.
Traction Control/Electronic Stability
Control 0194.
Curb View Camera (If Equipped). See
Assistance Systems for Parking or Backing
0 215.
Front Lift System Control (If Equipped).
See Front Lift System 0205.
11. Driver Mode Control 0196.
12. Shift Switches. See Dual Clutch
Transmission 0184.
13. Hybrid Battery Charging (Charge+). See Driver Mode Control 0196.
Auto Stop Disable Switch. See Stop/Start
System 0180.
14. Keyless Ignition. See Ignition Positions
0 178.
15. Driver Information Center (DIC) Controls. SeeDriver Information Center (DIC) 099.
16. Heated Steering Wheel 075 (If
Equipped).
17. Bluetooth Controls. See Steering Wheel
Controls 0119.
Voice Recognition Controls. See Steering
Wheel Controls 0119. 18. Volume Control Buttons. See
Steering
Wheel Controls 0119.
19. Horn 075.
20. Favorites Select Buttons. Steering Wheel
Controls 0119.
21. Z-Mode Control. See Driver Mode Control
0 196.
Forward Collision Alert (FCA) System
0 218.
22. Cruise Control 0212.
23. Electric Parking Brake 0192.
24. Data Link Connector (DLC) (Out of View). SeeMalfunction Indicator Lamp (Check
Engine Light) 090.
25. Instrument Panel Illumination Control
0113.
26. Head-Up Display Controls (If Equipped). SeeHead-Up Display (HUD) 0102.
Page 62 of 362

Chevrolet Corvette Owner Manual (GMNA-Localizing-U.S./Canada/Mexico-
17272984) - 2024 - CRC - 2/20/23
Seats and Restraints 61
{Warning
For up to 10 seconds after the vehicle is
turned off and the battery is
disconnected, an airbag can still inflate
during improper service. You can be
injured if you are close to an airbag
when it inflates. Avoid yellow connectors.
They are probably part of the airbag
system. Be sure to follow proper service
procedures, and make sure the person
performing work for you is qualified to
do so.
Adding Equipment to the
Airbag-Equipped Vehicle
Adding accessories that change the vehicle's
frame, bumper system, height, front end,
or side sheet metal may keep the airbag
system from working properly.
The operation of the airbag system can also
be affected by changing, including
improperly repairing or replacing, any parts
of the following:
.Airbag system, including airbag modules,
front or side impact sensors, sensing and
diagnostic module, or airbag wiring
.Front seats, including stitching, seams or
zippers
.Seat belts
.Steering wheel, instrument panel, ceiling
trim, or pillar garnish trim
.Inner door seals, including speakers
Your dealer and the service manual have
information about the location of the airbag
modules and sensors, sensing and diagnostic
module, and airbag wiring along with the
proper replacement procedures.
In addition, the vehicle has a passenger
sensing system for the front outboard
passenger position, which includes sensors
that are part of the passenger seat. The
passenger sensing system may not operate
properly if the original seat trim is replaced
with non-GM covers, upholstery or trim,
or with GM covers, upholstery or trim
designed for a different vehicle. Any object,
such as an aftermarket seat heater or a
comfort-enhancing pad or device, installed
under or on top of the seat fabric, could
also interfere with the operation of the
passenger sensing system. This could either
prevent proper deployment of the passenger
airbag(s) or prevent the passenger sensing system from properly turning off the
passenger airbag(s). See
Passenger Sensing
System 057.
If the vehicle must be modified because you
have a disability and have questions about
whether the modifications will affect the
vehicle’s airbag system, or if you have
questions about whether the airbag system
will be affected if the vehicle is modified for
any other reason, call Customer Assistance.
See Customer Assistance Offices 0331.
Airbag System Check
The airbag system does not need regularly
scheduled maintenance or replacement.
Make sure the airbag readiness light is
working. See Airbag Readiness Light 088.
Caution
If an airbag covering is damaged, opened,
or broken, the airbag may not work
properly. Do not open or break the airbag
coverings. If there are any opened or
broken airbag coverings, have the airbag
covering and/or airbag module replaced.
For the location of the airbags, see Where
Are the Airbags? 054. See your dealer
for service.
Page 83 of 362
Chevrolet Corvette Owner Manual (GMNA-Localizing-U.S./Canada/Mexico-
17272984) - 2024 - CRC - 2/20/23
82 Instruments and Controls
.Trip Computer/Performance/Maintenance:
The selected Driver Information Center
(DIC) displays can be viewed. SeeDriver
Information Center (DIC) 099.
.Audio
.Options
.Simplify
Info Tiles
The following is the list of all possible info
tiles that is shown on the left side of the
speedometer. Depending on the vehicle,
some may not be available. Information
displayed here can be customized from the
Options menu. See “Options”below.
Time & Temperature : Displays the current
time and the current outside air
temperature.
Instant Fuel Economy/Economy Trend :
Displays the current fuel economy in liters
per 100 kilometers (L/100 km) or miles per
gallon (mpg). This number reflects only the
approximate fuel economy and changes
frequently as driving conditions change.
This display cannot be reset. Shows history of the Average Fuel Economy
from the last 100 km (62 mi). Each bar
represents about 5 km (3 mi) of driving.
When driving, the bars shift to reflect the
most recent distance on the right side.
G-force :
Gives the driver an indication of
the vehicle performance in cornering. The
G-force gauge will show as an info tile on
the left side of the cluster, if selected.
Oil Temperature : Shows the current oil
temperature in either degrees Celsius (°C) or
degrees Fahrenheit (°F).
Oil Pressure : Shows the current oil pressure
in either kilopascal (kPa) or in pounds per
square inch (psi).
Battery Voltage : Shows the current 12-Volt
battery voltage.
Transmission Fluid Temperature : Shows the
temperature of the transmission fluid in
either degrees Celsius (°C) or degrees
Fahrenheit (°F).
Tire Status : Shows individual tire pressures
and overall temperature as either Cold, Cool,
Normal, Warm, or Hot. Normal is typical for
normal driving while Warm is typical for
spirited driving. Unknown may be displayed
if tire temperature information is
unavailable. Tire Pressure shows the approximate
pressures of all four tires. Tire pressure is
displayed in either kilopascal (kPa) or in
pounds per square inch (psi). If the pressure
is low, the value for that tire is shown in
amber. See
Tire Pressure Monitor System
0 288 and
Tire Pressure Monitor Operation 0289.
eLSD : If equipped, displays the amount of
rear differential coupling when the Electronic
Limited-Slip Differential (eLSD) is active and
functioning during vehicle operation.
A reading of 1% is an open differential and
100% is locked. It is normal for the value to
make small or large changes due to driving
conditions and driver inputs. See Limited-Slip
Differential 0211.
Wheel Slip : Shows the wheel
slip percentage of the vehicle.
Front Lift : During a driver requested Front
Lift (if equipped), the driver may
"remember" using the
S, or dismiss the
display by pressing the thumbwheel. When
the Front Lift is Raised due to location, the
driver may delete that stored location using
the
S, or dismiss the display by pressing
the thumbwheel.
See Front Lift System 0205.
Page 84 of 362
Chevrolet Corvette Owner Manual (GMNA-Localizing-U.S./Canada/Mexico-
17272984) - 2024 - CRC - 2/20/23
Instruments and Controls 83
Brake Temperature :Shows overall
temperature as either Normal, Warm, Hot,
or Overheated. Normal is typical for normal
driving while Warm is typical for spirited
driving. Unknown may be displayed if tire
temperature information is unavailable.
Lifetime Fuel Economy : Shows the
instantaneous fuel economy over the
lifetime of the vehicle.
Follow Distance : Shows the current follow
time to the vehicle ahead is displayed as a
time value.
Hybrid Battery Temperature : If equipped,
displays the temperature of the high voltage
battery which assists performance of the
vehicle in either degrees Celsius (°C) or
degrees Fahrenheit (°F).
Electric Power : If equipped, shows the
power coming from the high voltage
battery. When the power indicator is green,
battery power is being charged. When the
indicator is amber, the vehicle is using
power to assist.
Hybrid Battery : If equipped, displays the
high voltage battery charge status of the
vehicle. Hybrid Battery states:
.Red
–No eAWD
.Yellow –Electric assist limited
.White –Normal state of charge range
.Blue –Maximum state of charge range
Audio
Use the thumbwheel to scroll through audio
presets.
Options
Use the thumbwheel to scroll through items
in the Options menu.
Display Options
Press the thumbwheel to enter the Display
menu. There are seven instrument cluster
display configurations to choose from. Sport,
Tour, Track, Weather, My Mode, Z-Mode,
and Night. The style of the cluster will
change depending on the theme selected.
Default is linked to Driver mode. Other
display themes can be set.
If in Z-Mode or My Mode then those
displays plus HUD (if equipped) can be set. Night Mode is enabled when the Instrument
Panel Illumination Control is set to the
minimum level. See
Instrument Panel
Illumination Control 0113.
Shuttle Mode and Stealth Mode are enabled
when either are selected in the Driver Mode
Control before the vehicle is turned on. See
Driver Mode Control 0196.
.Sport/Z-Mode: Displays Coolant
Temperature, Fuel Gauge, Compass, Drive
Mode Indicator, Odometer, Speed,
Tachometer, Electronic Transmission
Range, Current Gear, Active Fuel
Management (AFM), Peak Performance,
Performance Shift Lights, Speed Limit, Info
Area, and Interaction Area.
.Tour/Weather/My Mode: Displays Coolant
Temperature, Fuel Gauge, Compass, Drive
Mode Indicator, Odometer, Speed,
Tachometer, Electronic Transmission
Range, Current Gear, Active Fuel
Management (AFM), Peak Performance,
Speed Limit, Info Area, and
Interaction Area.
.Track: Displays Coolant Temperature, Fuel
Gauge, Performance Traction
Management, Drive Mode Indicator,
Page 92 of 362

Chevrolet Corvette Owner Manual (GMNA-Localizing-U.S./Canada/Mexico-
17272984) - 2024 - CRC - 2/20/23
Instruments and Controls 91
To help prevent damage, reduce vehicle
speed and avoid hard accelerations and
uphill grades.
If the light continues to flash, find a safe
place to park. Turn the vehicle off and wait
at least 10 seconds before restarting the
engine. If the light is still flashing, follow
the previous guidelines and see your dealer
for service as soon as possible.
If the light is on steady :A malfunction has
been detected. Diagnosis and service may be
required.
Check the following:
.If fuel has been added to the vehicle
using the capless funnel adapter, make
sure that it has been removed. See
“Filling the Tank with a Portable Gas Can”
under Filling the Tank 0228. The
diagnostic system can detect if the
adapter has been left installed in the
vehicle, allowing fuel to evaporate into
the atmosphere. A few driving trips with
the adapter removed may turn off the
light.
.Poor fuel quality can cause inefficient
engine operation and poor driveability,
which may go away once the engine is
warmed up. If this occurs, change the fuel brand. It may require at least one full
tank of the proper fuel to turn the light
off. See
Recommended Fuel 0227.
If the light remains on, see your dealer.
Emissions Inspection and Maintenance
Programs
If the vehicle requires an Emissions
Inspection/Maintenance test, the test
equipment will likely connect to the
vehicle's Data Link Connector (DLC).
The DLC is under the instrument panel to
the left of the steering wheel. Connecting
devices that are not used to perform an
Emissions Inspection/Maintenance test or to
service the vehicle may affect vehicle
operation. See Add-On Electrical Equipment
0 230. See your dealer if assistance is
needed.
The vehicle may not pass inspection if:
.The light is on when the engine is
running.
.The light does not come on when the
ignition is in Service Mode.
.Critical emission control systems have not
been completely diagnosed. If this
happens, the vehicle would not be ready
for inspection and may require
several days of routine driving before the
system is ready for inspection. This can
happen if the 12-volt battery has recently
been replaced or run down, or if the
vehicle has been recently serviced.
See your dealer if the vehicle will not pass
or cannot be made ready for the test.
Front Lift System Light
If equipped, this light will flash to indicate
when the front of the vehicle is being raised
or lowered. An up or down arrow in the
light will display, depending on the direction
of movement. The light will stay lit while
the front is fully raised.
Page 95 of 362
Chevrolet Corvette Owner Manual (GMNA-Localizing-U.S./Canada/Mexico-
17272984) - 2024 - CRC - 2/20/23
94 Instruments and Controls
Lane Keep Assist (LKA) Light
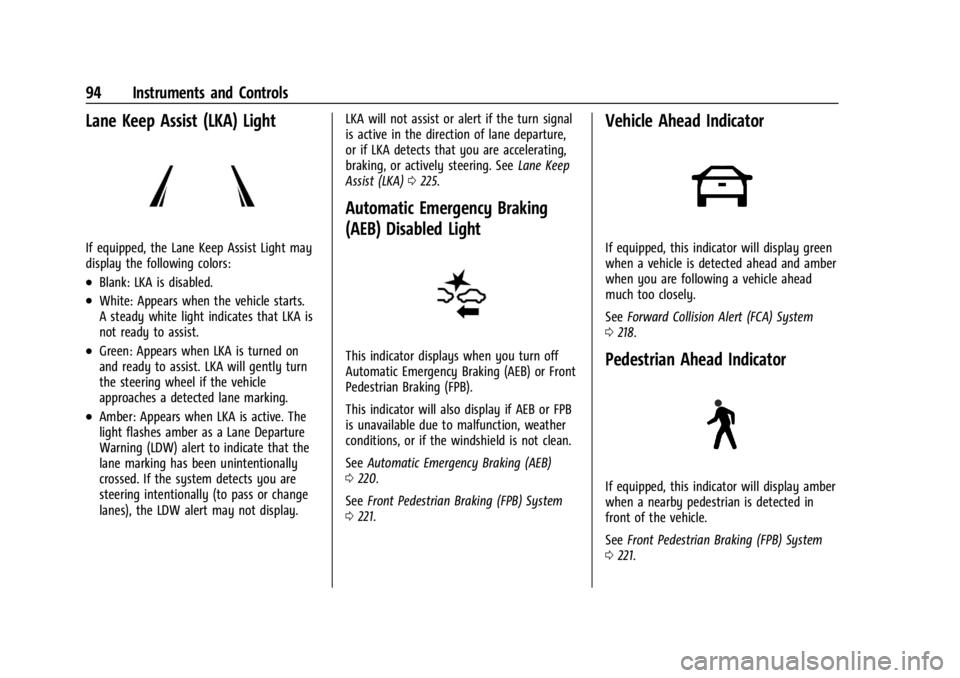
If equipped, the Lane Keep Assist Light may
display the following colors:
.Blank: LKA is disabled.
.White: Appears when the vehicle starts.
A steady white light indicates that LKA is
not ready to assist.
.Green: Appears when LKA is turned on
and ready to assist. LKA will gently turn
the steering wheel if the vehicle
approaches a detected lane marking.
.Amber: Appears when LKA is active. The
light flashes amber as a Lane Departure
Warning (LDW) alert to indicate that the
lane marking has been unintentionally
crossed. If the system detects you are
steering intentionally (to pass or change
lanes), the LDW alert may not display.LKA will not assist or alert if the turn signal
is active in the direction of lane departure,
or if LKA detects that you are accelerating,
braking, or actively steering. See
Lane Keep
Assist (LKA) 0225.
Automatic Emergency Braking
(AEB) Disabled Light
This indicator displays when you turn off
Automatic Emergency Braking (AEB) or Front
Pedestrian Braking (FPB).
This indicator will also display if AEB or FPB
is unavailable due to malfunction, weather
conditions, or if the windshield is not clean.
See Automatic Emergency Braking (AEB)
0 220.
See Front Pedestrian Braking (FPB) System
0 221.
Vehicle Ahead Indicator
If equipped, this indicator will display green
when a vehicle is detected ahead and amber
when you are following a vehicle ahead
much too closely.
See Forward Collision Alert (FCA) System
0 218.
Pedestrian Ahead Indicator
If equipped, this indicator will display amber
when a nearby pedestrian is detected in
front of the vehicle.
See Front Pedestrian Braking (FPB) System
0 221.
Page 101 of 362
Chevrolet Corvette Owner Manual (GMNA-Localizing-U.S./Canada/Mexico-
17272984) - 2024 - CRC - 2/20/23
100 Instruments and Controls
DIC Info Pages
The following is the list of all possible DIC
info displays. Depending on the vehicle,
some may not be available.
Trip Computer
Trip 1 or 2/Average Speed/Average Fuel
Economy :Trip displays the current distance
traveled, in either kilometers (km) or
miles (mi), since the trip odometer was last
reset. The trip odometer can be reset by
pressing and holding the thumbwheel while
this display is active.
Average Speed displays the average speed of
the vehicle in kilometers per hour (km/h) or
miles per hour (mph). This average is
calculated based on the various vehicle
speeds recorded since the last reset of this
value. The average speed can be reset by
pressing and holding the thumbwheel while
this display is active.
Average Fuel Economy displays the
approximate average liters per
100 kilometers (L/100 km) or miles per
gallon (mpg). This number is calculated
based on the number of L/100 km (mpg)
recorded since the last time this menu item
was reset. This number reflects only the
approximate average fuel economy that the vehicle has right now, and will change as
driving conditions change. The Average Fuel
Economy can be reset by pressing and
holding the thumbwheel while this display
is active.
Fuel Economy :
Displays the average fuel
economy, the best fuel economy over the
selected distance, and a bar graph showing
instantaneous fuel economy. Pressing the
thumbwheel will open a menu to change
the selected distance or reset the current
values.
Trip Timer : This display can be used as a
timer. To start/stop the timer, press the
thumbwheel while this display is active and
then select the start/stop the timer. The
display will show the amount of time that
has passed since the timer was last reset.
To reset the timer to zero, press the
thumbwheel to access the menu while this
display is active.
Fuel Used displays the approximate liters (L)
or gallons (gal) of fuel that have been used
since last reset. The fuel used can be reset
by pressing the thumbwheel and selecting
Reset Fuel Used in the menu. Current Drive Cycle :
Displays information in
relation to the current drive cycle including
Distance Traveled, Average Fuel Economy,
and the Total Time. They will reset after the
drive cycle is completed.
Speed Limit : Displays sign information,
which comes from a roadway database in
the on-board navigation.
Performance
Press the thumbwheel to enter the
Performance menu. Scroll through the
available items.
Friction Bubble : A four quadrant visual
display, indicative of the four corners of the
car, with a “bubble”showing where the
most inertia is being exerted on the vehicle.
Launch Control : If equipped, the Launch
Control display allows the driver to adjust
the parameters of the Launch Control
System. See Track Events and Competitive
Driving 0160.
Performance Timer : Press the thumbwheel
to enter the setup menu, then select Set
Start Speed. Scroll to desired Start Speed,
then press the thumbwheel to save it. While
on this menu, to change the End Speed,
scroll to End Speed and use the thumbwheel
to scroll to desired End Speed. Press the
Page 102 of 362
Chevrolet Corvette Owner Manual (GMNA-Localizing-U.S./Canada/Mexico-
17272984) - 2024 - CRC - 2/20/23
Instruments and Controls 101
thumbwheel to save it. On the next
acceleration, the performance timer will
record the time. Pressing the thumbwheel
while the timer is running will cancel the
timer if done before reaching the End Speed.
Lap Timer (without PDR) :Press
Twhen
Lap Timer is displayed to start, stop, or reset
the lap timer. Press the thumbwheel while
the Lap Timer page is active to start the
timer. If the lap timer is active, pressing the
thumbwheel will stop the current lap timer
and start a new lap. Pressing the
thumbwheel within 10 seconds after
completing the last lap (Stop Lap Timer
option is displayed), the Lap Timer will stop.
Lap Timer (with PDR) : The lap times
recorded with the PDR system will
automatically be displayed in this window.
This only happens if a track has been
selected in the PDR system and a video
recording is started. See Performance Data
Recorder (PDR) 0130.
Maintenance
Press the thumbwheel to enter the
Maintenance menu. Scroll through the
available items. Oil Life :
Displays an estimate of the oil's
remaining useful life. If REMAINING OIL LIFE
99% is displayed, that means 99% of the
current oil life remains.
When the remaining oil life is low, the
CHANGE ENGINE OIL SOON message will
appear on the display. The oil should be
changed as soon as possible. See Engine Oil
(5.5L LT6 Engine) 0246 or
Engine Oil (6.2L LT2 Engine) 0249. In
addition to the engine oil life system
monitoring the oil life, additional
maintenance is recommended in the
Maintenance Schedule. See Maintenance
Schedule 0316.
The Oil Life display must be reset after each
oil change. It will not reset itself. Do not
reset the Oil Life display accidentally at any
time other than when the oil has just been
changed. It cannot be reset accurately until
the next oil change. To reset, see Engine Oil
Life System 0252.
Transmission Fluid Life : Displays an
estimate of the fluid's remaining useful life.
If REMAINING FLUID LIFE 99% is displayed,
that means 99% of the current fluid life
remains. When the remaining fluid life is low, the
CHANGE TRANSMISSION FLUID SOON
message will appear on the display. The
fluid should be changed as soon as possible.
See
Dual Clutch Transmission Fluid Life
System 0253. In addition to the
Transmission Fluid Life system monitoring
the fluid life, additional maintenance is
recommended in the Maintenance Schedule.
See Maintenance Schedule 0316.
The Fluid Life display must be reset after
each fluid change. It will not reset itself. Do
not reset the Fluid Life display accidentally
at any time other than when the fluid has
just been changed. It cannot be reset
accurately until the next fluid change. To
reset, see Dual Clutch Transmission Fluid Life
System 0253.
Transmission Filter Life : Displays an
estimate of the filter’s remaining useful life.
If REMAINING FILTER LIFE 99% is displayed,
that means 99% of the current filter life
remains.
When the remaining filter life is low, the
REPLACE TRANSMISSION FILTER SOON
message will appear on the display. The
external canister filter should be replaced as
soon as possible. See Dual Clutch
Transmission Fluid Life System 0253. In