2024 CHEVROLET CORVETTE stop start
[x] Cancel search: stop startPage 196 of 362
Chevrolet Corvette Owner Manual (GMNA-Localizing-U.S./Canada/Mexico-
17272984) - 2024 - CRC - 2/20/23
Driving and Operating 195
If cruise control is being used when TCS
begins to limit wheel spin, the cruise control
will automatically disengage. Cruise control
may be reengaged when road conditions
allow. SeeCruise Control 0212.
If the driver disables TCS, cruise control will
disengage. Cruise control will also be
disabled if Performance Traction
Management (PTM) is selected, or if
StabiliTrak is turned off.
Both systems come on automatically when
the vehicle is started and begins to move.
The systems may be heard or felt while
they are operating or while performing
diagnostic checks. This is normal and does
not mean there is a problem with the
vehicle.
It is recommended to leave both systems on
for normal driving conditions, but it may be
necessary to turn TCS off if the vehicle gets
stuck in sand, mud, ice, or snow. See If the
Vehicle Is Stuck 0173 and “Turning the
Systems Off and On” later in this section.
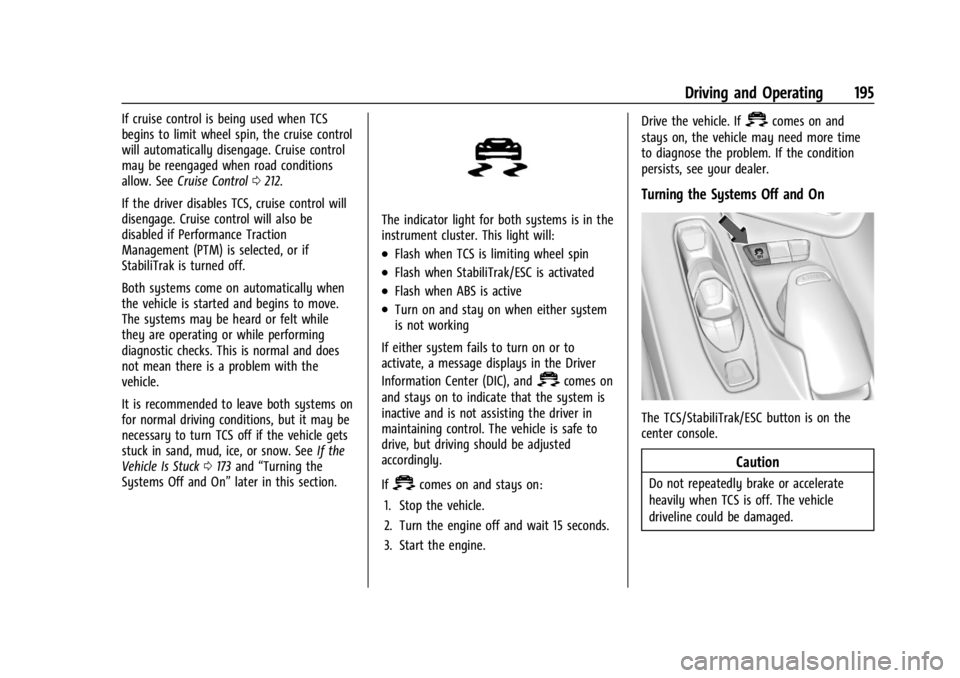
The indicator light for both systems is in the
instrument cluster. This light will:
.Flash when TCS is limiting wheel spin
.Flash when StabiliTrak/ESC is activated
.Flash when ABS is active
.Turn on and stay on when either system
is not working
If either system fails to turn on or to
activate, a message displays in the Driver
Information Center (DIC), and
=comes on
and stays on to indicate that the system is
inactive and is not assisting the driver in
maintaining control. The vehicle is safe to
drive, but driving should be adjusted
accordingly.
If
=comes on and stays on:
1. Stop the vehicle.
2. Turn the engine off and wait 15 seconds.
3. Start the engine. Drive the vehicle. If
=comes on and
stays on, the vehicle may need more time
to diagnose the problem. If the condition
persists, see your dealer.
Turning the Systems Off and On
The TCS/StabiliTrak/ESC button is on the
center console.
Caution
Do not repeatedly brake or accelerate
heavily when TCS is off. The vehicle
driveline could be damaged.
Page 197 of 362
Chevrolet Corvette Owner Manual (GMNA-Localizing-U.S./Canada/Mexico-
17272984) - 2024 - CRC - 2/20/23
196 Driving and Operating
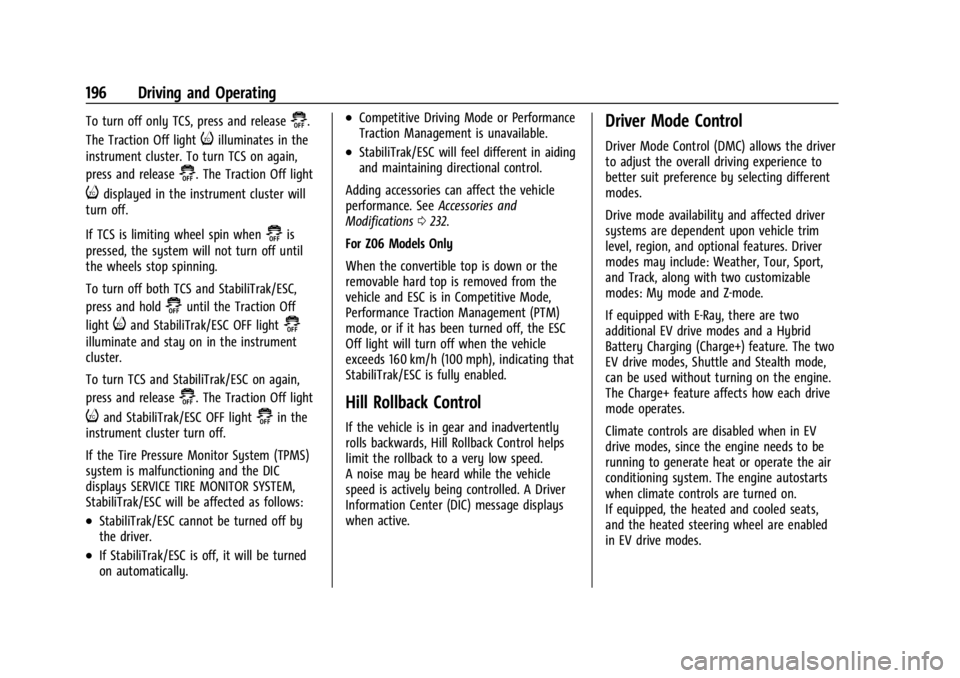
To turn off only TCS, press and release@.
The Traction Off light
iilluminates in the
instrument cluster. To turn TCS on again,
press and release
@. The Traction Off light
idisplayed in the instrument cluster will
turn off.
If TCS is limiting wheel spin when
@is
pressed, the system will not turn off until
the wheels stop spinning.
To turn off both TCS and StabiliTrak/ESC,
press and hold
@until the Traction Off
light
iand StabiliTrak/ESC OFF light@
illuminate and stay on in the instrument
cluster.
To turn TCS and StabiliTrak/ESC on again,
press and release
@. The Traction Off light
iand StabiliTrak/ESC OFF light@in the
instrument cluster turn off.
If the Tire Pressure Monitor System (TPMS)
system is malfunctioning and the DIC
displays SERVICE TIRE MONITOR SYSTEM,
StabiliTrak/ESC will be affected as follows:
.StabiliTrak/ESC cannot be turned off by
the driver.
.If StabiliTrak/ESC is off, it will be turned
on automatically.
.Competitive Driving Mode or Performance
Traction Management is unavailable.
.StabiliTrak/ESC will feel different in aiding
and maintaining directional control.
Adding accessories can affect the vehicle
performance. See Accessories and
Modifications 0232.
For Z06 Models Only
When the convertible top is down or the
removable hard top is removed from the
vehicle and ESC is in Competitive Mode,
Performance Traction Management (PTM)
mode, or if it has been turned off, the ESC
Off light will turn off when the vehicle
exceeds 160 km/h (100 mph), indicating that
StabiliTrak/ESC is fully enabled.
Hill Rollback Control
If the vehicle is in gear and inadvertently
rolls backwards, Hill Rollback Control helps
limit the rollback to a very low speed.
A noise may be heard while the vehicle
speed is actively being controlled. A Driver
Information Center (DIC) message displays
when active.
Driver Mode Control
Driver Mode Control (DMC) allows the driver
to adjust the overall driving experience to
better suit preference by selecting different
modes.
Drive mode availability and affected driver
systems are dependent upon vehicle trim
level, region, and optional features. Driver
modes may include: Weather, Tour, Sport,
and Track, along with two customizable
modes: My mode and Z-mode.
If equipped with E-Ray, there are two
additional EV drive modes and a Hybrid
Battery Charging (Charge+) feature. The two
EV drive modes, Shuttle and Stealth mode,
can be used without turning on the engine.
The Charge+ feature affects how each drive
mode operates.
Climate controls are disabled when in EV
drive modes, since the engine needs to be
running to generate heat or operate the air
conditioning system. The engine autostarts
when climate controls are turned on.
If equipped, the heated and cooled seats,
and the heated steering wheel are enabled
in EV drive modes.
Page 201 of 362
Chevrolet Corvette Owner Manual (GMNA-Localizing-U.S./Canada/Mexico-
17272984) - 2024 - CRC - 2/20/23
200 Driving and Operating
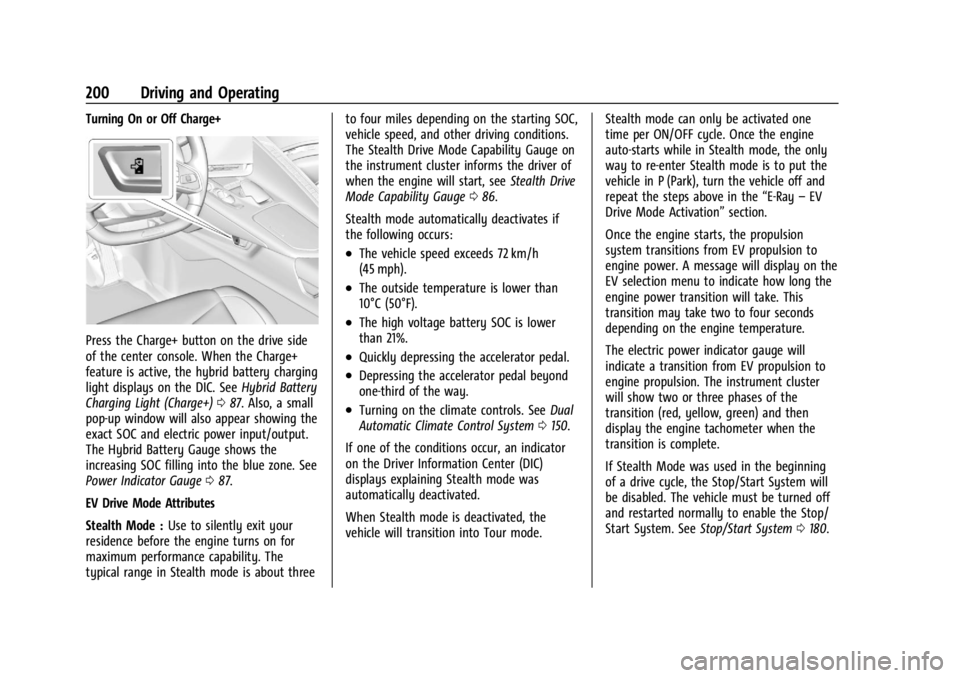
Turning On or Off Charge+
Press the Charge+ button on the drive side
of the center console. When the Charge+
feature is active, the hybrid battery charging
light displays on the DIC. SeeHybrid Battery
Charging Light (Charge+) 087. Also, a small
pop-up window will also appear showing the
exact SOC and electric power input/output.
The Hybrid Battery Gauge shows the
increasing SOC filling into the blue zone. See
Power Indicator Gauge 087.
EV Drive Mode Attributes
Stealth Mode : Use to silently exit your
residence before the engine turns on for
maximum performance capability. The
typical range in Stealth mode is about three to four miles depending on the starting SOC,
vehicle speed, and other driving conditions.
The Stealth Drive Mode Capability Gauge on
the instrument cluster informs the driver of
when the engine will start, see
Stealth Drive
Mode Capability Gauge 086.
Stealth mode automatically deactivates if
the following occurs:
.The vehicle speed exceeds 72 km/h
(45 mph).
.The outside temperature is lower than
10°C (50°F).
.The high voltage battery SOC is lower
than 21%.
.Quickly depressing the accelerator pedal.
.Depressing the accelerator pedal beyond
one-third of the way.
.Turning on the climate controls. See Dual
Automatic Climate Control System 0150.
If one of the conditions occur, an indicator
on the Driver Information Center (DIC)
displays explaining Stealth mode was
automatically deactivated.
When Stealth mode is deactivated, the
vehicle will transition into Tour mode. Stealth mode can only be activated one
time per ON/OFF cycle. Once the engine
auto-starts while in Stealth mode, the only
way to re-enter Stealth mode is to put the
vehicle in P (Park), turn the vehicle off and
repeat the steps above in the
“E-Ray–EV
Drive Mode Activation” section.
Once the engine starts, the propulsion
system transitions from EV propulsion to
engine power. A message will display on the
EV selection menu to indicate how long the
engine power transition will take. This
transition may take two to four seconds
depending on the engine temperature.
The electric power indicator gauge will
indicate a transition from EV propulsion to
engine propulsion. The instrument cluster
will show two or three phases of the
transition (red, yellow, green) and then
display the engine tachometer when the
transition is complete.
If Stealth Mode was used in the beginning
of a drive cycle, the Stop/Start System will
be disabled. The vehicle must be turned off
and restarted normally to enable the Stop/
Start System. See Stop/Start System 0180.
Page 202 of 362
Chevrolet Corvette Owner Manual (GMNA-Localizing-U.S./Canada/Mexico-
17272984) - 2024 - CRC - 2/20/23
Driving and Operating 201
{Warning
When exiting Stealth mode, allow
sufficient time for the vehicle to
automatically start the engine and
develop full system propulsion power
before merging into traffic. Attempting to
merge into traffic before the engine has
reached full power could cause a crash
resulting in vehicle damage, personal
injury, or death. It is best to exit Stealth
mode first and allow the engine to reach
full capacity before engaging in traffic.
Shuttle Mode : Use to propel the vehicle
using only electric power. Shuttle mode is
not intended for public roads. The typical
range in Shuttle mode is about four to
five miles depending on the starting SOC,
vehicle speed, terrain, and other driving
conditions. While the vehicle is in Shuttle
mode, the instrument cluster only displays
the vehicle speed, battery gauge, and a
electric power indicator gauge. The infotainment screen will only show the
date and time. If equipped, the HUD system
will not be functional.
Shuttle mode automatically deactivates if
the following occurs:
.The vehicle speed exceeds 24 km/h
(15 mph).
.The outside temperature is lower than
–
10°C (14°F).
.The high voltage battery SOC is 0%.
To deactivate Shuttle mode, put the vehicle
in P (Park) and turn off the vehicle. Then,
start the vehicle normally.
Shuttle mode will automatically start to
reduce propulsion power as the SOC reaches
0%. The message Start Engine to Charge
Battery will display on the instrument
cluster when the SOC reaches 5%.
If the engine is not started, propulsion
power reduces automatically and the vehicle
comes to a stop. The only way to charge your battery is to
start and run the vehicle from Normal mode.
See
“Normal Mode” later on in this section.
Do not store the hybrid battery with a low
SOC for an extended period of time. It is
best to store the battery in the white
eAWD zone.
Normal Mode : Use to have a normal
engine start when going through the EV
drive mode selection process.
Starting and running the vehicle from
Normal mode allows the engine and front
electric motor to regenerate power to
charge the hybrid battery.
Page 225 of 362

Chevrolet Corvette Owner Manual (GMNA-Localizing-U.S./Canada/Mexico-
17272984) - 2024 - CRC - 2/20/23
224 Driving and Operating
SBZA Detection Zones
The SBZA sensor covers a zone
approximately one lane over from both
sides of the vehicle, or approximately
3.5 m (11 ft). The height of the zone is
approximately between 0.5 m (1.5 ft) and
2 m (6 ft) off the ground. This zone starts at
approximately the middle of the vehicle and
goes back 5 m (16 ft).
How the System Works
The SBZA symbol lights up in the side
mirrors when the system detects a moving
vehicle in the next lane over that is in the
side blind zone. This indicates it may be
unsafe to change lanes. Before making alane change, check the SBZA display, check
mirrors, glance over your shoulder, and use
the turn signals.
Left Side Mirror
DisplayRight Side Mirror Display
When the vehicle is started, both outside
mirror SBZA displays will briefly come on to
indicate the system is operating. When the
vehicle is in a forward gear, the left- or
right-side mirror display will light up if a
moving vehicle is detected in that blind
zone. If the turn signal is activated in the
same direction as a detected vehicle, this
display will flash as an extra warning not to
change lanes.
SBZA can be disabled through vehicle
personalization. To view available settings
from the infotainment screen, touch
Settings > Vehicle > Collision/Detection
Systems. If SBZA is disabled by the driver,
the SBZA mirror displays will not light up.
When the System Does Not Seem to
Work Properly
SBZA displays may not come on when
passing a vehicle quickly, for a stopped
vehicle. SBZA may alert to objects attached
to the vehicle, such as a bicycle, or object
extending out to either side of the vehicle.
This is normal system operation; the vehicle
does not need service.
SBZA may not always alert the driver to
vehicles in the side blind zone, especially in
wet conditions. The system does not need
to be serviced. The system may light up due
to guardrails, signs, trees, shrubs, and other
non-moving objects. This is normal system
operation; the vehicle does not need service.
SBZA may not operate when the SBZA
sensors in the left or right corners of the
rear bumper are covered with mud, dirt,
snow, ice, or slush, or in heavy rainstorms.
For cleaning instructions, see "Washing the
Vehicle" under Exterior Care0306. If the
DIC still displays the system unavailable
message after cleaning both sides of the
vehicle toward the rear corners of the
vehicle, see your dealer.
Page 247 of 362
Chevrolet Corvette Owner Manual (GMNA-Localizing-U.S./Canada/Mexico-
17272984) - 2024 - CRC - 2/20/23
246 Vehicle Care
Engine Oil (5.5L LT6 Engine)
To ensure proper engine performance and
long life, pay careful attention to engine oil.
Follow these important steps:
.Use engine oil approved to the proper
specification and of the proper viscosity
grade. See“Selecting the Right Engine
Oil” later in this section.
.Check the engine oil level regularly and
maintain the proper oil level. See
“Checking Engine Oil” and“When to Add
Engine Oil” later in this section.
.Change the engine oil at the appropriate
time. SeeEngine Oil Life System 0252.
.Always dispose of engine oil properly. See
“What to Do with Used Oil” in this
section.
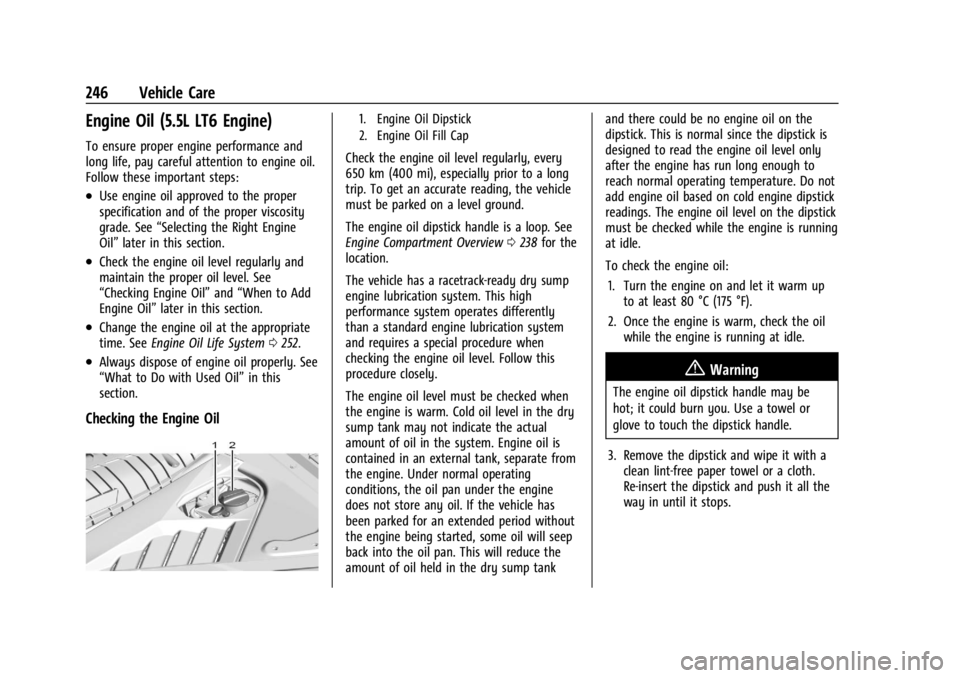
Checking the Engine Oil
1. Engine Oil Dipstick
2. Engine Oil Fill Cap
Check the engine oil level regularly, every
650 km (400 mi), especially prior to a long
trip. To get an accurate reading, the vehicle
must be parked on a level ground.
The engine oil dipstick handle is a loop. See
Engine Compartment Overview 0238 for the
location.
The vehicle has a racetrack-ready dry sump
engine lubrication system. This high
performance system operates differently
than a standard engine lubrication system
and requires a special procedure when
checking the engine oil level. Follow this
procedure closely.
The engine oil level must be checked when
the engine is warm. Cold oil level in the dry
sump tank may not indicate the actual
amount of oil in the system. Engine oil is
contained in an external tank, separate from
the engine. Under normal operating
conditions, the oil pan under the engine
does not store any oil. If the vehicle has
been parked for an extended period without
the engine being started, some oil will seep
back into the oil pan. This will reduce the
amount of oil held in the dry sump tank and there could be no engine oil on the
dipstick. This is normal since the dipstick is
designed to read the engine oil level only
after the engine has run long enough to
reach normal operating temperature. Do not
add engine oil based on cold engine dipstick
readings. The engine oil level on the dipstick
must be checked while the engine is running
at idle.
To check the engine oil:
1. Turn the engine on and let it warm up to at least 80 °C (175 °F).
2. Once the engine is warm, check the oil while the engine is running at idle.
{Warning
The engine oil dipstick handle may be
hot; it could burn you. Use a towel or
glove to touch the dipstick handle.
3. Remove the dipstick and wipe it with a clean lint-free paper towel or a cloth.
Re-insert the dipstick and push it all the
way in until it stops.
Page 249 of 362
Chevrolet Corvette Owner Manual (GMNA-Localizing-U.S./Canada/Mexico-
17272984) - 2024 - CRC - 2/20/23
248 Vehicle Care
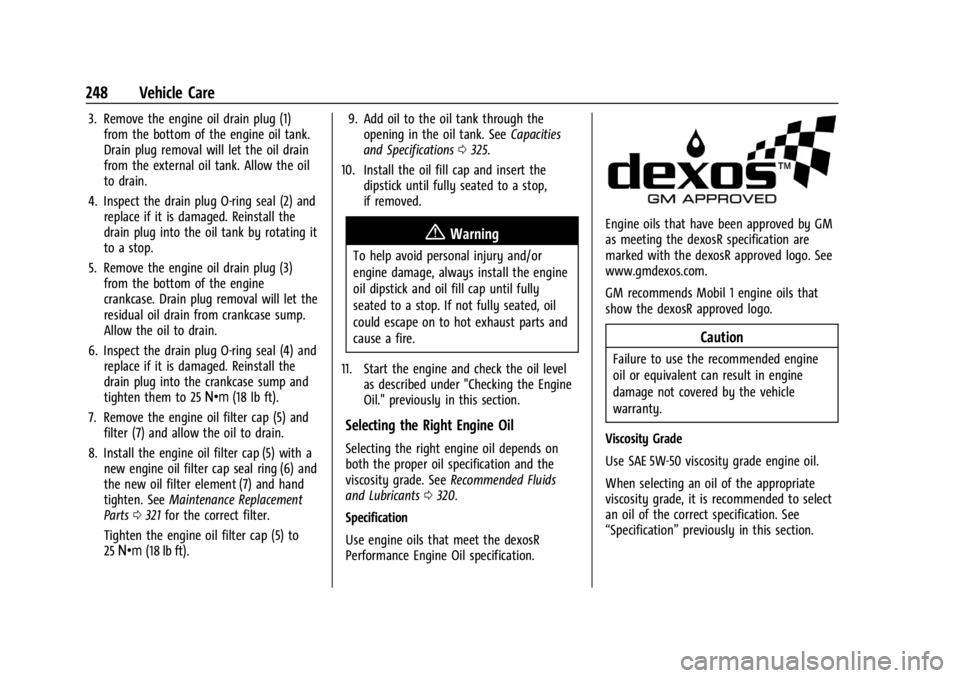
3. Remove the engine oil drain plug (1)from the bottom of the engine oil tank.
Drain plug removal will let the oil drain
from the external oil tank. Allow the oil
to drain.
4. Inspect the drain plug O-ring seal (2) and replace if it is damaged. Reinstall the
drain plug into the oil tank by rotating it
to a stop.
5. Remove the engine oil drain plug (3) from the bottom of the engine
crankcase. Drain plug removal will let the
residual oil drain from crankcase sump.
Allow the oil to drain.
6. Inspect the drain plug O-ring seal (4) and replace if it is damaged. Reinstall the
drain plug into the crankcase sump and
tighten them to 25 Y(18 lb ft).
7. Remove the engine oil filter cap (5) and filter (7) and allow the oil to drain.
8. Install the engine oil filter cap (5) with a new engine oil filter cap seal ring (6) and
the new oil filter element (7) and hand
tighten. See Maintenance Replacement
Parts 0321 for the correct filter.
Tighten the engine oil filter cap (5) to
25 Y (18 lb ft). 9. Add oil to the oil tank through the
opening in the oil tank. See Capacities
and Specifications 0325.
10. Install the oil fill cap and insert the dipstick until fully seated to a stop,
if removed.
{Warning
To help avoid personal injury and/or
engine damage, always install the engine
oil dipstick and oil fill cap until fully
seated to a stop. If not fully seated, oil
could escape on to hot exhaust parts and
cause a fire.
11. Start the engine and check the oil level as described under "Checking the Engine
Oil." previously in this section.
Selecting the Right Engine Oil
Selecting the right engine oil depends on
both the proper oil specification and the
viscosity grade. See Recommended Fluids
and Lubricants 0320.
Specification
Use engine oils that meet the dexosR
Performance Engine Oil specification.
Engine oils that have been approved by GM
as meeting the dexosR specification are
marked with the dexosR approved logo. See
www.gmdexos.com.
GM recommends Mobil 1 engine oils that
show the dexosR approved logo.
Caution
Failure to use the recommended engine
oil or equivalent can result in engine
damage not covered by the vehicle
warranty.
Viscosity Grade
Use SAE 5W-50 viscosity grade engine oil.
When selecting an oil of the appropriate
viscosity grade, it is recommended to select
an oil of the correct specification. See
“Specification” previously in this section.
Page 252 of 362
Chevrolet Corvette Owner Manual (GMNA-Localizing-U.S./Canada/Mexico-
17272984) - 2024 - CRC - 2/20/23
Vehicle Care 251
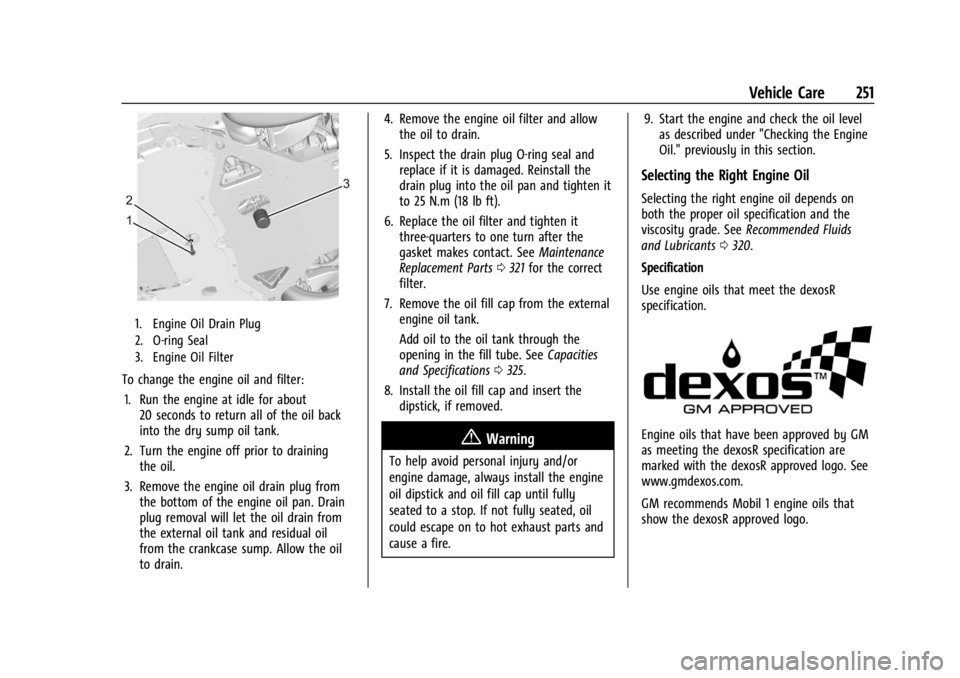
1. Engine Oil Drain Plug
2. O-ring Seal
3. Engine Oil Filter
To change the engine oil and filter:1. Run the engine at idle for about 20 seconds to return all of the oil back
into the dry sump oil tank.
2. Turn the engine off prior to draining the oil.
3. Remove the engine oil drain plug from the bottom of the engine oil pan. Drain
plug removal will let the oil drain from
the external oil tank and residual oil
from the crankcase sump. Allow the oil
to drain. 4. Remove the engine oil filter and allow
the oil to drain.
5. Inspect the drain plug O-ring seal and replace if it is damaged. Reinstall the
drain plug into the oil pan and tighten it
to 25 N.m (18 lb ft).
6. Replace the oil filter and tighten it three-quarters to one turn after the
gasket makes contact. See Maintenance
Replacement Parts 0321 for the correct
filter.
7. Remove the oil fill cap from the external engine oil tank.
Add oil to the oil tank through the
opening in the fill tube. See Capacities
and Specifications 0325.
8. Install the oil fill cap and insert the dipstick, if removed.
{Warning
To help avoid personal injury and/or
engine damage, always install the engine
oil dipstick and oil fill cap until fully
seated to a stop. If not fully seated, oil
could escape on to hot exhaust parts and
cause a fire. 9. Start the engine and check the oil level
as described under "Checking the Engine
Oil." previously in this section.
Selecting the Right Engine Oil
Selecting the right engine oil depends on
both the proper oil specification and the
viscosity grade. See Recommended Fluids
and Lubricants 0320.
Specification
Use engine oils that meet the dexosR
specification.
Engine oils that have been approved by GM
as meeting the dexosR specification are
marked with the dexosR approved logo. See
www.gmdexos.com.
GM recommends Mobil 1 engine oils that
show the dexosR approved logo.