2024 CHEVROLET CORVETTE lock
[x] Cancel search: lockPage 233 of 362

Chevrolet Corvette Owner Manual (GMNA-Localizing-U.S./Canada/Mexico-
17272984) - 2024 - CRC - 2/20/23
232 Vehicle Care
General Information
For service and parts needs, visit your
dealer. You will receive genuine GM parts
and GM-trained and supported service
people.
Genuine GM parts have one of these marks:
California Perchlorate Materials
Requirements
Certain types of automotive applications,
such as airbag initiators, seat belt
pretensioners, and lithium batteries
contained in electronic keys, may contain
perchlorate materials. Perchlorate Material–
special handling may apply. See
www.dtsc.ca.gov/hazardouswaste/
perchlorate.
Accessories and Modifications
Adding non-dealer accessories or making
modifications to the vehicle can affect
vehicle performance and safety, including
such things as airbags, braking, stability,
ride and handling, emissions systems,
aerodynamics, durability, Driver Assistance
Systems, and electronic systems like antilock
brakes, traction control, and stability control.
These accessories or modifications could
even cause malfunction or damage not
covered by the vehicle warranty.
Damage to suspension components caused
by modifying vehicle height outside of
factory settings will not be covered by the
vehicle warranty. Damage to vehicle components resulting
from modifications or the installation or use
of non-GM certified parts, including control
module or software modifications, is not
covered under the terms of the vehicle
warranty and may affect remaining
warranty coverage for affected parts.
GM Accessories are designed to complement
and function with other systems on the
vehicle. See your dealer to accessorize the
vehicle using genuine GM Accessories
installed by a dealer technician.
Also, see
Adding Equipment to the
Airbag-Equipped Vehicle 061.
Lifting the Vehicle
{Warning
Lifting a vehicle can cause an injury. The
vehicle can slip off the jack and roll over
you or other people. You and they could
be badly injured. Find a level place to lift
your vehicle. To help prevent the vehicle
from moving:
1. Set the parking brake firmly.
2. Put the transmission in P (Park). (Continued)
Page 234 of 362

Chevrolet Corvette Owner Manual (GMNA-Localizing-U.S./Canada/Mexico-
17272984) - 2024 - CRC - 2/20/23
Vehicle Care 233
Warning (Continued)
3. Turn off the engine.
To be even more certain the vehicle will
not move, put blocks in front of and
behind the wheels.
{Warning
Getting under a vehicle when it is lifted
on a jack is dangerous. If the vehicle slips
off the jack, you could be badly injured
or killed. Never get under a vehicle when
it is supported only by a jack.
{Warning
Raising the vehicle with the jack
improperly positioned can damage the
vehicle or the vehicle may fall and cause
injury to you or others.
If a jack is used to lift the vehicle, follow the
instructions that came with the jack, and be
sure to use the correct lifting points to
avoid damaging the vehicle.
Caution
Lifting the vehicle improperly can damage
it and result in costly repairs not covered
by the vehicle warranty. To lift the
vehicle properly and prevent vehicle
damage:
.Be sure to place a block or pad
between the jack and the vehicle.
.Lift only in the areas shown in the
following illustrations.
For additional information, see your
dealer and the service manual.
Caution
The front jack pads must not contact the
rocker panels, the front fenders, or the
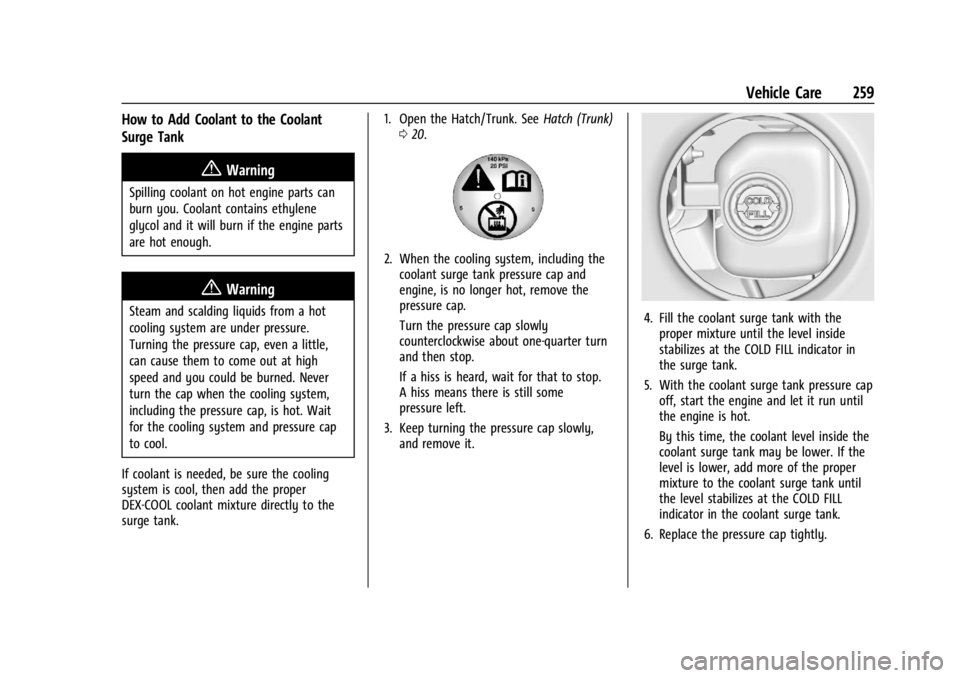
floor pan. If they do, damage may occur. Lifting from the Front
–Frame
Use only a service jack with a lifting pad
diameter of 64 mm (2.5 in) or smaller, and
thick enough to make sure the jack does not
contact the vehicle body.
Position the service jack and lifting pad
under the frame rail shipping slot
reinforcement.
Page 260 of 362

Chevrolet Corvette Owner Manual (GMNA-Localizing-U.S./Canada/Mexico-
17272984) - 2024 - CRC - 2/20/23
Vehicle Care 259
How to Add Coolant to the Coolant
Surge Tank
{Warning
Spilling coolant on hot engine parts can
burn you. Coolant contains ethylene
glycol and it will burn if the engine parts
are hot enough.
{Warning
Steam and scalding liquids from a hot
cooling system are under pressure.
Turning the pressure cap, even a little,
can cause them to come out at high
speed and you could be burned. Never
turn the cap when the cooling system,
including the pressure cap, is hot. Wait
for the cooling system and pressure cap
to cool.
If coolant is needed, be sure the cooling
system is cool, then add the proper
DEX-COOL coolant mixture directly to the
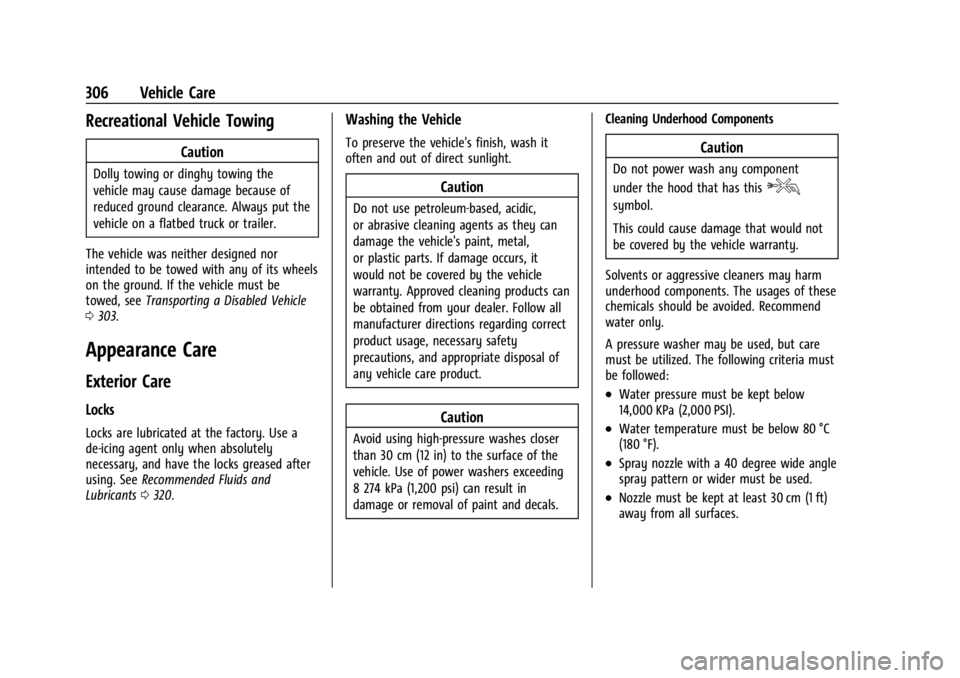
surge tank. 1. Open the Hatch/Trunk. See
Hatch (Trunk)
0 20.
2. When the cooling system, including the
coolant surge tank pressure cap and
engine, is no longer hot, remove the
pressure cap.
Turn the pressure cap slowly
counterclockwise about one-quarter turn
and then stop.
If a hiss is heard, wait for that to stop.
A hiss means there is still some
pressure left.
3. Keep turning the pressure cap slowly, and remove it.
4. Fill the coolant surge tank with theproper mixture until the level inside
stabilizes at the COLD FILL indicator in
the surge tank.
5. With the coolant surge tank pressure cap off, start the engine and let it run until
the engine is hot.
By this time, the coolant level inside the
coolant surge tank may be lower. If the
level is lower, add more of the proper
mixture to the coolant surge tank until
the level stabilizes at the COLD FILL
indicator in the coolant surge tank.
6. Replace the pressure cap tightly.
Page 274 of 362

Chevrolet Corvette Owner Manual (GMNA-Localizing-U.S./Canada/Mexico-
17272984) - 2024 - CRC - 2/20/23
Vehicle Care 273
Fuses and Circuit Breakers
The wiring circuits in the vehicle are
protected from short circuits by a
combination of fuses and circuit breakers.
This greatly reduces the chance of damage
caused by electrical problems.
{Danger
Fuses and circuit breakers are marked
with their ampere rating. Do not exceed
the specified amperage rating when
replacing fuses and circuit breakers. Use
of an oversized fuse or circuit breaker can
result in a vehicle fire. You and others
could be seriously injured or killed.
{Warning
Installation or use of fuses that do not
meet GM’s original fuse specifications is
dangerous. The fuses could fail, and result
in a fire. You or others could be injured
or killed, and the vehicle could be
damaged.
See Accessories and Modifications 0232 and
General Information 0232.
To check or replace a blown fuse, see
Electrical System Overload 0272.
Instrument Panel Fuse Block
The instrument panel fuse block is behind
the glove box. The glove box can be
accessed by unlatching the door damper and
squeezing the pivot to release the damper
ring. Pull the glove box bin side walls in to
release the door stops. Then turn the door
until the hinge hooks release from
hinge pin.
To Access:
1. Open the top cover.
2. Remove the top cover by pushing inward on the latch.
3. Pull the cover upward.
To Install: 1. Insert the tabs on the back of the cover into the slots in the instrument panel.
2. Align the clip with the slots in the instrument panel.
3. Press the cover into place.
See your dealer if additional assistance is
needed.
Page 277 of 362

Chevrolet Corvette Owner Manual (GMNA-Localizing-U.S./Canada/Mexico-
17272984) - 2024 - CRC - 2/20/23
276 Vehicle Care
RelaysUsage
K1 –
K2 Glove Box Relay
K3 Horn Relay
K4 Front Wash Relay K5 Retained Accessory Power/Accessory Relay
K6 Front Trunk Release Relay 1
K7 –
K8 –
K9 Front Trunk Release Relay 2
K10 Wiper RelayRear Compartment Fuse Block
The rear compartment fuse block is in the
rear of the vehicle in between the seats.
To Access: 1. Open top cover.
2. Remove the top cover by pushing inward on the latch.
3. Pull the cover upward.
To Install: 1. Insert the tabs on the back of the cover into the slots in the rear compartment.
2. Align the clip with the slots in the instrument panel.
3. Press the cover into place.
See your dealer if additional assistance is
needed.
Page 279 of 362

Chevrolet Corvette Owner Manual (GMNA-Localizing-U.S./Canada/Mexico-
17272984) - 2024 - CRC - 2/20/23
278 Vehicle Care
FusesUsage
20 Sensing and Diagnostic Module/Inside Rear
View Mirror
21 Exhaust Valve Solenoid
22 Fuel Pump/Fuel Tank Zone Module 1
23 Tonneau Left
24 Tonneau Right 25 Convertible Top Right
26 Convertible Top Left 27 Electronic Suspension Control
28 Scavenge Coolant Pump Motor
29 CGM
30 O2 Sensor 31 O2 Sensor/Engine Oil/ Canister Purge/Active
Fuel Management
32 Ignition Even
33 Ignition Odd
34 Engine Control Module 1 Fuses
Usage
35 Engine Control Module/ Mass Air Flow Sensor/
O2 Sensor/Air
Conditioning
36 Power Front Closure Module/Front Camera
Module
37 Canister Vent
38 Latch Control Module
39 Right Window Switch/ Door Lock
40 Left Window Switch/ Door Lock
41 Pedestrian Friendly Alert Module/High
Voltage System Lock
Out Switch
42 Engine Control Module 2
43 Charged Air Cooler
44 Air Conditioning Compressor
45 Transmission Control Module
46 – Fuses
Usage
47 DC/DC Battery 1
48 DC/DC Battery 2
49 Auxiliary Cooling Fan Right
50 Virtual Key Back up Module
51 Starter Pinion
52 Auxiliary Pump
53 Starter Solenoid
54 Auxiliary Cooling Fan Left
55 Automatic Leveling Control
56 Energy Storage Coolant Pump/Power Electronics
Coolant Pump
57 Rear Window Defogger
58 –
59 Left/Right Window
60 Passenger Power Seat 61 Driver Power Seat
Page 296 of 362

Chevrolet Corvette Owner Manual (GMNA-Localizing-U.S./Canada/Mexico-
17272984) - 2024 - CRC - 2/20/23
Vehicle Care 295
If the vehicle tires must be replaced
with a tire that does not have a TPC
Spec number, make sure they are the
same size, load range, speed rating, and
construction (radial) as the original
tires.
The Tire and Loading Information label
indicates the original equipment tires
on the vehicle. SeeVehicle Load Limits
0 174.
Different Size Tires and Wheels
If wheels or tires are installed that are a
different size than the original equipment
wheels and tires, vehicle performance,
including its braking, ride and handling
characteristics, stability, and resistance to
rollover may be affected. If the vehicle has
electronic systems such as antilock brakes,
rollover airbags, traction control, electronic
stability control, or All-Wheel Drive, the
performance of these systems can also be
affected.
{Warning
If different sized wheels are used, there
may not be an acceptable level of
performance and safety if tires not
recommended for those wheels are
selected. This increases the chance of a
crash and serious injury. Only use GM
specific wheel and tire systems developed
for the vehicle, and have them properly
installed by a GM certified technician.
See Buying New Tires 0294 and
Accessories and Modifications 0232.
Uniform Tire Quality Grading
The following information relates to the
system developed by the United States
National Highway Traffic Safety
Administration (NHTSA), which grades
tires by treadwear, traction, and
temperature performance. This applies
only to vehicles sold in the United
States. The grades are molded on the
sidewalls of most passenger car tires.
The Uniform Tire Quality Grading
(UTQG) system does not apply to deep
tread, winter tires, compact spare tires, tires with nominal rim diameters of
10 to 12 inches (25 to 30 cm), or to some
limited-production tires.
While the tires available on General
Motors passenger cars and light trucks
may vary with respect to these grades,
they must also conform to federal
safety requirements and additional
General Motors Tire Performance
Criteria (TPC) standards.
Quality grades can be found where
applicable on the tire sidewall between
tread shoulder and maximum section
width. For example:Treadwear 200 Traction AA Temperature A
All Passenger Car Tires Must Conform to
Federal Safety Requirements In Addition
To These Grades.
Treadwear
The treadwear grade is a comparative
rating based on the wear rate of the
tire when tested under controlled
conditions on a specified government
test course. For example, a tire graded
150 would wear one and one-half (1½)
Page 307 of 362

Chevrolet Corvette Owner Manual (GMNA-Localizing-U.S./Canada/Mexico-
17272984) - 2024 - CRC - 2/20/23
306 Vehicle Care
Recreational Vehicle Towing
Caution
Dolly towing or dinghy towing the
vehicle may cause damage because of
reduced ground clearance. Always put the
vehicle on a flatbed truck or trailer.
The vehicle was neither designed nor
intended to be towed with any of its wheels
on the ground. If the vehicle must be
towed, see Transporting a Disabled Vehicle
0 303.
Appearance Care
Exterior Care
Locks
Locks are lubricated at the factory. Use a
de-icing agent only when absolutely
necessary, and have the locks greased after
using. See Recommended Fluids and
Lubricants 0320.
Washing the Vehicle
To preserve the vehicle's finish, wash it
often and out of direct sunlight.
Caution
Do not use petroleum-based, acidic,
or abrasive cleaning agents as they can
damage the vehicle's paint, metal,
or plastic parts. If damage occurs, it
would not be covered by the vehicle
warranty. Approved cleaning products can
be obtained from your dealer. Follow all
manufacturer directions regarding correct
product usage, necessary safety
precautions, and appropriate disposal of
any vehicle care product.
Caution
Avoid using high-pressure washes closer
than 30 cm (12 in) to the surface of the
vehicle. Use of power washers exceeding
8 274 kPa (1,200 psi) can result in
damage or removal of paint and decals. Cleaning Underhood Components
Caution
Do not power wash any component
under the hood that has this
e
symbol.
This could cause damage that would not
be covered by the vehicle warranty.
Solvents or aggressive cleaners may harm
underhood components. The usages of these
chemicals should be avoided. Recommend
water only.
A pressure washer may be used, but care
must be utilized. The following criteria must
be followed:
.Water pressure must be kept below
14,000 KPa (2,000 PSI).
.Water temperature must be below 80 °C
(180 °F).
.Spray nozzle with a 40 degree wide angle
spray pattern or wider must be used.
.Nozzle must be kept at least 30 cm (1 ft)
away from all surfaces.