2023 TOYOTA YARIS CROSS fuel
[x] Cancel search: fuelPage 403 of 698

401
6
Owners Manual_Europe_M52N75_en
6-3. Do-it-yourself maintenance
Maintenance and care
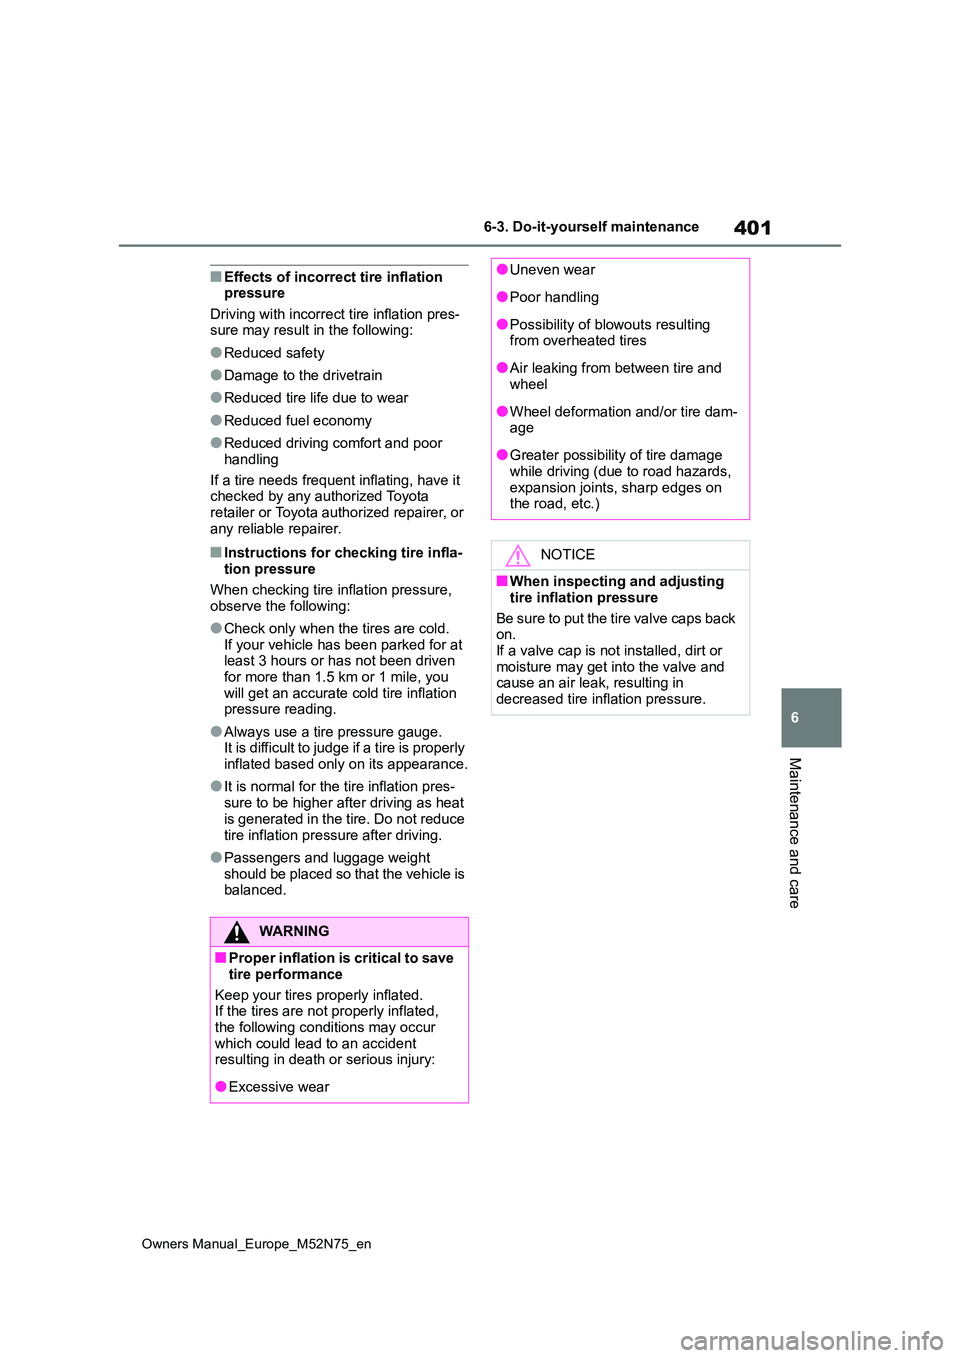
■Effects of incorrect tire inflation pressure
Driving with incorrect tire inflation pres- sure may result in the following:
●Reduced safety
●Damage to the drivetrain
●Reduced tire life due to wear
●Reduced fuel economy
●Reduced driving comfort and poor
handling
If a tire needs frequent inflating, have it checked by any authorized Toyota
retailer or Toyota authorized repairer, or any reliable repairer.
■Instructions for checking tire infla-tion pressure
When checking tire inflation pressure, observe the following:
●Check only when the tires are cold.If your vehicle has been parked for at least 3 hours or has not been driven
for more than 1.5 km or 1 mile, you will get an accurate cold tire inflation pressure reading.
●Always use a tire pressure gauge.It is difficult to judge if a tire is properly
inflated based only on its appearance.
●It is normal for the tire inflation pres-
sure to be higher after driving as heat is generated in the tire. Do not reduce
tire inflation pressure after driving.
●Passengers and luggage weight
should be placed so that the vehicle is balanced.
WARNING
■Proper inflation is critical to save
tire performance
Keep your tires properly inflated. If the tires are not properly inflated,
the following conditions may occur which could lead to an accident resulting in death or serious injury:
●Excessive wear
●Uneven wear
●Poor handling
●Possibility of blowouts resulting from overheated tires
●Air leaking from between tire and wheel
●Wheel deformation and/or tire dam-age
●Greater possibility of tire damage while driving (due to road hazards,
expansion joints, sharp edges on the road, etc.)
NOTICE
■When inspecting and adjusting
tire inflation pressure
Be sure to put the tire valve caps back on.
If a valve cap is not installed, dirt or moisture may get into the valve and cause an air leak, resulting in
decreased tire inflation pressure.
Page 408 of 698

406
Owners Manual_Europe_M52N75_en
6-3. Do-it-yourself maintenance
Remove the dust from the air intake
vent with a vacuum cleaner, etc.
Make sure to only use a vacuum to
suck out dust and clogs. Attempting to
blow out dust and clogs using an air-
gun, etc. may push it into the air intake
vent. ( P.408)
If dust and clogs cannot be com-
pletely removed with the air intake
vent cover installed, remove the
cover and clean the filter.
1 Turn the power switch off.
2 Using a flathead screwdriver,
remove the air intake vent cover.
1 Pull the cover as shown in the
illustration to disengage the 2
claws, starting from the claw in
the upper right corner.
2 Pull the cover toward the side of
the vehicle to remove it.
3 Remove the air intake vent filter.
1 Disengage the 2 claws as
shown in the illustration.
2 Disengage the 2 tabs and
Cleaning the hybrid bat-
ter y (traction batter y)
air intake vent and filter
To prevent the fuel economy
from being affected, visually
inspect the hybrid battery
(traction battery) air intake
vent periodically for dust and
clogs. If it is dusty or clogged
or if “Maintenance Required
for Traction Battery Cooling
Parts See Owner’s Manual” is
displayed on th e multi-infor-
mation display, clean the air
intake vent using the following
procedures:
Cleaning the air intake vent
If dust and clogs cannot be
completely removed
Page 409 of 698

407
6
Owners Manual_Europe_M52N75_en
6-3. Do-it-yourself maintenance
Maintenance and care
remove the filter from cover as
shown in the illustration.
4 Remove the dust and clogs from
the filter using a vacuum
cleaner, etc.
Make sure to also remove the dust and clogs from the inside of the air intake
vent cover.
5 Reinstall the filter to the cover.
1 Engage the filter to the 2 tabs as
shown in the illustration.
2 Engage the 2 claws to install the
filter.
Make sure that the filter is not crooked or deformed when installing it.
6 Install the air intake vent cover.
1 Insert the tab of the cover as
shown in the illustration.
2 Push the cover to engage the 2
claws.
■Scheduled maintenance of the air
intake vent
Refer to “Toyota Service Booklet” or “Toyota Warranty Booklet”.
■Cleaning the air intake vent
●Dust in the air intake vent may inter-fere with the cooling of the hybrid bat-
tery (traction battery). If charging/discharging of the hybrid battery (traction battery) becomes lim-
ited, the distance that the vehicle can be driven using the electric motor (traction motor) may be reduced and
the fuel economy may be reduced. Inspect and clean the air intake vent periodically.
●Improper handling of the air intake vent cover and filter may result in
damage to them. If you have any con- cerns about cleaning the filter, contact any authorized Toyota retailer or
Toyota authorized repairer, or any reli- able repairer.
■If “Maintenance Required for Trac-tion Battery Cooling Parts See
Owner’s Manual” is displayed on the multi-information display
●If this warning message is displayed on the multi-information display, remove the air intake vent cover and
Page 440 of 698

438
Owners Manual_Europe_M52N75_en
7-2. Steps to take in an emergency
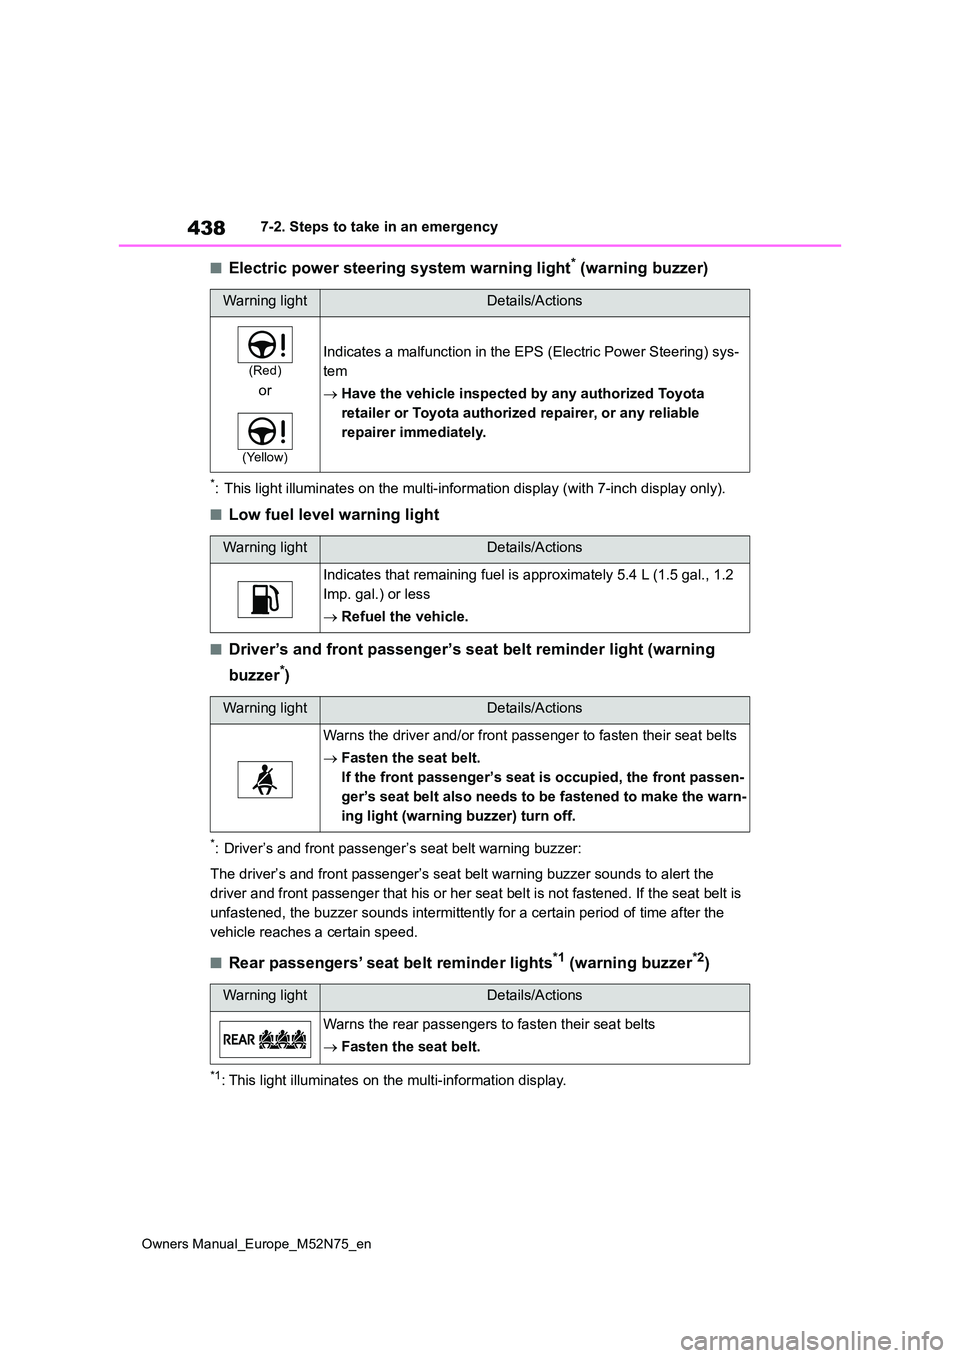
■Electric power steering system warning light* (warning buzzer)
*: This light illuminates on the multi-information display (with 7-inch display only).
■Low fuel level warning light
■Driver’s and front passenger’s seat belt reminder light (warning
buzzer*)
*: Driver’s and front passenger’s seat belt warning buzzer:
The driver’s and front passenger’s seat belt warning buzzer sou nds to alert the
driver and front passenger that his or her seat belt is not fas tened. If the seat belt is
unfastened, the buzzer sounds intermittently for a certain peri od of time after the
vehicle reaches a certain speed.
■Rear passengers’ seat belt reminder lights*1 (warning buzzer*2)
*1: This light illuminates on the multi-information display.
Warning lightDetails/Actions
(Red)
or
(Yellow)
Indicates a malfunction in the EPS (Electric Power Steering) sy s-
tem
Have the vehicle inspected by any authorized Toyota
retailer or Toyota authorized repairer, or any reliable
repairer immediately.
Warning lightDetails/Actions
Indicates that remaining fuel is approximately 5.4 L (1.5 gal., 1.2
Imp. gal.) or less
Refuel the vehicle.
Warning lightDetails/Actions
Warns the driver and/or front passenger to fasten their seat belts
Fasten the seat belt.
If the front passenger’s seat is occupied, the front passen-
ger’s seat belt also needs to be fastened to make the warn-
ing light (warning buzzer) turn off.
Warning lightDetails/Actions
Warns the rear passengers to fasten their seat belts
Fasten the seat belt.
Page 444 of 698

442
Owners Manual_Europe_M52N75_en
7-2. Steps to take in an emergency
■Slip indicator
■Parking brake indicator
■Brake hold operated indicator
■Warning buzzer
In some cases, the buzzer may not be heard due to being in a noisy location or audio sound.
■Front passenger detection sensor,
seat belt reminder and warning buzzer
●If luggage is placed on the front pas-senger seat, the front passenger detection sensor may cause the warn-
ing light to flash and the warning buzzer to sound even if a passenger is not sitting in the seat.
●If a cushion is placed on the seat, the sensor may not detect a passenger,
and the warning light may not operate
properly.
■If the malfunction indicator lamp comes on while driving
For some models, the malfunction indi-
cator lamp will come on if the fuel tank becomes completely empty. If the fuel tank is empty, refuel the vehicle immedi-
ately. The malfunction indicator lamp will go off after several trips.
If the malfunction indicator lamp does not go off, contact any authorized Toyota retailer or Toyota authorized repairer, or
any reliable repairer as soon as possi- ble.
Warning lightDetails/Actions
Indicates a malfunction in:
The VSC system;
The TRC system; or
The hill-start assist control system
Have the vehicle inspected by any authorized Toyota
retailer or Toyota authorized repairer, or any reliable
repairer immediately.
Warning lightDetails/Actions
(Flashes)
It is possible that the parking brake is not fully engaged or
released
Operate the parking brake switch once again.
This light comes on when the parking brake is not released. If the
light turns off after the parking brake is fully released, the system is
operating normally.
Warning lightDetails/Actions
(Flashes)
Indicates a malfunction in the brake hold system
Have the vehicle inspected by any authorized Toyota
retailer or Toyota authorized repairer, or any reliable
repairer immediately.
Page 461 of 698

459
7
Owners Manual_Europe_M52N75_en
7-2. Steps to take in an emergency
When trouble arises
Stop the vehicle in a safe place
on a hard, flat surface.
Set the parking brake.
Shift the shift lever to P.
Stop the hybrid system.
Turn on the emergency flashers.
( P.426)
For vehicles with power back
door: Turn off the power back
door system. ( P.151)
NOTICE
●If fuel splatters on the repair kit, the repair kit may deteriorate. Take
care not to allow fuel to contact it.
●Place the repair kit in a storage to
prevent it from being exposed to dirt or water.
●Store the repair kit in the luggage compartment out of reach of chil-dren.
●Do not disassemble or modify the repair kit. Do not subject parts such
as the air pressure indicator to impacts. This may cause a malfunc-tion.
■To avoid damage to the tire pres-sure warning valves and trans-
mitters
When a tire is repaired with liquid sealants, the tire pressure warning
valve and transmitter may not operate properly. If a liquid sealant is used, contact any authorized Toyota retailer
or Toyota authorized repairer, or any reliable repairer or other qualified ser-vice shop as soon as possible. After
use of liquid sealant, make sure to replace the tire pressure warning valve and transmitter when repairing
or replacing the tire. ( P.394)
If you have a flat tire
(vehicles with a spare
tire)
Your vehicle is equipped with a
spare tire. The flat tire can be
replaced with the spare tire.
For details about tires: P. 3 9 0
WARNING
■If you have a flat tire
Do not continue driving with a flat tire. Driving even a short distance with a flat tire can damage the tire and the
wheel beyond repair, which could result in an accident.
Before jacking up the vehi-
cle
Page 470 of 698

468
Owners Manual_Europe_M52N75_en
7-2. Steps to take in an emergency
One of the following may be the
cause of the problem:
Vehicles with a smart entry &
start system: The electronic key
may not be functioning properly.
( P.470)
There may not be sufficient fuel
in the vehicle’s tank. Refuel the
vehicle.
There may be a malfunction in
the immobilizer system. ( P.84)
Vehicles with a smart entry &
start system: There may be a
malfunction in the steering lock
system.
Vehicles with a smart entry &
start system: The hybrid system
may be malfunctioning due to an
electrical problem such as elec-
tronic key battery depletion or a
blown fuse. However, depend-
ing on the type of malfunction, an
interim measure is available to
start the hybrid system.
( P.469)
The temperature of the hybrid
battery (traction battery) may be
extremely low (below approxi-
mately -30°C [-22°F]). ( P.189,
191)
One of the following may be the
cause of the problem:
The 12-volt battery may be dis-
charged. ( P.472)
The 12-volt battery terminal con-
nections may be loose or cor-
roded. ( P.388)
One of the following may be the
cause of the problem:
The 12-volt battery may be dis-
charged. ( P.472)
One or both of the 12-volt battery
terminals may be disconnected.
( P.388)
Contact any authorized Toyota retailer
or Toyota authorized repairer, or any
reliable repairer if the problem cannot
be repaired, or if repair procedures are
unknown.
If the hybrid system will
not start
Reasons for the hybrid system
not starting vary depending on
the situation. Check the follow-
ing and perform the appropri-
ate procedure:
The hybrid system will not
start even though the cor-
rect starting procedure is
being followed. ( P.189,
191)
The interior lights and head-
lights are dim, or the horn
does not sound or sounds at
a low volume.
The interior lights and head-
lights do not turn on, or the
horn does not sound.
Page 485 of 698

8
483
Owners Manual_Europe_M52N75_en
8
Vehicle specifications
Vehicle specifications
8-1. Specifications
Maintenance data (fuel, oil
level, etc.) ....................... 484
Fuel information ................ 493
8-2. Customization
Customizable features ...... 494
8-3. Initialization
Items to initialize ............... 505