2023 TOYOTA YARIS CROSS Tail Lights
[x] Cancel search: Tail LightsPage 187 of 698

185
4
Owners Manual_Europe_M52N75_en
4-1. Before driving
Driving3855 mm (33.7 in.)
4 768 mm (30.2 in.)
5 335 mm (13.2 in.)
6 30 mm (1.2 in.)
7 396 mm (15.6 in.)
■Tire information
●Increase the tire inflation pressure to
20.0 kPa (0.2 kgf/cm2 or bar, 3 psi) greater than the recommended value when towing. ( P.490)
●Increase the air pressure of the trailer tires in accordance with the total
trailer weight and according to the val- ues recommended by the manufac-turer of your trailer.
■Trailer lights
Please consult any authorized Toyota retailer or Toyota authorized repairer, or any reliable repairer when installing
trailer lights, as incorrect installation may cause damage to the vehicle’s lights. Please take care to comply with
your state’s laws when installing trailer lights.
■When towing a trailer
Disable the following systems, as the systems may not operate properly.
●LTA (Lane Tracing Assist) ( P. 2 4 2 )
●Dynamic radar cruise control with full-
speed range ( P.252)
●PKSB (Parking Support Brake)
( P.291)
●BSM (Blind Spot Monitor) (P.270)
●Toyota parking assist-sensor ( P.275)
●RCTA (Rear Cross Traffic Alert) func- tion ( P.285)
■Break-in schedule
Toyota recommends that vehicles fitted with new power train components should not be used for towing trailers for
the first 800 km (500 miles).
■Safety checks before towing
●Check that the maximum load limit for
the towing hitch/bracket hitch ball is not exceeded. Bear in mind that the coupling weight of the trailer will add
to the load exerted on the vehicle. Also make sure that you will not be towing a load that exceeds the maxi-
mum permissible axle capacity.
●Ensure that the trailer load is secure.
●Supplementary outside rear view mir- rors should be added to the vehicle if
the traffic behind cannot be clearly seen with standard mirrors. Adjust the extending arms of these mirrors on
both sides of the vehicle so that they always provide maximum visibility of the road behind.
■Maintenance
●Maintenance must be performed more frequently when using the vehicle for
towing due to the greater weight bur- den placed on the vehicle compared to normal driving.
●Retighten all bolts securing the hitch-ing ball and bracket after towing for
approximately 1000 km (600 miles).
Page 208 of 698
206
Owners Manual_Europe_M52N75_en
4-3. Operating the lights and wipers
4-3.Operating the lights and wipers
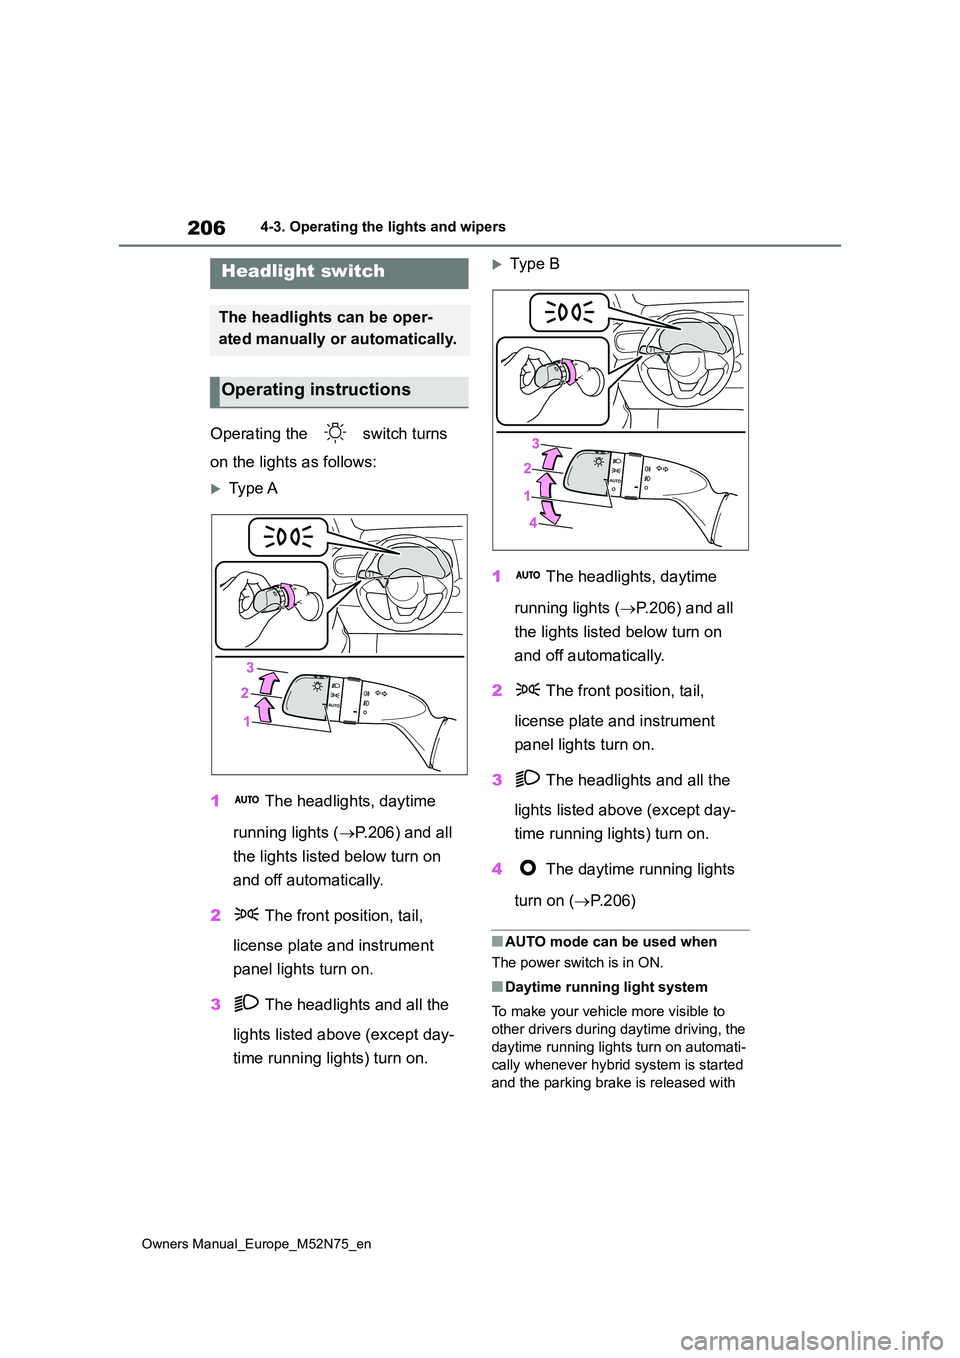
Operating the switch turns
on the lights as follows:
Type A
1 The headlights, daytime
running lights ( P.206) and all
the lights listed below turn on
and off automatically.
2 The front position, tail,
license plate and instrument
panel lights turn on.
3 The headlights and all the
lights listed above (except day-
time running lights) turn on.
Typ e B
1 The headlights, daytime
running lights ( P.206) and all
the lights listed below turn on
and off automatically.
2 The front position, tail,
license plate and instrument
panel lights turn on.
3 The headlights and all the
lights listed above (except day-
time running lights) turn on.
4 The daytime running lights
turn on ( P. 2 0 6 )
■AUTO mode can be used when
The power switch is in ON.
■Daytime running light system
To make your vehicle more visible to
other drivers during daytime driving, the
daytime running lights turn on automati-
cally whenever hybrid system is started
and the parking brake is released with
Headlight switch
The headlights can be oper-
ated manually or automatically.
Operating instructions
Page 215 of 698

213
4
Owners Manual_Europe_M52N75_en
4-3. Operating the lights and wipers
Driving
beams are projected will be adjusted
automatically, depending on the loca- tion of vehicles ahead:• The vehicle speed is approximately 15
km/h (10 mph) or more. • The area ahead of the vehicle is dark.• There are vehicles ahead with head-
lights or tail lights turned on.
●If any of the following conditions are
met, the high beams or shaded high beams will be changed to the low beams automatically:
• The vehicle speed is below approxi- mately 15 km/h (10 mph).• The area ahead of the vehicle is not
dark. • There are many vehicles ahead.• Vehicles ahead are moving quickly
and the high beams may blind the drivers of the other vehicles.
■Front camera detection information
●The high beams may not be automati-cally changed to the shaded high beams in the following situations:
• When vehicles ahead suddenly appear from a curve• When the vehicle is cut in front of by
another vehicle • When vehicles ahead are hidden from sight due to repeated curves, road
dividers or roadside trees • When vehicles ahead appear from the faraway lane on wide road
• When vehicles ahead have no lights
●The high beams may be changed to
the shaded high beams if a vehicle ahead that is using fog lights without its headlights turned on is detected.
●House lights, street lights, traffic sig-nals, and illuminated billboards or
signs and other reflective objects may cause the high beams to change to the shaded high beams, cause the
high beams not to change to the shaded high beams, or change the area that is not illuminated.
●The following factors may affect the amount of time taken to turn the high
beam on or off, or the speed by which the areas not illuminated change:
• The brightness of headlights, fog
lights, and tail lights of vehicles ahead • The movement and direction of vehi-cles ahead
• When a vehicle ahead only has oper- ational lights on one side• When a vehicle ahead is a two-
wheeled vehicle • The condition of the road (gradient, curve, condition of the road surface,
etc.) • The number of passengers and amount of luggage
●The light distribution control of the headlights may change unexpectedly.
●Bicycles or similar objects may not be detected.
●In the following situations the system may not be able to correctly detect the
surrounding brightness level. This may cause the low beams to remain on or the high beams to flash or daz-
zle pedestrians or vehicles ahead. In such a case, it is necessary to manu-ally switch between the high and low
beams. • When driving in inclement weather (heavy rain, snow, fog, sandstorms,
etc.) • When the windshield is obscured by fog, mist, ice, dirt, etc.
• When the windshield is cracked or damaged• When the front camera is deformed or
dirty • When the temperature of the front camera is extremely high
• When the surrounding brightness level is equal to that of headlights, tail lights or fog lights
• When headlights or tail lights of vehi- cles ahead are turned off, dirty, chang-ing color, or not aimed properly
• When the vehicle is hit by water, snow, dust, etc., from a preceding vehicle
• When driving through an area of inter- mittently changing brightness and darkness
• When frequently and repeatedly driv- ing ascending/descending roads, or
Page 218 of 698
216
Owners Manual_Europe_M52N75_en
4-3. Operating the lights and wipers
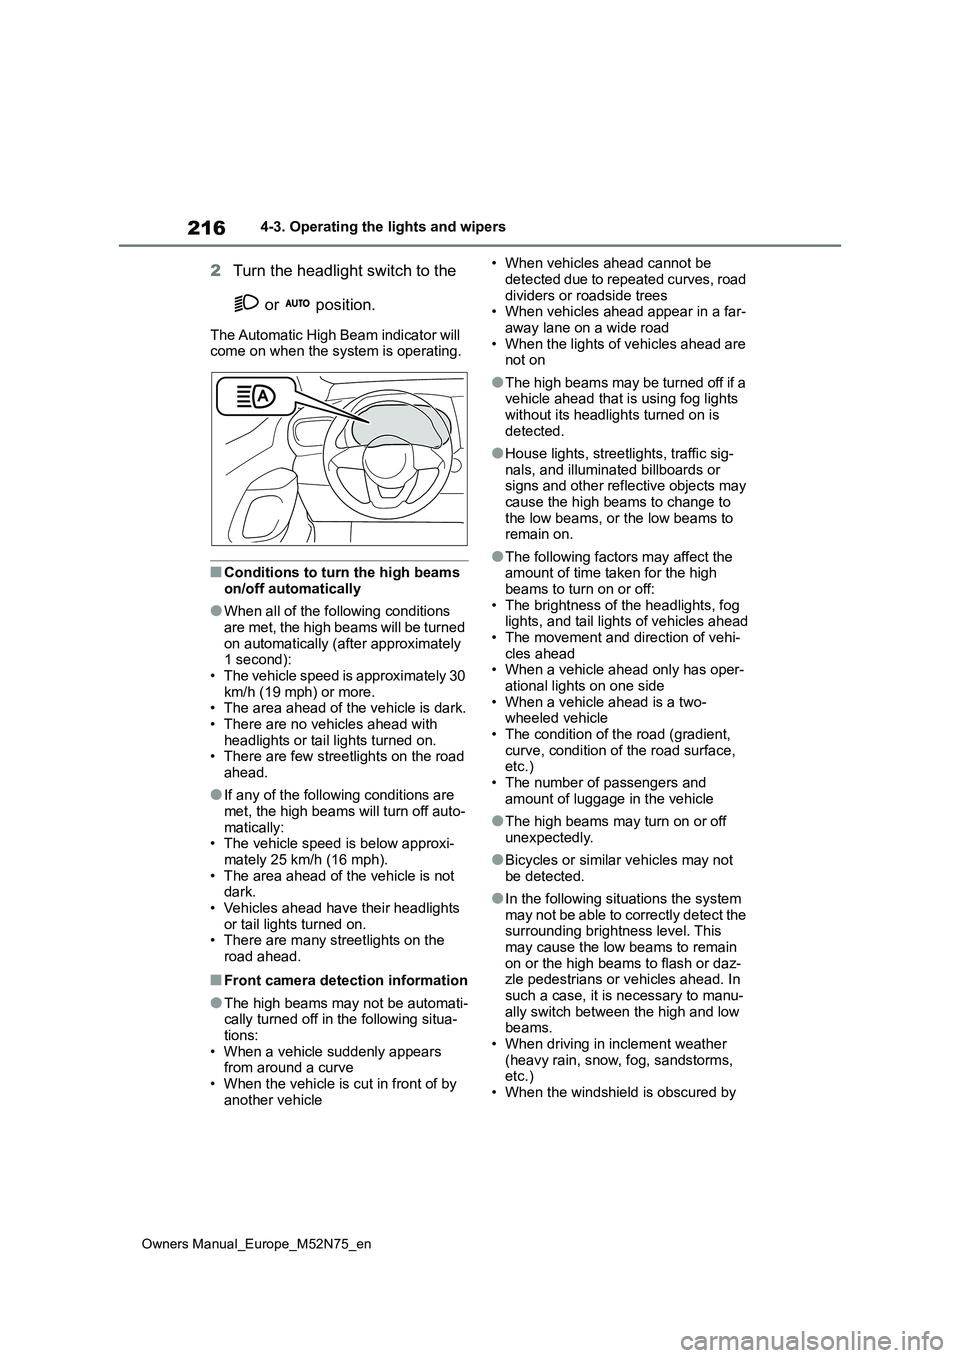
2Turn the headlight switch to the
or position.
The Automatic High Beam indicator will come on when the system is operating.
■Conditions to turn the high beams on/off automatically
●When all of the following conditions are met, the high beams will be turned
on automatically (after approximately 1 second):• The vehicle speed is approximately 30
km/h (19 mph) or more. • The area ahead of the vehicle is dark.• There are no vehicles ahead with
headlights or tail lights turned on. • There are few streetlights on the road ahead.
●If any of the following conditions are met, the high beams will turn off auto-
matically: • The vehicle speed is below approxi-mately 25 km/h (16 mph).
• The area ahead of the vehicle is not dark.• Vehicles ahead have their headlights
or tail lights turned on. • There are many streetlights on the road ahead.
■Front camera detection information
●The high beams may not be automati-cally turned off in the following situa-
tions: • When a vehicle suddenly appears from around a curve
• When the vehicle is cut in front of by another vehicle
• When vehicles ahead cannot be
detected due to repeated curves, road dividers or roadside trees• When vehicles ahead appear in a far-
away lane on a wide road • When the lights of vehicles ahead are not on
●The high beams may be turned off if a vehicle ahead that is using fog lights
without its headlights turned on is detected.
●House lights, streetlights, traffic sig-nals, and illuminated billboards or signs and other reflective objects may
cause the high beams to change to the low beams, or the low beams to remain on.
●The following factors may affect the amount of time taken for the high
beams to turn on or off: • The brightness of the headlights, fog lights, and tail lights of vehicles ahead
• The movement and direction of vehi- cles ahead• When a vehicle ahead only has oper-
ational lights on one side • When a vehicle ahead is a two-wheeled vehicle
• The condition of the road (gradient, curve, condition of the road surface, etc.)
• The number of passengers and amount of luggage in the vehicle
●The high beams may turn on or off unexpectedly.
●Bicycles or similar vehicles may not be detected.
●In the following situations the system may not be able to correctly detect the surrounding brightness level. This
may cause the low beams to remain on or the high beams to flash or daz-zle pedestrians or vehicles ahead. In
such a case, it is necessary to manu- ally switch between the high and low beams.
• When driving in inclement weather (heavy rain, snow, fog, sandstorms, etc.)
• When the windshield is obscured by
Page 219 of 698
217
4
Owners Manual_Europe_M52N75_en
4-3. Operating the lights and wipers
Driving
fog, mist, ice, dirt, etc.
• When the windshield is cracked or damaged• When the front camera is deformed or
dirty • When the temperature of the front camera is extremely high
• When the surrounding brightness level is equal to that of headlights, tail lights or fog lights
• When headlights or tail lights of vehi- cles ahead are turned off, dirty, chang-ing color, or not aimed properly
• When the vehicle is hit by water, snow, dust, etc., from a preceding vehicle
• When driving through an area of inter- mittently changing brightness and darkness
• When frequently and repeatedly driv- ing ascending/descending roads, or roads with rough, bumpy or uneven
surfaces (such as stone-paved roads, gravel roads, etc.)• When frequently and repeatedly tak-
ing curves or driving on a winding road• When there is a highly reflective
object ahead of the vehicle, such as a sign or mirror• When the back of a preceding vehicle
is highly reflective, such as a con- tainer on a truck• When the vehicle’s headlights are
damaged or dirty, or are not aimed properly• When the vehicle is listing or titling
due to a flat tire, a trailer being towed, etc.• When the headlights are changed
between the high beams and low beams repeatedly in an abnormal manner
• When the driver believes that the high beams may be flashing or dazzling pedestrians or other drivers
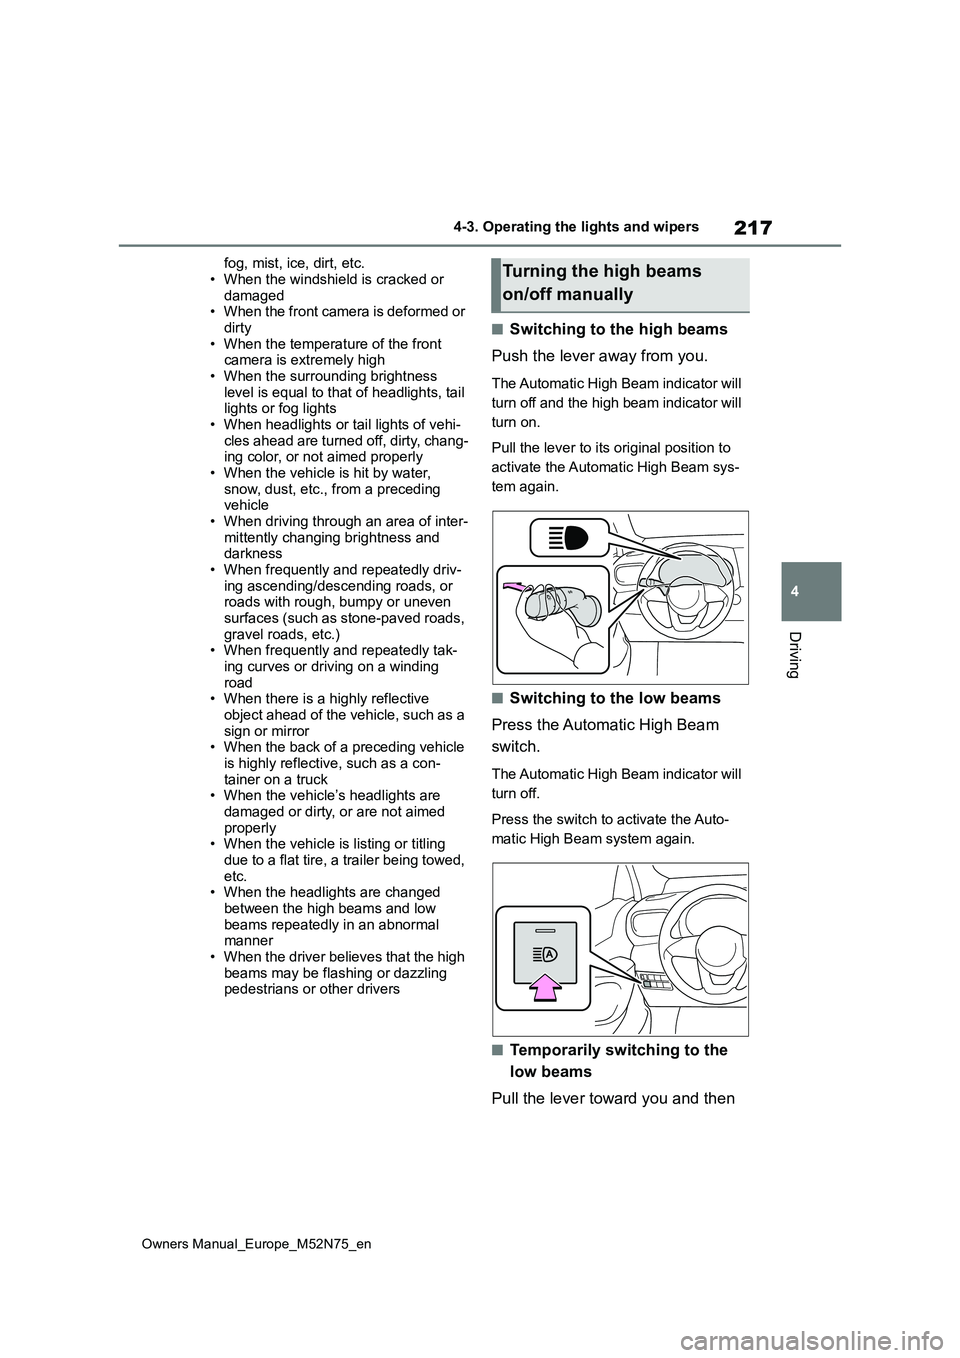
■Switching to the high beams
Push the lever away from you.
The Automatic High Beam indicator will
turn off and the high beam indicator will
turn on.
Pull the lever to its original position to
activate the Automatic High Beam sys-
tem again.
■Switching to the low beams
Press the Automatic High Beam
switch.
The Automatic High Beam indicator will
turn off.
Press the switch to activate the Auto-
matic High Beam system again.
■Temporarily switching to the
low beams
Pull the lever toward you and then
Turning the high beams
on/off manually
Page 224 of 698
222
Owners Manual_Europe_M52N75_en
4-3. Operating the lights and wipers
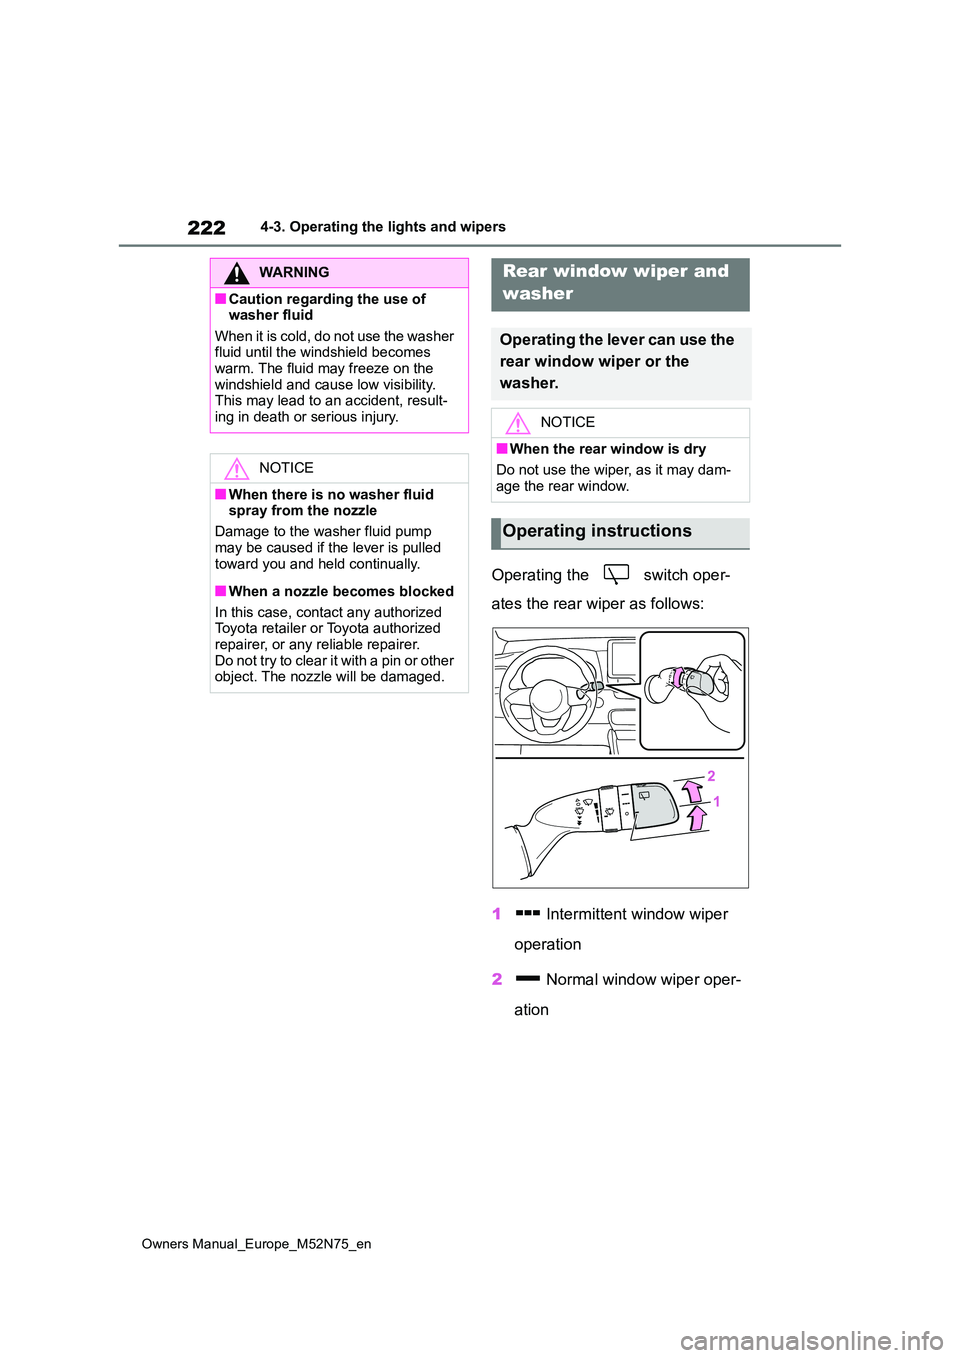
Operating the switch oper-
ates the rear wiper as follows:
1 Intermittent window wiper
operation
2 Normal window wiper oper-
ation
WARNING
■Caution regarding the use of washer fluid
When it is cold, do not use the washer fluid until the windshield becomes warm. The fluid may freeze on the
windshield and cause low visibility. This may lead to an accident, result-ing in death or serious injury.
NOTICE
■When there is no washer fluid spray from the nozzle
Damage to the washer fluid pump
may be caused if the lever is pulled toward you and held continually.
■When a nozzle becomes blocked
In this case, contact any authorized Toyota retailer or Toyota authorized
repairer, or any reliable repairer. Do not try to clear it with a pin or other object. The nozzle will be damaged.
Rear window wiper and
washer
Operating the lever can use the
rear window wiper or the
washer.
NOTICE
■When the rear window is dry
Do not use the wiper, as it may dam-
age the rear window.
Operating instructions
Page 225 of 698
223
4
Owners Manual_Europe_M52N75_en
4-3. Operating the lights and wipers
Driving
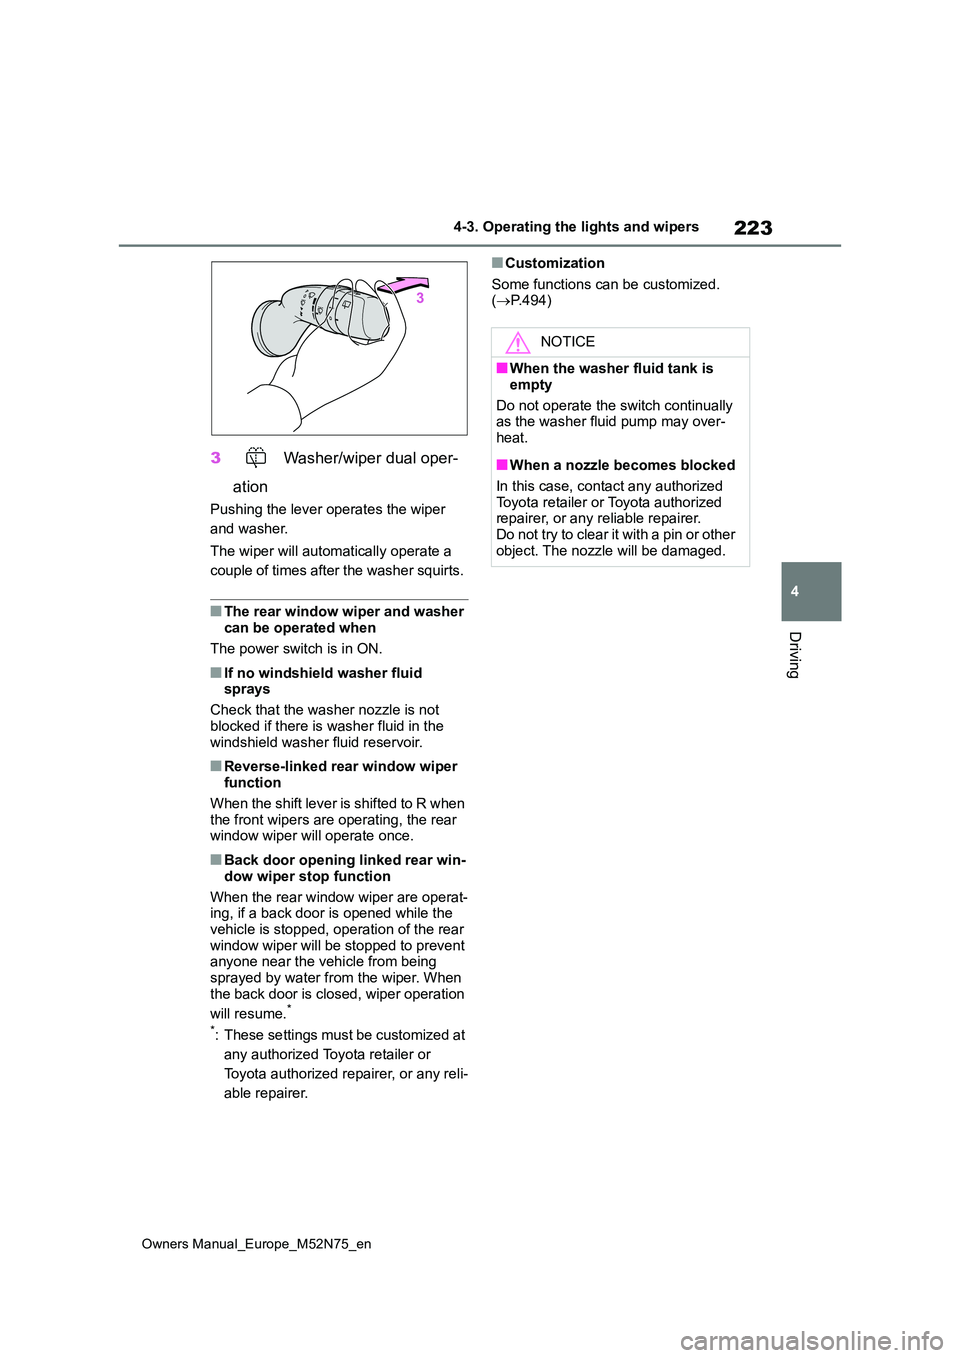
3 Washer/wiper dual oper-
ation
Pushing the lever operates the wiper
and washer.
The wiper will automatically operate a
couple of times after the washer squirts.
■The rear window wiper and washer can be operated when
The power switch is in ON.
■If no windshield washer fluid sprays
Check that the washer nozzle is not
blocked if there is washer fluid in the windshield washer fluid reservoir.
■Reverse-linked rear window wiper function
When the shift lever is shifted to R when the front wipers are operating, the rear window wiper will operate once.
■Back door opening linked rear win-
dow wiper stop function
When the rear window wiper are operat- ing, if a back door is opened while the
vehicle is stopped, operation of the rear window wiper will be stopped to prevent anyone near the vehicle from being
sprayed by water from the wiper. When the back door is closed, wiper operation
will resume.*
*: These settings must be customized at
any authorized Toyota retailer or
Toyota authorized repairer, or any reli-
able repairer.
■Customization
Some functions can be customized. ( P.494)
NOTICE
■When the washer fluid tank is
empty
Do not operate the switch continually as the washer fluid pump may over-
heat.
■When a nozzle becomes blocked
In this case, contact any authorized Toyota retailer or Toyota authorized repairer, or any reliable repairer.
Do not try to clear it with a pin or other object. The nozzle will be damaged.
Page 230 of 698

228
Owners Manual_Europe_M52N75_en
4-5. Using the driving support systems
WARNING
●Do not attach objects, such as stickers, transparent stickers, etc.,
to the outer side of the windshield in front of the front camera (shaded area in the illustration).
From the top of the windshield to
approximately 1 cm (0.4 in.) below
the bottom of the front camera
Approximately 20 cm (7.9 in.)
(Approximately 10 cm [4.0 in.] to
the right and left from the center of
the front camera)
●If the part of the windshield in front
of the front camera is fogged up or covered with condensation or ice, use the windshield defogger to
remove the fog, condensation or ice. ( P.344)
●If water droplets cannot be properly removed from the area of the wind-shield in front of the front camera by
the windshield wipers, replace the wiper insert or wiper blade.
●Do not attach window tint to the windshield.
●Replace the windshield if it is dam-aged or cracked.After replacing the windshield, the
front camera must be recalibrated. Contact any authorized Toyota retailer or Toyota authorized
repairer, or any reliable repairer for details.
●Do not allow liquids to contact the front camera.
●Do not allow bright lights to shine into the front camera.
●Do not dirty or damage the front camera.When cleaning the inside of the
windshield, do not allow glass cleaner to contact the lens of the front camera. Also, do not touch the
lens. If the lens is dirty or damaged, con-tact any authorized Toyota retailer
or Toyota authorized repairer, or any reliable repairer.
●Do not subject the front camera to a strong impact.
●Do not change the installation posi-tion or direction of the front camera or remove it.
●Do not disassemble the front cam-era.
●Do not modify any components of the vehicle around the front camera
(inside rear view mirror, etc.) or ceil- ing.
●Do not attach any accessories to the hood, front grille or front bumper that may obstruct the front camera.
Contact any authorized Toyota retailer or Toyota authorized repairer, or any reliable repairer for
details.
●If a surfboard or other long object is
to be mounted on the roof, make sure that it will not obstruct the front camera.
●Do not modify the headlights or other lights.