2023 TOYOTA VENZA HYBRID ESP
[x] Cancel search: ESPPage 124 of 560
1242-1. Instrument cluster
through sunglasses, especially
polarized sunglasses. Adjust the
brightness of the head-up display or
remove your sunglasses.
■Street name display
Only street names which are
included in the map data will be dis-
played.
Select the “HUD” on the
screen of the multi-information
display. ( P.106)
■Enabling/disabling the
head-up display
The head-up display enabled
and disabled with each press of
the of the meter control
switches.
■Changing settings of the
head-up display
The following settings can be
changed pressing and hold of
the of the meter control
switches.
Brightness and vertical posi-
tion of the head-up display
Select to adjust the brightness or
vertical position of the head-up dis-
play.
Tachometer Settings
Select to display the blank, Hybrid
System Indicator or tachometer.
Display content
Select to enable/d isable the follow-
ing items:
• Navigation display (if equipped)
• Driving Assist display
*
WARNING
■When using the head-up dis-
play
●Check that the position and
brightness of the head-up dis-
play image does not interfere
with safe driving. Incorrect
adjustment of the image’s posi-
tion or brightness may obstruct
the driver’s view and lead to an
accident, resulting in death or
serious injury.
●Do not continuously look at the
head-up display while driving as
you may fail to see pedestrians,
objects on the r oad, etc. ahead
of the vehicle.
NOTICE
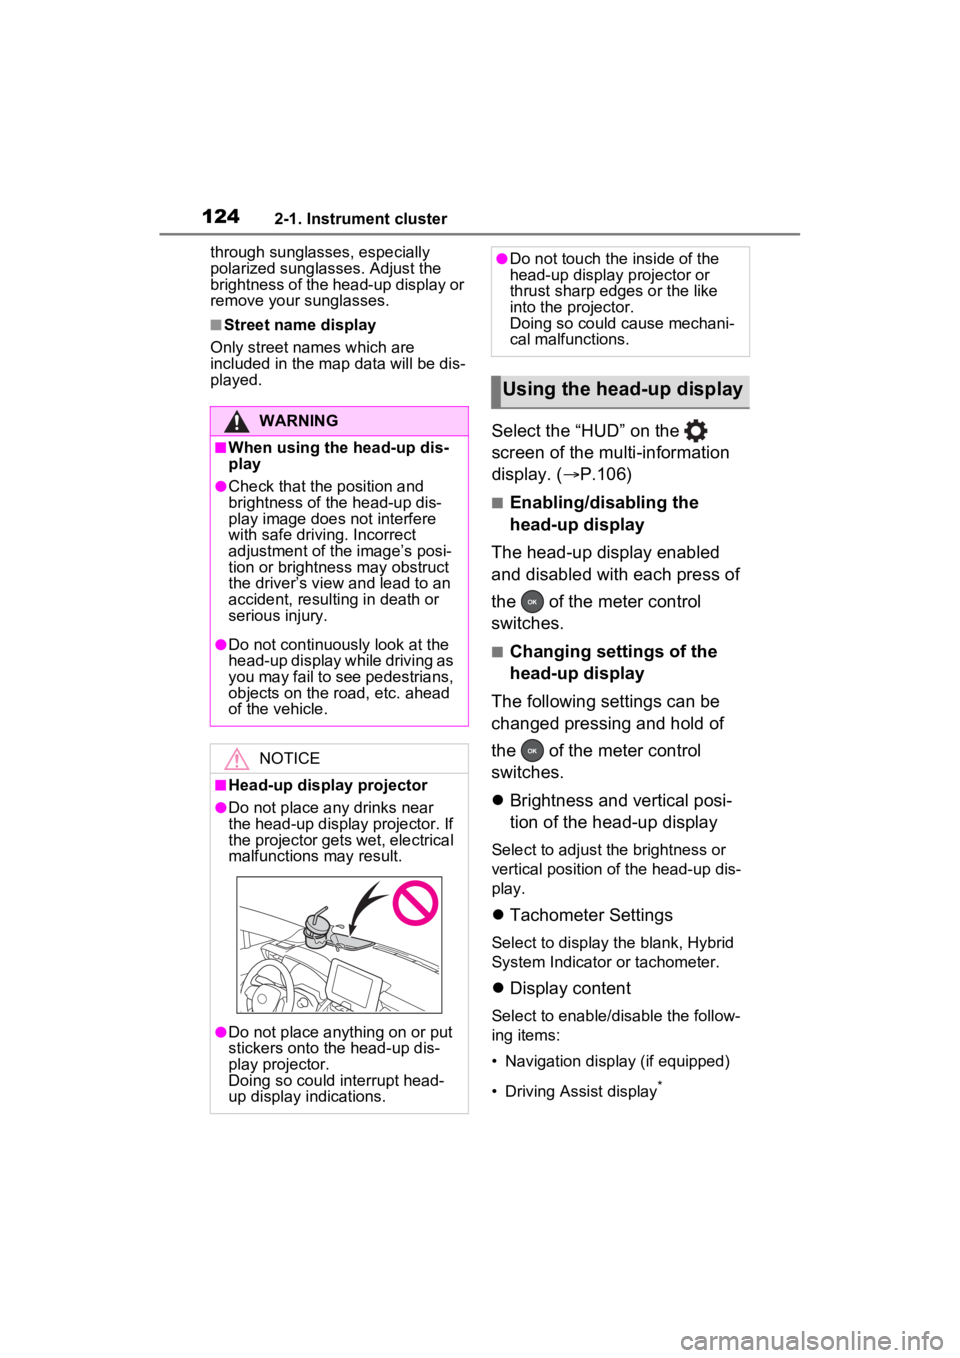
■Head-up display projector
●Do not place any drinks near
the head-up display projector. If
the projector gets wet, electrical
malfunctions may result.
●Do not place anything on or put
stickers onto the head-up dis-
play projector.
Doing so could interrupt head-
up display indications.
●Do not touch the inside of the
head-up display projector or
thrust sharp edges or the like
into the projector.
Doing so could cause mechani-
cal malfunctions.
Using the head-up display
Page 139 of 560
1393-2. Opening, closing and locking the doors
3
Before driving
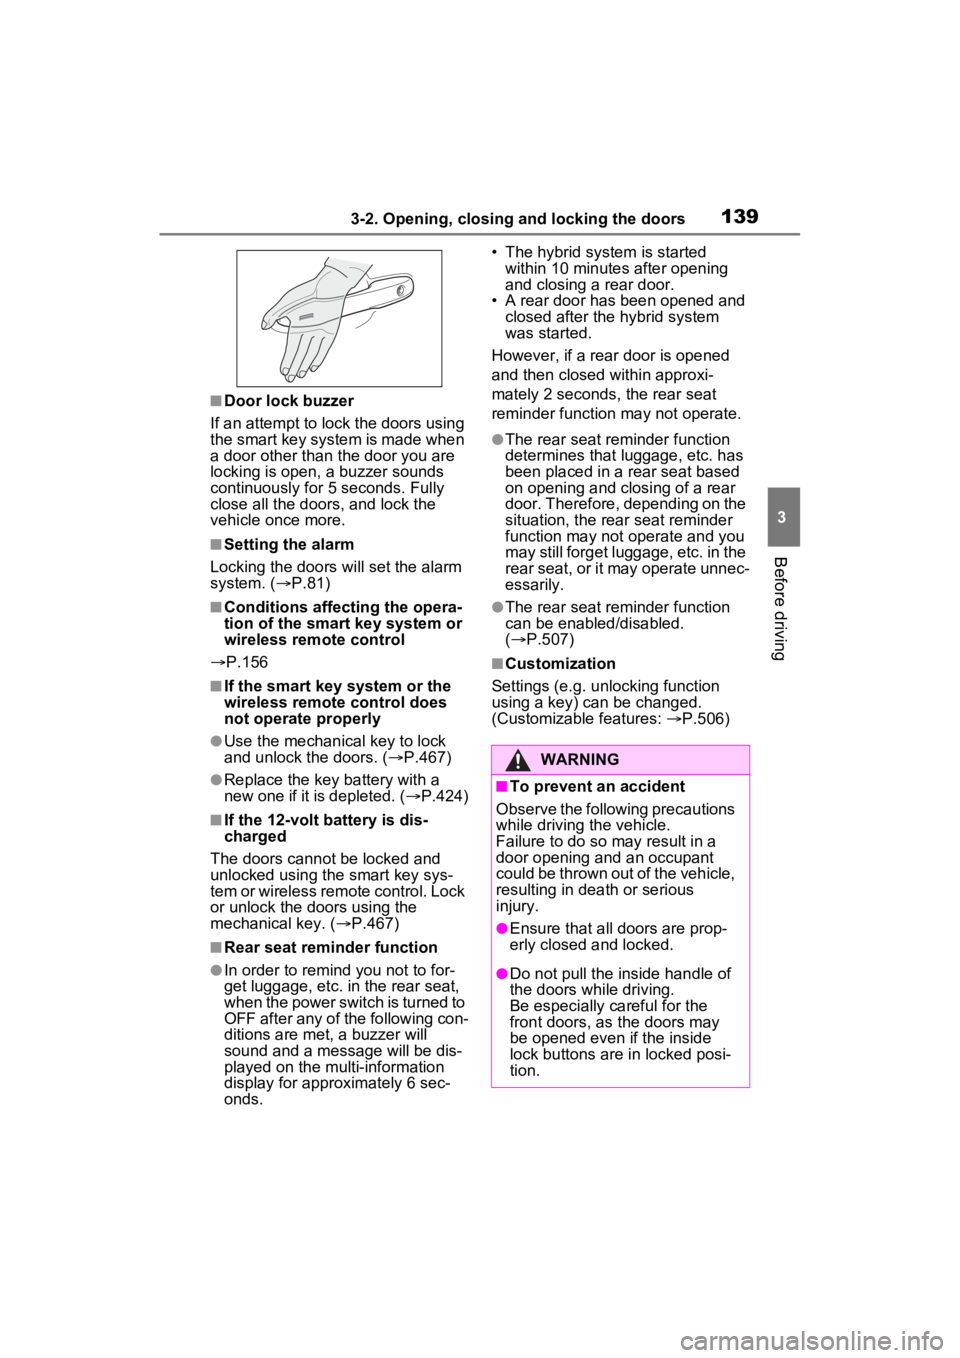
■Door lock buzzer
If an attempt to lock the doors using
the smart key system is made when
a door other than t he door you are
locking is open, a buzzer sounds
continuously for 5 seconds. Fully
close all the doors, and lock the
vehicle once more.
■Setting the alarm
Locking the doors will set the alarm
system. ( P.81)
■Conditions affecting the opera-
tion of the smart key system or
wireless remo te control
P.156
■If the smart key system or the
wireless remote control does
not operate properly
●Use the mechanical key to lock
and unlock the doors. ( P.467)
●Replace the key battery with a
new one if it is depleted. ( P.424)
■If the 12-volt battery is dis-
charged
The doors cannot be locked and
unlocked using the smart key sys-
tem or wireless remote control. Lock
or unlock the doors using the
mechanical key. ( P.467)
■Rear seat reminder function
●In order to remind you not to for-
get luggage, etc. in the rear seat,
when the power switch is turned to
OFF after any of the following con-
ditions are met, a buzzer will
sound and a message will be dis-
played on the multi-information
display for approximately 6 sec-
onds. • The hybrid system is started
within 10 minutes after opening
and closing a rear door.
• A rear door has been opened and closed after the hybrid system
was started.
However, if a rear door is opened
and then closed within approxi-
mately 2 seconds, the rear seat
reminder function may not operate.
●The rear seat reminder function
determines that luggage, etc. has
been placed in a rear seat based
on opening and closing of a rear
door. Therefore, depending on the
situation, the rear seat reminder
function may not operate and you
may still forget luggage, etc. in the
rear seat, or it may operate unnec-
essarily.
●The rear seat reminder function
can be enabled/disabled.
( P.507)
■Customization
Settings (e.g. unlocking function
using a key) can be changed.
(Customizable features: P.506)
WARNING
■To prevent an accident
Observe the following precautions
while driving the vehicle.
Failure to do so may result in a
door opening and an occupant
could be thrown out of the vehicle,
resulting in dea th or serious
injury.
●Ensure that all doors are prop-
erly closed and locked.
●Do not pull the inside handle of
the doors while driving.
Be especially careful for the
front doors, as the doors may
be opened even if the inside
lock buttons are in locked posi-
tion.
Page 166 of 560
1663-3. Adjusting the seats
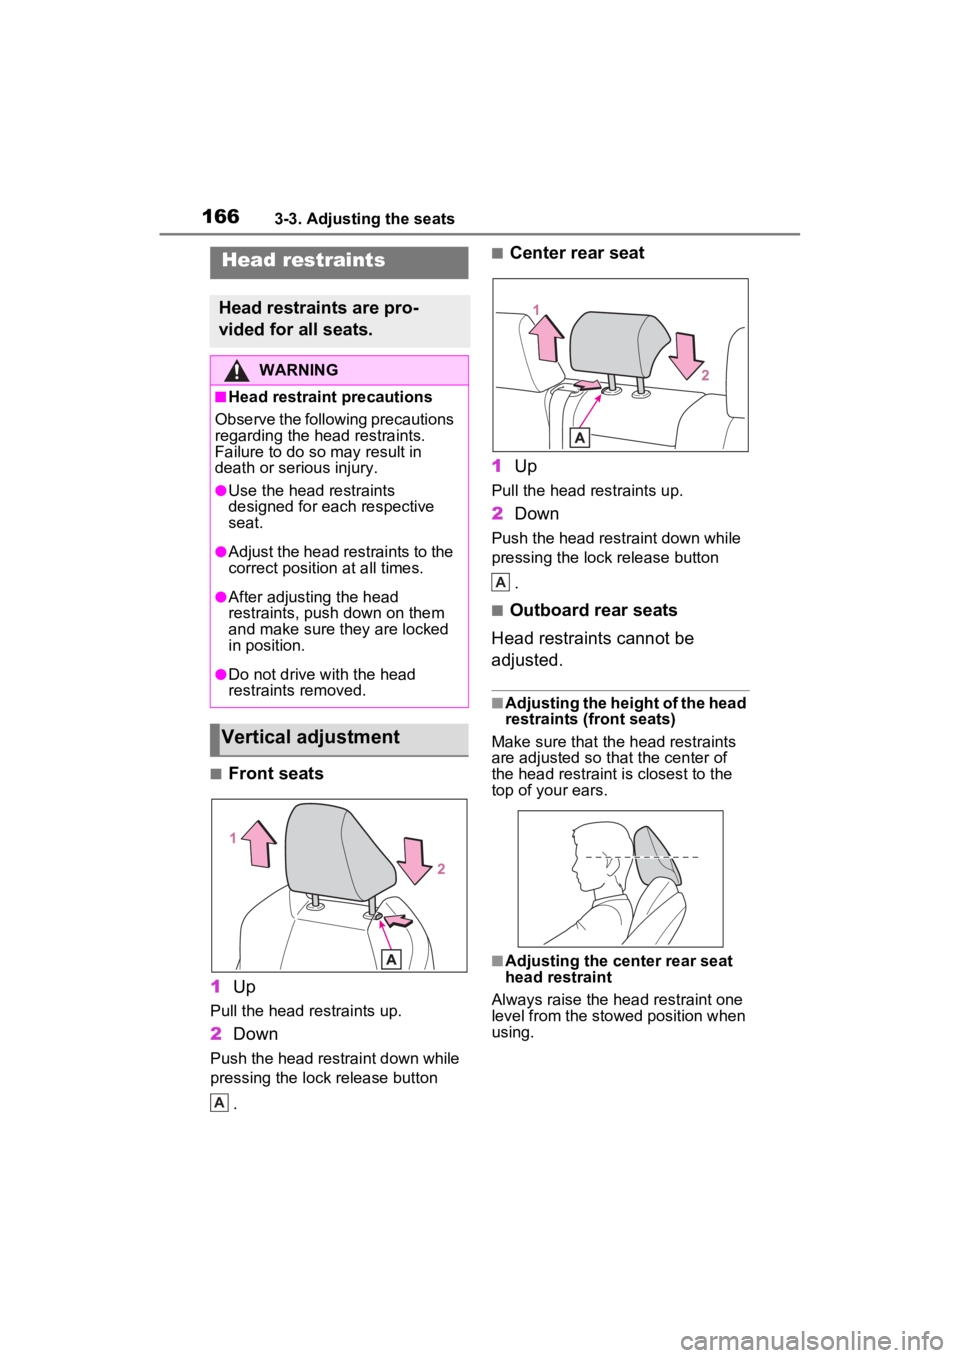
■Front seats
1 Up
Pull the head restraints up.
2Down
Push the head restraint down while
pressing the lock release button
.
■Center rear seat
1 Up
Pull the head restraints up.
2Down
Push the head restraint down while
pressing the lock release button
.
■Outboard rear seats
Head restraints cannot be
adjusted.
■Adjusting the height of the head
restraints (front seats)
Make sure that the head restraints
are adjusted so that the center of
the head restraint i s closest to the
top of your ears.
■Adjusting the center rear seat
head restraint
Always raise the head restraint one
level from the stowed position when
using.
Head restraints
Head restraints are pro-
vided for all seats.
WARNING
■Head restraint precautions
Observe the following precautions
regarding the head restraints.
Failure to do so m ay result in
death or serious injury.
●Use the head restraints
designed for each respective
seat.
●Adjust the head restraints to the
correct position at all times.
●After adjusting the head
restraints, push down on them
and make sure they are locked
in position.
●Do not drive with the head
restraints removed.
Vertical adjustment
A
A
Page 169 of 560
1693-4. Adjusting the steering wheel and mirrors
3
Before driving
*: If equipped
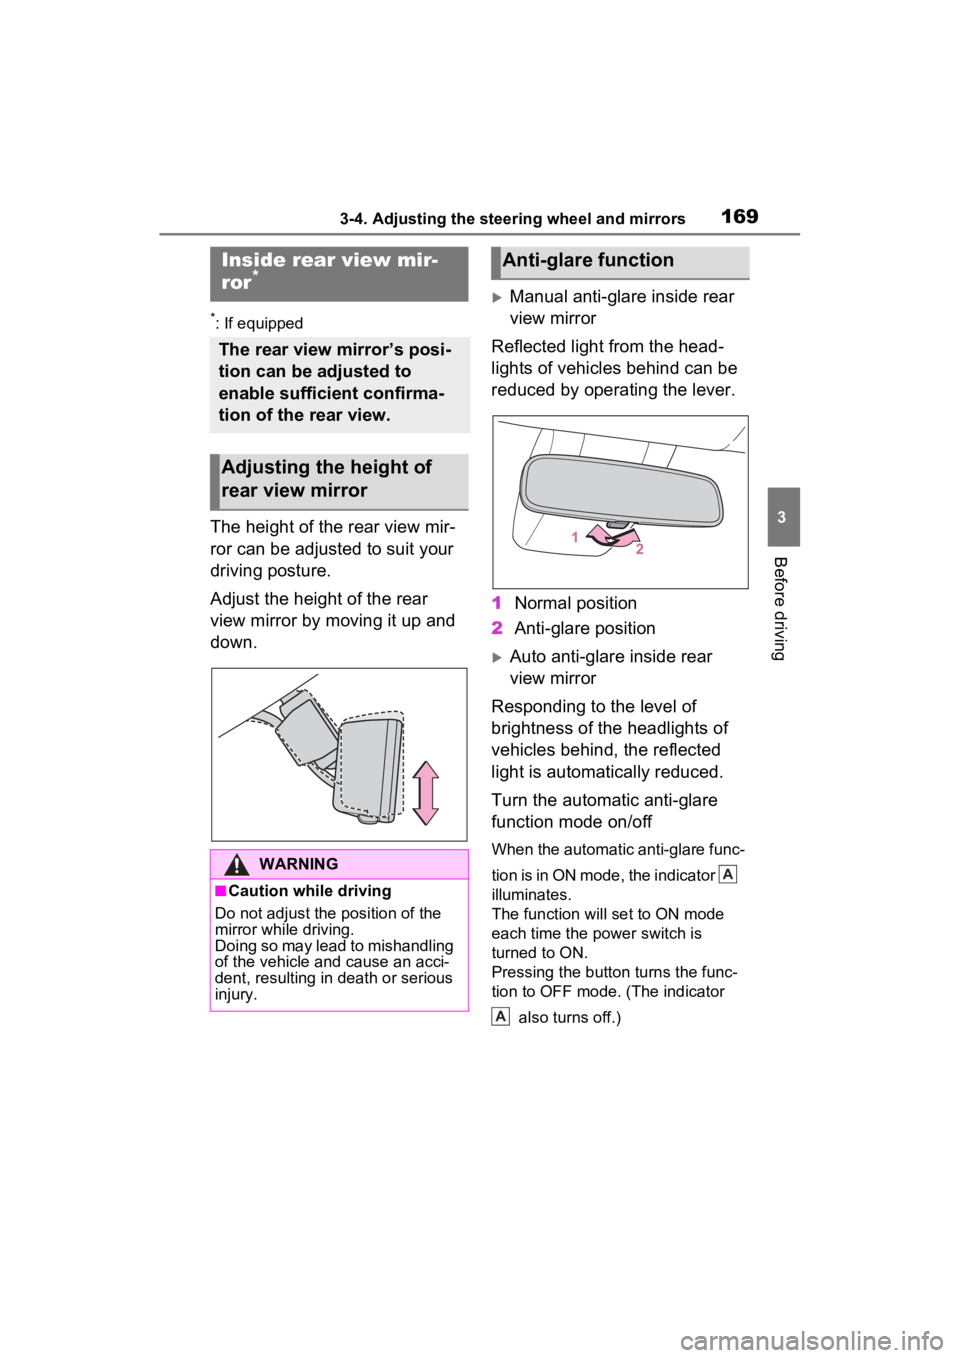
The height of the rear view mir-
ror can be adjusted to suit your
driving posture.
Adjust the height of the rear
view mirror by moving it up and
down.
Manual anti-glare inside rear
view mirror
Reflected light from the head-
lights of vehicles behind can be
reduced by operating the lever.
1 Normal position
2 Anti-glare position
Auto anti-glare inside rear
view mirror
Responding to the level of
brightness of the headlights of
vehicles behind, the reflected
light is automatically reduced.
Turn the automatic anti-glare
function mode on/off
When the automatic anti-glare func-
tion is in ON mode, the indicator
illuminates.
The function will set to ON mode
each time the power switch is
turned to ON.
Pressing the button turns the func-
tion to OFF mode. (The indicator
also turns off.)
Inside rear view mir-
ror*
The rear view mirror’s posi-
tion can be adjusted to
enable sufficient confirma-
tion of the rear view.
Adjusting the height of
rear view mirror
WARNING
■Caution while driving
Do not adjust the position of the
mirror while driving.
Doing so may lead to mishandling
of the vehicle and cause an acci-
dent, resulting in death or serious
injury.
Anti-glare function
A
A
Page 170 of 560
1703-4. Adjusting the steering wheel and mirrors
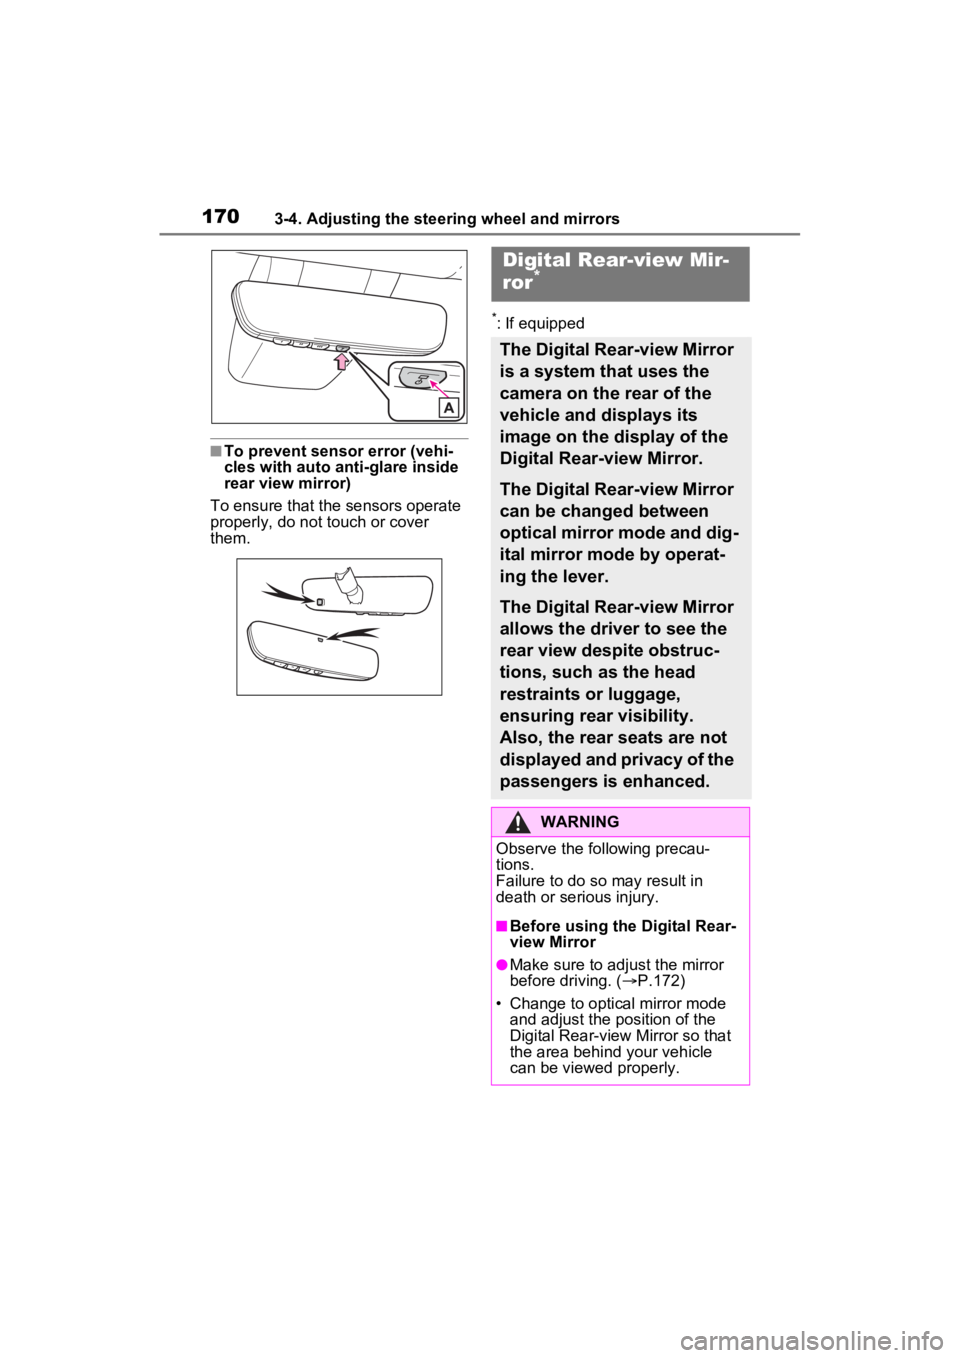
■To prevent sensor error (vehi-
cles with auto anti-glare inside
rear view mirror)
To ensure that the sensors operate
properly, do not touch or cover
them.
*: If equipped
Digital Rear-view Mir-
ror*
The Digital Rear-view Mirror
is a system that uses the
camera on the rear of the
vehicle and displays its
image on the display of the
Digital Rear-view Mirror.
The Digital Rear-view Mirror
can be changed between
optical mirror mode and dig-
ital mirror mode by operat-
ing the lever.
The Digital Rear-view Mirror
allows the driver to see the
rear view despite obstruc-
tions, such as the head
restraints or luggage,
ensuring rear visibility.
Also, the rear seats are not
displayed and privacy of the
passengers is enhanced.
WARNING
Observe the following precau-
tions.
Failure to do so may result in
death or serious injury.
■Before using the Digital Rear-
view Mirror
●Make sure to adjust the mirror
before driving. ( P.172)
• Change to optical mirror mode and adjust the position of the
Digital Rear-view Mirror so that
the area behind your vehicle
can be viewed properly.
Page 173 of 560
1733-4. Adjusting the steering wheel and mirrors
3
Before driving
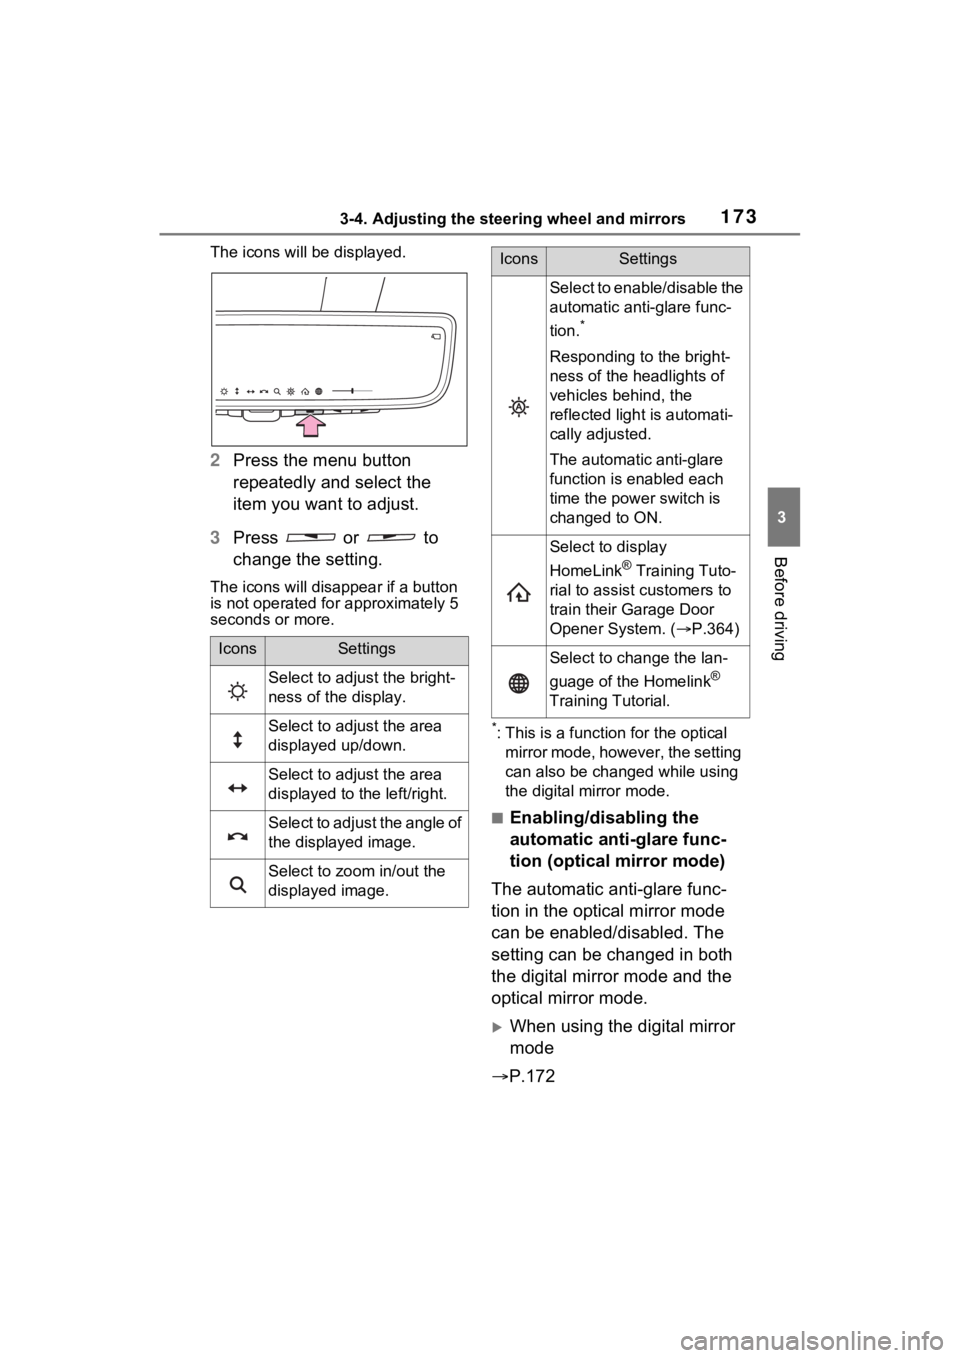
The icons will be displayed.
2Press the menu button
repeatedly and select the
item you want to adjust.
3 Press or to
change the setting.
The icons will disapp ear if a button
is not operated fo r approximately 5
seconds or more.
*: This is a functi on for the optical
mirror mode, however, the setting
can also be changed while using
the digital mirror mode.
■Enabling/disabling the
automatic anti-glare func-
tion (optical mirror mode)
The automatic anti-glare func-
tion in the optical mirror mode
can be enabled/disabled. The
setting can be changed in both
the digital mirror mode and the
optical mirror mode.
When using the digital mirror
mode
P.172
IconsSettings
Select to adjust the bright-
ness of the display.
Select to adjust the area
displayed up/down.
Select to adjust the area
displayed to the left/right.
Select to adjust the angle of
the displayed image.
Select to zoom in/out the
displayed image.
Select to enable/disable the
automatic anti-glare func-
tion.
*
Responding to the bright-
ness of the headlights of
vehicles behind, the
reflected light is automati-
cally adjusted.
The automatic anti-glare
function is enabled each
time the power switch is
changed to ON.
Select to display
HomeLink
® Training Tuto-
rial to assist customers to
train their Garage Door
Opener System. ( P.364)
Select to change the lan-
guage of the Homelink
®
Training Tutorial.
IconsSettings
Page 174 of 560
1743-4. Adjusting the steering wheel and mirrors
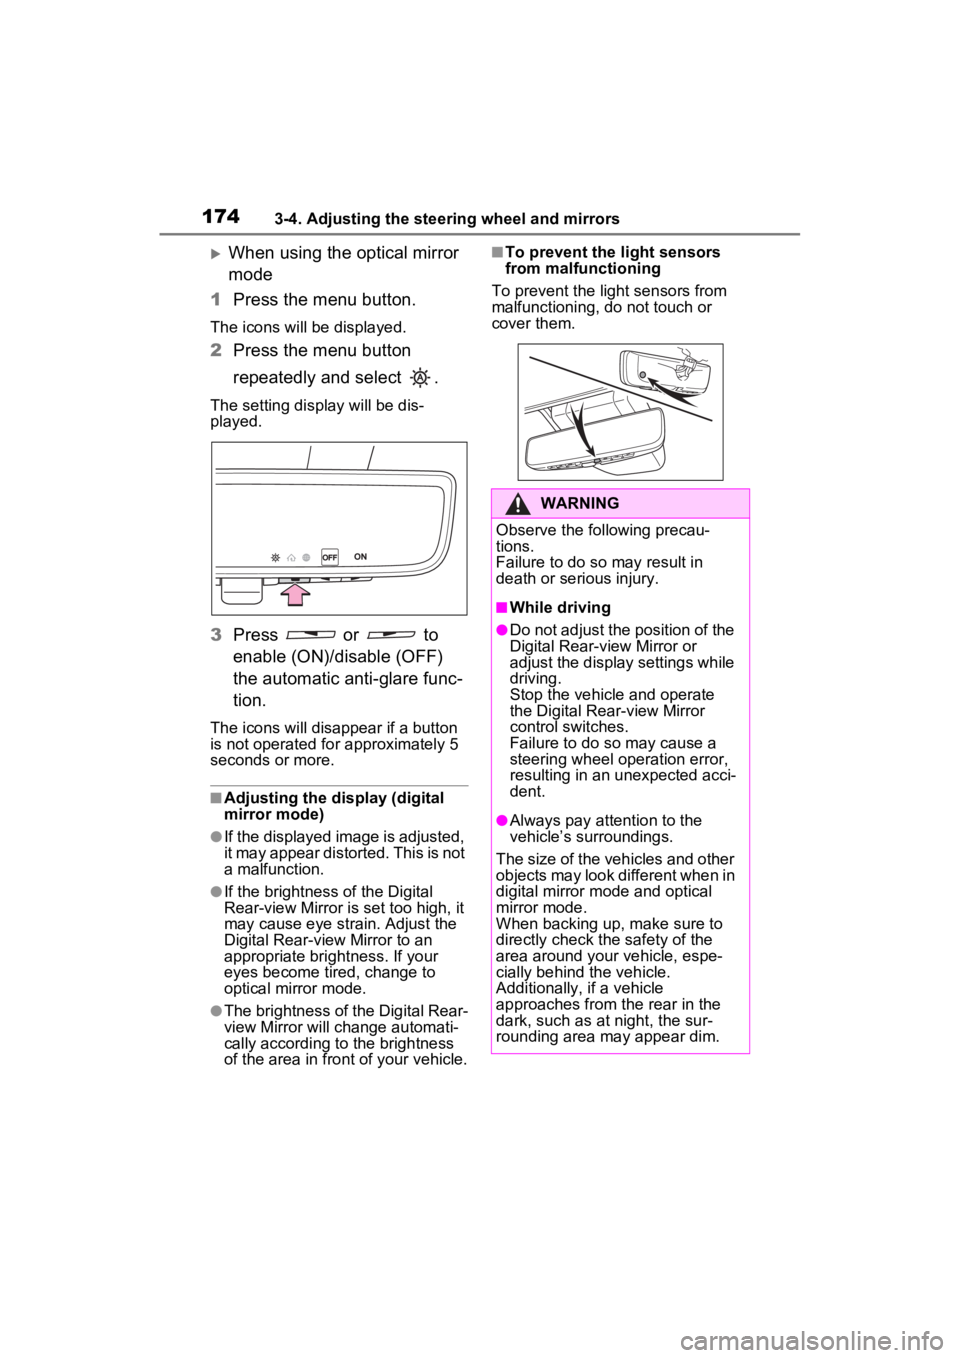
When using the optical mirror
mode
1 Press the menu button.
The icons will be displayed.
2Press the menu button
repeatedly and select .
The setting display will be dis-
played.
3Press or to
enable (ON)/disable (OFF)
the automatic anti-glare func-
tion.
The icons will disappear if a button
is not operated fo r approximately 5
seconds or more.
■Adjusting the display (digital
mirror mode)
●If the displayed image is adjusted,
it may appear distorted. This is not
a malfunction.
●If the brightness of the Digital
Rear-view Mirror is set too high, it
may cause eye strain. Adjust the
Digital Rear-view Mirror to an
appropriate brightness. If your
eyes become tired, change to
optical mirror mode.
●The brightness of the Digital Rear-
view Mirror will ch ange automati-
cally according to the brightness
of the area in front of your vehicle.
■To prevent the light sensors
from malfunctioning
To prevent the light sensors from
malfunctioning, do not touch or
cover them.
WARNING
Observe the following precau-
tions.
Failure to do so may result in
death or serious injury.
■While driving
●Do not adjust the position of the
Digital Rear-view Mirror or
adjust the display settings while
driving.
Stop the vehicle and operate
the Digital Rear-view Mirror
control switches.
Failure to do so may cause a
steering wheel operation error,
resulting in an unexpected acci-
dent.
●Always pay attention to the
vehicle’s surroundings.
The size of the vehicles and other
objects may look different when in
digital mirror mode and optical
mirror mode.
When backing up, make sure to
directly check the safety of the
area around your vehicle, espe-
cially behind the vehicle.
Additionally, if a vehicle
approaches from the rear in the
dark, such as at night, the sur-
rounding area may appear dim.
Page 184 of 560
1843-5. Opening, closing the windows
5Release the power window
switch for a m oment, resume
pushing the switch in the one-
touch opening direction, and
hold it there for a pproximately 4
seconds or more.
6 Pull and hold the power window
switch in the one-touch closing
direction again. After the side
window is completely closed,
continue holding the switch for a
further 1 second or more.
If you release the switch while the
side window is moving, start again
from the beginning.
If the side window reverses and
cannot be fully closed or opened,
have the vehicle inspected by your
Toyota dealer.
■Door lock linked power window
operation
●The power windows can be
opened and closed using the
mechanical key.
* ( P.467)
●The power windows can be
opened using the wireless remote
control.
* ( P.137)
●The alarm may be triggered if the
alarm is set and the power window
is closed using the door lock
linked power win dow operation
function. ( P.81)
*: These settings must be custom-
ized at your To yota dealer.
■Power window open reminder
function
A message is shown on the multi-
information display when the power
switch is turned to OFF and the
driver’s door is opened with the
power windows open.
■Customization
Settings (e.g. linked door lock oper-
ation) can be changed. (Customiz-
able features: P.509)
WARNING
Observe the following precau-
tions.
Failing to do so may result in
death or serious injury.
■Closing the power windows
●The driver is responsible for all
the power window operations,
including the operation for the
passengers. In order to prevent
accidental operation, especially
by a child, do not let a child
operate the power windows. It is
possible for children and other
passengers to have body parts
caught in the power window.
Also, when ridin g with a child, it
is recommended to use the win-
dow lock switch. ( P.185)
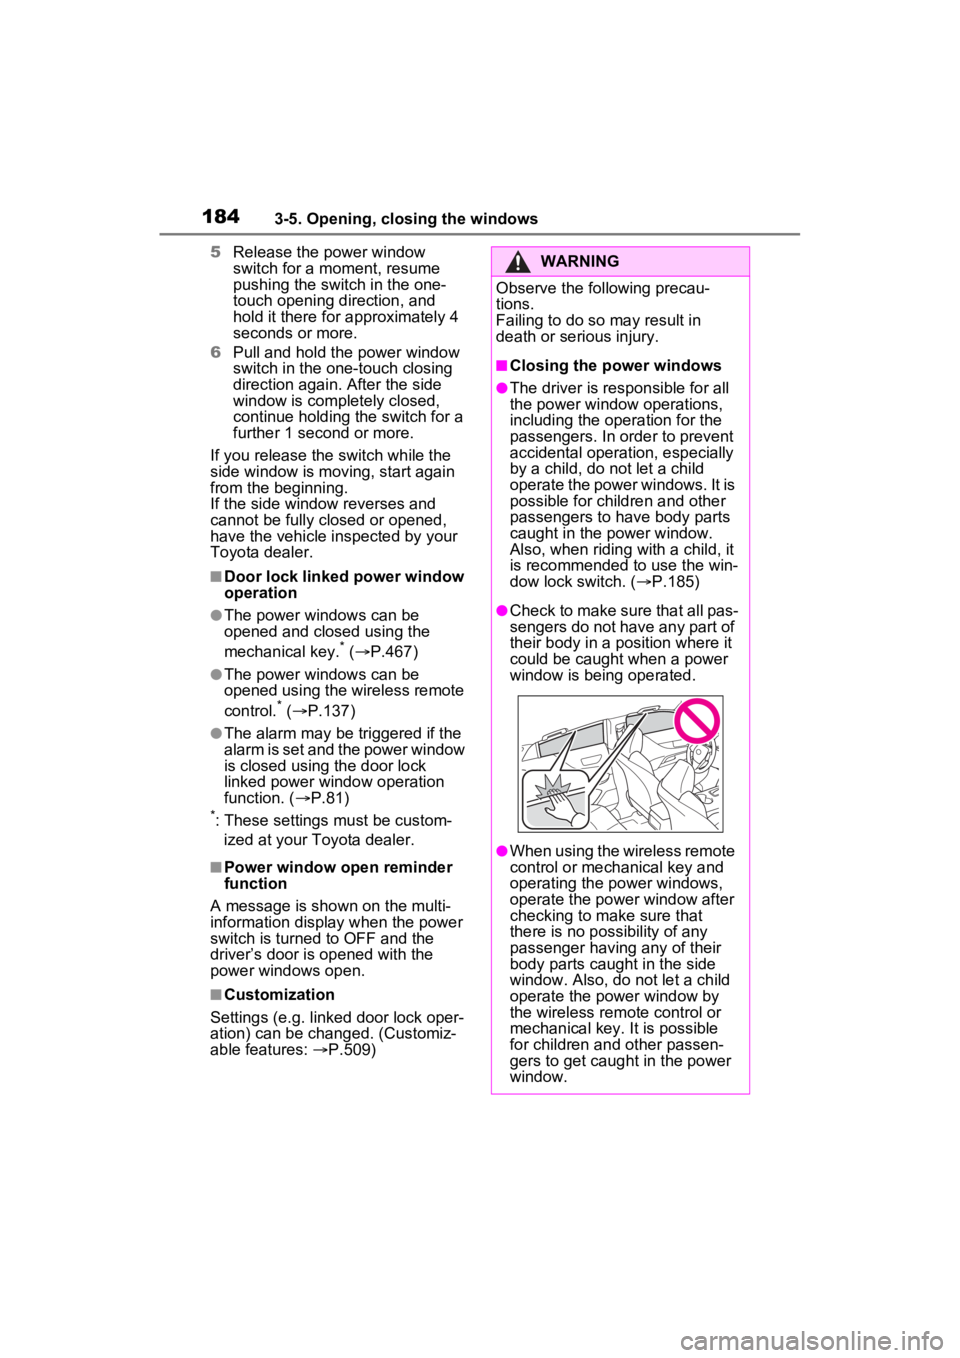
●Check to make sure that all pas-
sengers do not have any part of
their body in a position where it
could be caught when a power
window is being operated.
●When using the wireless remote
control or mechanical key and
operating the power windows,
operate the power window after
checking to make sure that
there is no possibility of any
passenger having any of their
body parts caught in the side
window. Also, do not let a child
operate the power window by
the wireless remote control or
mechanical key. It is possible
for children and other passen-
gers to get caught in the power
window.