2023 TOYOTA RAV4 PRIME climate control
[x] Cancel search: climate controlPage 132 of 662
1322-2. Charging
3Press or of the meter
control switches to select
“Charging Settings”, and then
press .
The “Charging Settings” screen will
be displayed.
4Press or of the meter
control switches to select
“Charging Schedule”, and
then press .
The “Charging Schedule” screen
will be displayed.
5Press or of the meter
control switches to select
“Scheduled Events”, and
then press .
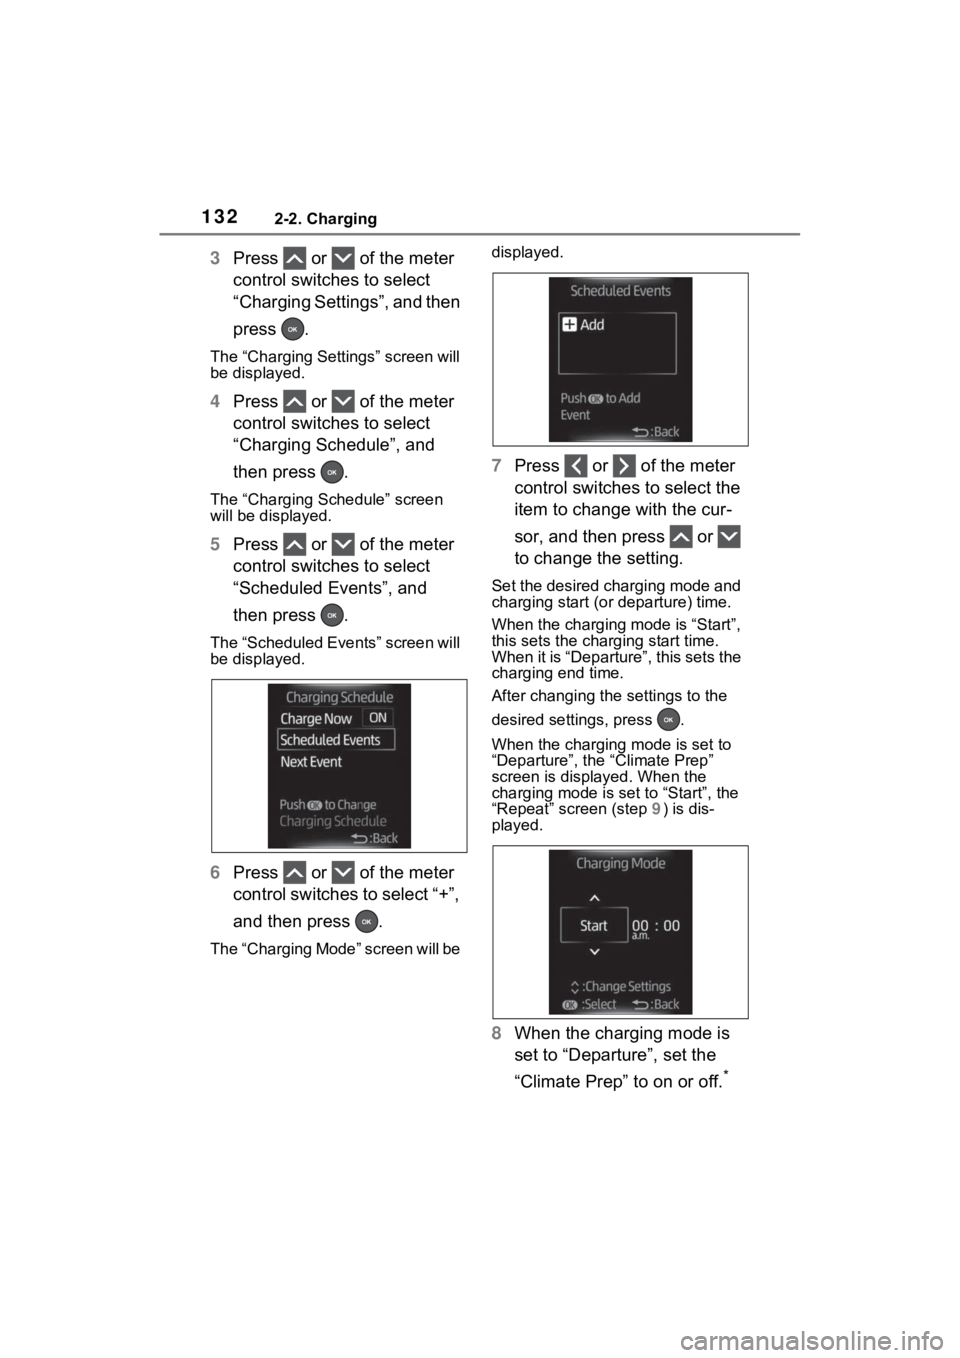
The “Scheduled Events” screen will
be displayed.
6Press or of the meter
control switches to select “+”,
and then press .
The “Charging Mode” screen will be displayed.
7
Press or of the meter
control switches to select the
item to change with the cur-
sor, and then press or
to change the setting.
Set the desired charging mode and
charging start (or departure) time.
When the charging mode is “Start”,
this sets the charging start time.
When it is “Departure”, this sets the
charging end time.
After changing the settings to the
desired settings, press .
When the charging mode is set to
“Departure”, the “Climate Prep”
screen is displayed. When the
charging mode is set to “Start”, the
“Repeat” screen (step 9) is dis-
played.
8 When the charging mode is
set to “Departure”, set the
“Climate Prep” to on or off.
*
Page 133 of 662
1332-2. Charging
2
Plug-in hybrid system
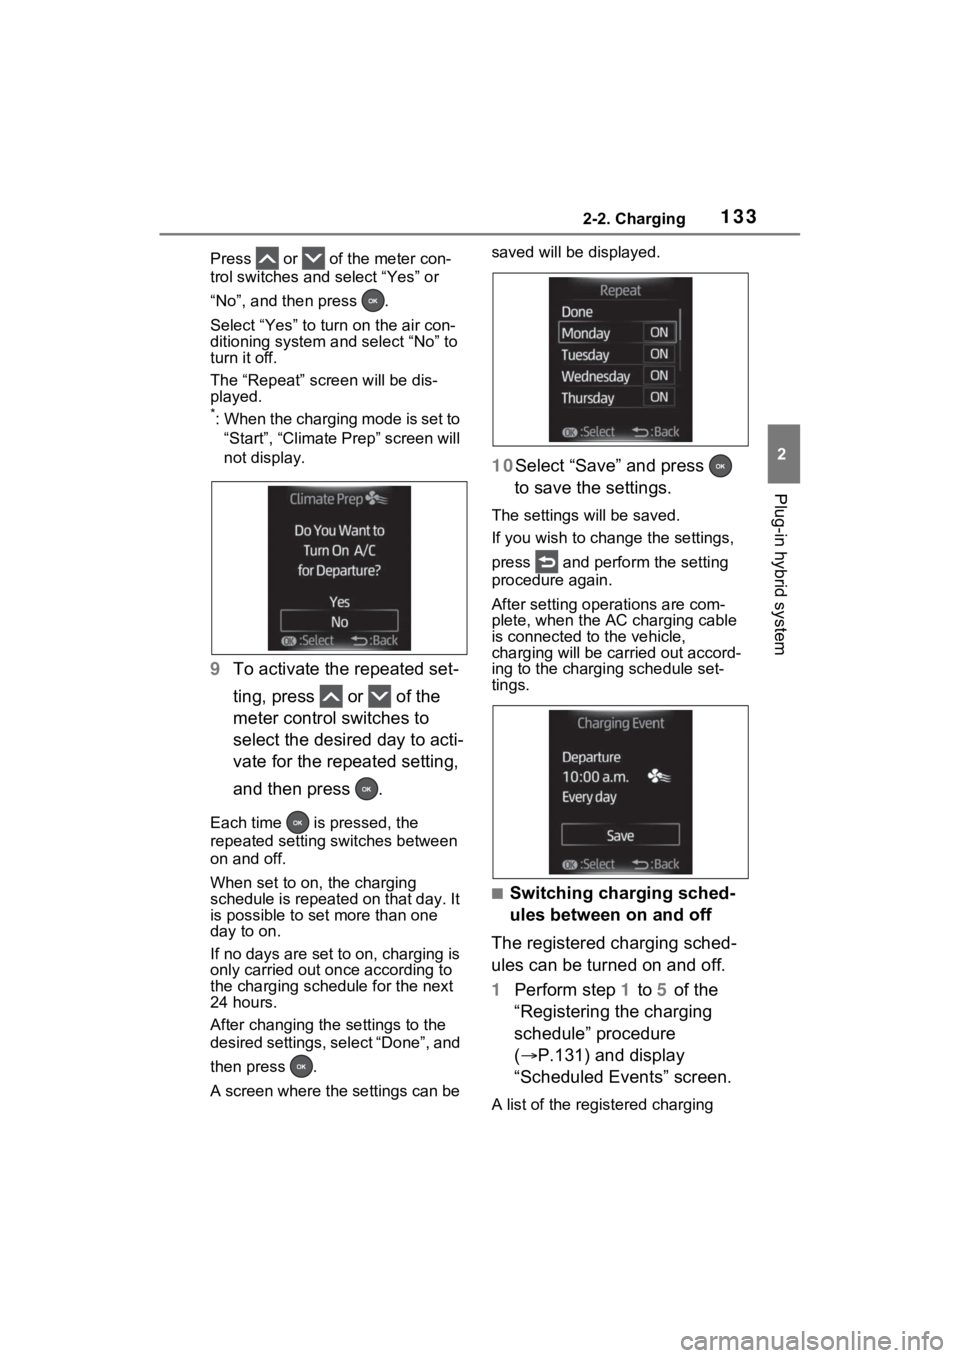
Press or of the meter con-
trol switches and select “Yes” or
“No”, and then press .
Select “Yes” to turn on the air con-
ditioning system and select “No” to
turn it off.
The “Repeat” screen will be dis-
played.
*: When the charging mode is set to
“Start”, “Climate Prep” screen will
not display.
9 To activate the repeated set-
ting, press or of the
meter control switches to
select the desired day to acti-
vate for the repeated setting,
and then press .
Each time is pressed, the
repeated setting switches between
on and off.
When set to on, the charging
schedule is repeated on that day. It
is possible to set more than one
day to on.
If no days are set to on, charging is
only carried out on ce according to
the charging sche dule for the next
24 hours.
After changing the settings to the
desired settings, select “Done”, and
then press .
A screen where the settings can be saved will be displayed.
10Select “Save” and press
to save the settings.
The settings will be saved.
If you wish to change the settings,
press and perform the setting
procedure again.
After setting ope rations are com-
plete, when the AC charging cable
is connected to the vehicle,
charging will be carried out accord-
ing to the charging schedule set-
tings.
■Switching charging sched-
ules between on and off
The registered charging sched-
ules can be turned on and off.
1 Perform step 1 to 5 of the
“Registering the charging
schedule” procedure
( P.131) and display
“Scheduled Events” screen.
A list of the registered charging
Page 138 of 662
1382-2. Charging
“ Vehicle Settings”. Then
press and hold .
4 Press or of the meter
control switches to select
“Charging Settings”, and then
press .
The “Charging Settings” screen will
be displayed.
5Press or of the meter
control switches to select
“Charging Schedule”, and
then press .
The “Charging Schedule” screen
will be displayed.
6Press or of the meter
control switches to select
“Scheduled Events”, and
then press .
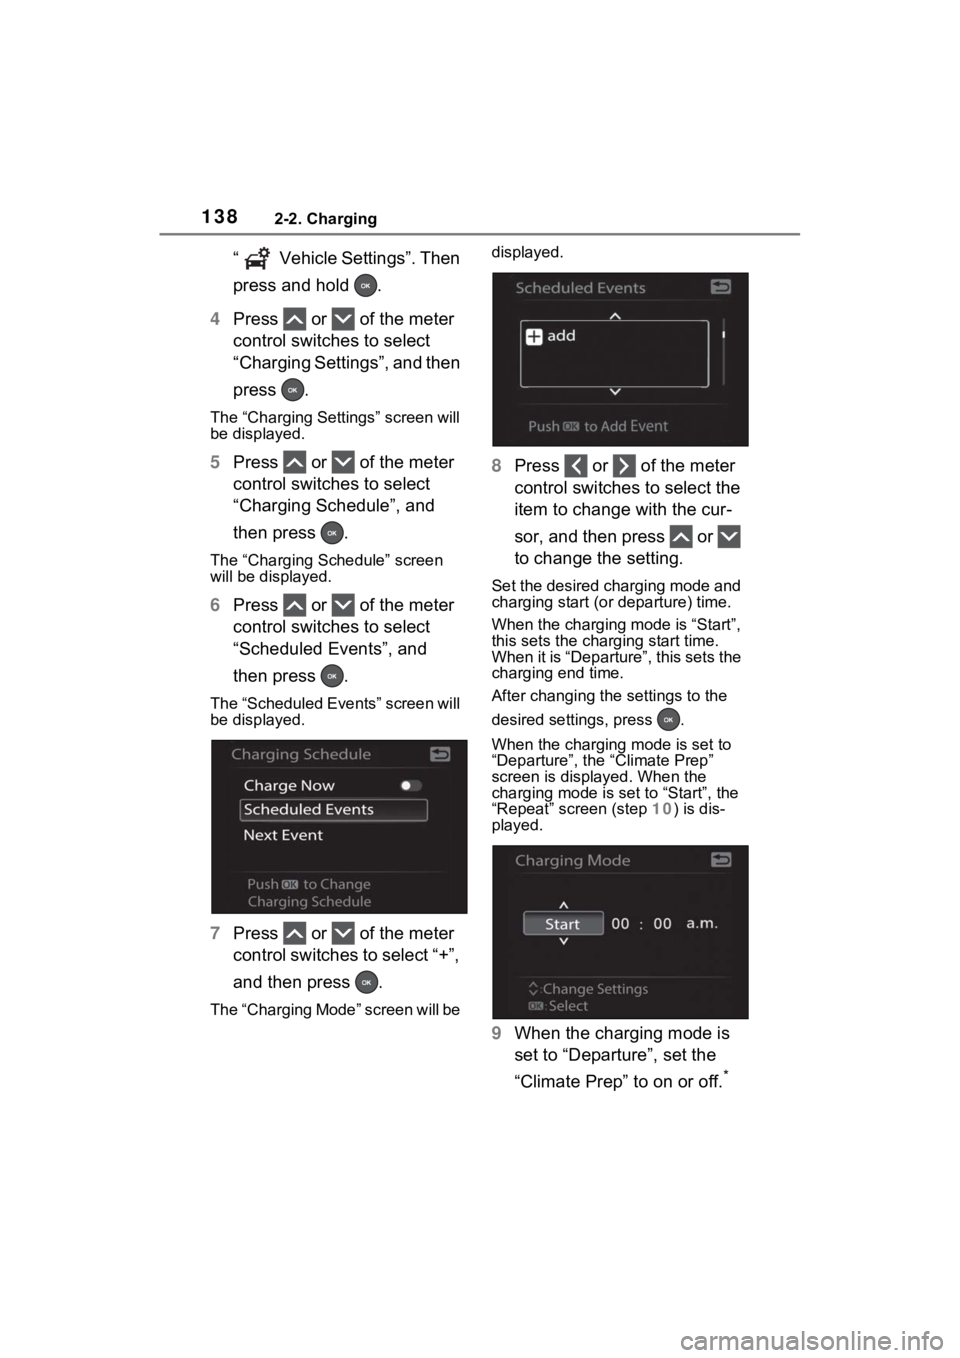
The “Scheduled Events” screen will
be displayed.
7Press or of the meter
control switches to select “+”,
and then press .
The “Charging Mode” screen will be displayed.
8
Press or of the meter
control switches to select the
item to change with the cur-
sor, and then press or
to change the setting.
Set the desired charging mode and
charging start (or departure) time.
When the charging mode is “Start”,
this sets the charging start time.
When it is “Departure”, this sets the
charging end time.
After changing the settings to the
desired settings, press .
When the charging mode is set to
“Departure”, the “Climate Prep”
screen is displayed. When the
charging mode is set to “Start”, the
“Repeat” screen (step 10) is dis-
played.
9 When the charging mode is
set to “Departure”, set the
“Climate Prep” to on or off.
*
Page 139 of 662
1392-2. Charging
2
Plug-in hybrid system
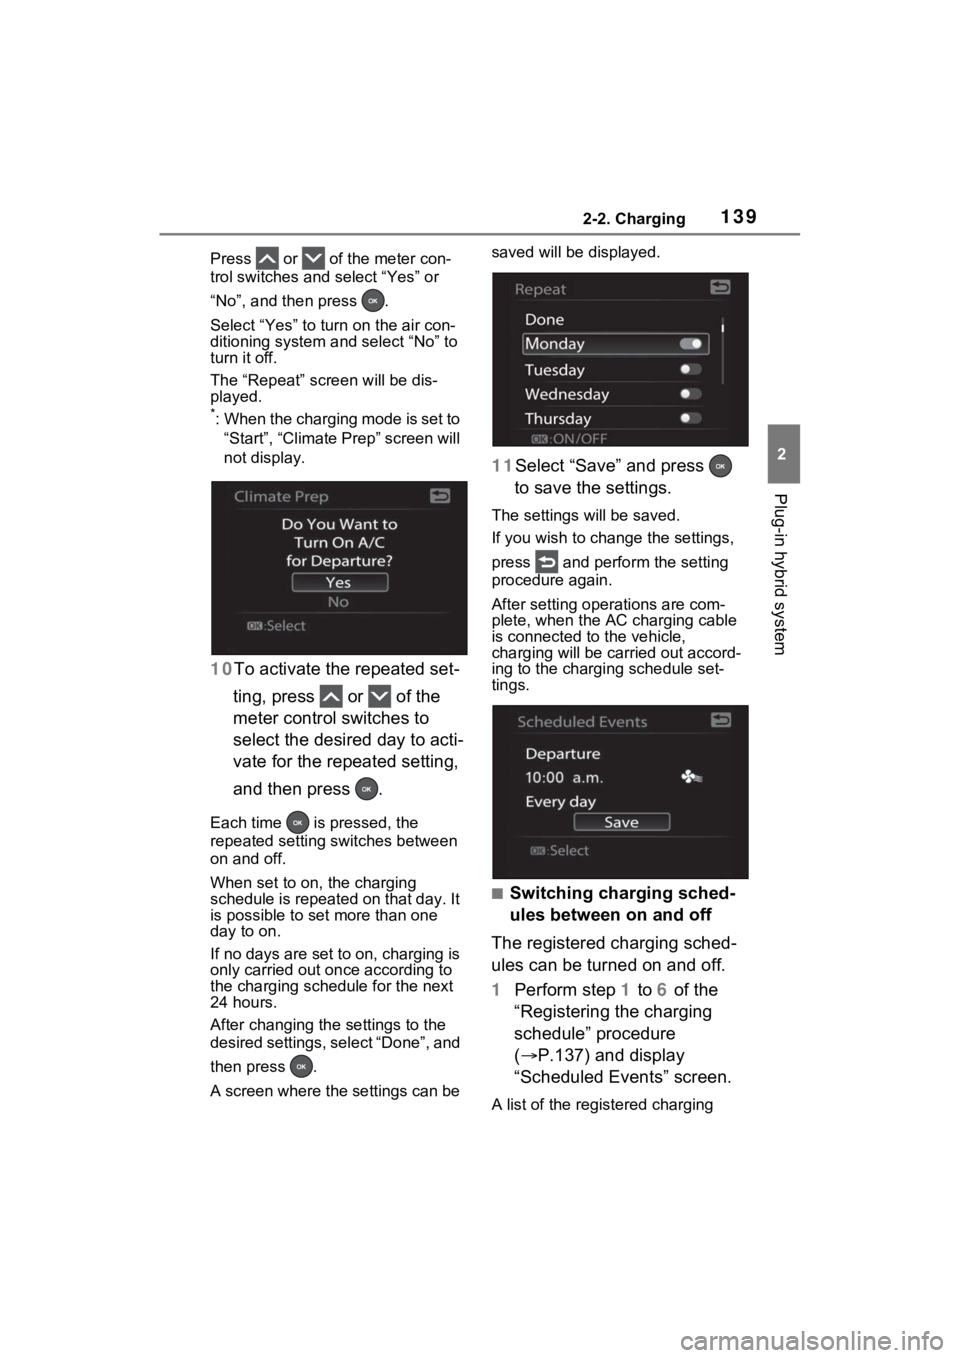
Press or of the meter con-
trol switches and select “Yes” or
“No”, and then press .
Select “Yes” to turn on the air con-
ditioning system and select “No” to
turn it off.
The “Repeat” screen will be dis-
played.
*: When the charging mode is set to
“Start”, “Climate Prep” screen will
not display.
10 To activate the repeated set-
ting, press or of the
meter control switches to
select the desired day to acti-
vate for the repeated setting,
and then press .
Each time is pressed, the
repeated setting switches between
on and off.
When set to on, the charging
schedule is repeated on that day. It
is possible to set more than one
day to on.
If no days are set to on, charging is
only carried out on ce according to
the charging sche dule for the next
24 hours.
After changing the settings to the
desired settings, select “Done”, and
then press .
A screen where the settings can be saved will be displayed.
11Select “Save” and press
to save the settings.
The settings will be saved.
If you wish to change the settings,
press and perform the setting
procedure again.
After setting ope rations are com-
plete, when the AC charging cable
is connected to the vehicle,
charging will be carried out accord-
ing to the charging schedule set-
tings.
■Switching charging sched-
ules between on and off
The registered charging sched-
ules can be turned on and off.
1 Perform step 1 to 6 of the
“Registering the charging
schedule” procedure
( P.137) and display
“Scheduled Events” screen.
A list of the registered charging
Page 412 of 662
4145-6. Driving tips
Perform the following according
to the driving conditions:
Do not try to forcibly open a
window or move a wiper that
is frozen. Pour warm water
over the frozen area to melt
the ice. Wipe away the water
immediately to prevent it from
freezing.
To ensure proper operation of
the climate control system
fan, remove any snow that
has accumulated on the air
inlet vents in front of the wind-
shield.
Check for and remove any
excess ice or snow that may
have accumulated on the
exterior lights, outside rear
view mirrors, windows, vehi-
cle’s roof, chassis, around the
tires or on the brakes.
Remove any snow or mud
from the bottom of your shoes
before getting in the vehicle. Accelerate the vehicle slowly,
keep a safe distance between
you and the vehicle ahead, and
drive at a reduced speed suit-
able to road conditions.
Turn automatic mode of the
parking brake off.
Otherwise, the parking brake
may freeze and not be able to
be released automatically.
Also, avoid using the following as
the parking brake may operate
automatically, even if automatic
mode is off.
• Brake hold system
Park the vehicle and shift the
shift lever to P without setting
the parking brake. The park-
ing brake may freeze up, pre-
venting it from being released.
If the vehicle is parked without
setting the parking brake,
make sure to block the
wheels. Failure to do so may
be dangerous because it may
cause the vehicle to move
unexpectedly, possibly lead-
ing to an accident.
When the parking brake is in
automatic mode, release the
parking brake after shifting
the shift lever to P. ( P.316)
If the vehicle is parked without
setting the parking brake,
NOTICE
■Repairing or replacing snow
tires (vehicles with tire pres-
sure warning system)
Request repairs or replacement of
snow tires from your Toyota
dealer or legitimate tire retailers.
This is because the removal and
attachment of snow tires affects
the operation of the tire pressure
warning valves and transmitters.
Before driving the vehicle
When driving the vehicle
When parking the vehicle
Page 590 of 662
5929-1. Specifications
Bead
Sidewall
Shoulder
Tread
Belt
Inner liner
Reinforcing rubber
Carcass
Rim lines
Bead wires
Chafer
This information has been pre-
pared in accordance with regu-
lations issued by the National
Highway Traffic Safety Adminis-
tration of the U.S. Department of
Transportation.
It provides the purchasers
and/or prospective purchasers
of Toyota vehicles with informa-
tion on uniform tire quality grad-
ing.
Your Toyota dealer will help answer
any questions you may have as you
read this information.
■DOT quality grades
All passenger vehicle tires must
conform to Federal Safety
Requirements in addition to
these grades. Quality grades
can be found where applicable on the tire sidewall between
tread shoulder and maximum
section width.
For example: Treadwear 200 Trac-
tion AA Temperature A
■Treadwear
The treadwear grade is a com-
parative rating based on the
wear rate of the tire when tested
under controlled conditions on a
specified government test
course.
For example, a tire graded 150
would wear one and a half (1 - 1/2)
times as well on the government
course as a tire graded 100.
The relative performance of tires
depends upon the ac tual conditions
of their use. Performance may dif-
fer significantly from the norm due
to variations in dri ving habits, ser-
vice practices and differences in
road characteristics and climate.
■Traction AA, A, B, C
The traction grades, from high-
est to lowest, are AA, A, B and
C, and they represent the tire’s
ability to stop on wet pavement
as measured under controlled
conditions on specified govern-
ment test surfaces of asphalt
and concrete.
A tire marked C may have poor
traction performance.
Warning: The traction grade
assigned to this tire is based on
braking (straight ahead) traction
tests and does not include corner-
ing (turning) traction.
Uniform Tire Quality
Grading
A
B
C
D
E
F
G
H
I
J
K