2023 TOYOTA RAV4 HYBRID brake light
[x] Cancel search: brake lightPage 3 of 586

3TABLE OF CONTENTS
1
2
3
4
5
6
7
8
9
Panoramic moon roof....189
4-1. Before driving Driving the vehicle......... 195
Cargo and luggage ....... 202
Vehicle load limits ......... 205
Trailer towing ................ 206
Dinghy towing ............... 216
4-2. Driving procedures Power (ignition) switch (vehi-cles without smart key sys-
tem) ............................. 217
Power (ignition) switch (vehi- cles with smart key system).................................... 219
EV drive mode .............. 224
Hybrid transmission ...... 226
Turn signal lever ........... 230
Parking brake ................ 231
Brake Hold .................... 235
4-3. Operating the lights and wipers
Headlight switch ............ 237
AHB (Automatic High Beam) .................................... 240
Fog light switch ............. 244
Windshield wipers and washer......................... 244
Rear window wiper and washer......................... 247
4-4. Refueling Opening the fuel tank cap.................................... 2494-5. Using the driving support
systems
Toyota Safety Sense 2.5 252
PCS (Pre-Collision System) .................................... 257
LTA (Lane Tracing Assist) .................................... 268
RSA (Road Sign Assist) 279
Dynamic radar cruise control with full-speed range ... 282
BSM (Blind Spot Monitor) .................................... 293
Intuitive parking assist ... 298
RCTA (Rear Cross Traffic Alert) function .............. 307
PKSB (Parking Support Brake) .......................... 312
Parking Support Brake func- tion (static objects) ...... 318
Parking Support Brake func- tion (rear-crossing vehicles)
.................................... 321
Driving mode s elect switch
.................................... 323
Trail Mode (AWD vehicles) .................................... 324
Driving assist systems ... 326
4-6. Driving tips Hybrid Electric Vehicle driv-ing tips ......................... 332
Winter driving tips .......... 334
Utility vehicle precautions .... ...
............................. 337
4Driving
Page 35 of 586

351-1. For safe use
1
For safety and security
Front passenger occupant classification system (ECU and sen-
sors)
Knee airbag
SRS warning light
Airbag sensor assembly
Your vehicle is equipped with ADVANCED AIRBAGS designed
based on the US motor vehicle safety standards (FMVSS208). The
airbag sensor assembly (ECU) cont rols airbag deployment based on
information obtained from the sensors etc. shown in the system
components diagram above. This in formation includes crash sever-
ity and occupant information. As the airbags deploy, a chemical
reaction in the inflators quickly fills the airbags with non-toxic gas to
help restrain the motion of the occupants.
■If the SRS airbags deploy
(inflate)
●Slight abrasions, burns, bruising
etc., may be sustained from SRS
airbags, due to the extremely high
speed deployment (inflation) by
hot gases.
●A loud noise and white powder will
be emitted.
●Parts of the airbag module (steer-
ing wheel hub, airbag cover and
inflator) as well as the front seats,
parts of the front and rear pillars,
and roof side rails, may be hot for
several minutes. T he airbag itself
may also be hot.
●The windshield may crack.
●The hybrid system will be stopped
and fuel supply to the engine will
be stopped. ( P.79)
●The brakes and st op lights will be
controlled automatically.
( P.327)
●The interior lights will turn on auto-
matically. ( P.352)
●The emergency flashers will turn
on automatically. ( P.448)
●For Safety Connect subscribers, if
any of the followin g situations occur, the system is designed to
send an emergency call to the
response center, notifying them of
the vehicle’s location (without
needing to push the “SOS” button)
and an agent will attempt to speak
with the occupants to ascertain
the level of emergency and assis-
tance required. If the occupants
are unable to communicate, the
agent automatically treats the call
as an emergency and helps to dis-
patch the necessary emergency
services. (
P.65)
• An SRS airbag is deployed.
• A seat belt pretensioner is acti- vated.
• The vehicle is involved in a severe rear-end collision.
■SRS airbag deployment condi-
tions (SRS front airbags)
●The SRS front airbags will deploy
in the event of an impact that
exceeds the set threshold level
(the level of forc e corresponding
to an approximately 12 - 18 mph
[20 - 30 km/h] frontal collision with
a fixed wall that does not move or
deform).
However, this threshold velocity will
be considerably higher in the follow-
ing situations:
N
O
P
Q
Page 76 of 586
761-4. Hybrid system
■Running out of fuel
When the vehicle has run out of fuel
and the hybrid system cannot be
started, refuel th e vehicle with at
least enough gasoline to make the
low fuel level warning light ( P.462)
go off. If there is only a small
amount of fuel, th e hybrid system
may not be able to start. (The stan-
dard amount of fuel is about 2.3 gal.
[8.8 L, 1.9 Imp.gal.], when the vehi-
cle is on a level su rface. This value
may vary when the vehicle is on a
slope. Add extra fuel when the vehi-
cle is inclined.)
■Electromagnetic waves
●High voltage parts and cables on
Hybrid Electric Vehicles incorpo-
rate electromagnetic shielding,
and therefore emi t approximately
the same amount of electromag-
netic waves as conventional gaso-
line powered vehicles or home
electronic appliances.
●Your vehicle may cause sound
interference in so me third party-
produced radio parts.
■Hybrid battery (tr action battery)
The hybrid battery (traction battery)
has a limited service life. The lifes-
pan of the hybrid battery (traction
battery) can change in accordance
with driving style and driving condi-
tions.
■Starting the hybrid system in an
extremely cold environment
When the hybrid battery (traction
battery) is extremely cold (below
approximately -22°F [-30°C]) under
the influence of t he outside tem-
perature, it may no t be possible to
start the hybrid system. In this case,
try to start the hybrid system again
after the temperature of the hybrid
battery increases due to the outside
temperature increase etc.
WARNING
■High voltage precautions
This vehicle has high voltage DC
and AC systems as well as a 12-
volt system. DC and AC high volt-
age is very dangerous and can
cause severe burns and electric
shock that may result in death or
serious injury.
●Never touch, disassemble,
remove or replace the high volt-
age parts, cables or their con-
nectors.
●The hybrid system will become
hot after starting as the system
uses high voltage. Be careful of
both the high voltage and the
high temperature, and always
obey the warning labels
attached to the vehicle.
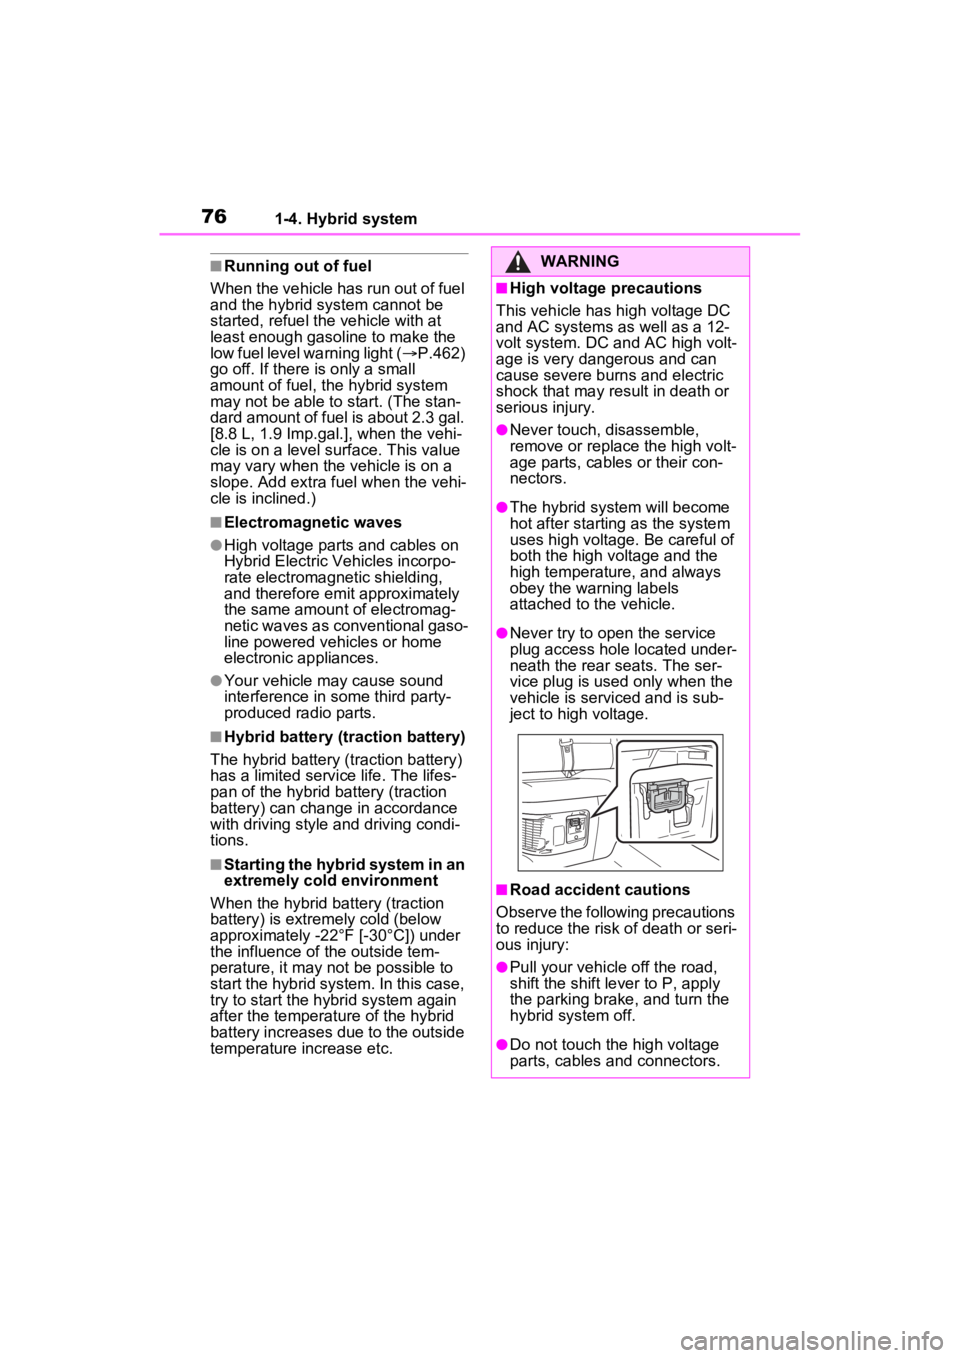
●Never try to open the service
plug access hole located under-
neath the rear seats. The ser-
vice plug is used only when the
vehicle is serviced and is sub-
ject to high voltage.
■Road accident cautions
Observe the following precautions
to reduce the risk of death or seri-
ous injury:
●Pull your vehicle off the road,
shift the shift le ver to P, apply
the parking brake, and turn the
hybrid system off.
●Do not touch the high voltage
parts, cables and connectors.
Page 88 of 586
882-1. Instrument cluster
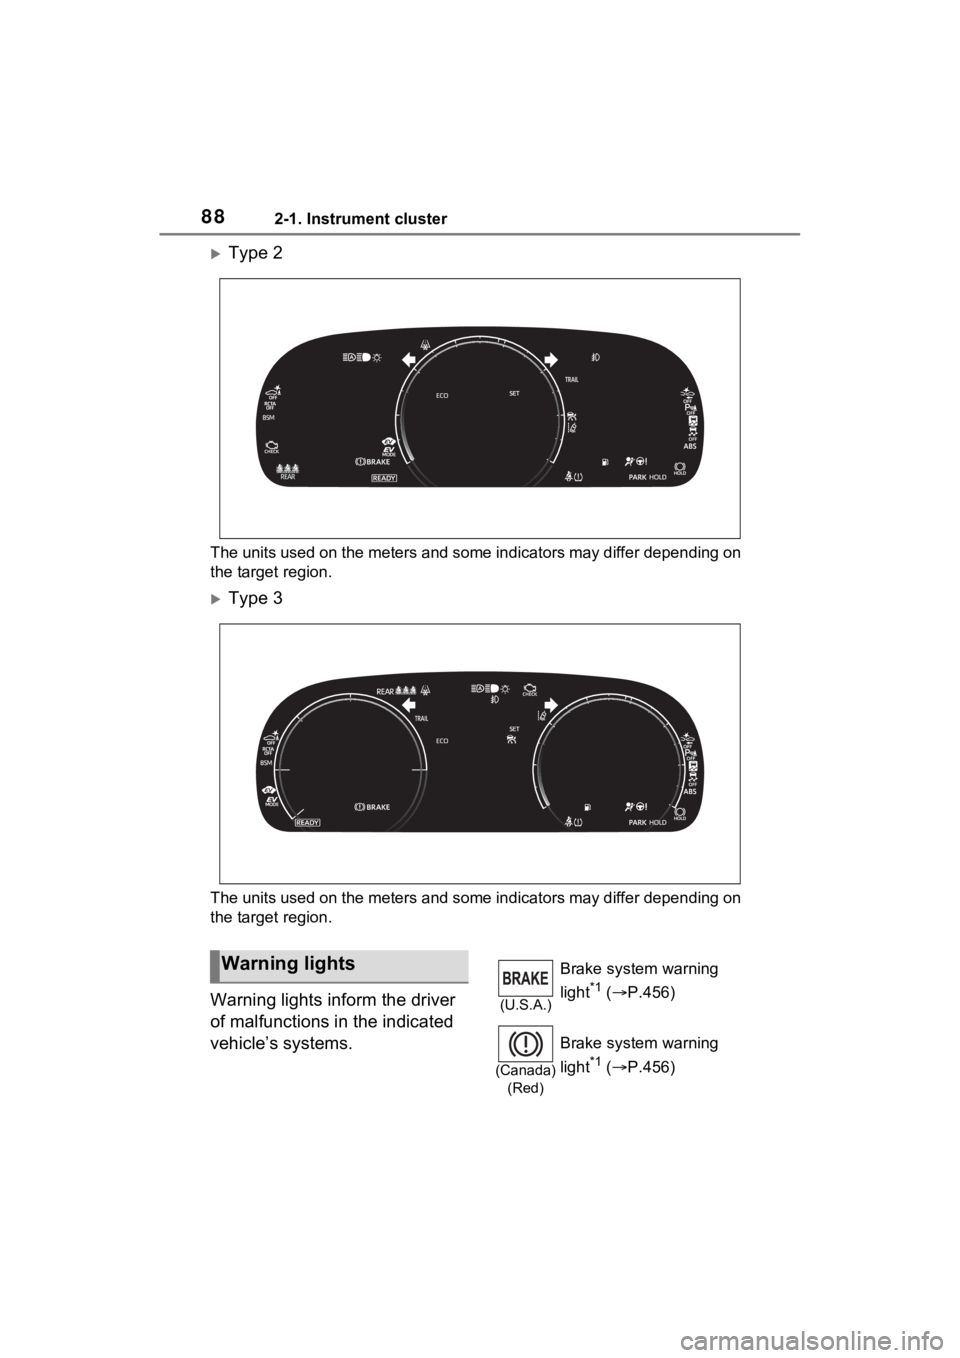
Type 2
The units used on the meters and some indicators may differ depending on
the target region.
Type 3
The units used on the meters and some indicators may differ dep ending on
the target region.
Warning lights inform the driver
of malfunctions in the indicated
vehicle’s systems.
Warning lights
(U.S.A.)
Brake system warning
light
*1 ( P.456)
(Canada)
(Red)
Brake system warning
light
*1 ( P.456)
Page 89 of 586
892-1. Instrument cluster
2
Vehicle status information and indicators
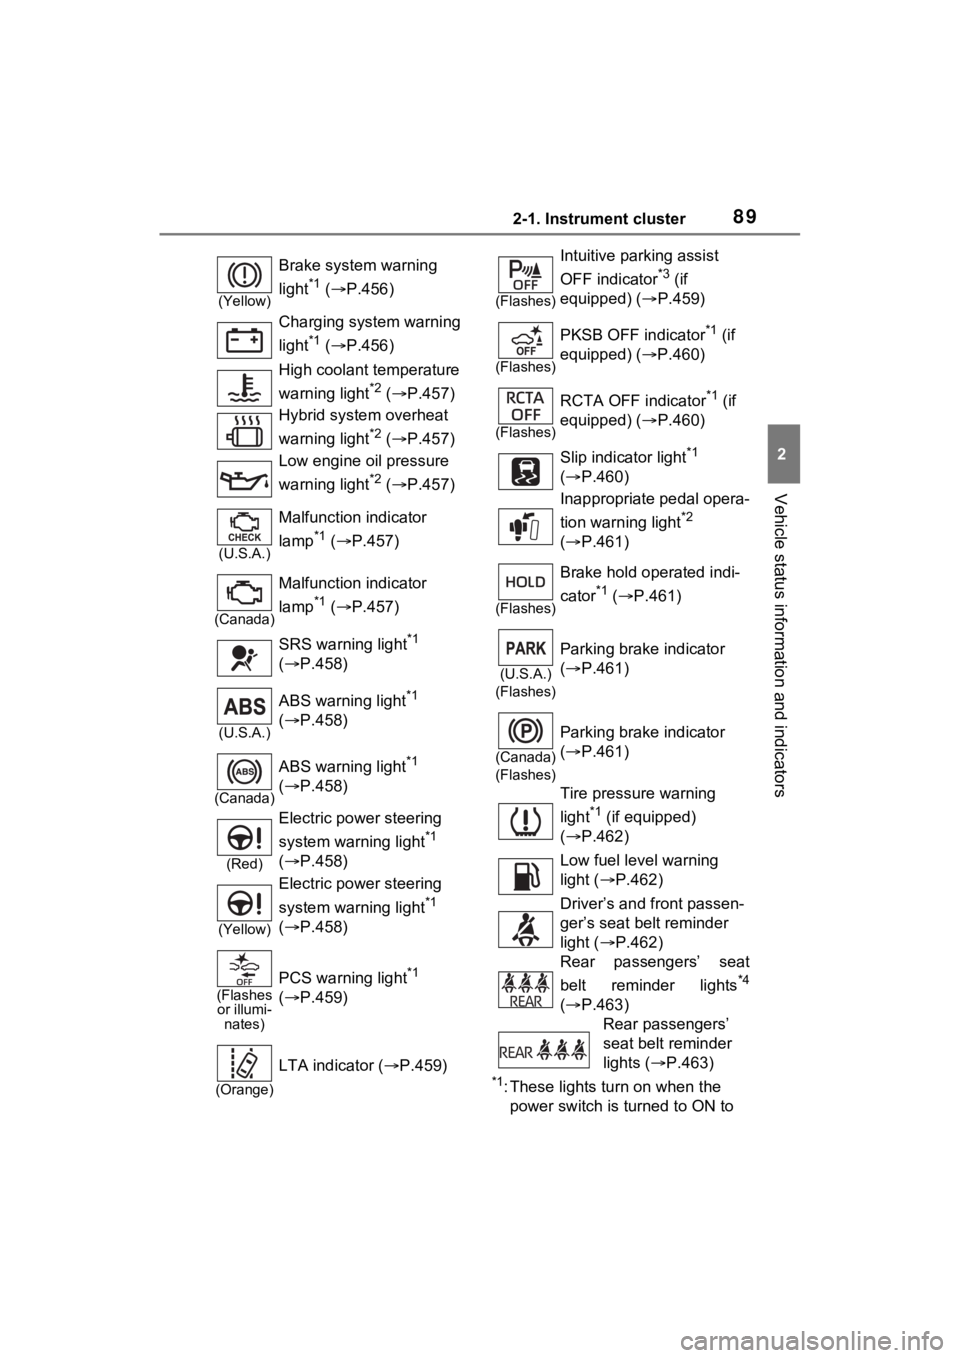
*1: These lights turn on when the
power switch is turned to ON to
(Yellow)
Brake system warning
light
*1 ( P.456)
Charging system warning
light
*1 ( P.456)
High coolant temperature
warning light
*2 ( P.457)
Hybrid system overheat
warning light
*2 ( P.457)
Low engine oil pressure
warning light
*2 ( P.457)
(U.S.A.)
Malfunction indicator
lamp
*1 ( P.457)
(Canada)
Malfunction indicator
lamp
*1 ( P.457)
SRS warning light
*1
( P.458)
(U.S.A.)
ABS warning light*1
( P.458)
(Canada)
ABS warning light*1
( P.458)
(Red)
Electric power steering
system warning light
*1
( P.458)
(Yellow)
Electric power steering
system warning light
*1
( P.458)
(Flashes
or illumi- nates)
PCS warning light*1
( P.459)
(Orange)
LTA indicator ( P.459)
(Flashes)
Intuitive parking assist
OFF indicator
*3 (if
equipped) ( P.459)
(Flashes)
PKSB OFF indicator*1 (if
equipped) ( P.460)
(Flashes)
RCTA OFF indicator*1 (if
equipped) ( P.460)
Slip indicator light
*1
( P.460)
Inappropriate pedal opera-
tion warning light
*2
( P.461)
(Flashes)
Brake hold operated indi-
cator
*1 ( P.461)
(U.S.A.)
(Flashes)
Parking brake indicator
( P.461)
(Canada)
(Flashes)
Parking brake indicator
( P.461)
Tire pressure warning
light
*1 (if equipped)
( P.462)
Low fuel level warning
light ( P.462)
Driver’s and front passen-
ger’s seat belt reminder
light ( P.462)
Rear passengers’ seat
belt reminder lights
*4
( P.463)
Rear passengers’
seat belt reminder
lights ( P.463)
Page 91 of 586
912-1. Instrument cluster
2
Vehicle status information and indicators
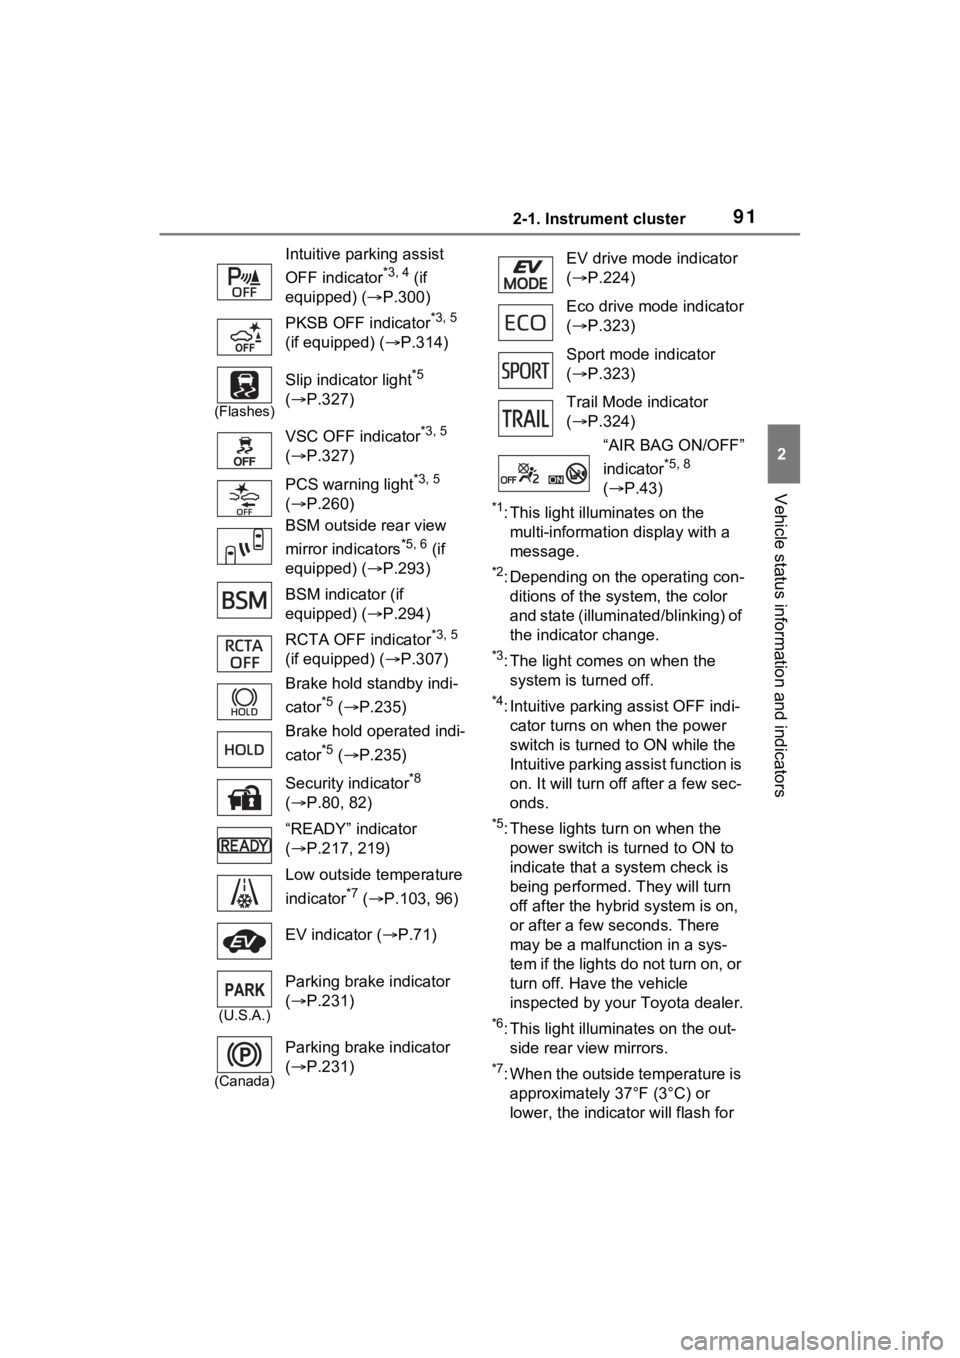
*1: This light illuminates on the multi-information display with a
message.
*2: Depending on the operating con-ditions of the system, the color
and state (illuminat ed/blinking) of
the indicator change.
*3: The light comes on when the system is turned off.
*4: Intuitive parking assist OFF indi-cator turns on wh en the power
switch is turned t o ON while the
Intuitive parking assist function is
on. It will turn off after a few sec-
onds.
*5: These lights tu rn on when the
power switch is turned to ON to
indicate that a system check is
being performed. They will turn
off after the hybrid system is on,
or after a few seconds. There
may be a malfunction in a sys-
tem if the lights do not turn on, or
turn off. Have the vehicle
inspected by your Toyota dealer.
*6: This light illuminates on the out- side rear view mirrors.
*7: When the outside temperature is approximately 37°F (3°C) or
lower, the indicator will flash for
Intuitive parking assist
OFF indicator
*3, 4 (if
equipped) ( P.300)
PKSB OFF indicator
*3, 5
(if equipped) ( P.314)
(Flashes)
Slip indicator light*5
( P.327)
VSC OFF indicator
*3, 5
( P.327)
PCS warning light
*3, 5
( P.260)
BSM outside rear view
mirror indicators
*5, 6 (if
equipped) ( P.293)
BSM indicator (if
equipped) ( P.294)
RCTA OFF indicator
*3, 5
(if equipped) ( P.307)
Brake hold standby indi-
cator
*5 ( P.235)
Brake hold operated indi-
cator
*5 ( P.235)
Security indicator
*8
( P.80, 82)
“READY” indicator
( P.217, 219)
Low outside temperature
indicator
*7 ( P.103, 96)
EV indicator ( P.71)
(U.S.A.)
Parking brake indicator
( P.231)
(Canada)
Parking brake indicator
( P.231)
EV drive mode indicator
( P.224)
Eco drive mode indicator
( P.323)
Sport mode indicator
( P.323)
Trail Mode indicator
( P.324)
“AIR BAG ON/OFF”
indicator
*5, 8
( P.43)
Page 150 of 586

1483-2. Opening, closing and locking the doors
bumper while the back door is
opening/closing, the back door will
stop moving.
If a foot is moved under the rear
bumper again during the halted
operation, the back door will per-
form the reverse operation.
■Luggage compartment light
●The luggage compartment light
turns on when the back door is
opened.
●When the power switch is turned
to OFF, the light will go off auto-
matically after 20 minutes.
■Back door closer
In the event that the back door is left
slightly open, the back door closer
will automatically close it to the fully
closed position.
Whatever the state of the power
switch, the back door closer oper-
ates.
■Power back door operating con-
ditions
The power back door can automati-
cally open and close under the fol-
lowing conditions:
●When the power back door sys-
tem is enabled. ( P.110)
●When the power switch is in ON,
in addition to the above for the
opening operations, the back door
operates for any of the following
conditions:
• Parking brake is engaged
• The brake pedal is depressed
• The shift lever is in P.
■Operation of the power back
door
●A buzzer sounds and the emer-
gency flashers flash twice to indi-
cate that the back door is
opening/closing.
●When the power back door sys-
tem is disabled, the power back
door does not ope rate but it can
be opened and closed by hand.
●When the power back door auto-
matically opens, if an abnormality
due to people or objects is
detected, operation will stop.
■Jam protection function
Sensors are equipped on both sides
of the power back door. If anything
obstructs the power back door while
it is closing, the back door will auto-
matically operate in the opposite
direction or stop.
■Fall-down protection function
While the power back door is open-
ing automatically, applying exces-
sive force to it will stop the opening
operation to prevent the power back
door from suddenly shutting.
■Back door closing assist
If the back door is lowered manually
when the back door is stopped at an
open position, the back door will
fully close automatically.
■Back door reserve lock function
This function is a function which
reserves locking of all doors, before-
hand, when the power back door is
open.
When the following procedure is
performed, all the doors except the
power back door are locked and
then power back door will also be
locked at the same time it is closed.
1 Close all doors, except the back
door.
2 During the power back door clos-
ing operation, lock the doors
using the smart key system from
the side doors ( P.135) or the
wireless remote control.
( P.135)
Page 165 of 586
1633-3. Adjusting the seats
3
Before driving
*: If equipped
■Recording procedure
1 Check that the shift lever is in
P.
2 Turn the power switch to ON.
3 Adjust the driver’s seat to the
desired positions.
4 While pressing the “SET” but-
ton, or within 3 seconds after
the “SET” button is pressed,
press button “1” or “2” until
the buzzer sounds.
If the selected button has already
been preset, the previously
recorded positio n will be overwrit-
WARNING
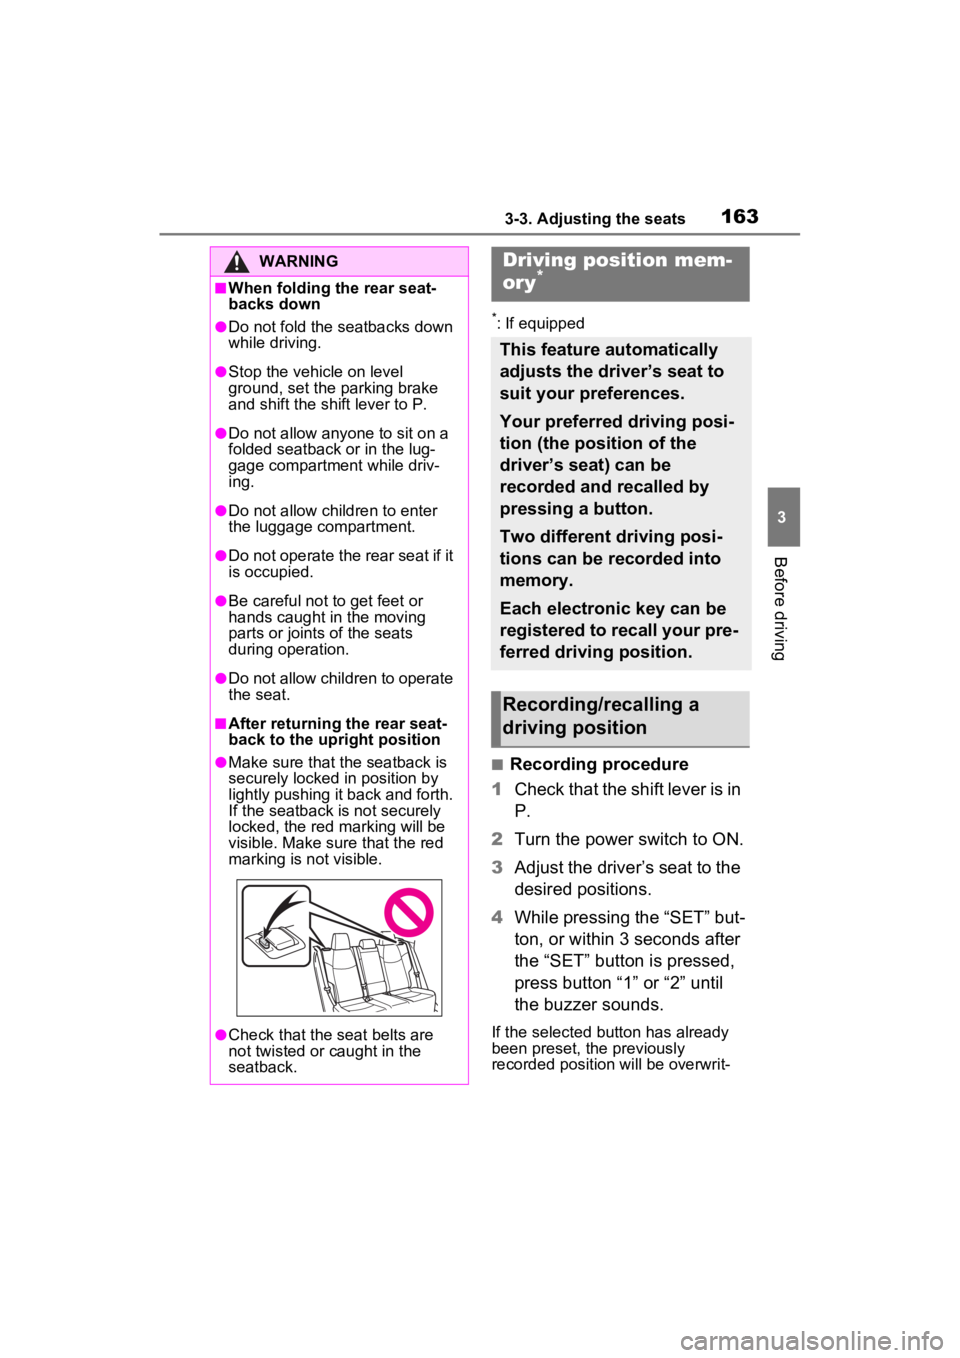
■When folding the rear seat-
backs down
●Do not fold the seatbacks down
while driving.
●Stop the vehicle on level
ground, set the parking brake
and shift the shift lever to P.
●Do not allow anyo ne to sit on a
folded seatback or in the lug-
gage compartment while driv-
ing.
●Do not allow child ren to enter
the luggage compartment.
●Do not operate the rear seat if it
is occupied.
●Be careful not to get feet or
hands caught in the moving
parts or joints of the seats
during operation.
●Do not allow children to operate
the seat.
■After returning the rear seat-
back to the upright position
●Make sure that the seatback is
securely locked in position by
lightly pushing it back and forth.
If the seatback is not securely
locked, the red marking will be
visible. Make sure that the red
marking is not visible.
●Check that the seat belts are
not twisted or caught in the
seatback.
Driving position mem-
ory*
This feature automatically
adjusts the driver’s seat to
suit your preferences.
Your preferred driving posi-
tion (the position of the
driver’s seat) can be
recorded and recalled by
pressing a button.
Two different driving posi-
tions can be recorded into
memory.
Each electronic key can be
registered to recall your pre-
ferred driving position.
Recording/recalling a
driving position