2023 TOYOTA RAV4 HYBRID light
[x] Cancel search: lightPage 420 of 586
4186-3. Do-it-yourself maintenance
4Press or of the meter
control switches and select
“TPWS”, and then press .
5 Press or of the meter
control switches and select
“Change Wheel”. Then press
and hold until the tire
pressure warning light starts
slowly blinking 3 times.
The change wheel set mode is acti-
vated and registration is started.
Then a message w ill be displayed
on the multi-info rmation display.
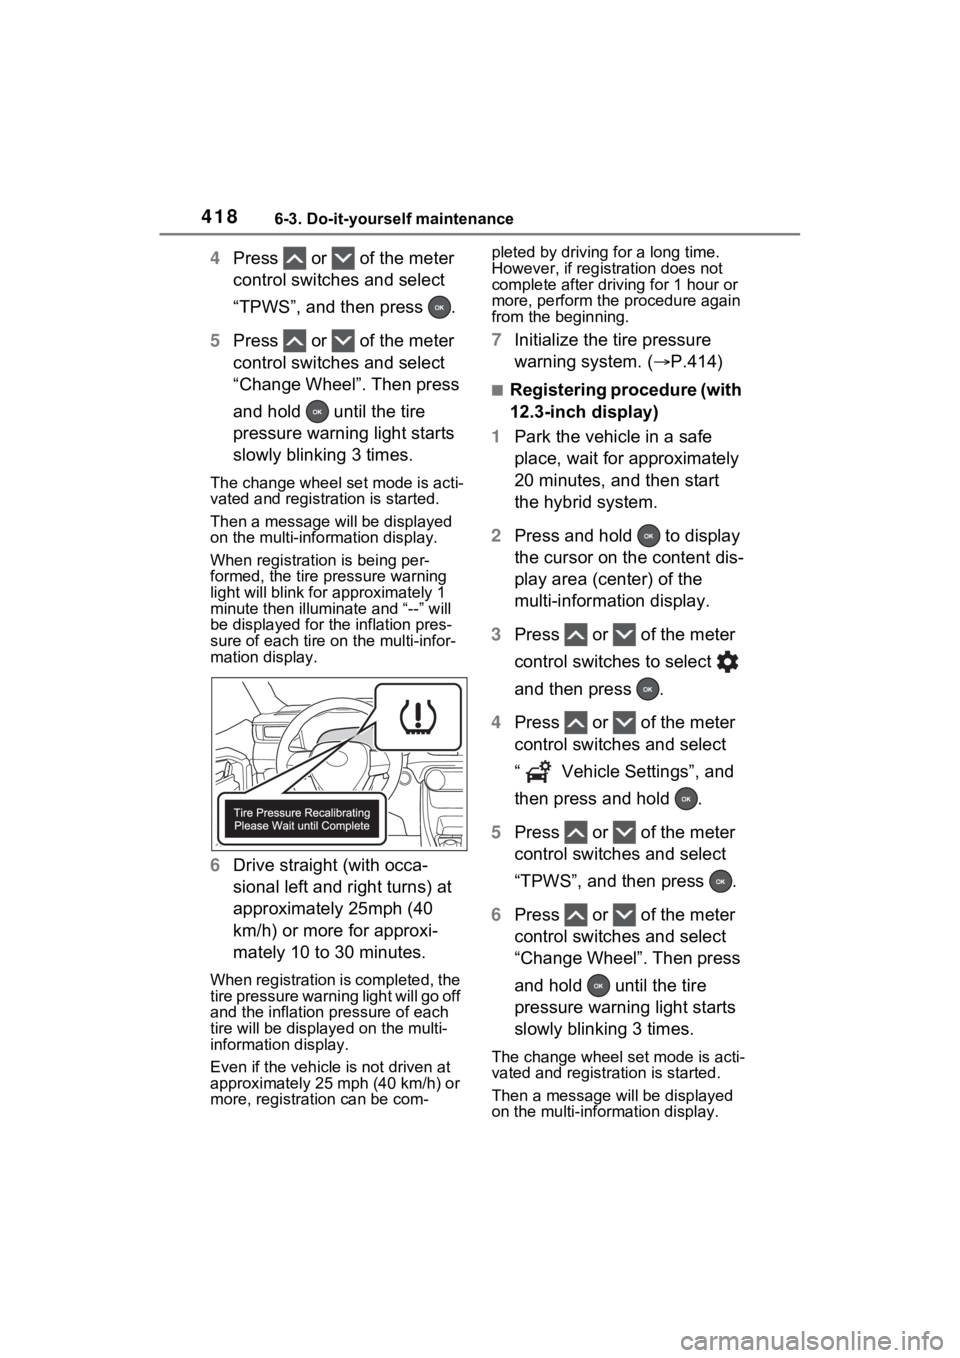
When registration is being per-
formed, the tire pressure warning
light will blink for approximately 1
minute then illumi nate and “--” will
be displayed for the inflation pres-
sure of each tire on the multi-infor-
mation display.
6 Drive straight (with occa-
sional left and right turns) at
approximately 25mph (40
km/h) or more for approxi-
mately 10 to 30 minutes.
When registration is completed, the
tire pressure warning light will go off
and the inflation pressure of each
tire will be displayed on the multi-
information display.
Even if the vehicle is not driven at
approximately 25 mph (40 km/h) or
more, registration can be com- pleted by driving for a long time.
However, if registr
ation does not
complete after driving for 1 hour or
more, perform the p rocedure again
from the beginning.
7 Initialize the tire pressure
warning system. ( P.414)
■Registering procedure (with
12.3-inch display)
1 Park the vehicle in a safe
place, wait for approximately
20 minutes, and then start
the hybrid system.
2 Press and hold to display
the cursor on the content dis-
play area (center) of the
multi-information display.
3 Press or of the meter
control switches to select
and then press .
4 Press or of the meter
control switches and select
“ Vehicle Settings”, and
then press and hold .
5 Press or of the meter
control switches and select
“TPWS”, and then press .
6 Press or of the meter
control switches and select
“Change Wheel”. Then press
and hold until the tire
pressure warning light starts
slowly blinking 3 times.
The change wheel set mode is acti-
vated and registra tion is started.
Then a message will be displayed
on the multi-information display.
Page 421 of 586
4196-3. Do-it-yourself maintenance
6
Maintenance and care
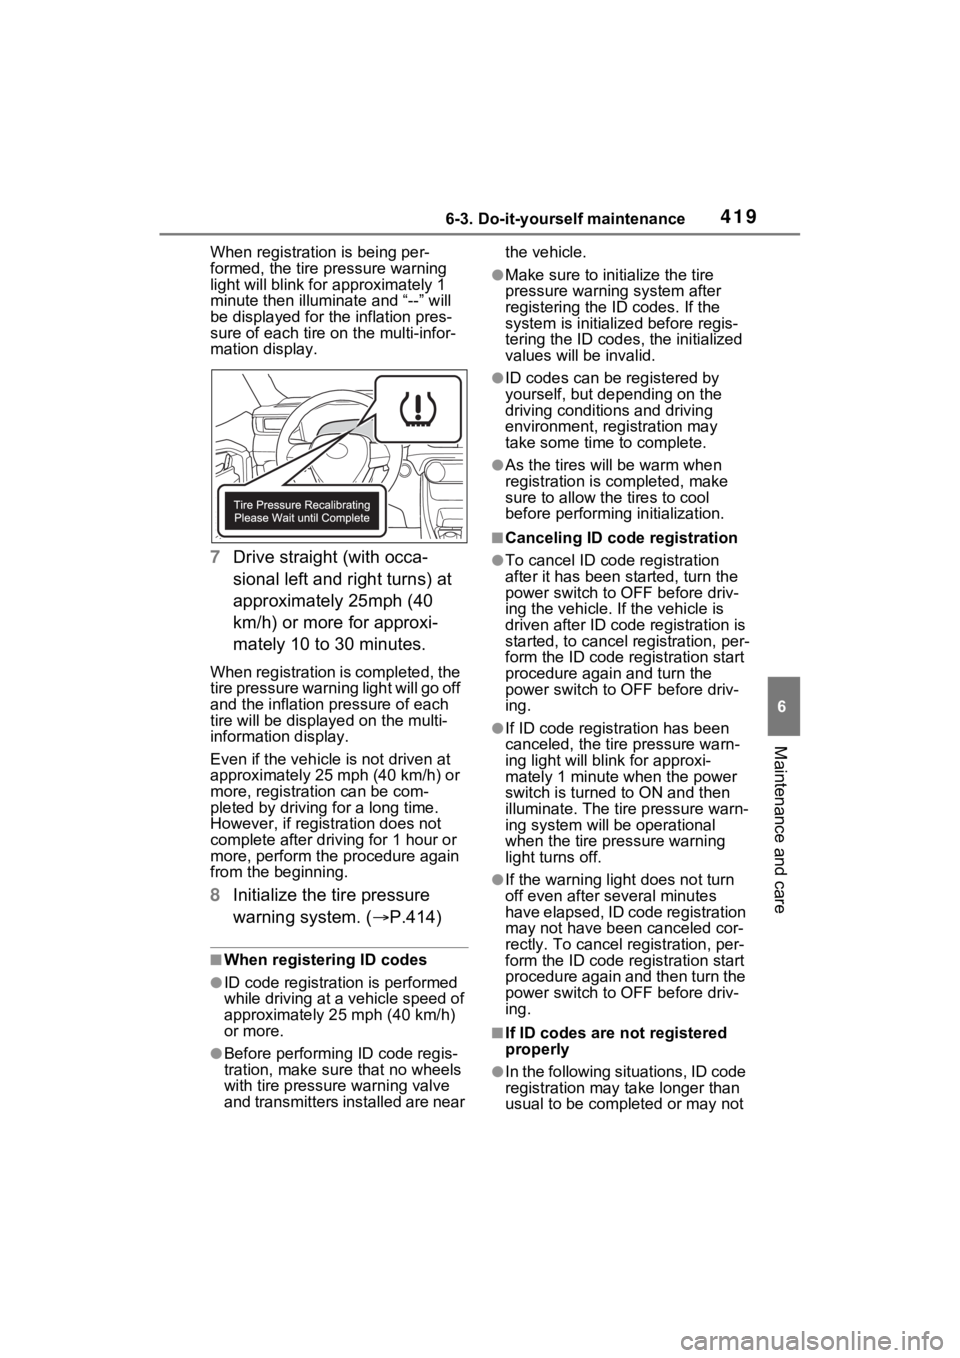
When registration is being per-
formed, the tire pressure warning
light will blink for approximately 1
minute then illumi nate and “--” will
be displayed for the inflation pres-
sure of each tire on the multi-infor-
mation display.
7 Drive straight (with occa-
sional left and right turns) at
approximately 25mph (40
km/h) or more for approxi-
mately 10 to 30 minutes.
When registration is completed, the
tire pressure warning light will go off
and the inflation pressure of each
tire will be displayed on the multi-
information display.
Even if the vehicle is not driven at
approximately 25 mph (40 km/h) or
more, registration can be com-
pleted by driving for a long time.
However, if registration does not
complete after driving for 1 hour or
more, perform the procedure again
from the beginning.
8 Initialize the tire pressure
warning system. ( P.414)
■When registering ID codes
●ID code registration is performed
while driving at a vehicle speed of
approximately 25 mph (40 km/h)
or more.
●Before performin g ID code regis-
tration, make sure that no wheels
with tire pressur e warning valve
and transmitters installed are near the vehicle.
●Make sure to initi
alize the tire
pressure warning system after
registering the ID codes. If the
system is initialized before regis-
tering the ID codes , the initialized
values will be invalid.
●ID codes can be registered by
yourself, but depending on the
driving conditions and driving
environment, registration may
take some time to complete.
●As the tires will be warm when
registration is completed, make
sure to allow the tires to cool
before performin g initialization.
■Canceling ID code registration
●To cancel ID code registration
after it has been started, turn the
power switch to OFF before driv-
ing the vehicle. If the vehicle is
driven after ID code registration is
started, to cancel registration, per-
form the ID code registration start
procedure again and turn the
power switch to OFF before driv-
ing.
●If ID code registration has been
canceled, the tire pressure warn-
ing light will blink for approxi-
mately 1 minute when the power
switch is turned to ON and then
illuminate. The tire pressure warn-
ing system will be operational
when the tire pressure warning
light turns off.
●If the warning lig ht does not turn
off even after several minutes
have elapsed, ID code registration
may not have been canceled cor-
rectly. To cancel registration, per-
form the ID code registration start
procedure again and then turn the
power switch to OFF before driv-
ing.
■If ID codes are not registered
properly
●In the following situations, ID code
registration may take longer than
usual to be completed or may not
Page 422 of 586
4206-3. Do-it-yourself maintenance
be possible. Normally, registra-
tion completes within approxi-
mately 30 minutes.
If ID code registration is not com-
plete after driving for approxi-
mately 30 minutes, continue
driving for a while.
• Vehicle is not parked for approxi- mately 20 minutes or more before
driving
• Vehicle is not driven at approxi- mately 25 mph ( 40 km/h) or more
• Vehicle is driven on unpaved roads
• Vehicle is driven near other vehi-
cles and system cannot recog-
nize tire pressure warning valve
and transmitters of your vehicle
over those of other vehicles
• Wheel with tire p ressure warning
valve and transmitter installed is
inside or near the vehicle
If registration does not complete
after driving for 1 hour or more, per-
form the ID code registration proce-
dure again from the beginning.
●If the vehicle is reversed during
registration, the data up to that
point is reset, so perform the reg-
istration procedure again from the
beginning.
●In the following situations, ID code
registration will not be started or
was not completed properly and
the system will no t operate prop-
erly. Perform the ID code registra-
tion procedure again.
• If, when attempting to start ID code registration, the tire pressure
warning light does not blink slowly
3 times.
• If, when the vehicle has been driven for about 20 minutes after
performing ID co de registration,
the tire pressur e warning light
blinks for approxi mately 1 minute
and then illu minates.
If the ID codes cannot be registered
even when performing the above
procedure, contact your Toyota
dealer.
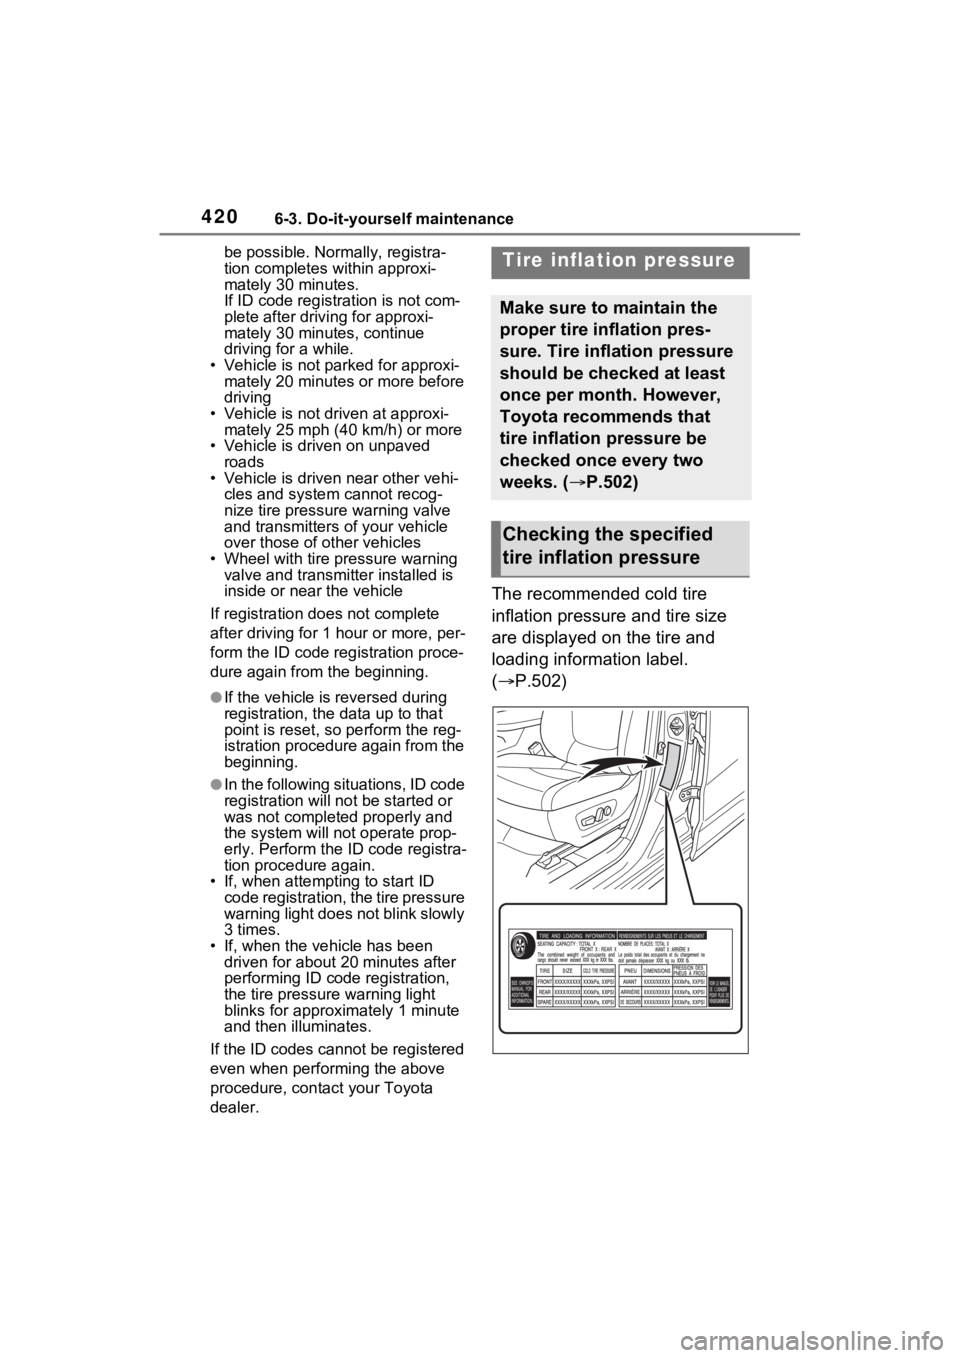
The recommended cold tire
inflation pressure and tire size
are displayed on the tire and
loading information label.
( P.502)
Tire inflation pressure
Make sure to maintain the
proper tire inflation pres-
sure. Tire inflation pressure
should be checked at least
once per month. However,
Toyota recommends that
tire inflation pressure be
checked once every two
weeks. ( P.502)
Checking the specified
tire inflation pressure
Page 426 of 586
4246-3. Do-it-yourself maintenance
1Turn the power switch to
OFF.
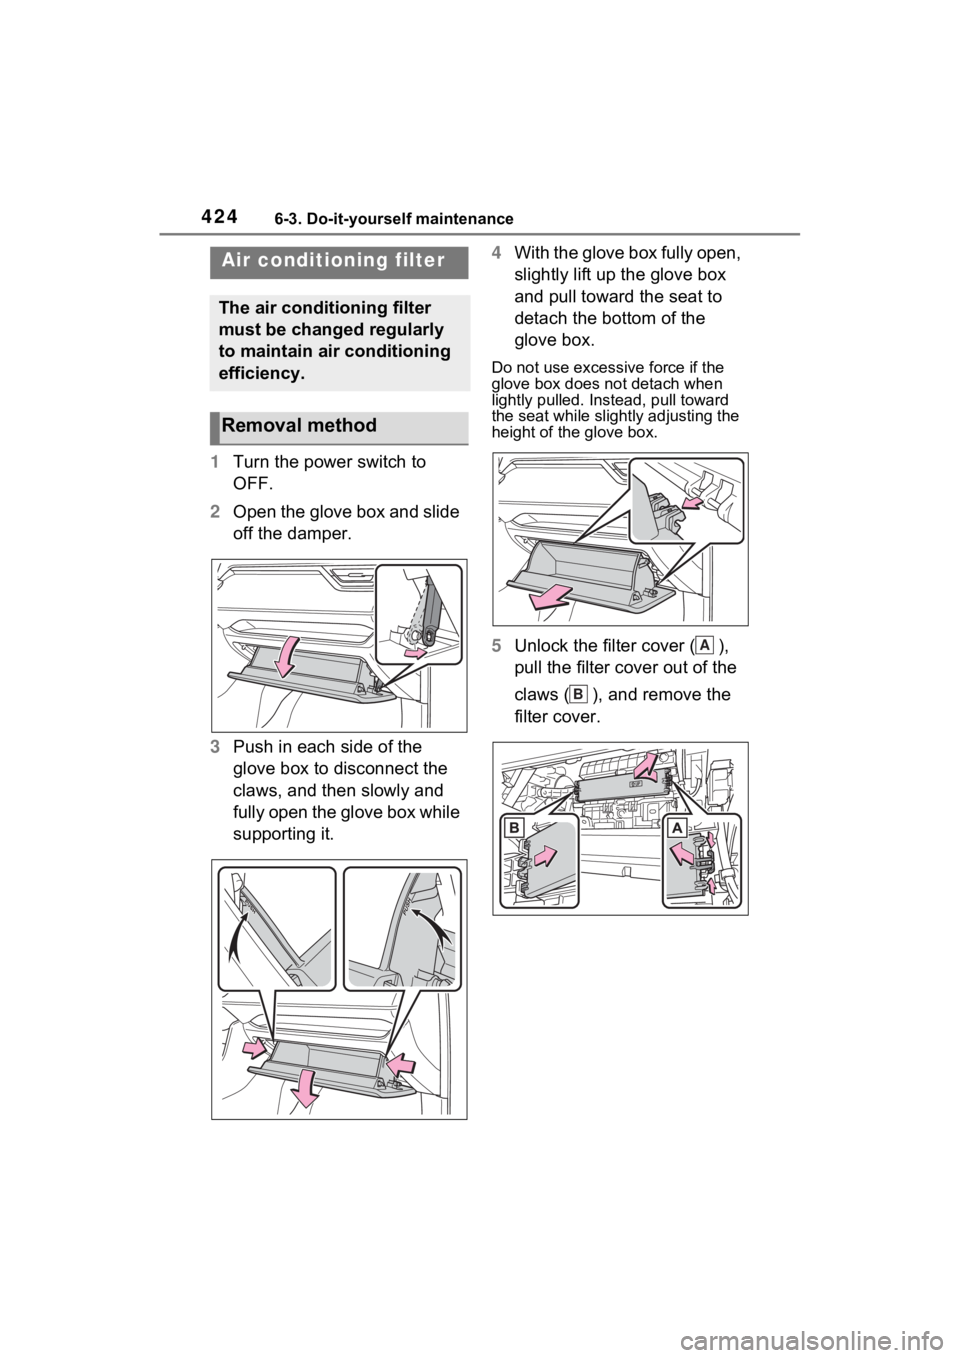
2 Open the glove box and slide
off the damper.
3 Push in each side of the
glove box to disconnect the
claws, and then slowly and
fully open the glove box while
supporting it. 4
With the glove box fully open,
slightly lift up the glove box
and pull toward the seat to
detach the bottom of the
glove box.
Do not use excessi ve force if the
glove box does not detach when
lightly pulled. Ins tead, pull toward
the seat while slightly adjusting the
height of the glove box.
5 Unlock the filter cover ( ),
pull the filter cover out of the
claws ( ), and remove the
filter cover.
Air condition ing filter
The air conditioning filter
must be changed regularly
to maintain air conditioning
efficiency.
Removal method
A
B
Page 429 of 586
4276-3. Do-it-yourself maintenance
6
Maintenance and care
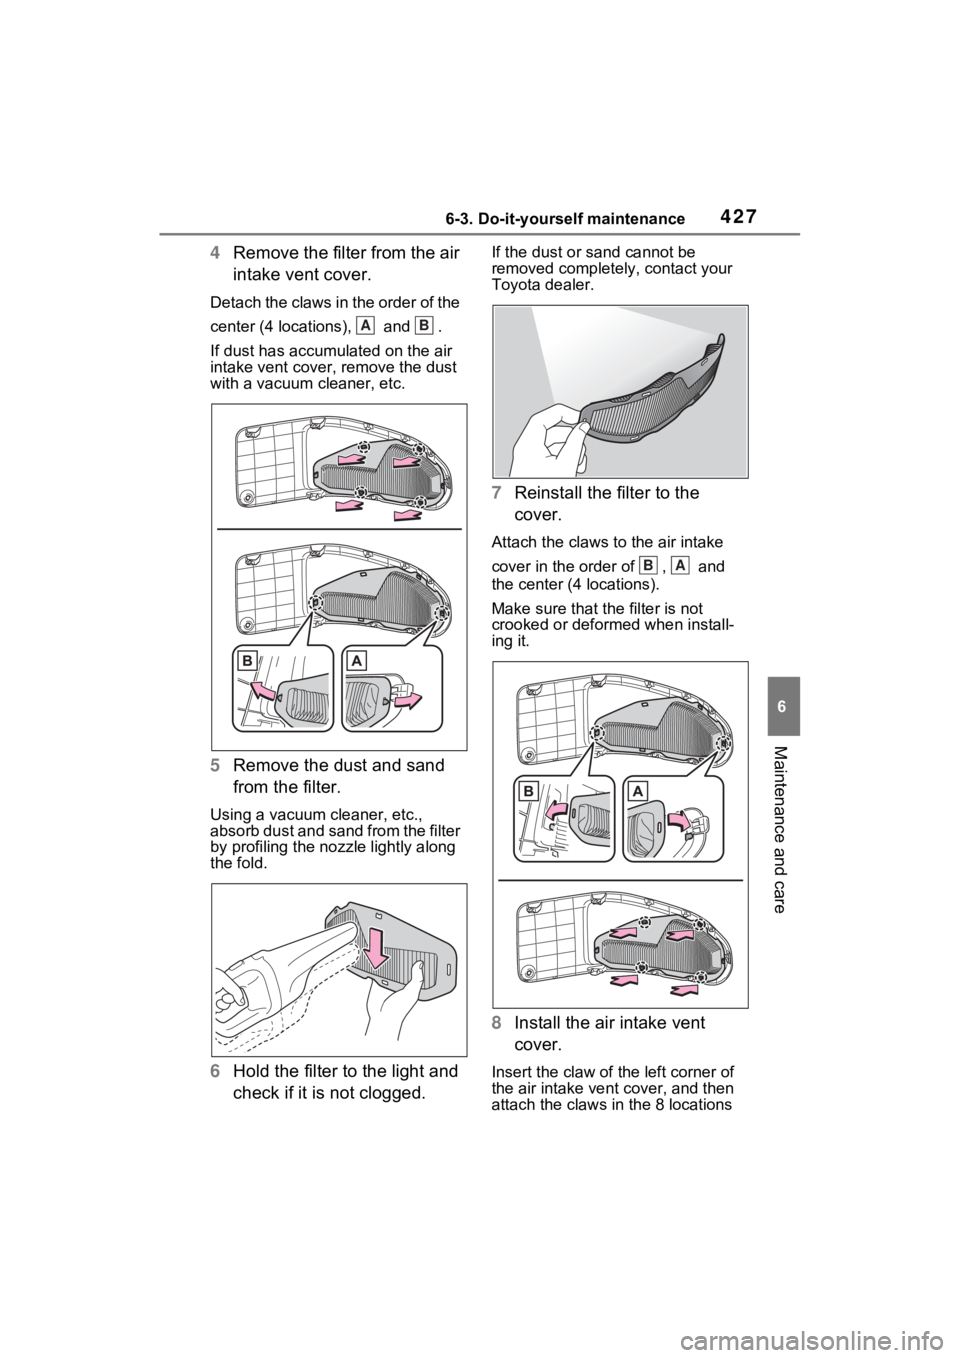
4Remove the filter from the air
intake vent cover.
Detach the claws in the order of the
center (4 locations), and .
If dust has accumulated on the air
intake vent cover, r emove the dust
with a vacuum cleaner, etc.
5 Remove the dust and sand
from the filter.
Using a vacuum cleaner, etc.,
absorb dust and sand from the filter
by profiling the nozz le lightly along
the fold.
6 Hold the filter to the light and
check if it is not clogged.
If the dust or sand cannot be
removed completely, contact your
Toyota dealer.
7Reinstall the filter to the
cover.
Attach the claws to the air intake
cover in the order of , and
the center (4 locations).
Make sure that the filter is not
crooked or deformed when install-
ing it.
8Install the air intake vent
cover.
Insert the claw of the left corner of
the air intake vent cover, and then
attach the claws in the 8 locations
AB
BA
Page 433 of 586

4316-3. Do-it-yourself maintenance
6
Maintenance and care
the claw detaches, and then
remove the wiper blade from
the wiper arm.
3 Pull the wiper insert out past
the stopper on the wiper
blade, and then continue to
pull until it is completely
removed.
Lightly grasp betw een the claws of
the wiper blade to allow the wiper
insert to lift up, mak ing it easier to
remove.
4 Remove the 2 metal plates
from the old wiper insert and install them to the replace-
ment wiper insert.
5 Insert the wiper insert starting
from the claw at the center of
the wiper blade. Pass the
wiper insert through the 3
claws so that it sticks out
from the stopper, and then
pass the wiper insert through
the final remaining claw.
Applying a small amount of washer
fluid to the wiper i nsert can make it
easier to insert the claws into the
grooves.
6 Check that the wiper blade
claws are fitted in the
grooves of the wiper insert.
If the wiper blade claws are not fit-
ted in the grooves of the wiper
insert, grasp the wiper insert and
slide it back and forth multiple times
to insert the claws into the grooves.
Lightly lift up the center of the wiper
insert to make the rubber easier to
Page 439 of 586

4376-3. Do-it-yourself maintenance
6
Maintenance and care
3Remove the fuse.
Only type A fuse can be removed
using the pullout tool.
4Check if the fuse is blown.
Replace the blown fuse with a new
fuse of an appropriate amperage
rating. The amperage rating can be
found on the fuse box lid.
Type A
Normal fuse
Blown fuse
Type BNormal fuse
Blown fuse
Type CNormal fuse
Blown fuse
■After a fuse is replaced
●When installing the lid, make sure
that the tab is ins talled securely.
●If the lights do not turn on even
after the fuse has been replaced,
a bulb may need replacement.
( P.439)
●If the replaced fuse blows again,
have the vehicle inspected by
your Toyota dealer.
■If there is an ove rload in a cir-
cuit
The fuses are designed to blow,
protecting the wiring harness from
damage.A
B
A
B
A
B
Page 440 of 586

4386-3. Do-it-yourself maintenance
*: Vehicles with LED projector
headlights
Adjustment bolt A
Adjustment bolt B
Make sure the vehicle has a
full tank of gasoline and the
area around the headlight is
not deformed.
Park the vehicle on level
ground.
Make sure the tire inflation
pressure is at the specified
level.
Have someone sit in the
driver’s seat.
Bounce the vehicle several
times.
WARNING
■To prevent system break-
downs and vehicle fire
Observe the following precau-
tions.
Failure to do so may cause dam-
age to the vehicle, and possibly a
fire or injury.
●Never use a fuse of a higher
amperage rating than that indi-
cated, or use any other object in
place of a fuse.
●Always use a genuine Toyota
fuse or equivalent.
Never replace a fuse with a
wire, even as a temporary fix.
●Do not modify the fuses or fuse
boxes.
NOTICE
■Before replacing fuses
Have the cause of electrical over-
load determined and repaired by
your Toyota dealer as soon as
possible.
■To prevent damage to the
engine compartment fuse box
cover
When opening the fuse box, com-
pletely release the claw locks
before lifting up the cover. Other-
wise, the claws may be damaged.
Headlight aim*
Vertical movement adjust-
ing bolts
Before checking the head-
light aim
A
B