2023 TOYOTA RAV4 HYBRID light
[x] Cancel search: lightPage 400 of 586
3986-3. Do-it-yourself maintenance
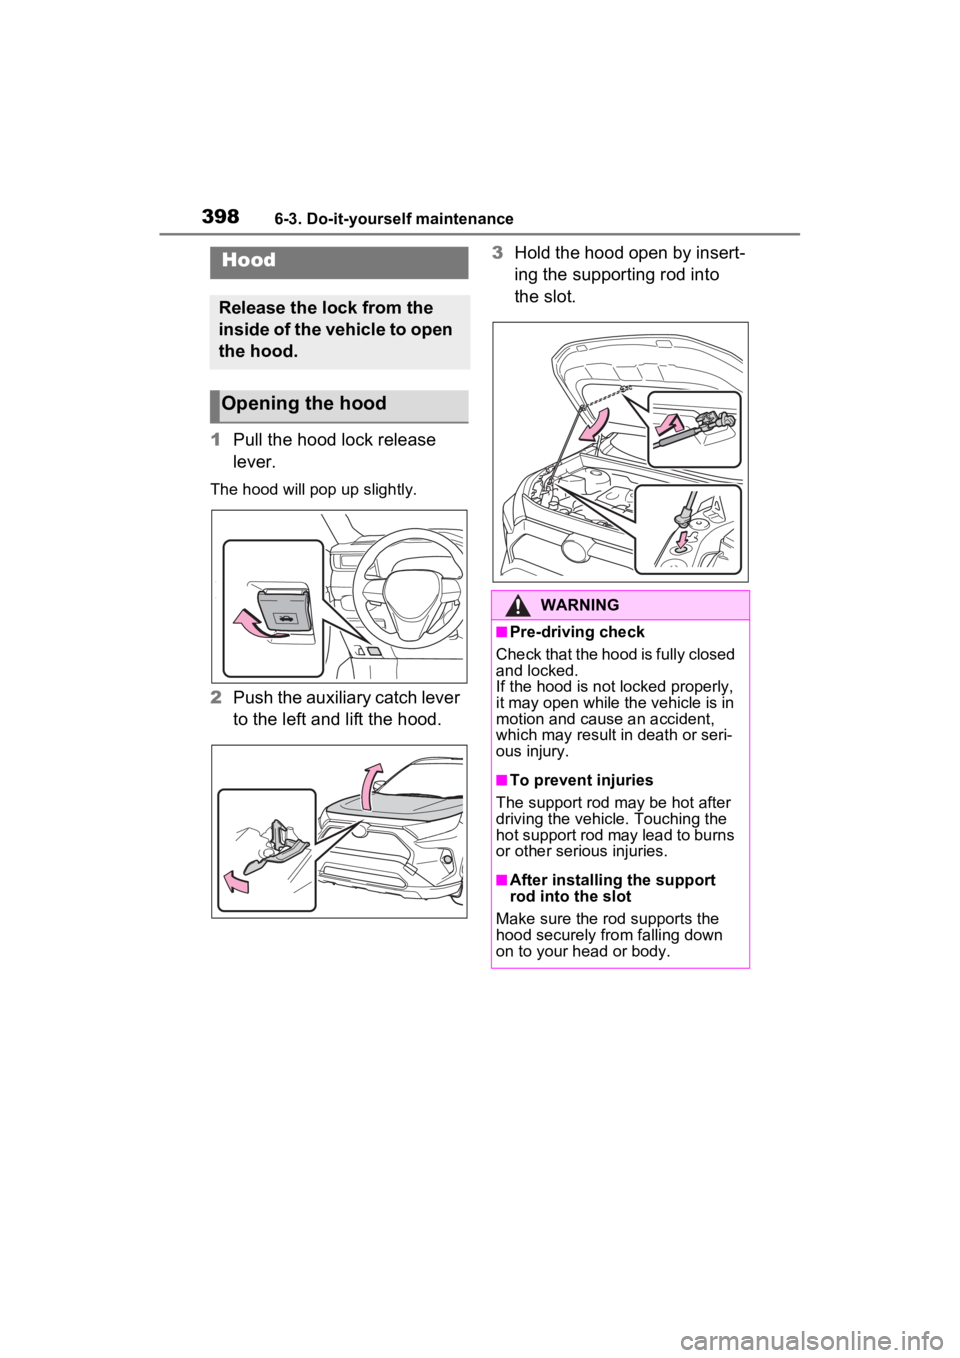
1Pull the hood lock release
lever.
The hood will pop up slightly.
2Push the auxiliary catch lever
to the left and lift the hood. 3
Hold the hood open by insert-
ing the supporting rod into
the slot.
Hood
Release the lock from the
inside of the vehicle to open
the hood.
Opening the hood
WARNING
■Pre-driving check
Check that the hood is fully closed
and locked.
If the hood is not locked properly,
it may open while the vehicle is in
motion and cause an accident,
which may result i n death or seri-
ous injury.
■To prevent injuries
The support rod may be hot after
driving the vehicle. Touching the
hot support rod may lead to burns
or other serious injuries.
■After installing the support
rod into the slot
Make sure the rod supports the
hood securely fro m falling down
on to your head or body.
Page 408 of 586
4066-3. Do-it-yourself maintenance
■Brake fluid can absorb moisture
from the air
Excess moisture in the brake fluid
can cause a dangerous loss of brak-
ing efficiency. Use only newly
opened brake fluid.
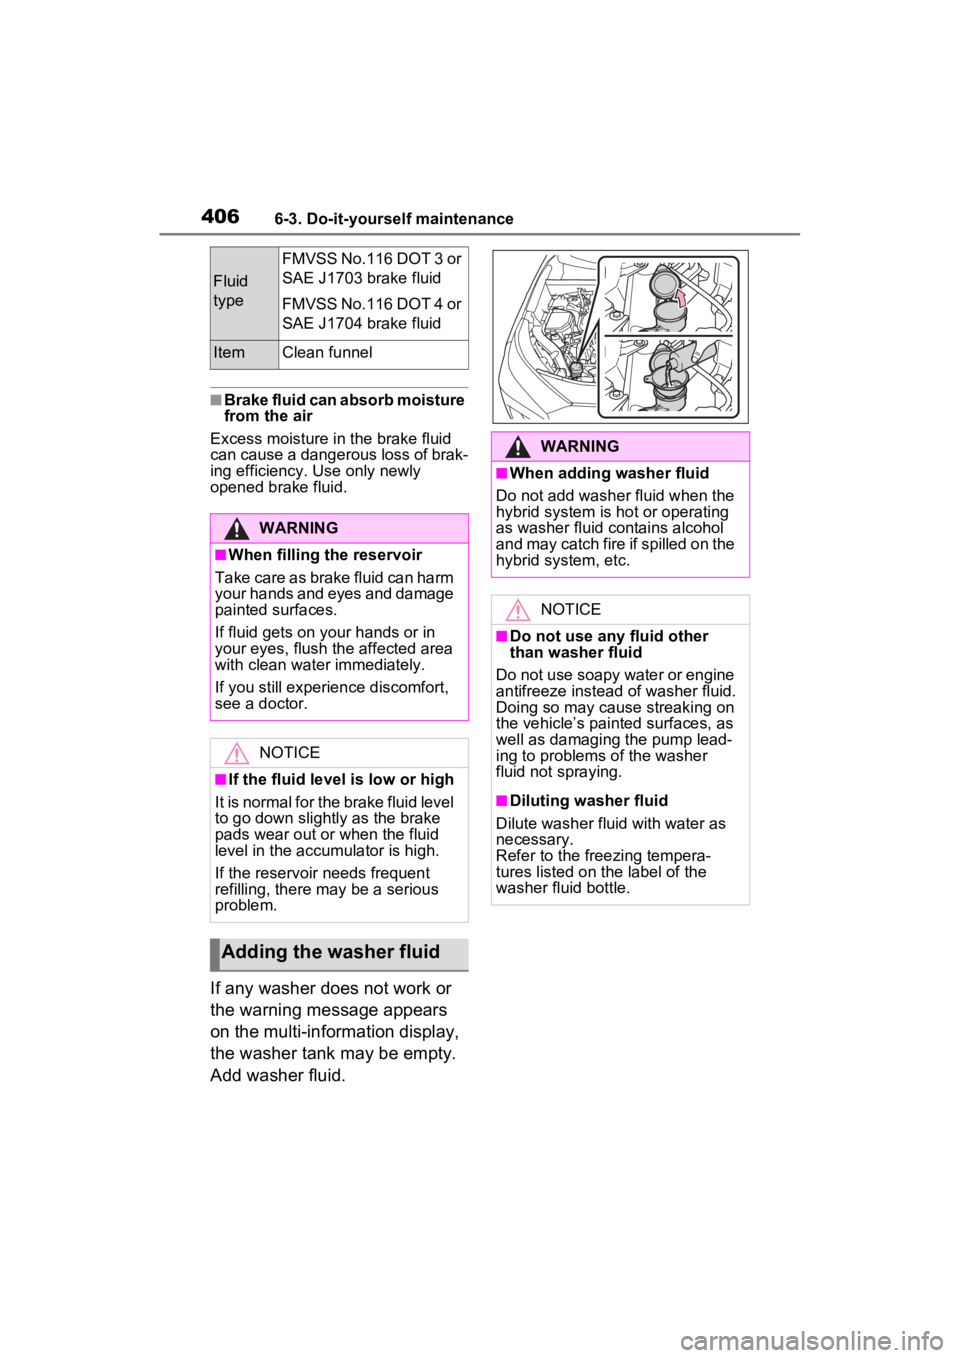
If any washer does not work or
the warning message appears
on the multi-information display,
the washer tank may be empty.
Add washer fluid.
Fluid
type
FMVSS No.116 DOT 3 or
SAE J1703 brake fluid
FMVSS No.116 DOT 4 or
SAE J1704 brake fluid
ItemClean funnel
WARNING
■When filling the reservoir
Take care as brake fluid can harm
your hands and eyes and damage
painted surfaces.
If fluid gets on your hands or in
your eyes, flush th e affected area
with clean water immediately.
If you still experien ce discomfort,
see a doctor.
NOTICE
■If the fluid level is low or high
It is normal for the brake fluid level
to go down slightly as the brake
pads wear out or when the fluid
level in the accumulator is high.
If the reservoir needs frequent
refilling, there may be a serious
problem.
Adding the washer fluid
WARNING
■When adding washer fluid
Do not add washer fluid when the
hybrid system is hot or operating
as washer fluid contains alcohol
and may catch fire if spilled on the
hybrid system, etc.
NOTICE
■Do not use any fluid other
than washer fluid
Do not use soapy water or engine
antifreeze instead of washer fluid.
Doing so may cause streaking on
the vehicle’s painted surfaces, as
well as damaging the pump lead-
ing to problems of the washer
fluid not spraying.
■Diluting washer fluid
Dilute washer fluid with water as
necessary.
Refer to the freezing tempera-
tures listed on the label of the
washer fluid bottle.
Page 409 of 586

4076-3. Do-it-yourself maintenance
6
Maintenance and care
The 12-volt battery is located in
the right-hand side of luggage
compartment.
■Before recharging
When recharging, the 12-volt bat-
tery produces hydrogen gas which
is flammable and explosive. There-
fore, observe the following precau-
tions before recharging:
●If recharging with the 12-volt bat-
tery installed on the vehicle, be
sure to disconnect the ground
cable.
●Make sure the power switch on
the charger is off when connecting
and disconnecting the charger
cables to the 12-volt battery.
■After recharging/reconnecting
the 12-volt battery (vehicles
with smart key system)
●Unlocking the doors using the
smart key system may not be pos-
sible immediately after reconnect-
ing the 12-volt battery. If this
happens, use the wireless remote
control or the mechanical key to
lock/unlock the doors.
●Start the hybrid system with the
power switch in ACC. The hybrid
system may not start with the
power switch turned off. How-
ever, the hybrid system will oper- ate normally from the second
attempt.
●The power switch mode is
recorded by the vehicle. If the 12-
volt battery is reconnected, the
vehicle will return the power
switch mode to the status it was in
before the 1
2-volt battery was dis-
connected. Make sure to turn off
the power switch before discon-
nect the 12-volt battery. Take
extra care when connecting the
12-volt battery if the power switch
mode prior to discharge is
unknown.
If the hybrid system will not start
even after multiple attempts at all
methods above, contact your
Toyota dealer.
12-volt battery
Location
WARNING
■Chemicals in the 12-volt bat-
tery
The 12-volt battery contains poi-
sonous and corrosive sulfuric acid
and may produce hydrogen gas
which is flammable and explosive.
To reduce the risk of death or
serious injury, take the following
precautions while working on or
near the 12-volt battery:
●Do not cause sparks by touch-
ing the 12-volt battery terminals
with tools.
●Do not smoke or light a match
near the 12-volt battery.
●Avoid contact with eyes, skin
and clothes.
●Never inhale or swallow electro-
lyte.
●Wear protective safety glasses
when working near the 12-volt
battery.
●Keep children away from the
12-volt battery.
Page 414 of 586
4126-3. Do-it-yourself maintenance
■When rotating the tires (vehi-
cles with tire pressure warning
system)
Make sure that the power switch is
OFF. If the tires are rotated while
the power switch is in ON, the tire
position informa tion will not be
updated. If this accidentally occurs,
either turn the power switch to OFF
and then to ON, or initialize the sys-
tem after checking that the tire pres-
sure is properly adjusted.
Your vehicle is equipped with a
tire pressure warning system
that uses tire pressure warning
valves and transmitters to detect
low tire inflation pressure before
serious problems arise.
If the tire pressure drops
below a predetermined level,
the driver is warned by a
screen display and a warning
light. ( P.462)
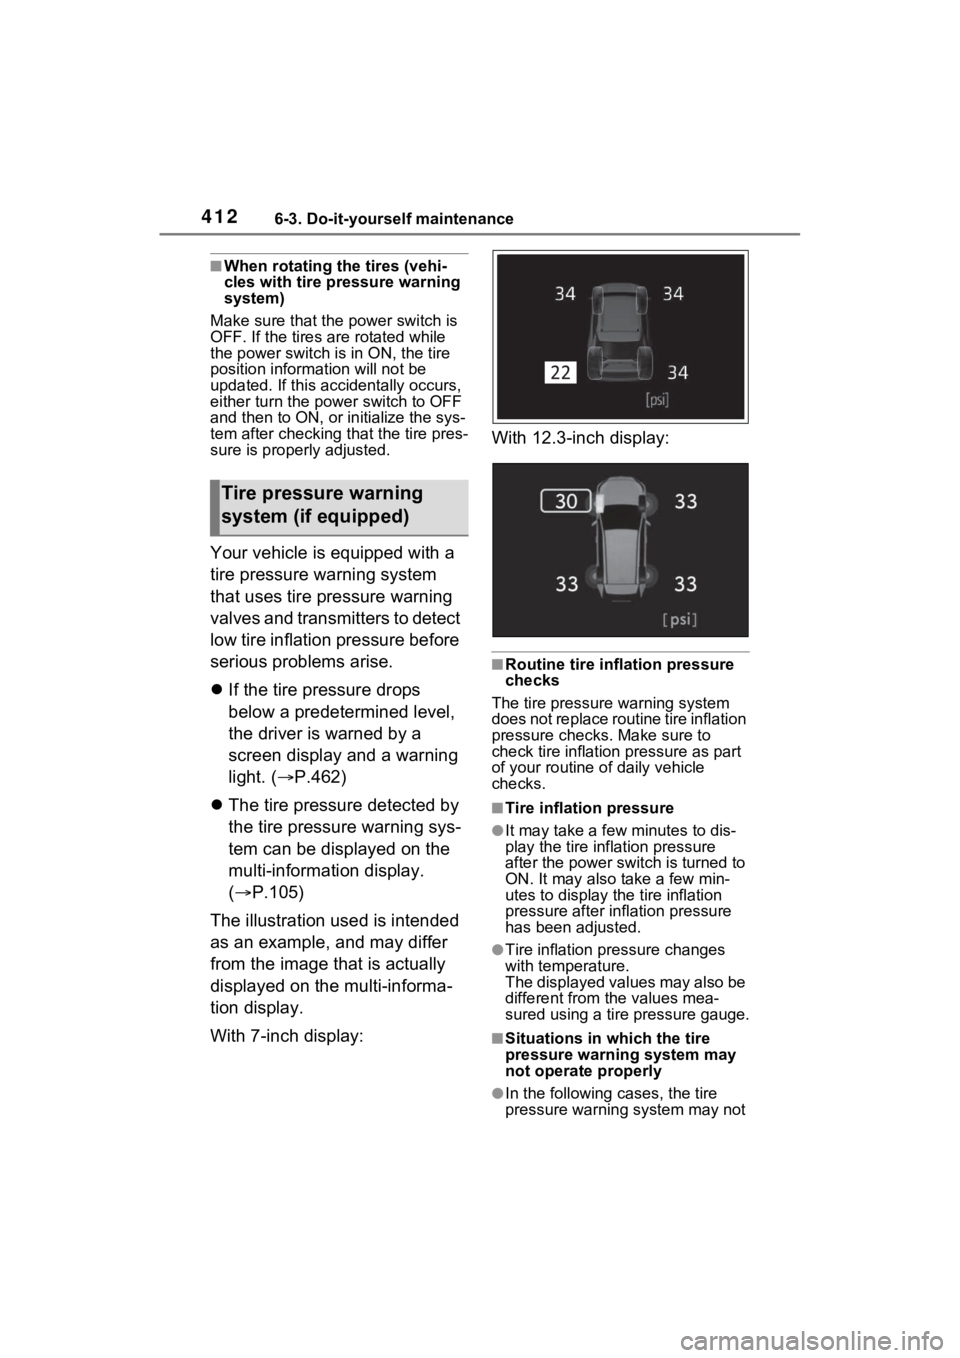
The tire pressure detected by
the tire pressure warning sys-
tem can be displayed on the
multi-information display.
( P.105)
The illustration used is intended
as an example, and may differ
from the image that is actually
displayed on the multi-informa-
tion display.
With 7-inch display: With 12.3-inch display:
■Routine tire inflation pressure
checks
The tire pressure warning system
does not replace routine tire inflation
pressure checks . Make sure to
check tire inflation pressure as part
of your routine o f daily vehicle
checks.
■Tire inflation pressure
●It may take a few minutes to dis-
play the tire inflation pressure
after the power switch is turned to
ON. It may also take a few min-
utes to display the tire inflation
pressure after infl ation pressure
has been adjusted.
●Tire inflation pressure changes
with temperature.
The displayed values may also be
different from the values mea-
sured using a tire pressure gauge.
■Situations in which the tire
pressure warning system may
not operate properly
●In the following cases, the tire
pressure warning system may not
Tire pressure warning
system (if equipped)
Page 415 of 586
4136-3. Do-it-yourself maintenance
6
Maintenance and care
operate properly.
• If non-genuine Toyota wheels are used.
• A tire has been replaced with a tire that is not an OE (Original
Equipment) tire.
• A tire has been replaced with a tire that is not of the specified size.
• Tire chains, etc. are equipped.
• An auxiliary-supported run-flat tire
is equipped.
• If a window tint that affects the
radio wave signals is installed.
• If there is a lot of snow or ice on the vehicle, particularly around the
wheels or wheel housings.
• If the tire inflation pressure is extremely higher than the speci-
fied level.
• If wheels without tire pressure warning valves a nd transmitters
are used.
• If the ID code on the tire pressure warning valves and transmitters is
not registered in the tire pressure
warning computer.
●Performance may be affected in
the following situations.
• Near a TV tower, electric power
plant, gas station , radio station,
large display, airpo rt or other facil-
ity that generates strong radio
waves or electrical noise
• When carrying a portable radio, cellular phone, cordless phone or
other wireless communication
device
If tire position information is not cor-
rectly displayed due to the radio
wave conditions, the display may be
corrected by driving and changing
the radio wave conditions.
●When the vehicle is parked, the
time taken for the warning to start
or go off could be extended.
●When tire inflation pressure
declines rapidly for example when
a tire has burst, the warning may
not function.
■Warning performance of the tire
pressure warning system
The warning of the tire pressure
warning system w ill change in
accordance with the conditions
under which it was initialized. For
this reason, the system may give a
warning even if th e tire pressure
does not reach a low enough level,
or if the pressure is higher than the
pressure that was adjusted to when
the system was initialized.
When replacing tires or wheels,
tire pressure warning valves and
transmitters must also be
installed.
When new tire pressure warning
valves and transmitters are
installed, new ID codes must be
registered in the tire pressure
warning computer and the tire
pressure warning system must
be initialized. ( P.417)
■When replacing the tires and
wheels
If the ID code of the tire pressure
warning valve and tr ansmitter is not
registered, the tire pressure warning
system will not work properly. After
driving for about 20 minutes, the tire
pressure warning light blinks for 1
minute and stays on to indicate a
system malfunction.
Installing tire pressure
warning valves and trans-
mitters (if equipped)
Page 417 of 586

4156-3. Do-it-yourself maintenance
6
Maintenance and care
7Press or of the meter
control switches, select the
“Set Pressure”. Then press
and hold .
“Setting Tire Pressure Warning
System” will be dis played on the
multi-information display and the
tire pressure warni ng light will blink
3 times.
When the message disappears, ini-
tialization is complete.
A message is displayed on the
multi-information di splay. Also, “--”
is displayed for inflation pressure of
each tire on the multi-information
display while the tire pressure
warning system determines the
position.
8 Drive straight (with occa-
sional left and right turns) at
approximately 25mph (40
km/h) or more for approxi-
mately 10 to 30 minutes.
When initialization is complete, the
inflation pressure of each tire will be
displayed on the multi-information
display.
Even if the vehicle is not driven at
approximately 25 mph (40 km/h) or
more, initializat ion can be com-
pleted by driving for a long time.
However, if initia lization does not
complete after driving for 1 hour or
more, park the vehicle in a safe
place for approximately 20 minutes
and then drive th e vehicle again.
■How to initialize the tire
pressure warning system
(with 12.3-inch display)
1 Park the vehicle in a safe
place and stop the hybrid
system for 20 minutes or
more.
Initialization cannot be performed
while the vehicle is moving.
2Adjust the tire inflation pres-
sure to the specified cold tire
inflation pressure level.
( P.502)
Make sure to adjust the tire pres-
sure to the specifie d cold tire infla-
tion pressure level. The tire
pressure warning system will oper-
ate based on this pressure level.
3Start the hybrid system.
4 Press and hold to display
the cursor on the content dis-
play area (center) of the
multi-information display.
5 Press or of the meter
control switches to select
and then press .
6 Press or of the meter
control switches, select “
Vehicle Settings” and then
press and hold .
7 Press or of the meter
control switches, select
“TPWS” and then press .
8 Press or of the meter
control switches, select the
Page 418 of 586
4166-3. Do-it-yourself maintenance
“Set Pressure”. Then press
and hold .
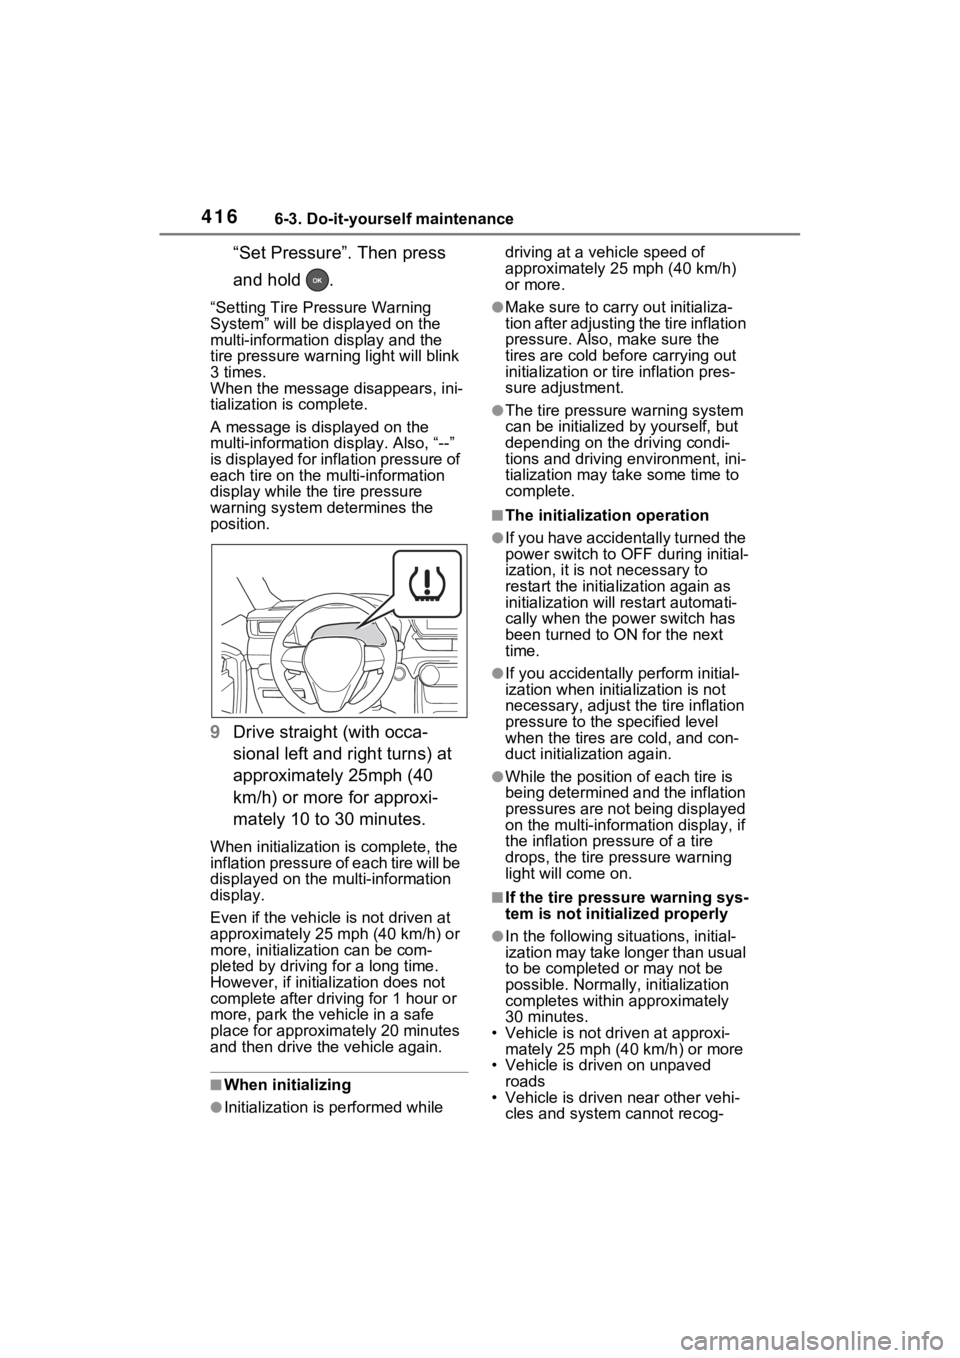
“Setting Tire Pressure Warning
System” will be dis played on the
multi-information display and the
tire pressure warni ng light will blink
3 times.
When the message disappears, ini-
tialization is complete.
A message is displayed on the
multi-information di splay. Also, “--”
is displayed for inflation pressure of
each tire on the multi-information
display while the tire pressure
warning system determines the
position.
9 Drive straight (with occa-
sional left and right turns) at
approximately 25mph (40
km/h) or more for approxi-
mately 10 to 30 minutes.
When initialization is complete, the
inflation pressure of each tire will be
displayed on the multi-information
display.
Even if the vehicle is not driven at
approximately 25 mph (40 km/h) or
more, initializat ion can be com-
pleted by driving for a long time.
However, if initia lization does not
complete after driving for 1 hour or
more, park the vehicle in a safe
place for approximately 20 minutes
and then drive th e vehicle again.
■When initializing
●Initialization is performed while driving at a veh
icle speed of
approximately 25 mph (40 km/h)
or more.
●Make sure to carry out initializa-
tion after adjusting the tire inflation
pressure. Also, make sure the
tires are cold before carrying out
initialization or tire inflation pres-
sure adjustment.
●The tire pressure warning system
can be initialized by yourself, but
depending on the driving condi-
tions and driving environment, ini-
tialization may take some time to
complete.
■The initialization operation
●If you have accidentally turned the
power switch to OFF during initial-
ization, it is not necessary to
restart the initialization again as
initialization will re start automati-
cally when the power switch has
been turned to ON for the next
time.
●If you accidentally perform initial-
ization when initia lization is not
necessary, adjust the tire inflation
pressure to the s pecified level
when the tires are cold, and con-
duct initialization again.
●While the position of each tire is
being determined and the inflation
pressures are not being displayed
on the multi-information display, if
the inflation pressure of a tire
drops, the tire pressure warning
light will come on.
■If the tire pressure warning sys-
tem is not initia lized properly
●In the following situations, initial-
ization may take longer than usual
to be completed or may not be
possible. Normally, initialization
completes within approximately
30 minutes.
• Vehicle is not driven at approxi- mately 25 mph (40 km/h) or more
• Vehicle is driven on unpaved
roads
• Vehicle is driven near other vehi- cles and system cannot recog-
Page 419 of 586
4176-3. Do-it-yourself maintenance
6
Maintenance and care
nize tire pressure warning valve
and transmitters of your vehicle
over those of other vehicles.
• If the vehicle is driven in heavy traffic or another situation where
other vehicles are driven close by,
it may take time for the system to
recognize the tire pressure warn-
ing valve and tran smitters of your
vehicle over those of other vehi-
cles.
If initialization does not complete
after driving for 1 hour or more, park
the vehicle in a safe place for
approximately 20 minutes and then
drive the vehicle again.
●If the vehicle is reversed during
initialization, the data up to that
point is reset, so perform the ini-
tialization procedure again from
the beginning.
●In the following situations, initial-
ization will not be started or was
not completed properly and the
system will not ope rate properly.
Perform the initialization proce-
dure again.
• If, when attempting to start initial- ization, the tire pressure warning
light does not blink 3 times.
• If, when the vehicle has been driven for about 20 minutes after
performing initialization, the tire
pressure warning light blinks for
approximately 1 minute and then
illuminates.
If the inflation pressure of each tire
is still not displayed, have the vehi-
cle inspected by your Toyota dealer.
Every tire pressure warning
valve and transmitter has a
unique ID code. When replacing
a tire pressure warning valve
and transmitter, it is necessary
to register the ID code.
When registering the ID codes,
perform the following procedure.
■Registering procedure (with
7-inch display)
1 Park the vehicle in a safe
place, wait for approximately
20 minutes, and then start
the hybrid system.
2 Press or of the meter
control switches on the steer-
ing wheel and select .
3 Press or of the meter
control switches and select
“Vehicle Settings”, and then
press and hold .
WARNING
■When initializing the tire pres-
sure warning system
Do not initialize tire inflation pres-
sure without first adjusting the tire
inflation pressure to the specified
level. Otherwise, the tire pressure
warning light may not come on
even if the tire inflation pressure is
low, or it may come on when the
tire inflation pressure is actually
normal.
Registering ID codes
(vehicles with tire pres-
sure warning system)