2023 TOYOTA COROLLA HYBRID warning
[x] Cancel search: warningPage 409 of 496
4097-2. Steps to take in an emergency
7
When trouble arises
1Ensure that the shift lever is
in P and depress the brake
pedal.
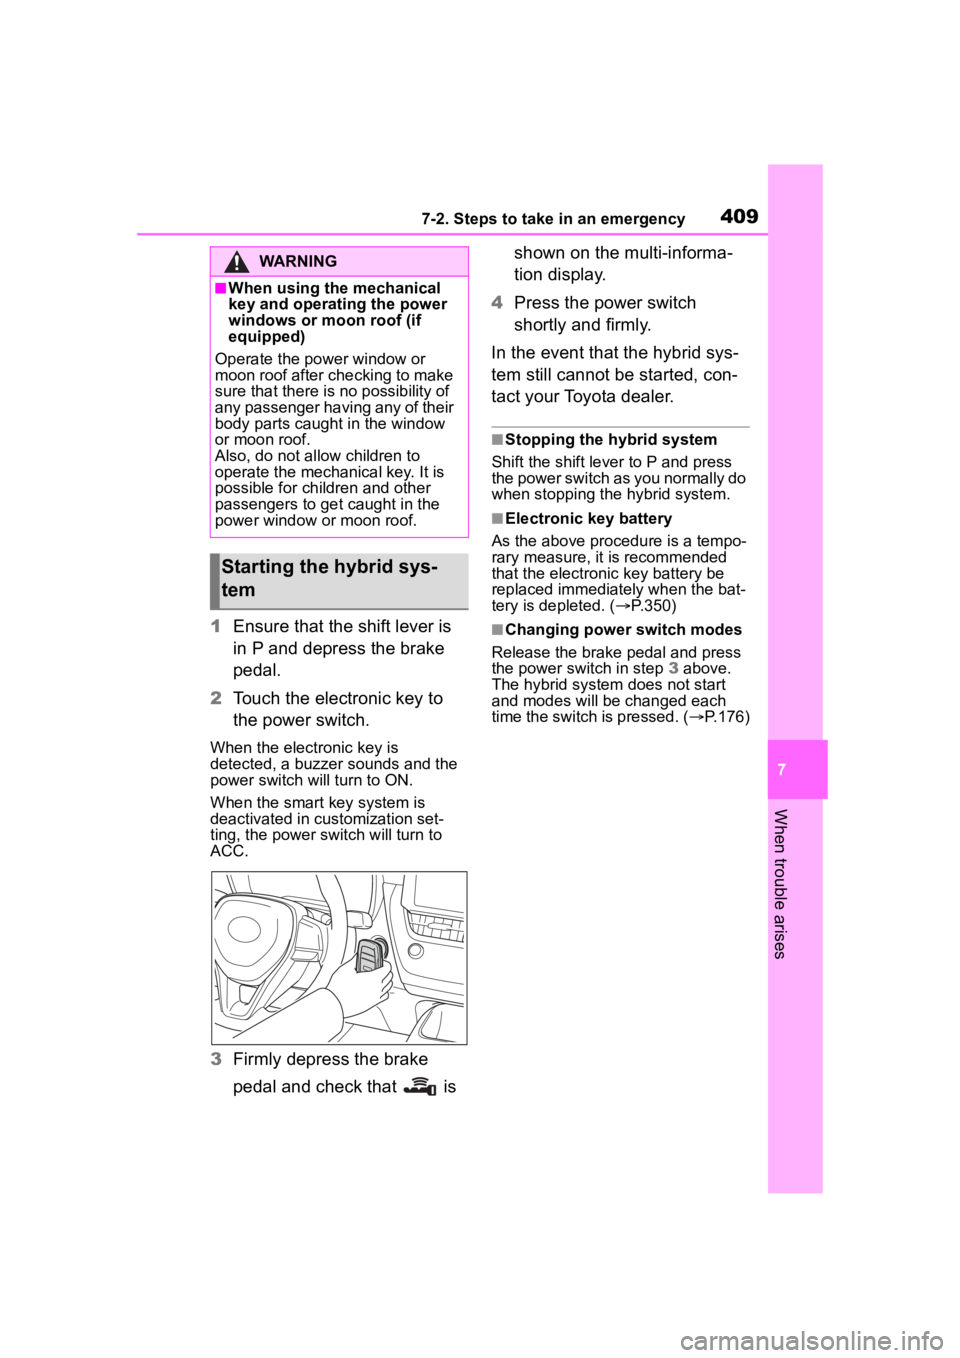
2 Touch the electronic key to
the power switch.
When the electronic key is
detected, a buzzer sounds and the
power switch will turn to ON.
When the smart key system is
deactivated in customization set-
ting, the power switch will turn to
ACC.
3Firmly depress the brake
pedal and check that is shown on the multi-informa-
tion display.
4 Press the power switch
shortly and firmly.
In the event that the hybrid sys-
tem still cannot be started, con-
tact your Toyota dealer.
■Stopping the hybrid system
Shift the shift lever to P and press
the power switch as you normally do
when stopping the hybrid system.
■Electronic key battery
As the above proce dure is a tempo-
rary measure, it is recommended
that the electronic key battery be
replaced immediately when the bat-
tery is depleted. ( P.350)
■Changing power switch modes
Release the brake pedal and press
the power switch in step 3 above.
The hybrid system does not start
and modes will be changed each
time the switch is pressed. ( P.176)
WARNING
■When using the mechanical
key and operating the power
windows or moon roof (if
equipped)
Operate the power window or
moon roof after checking to make
sure that there is n o possibility of
any passenger having any of their
body parts caught in the window
or moon roof.
Also, do not allow children to
operate the mechanical key. It is
possible for children and other
passengers to get caught in the
power window or moon roof.
Starting the hybrid sys-
tem
Page 412 of 496
4127-2. Steps to take in an emergency
■To prevent 12-volt battery dis-
charge
●Turn off the headlights and the
audio system while the hybrid sys-
tem is off.
●Turn off any unnecessary electri-
cal components when the vehicle
is running at a low speed for an
extended period, such as in heavy
traffic.
■When the 12-volt battery is
removed or discharged
●Information stored in the ECU is
cleared. When the 12-volt battery
is depleted, have the vehicle
inspected at you r Toyota dealer.
●Some systems may require initial-
ization. (P.452)
■When removing the 12-volt bat-
tery terminals
When the 12-volt battery terminals
are removed, the information stored
in the ECU is cleared. Before
removing the 12-volt battery termi-
nals, contact your Toyota dealer.
■Charging the 1 2-volt battery
The electricity stor ed in the 12-volt
battery will discharge gradually even
when the vehicle is not in use, due
to natural discharge and the drain-
ing effects of certain electrical appli-
ances. If the vehicle is left for a long
time, the 12-volt battery may dis-
charge, and the hybrid system may
be unable to start. (The 12-volt bat-
tery recharges aut omatically while
the hybrid system is operating.)
■When recharging or replacing
the 12-volt battery (vehicles
with a smart key system)
●In some cases, it may not be pos-
sible to unlock the doors using the
smart key system when the
12-volt battery is discharged. Use
the wireless remote control or the
mechanical key to lock or unlock
the doors.
●The hybrid system may not start
on the first att empt after the 12-volt battery has recharged but
will start normally after the second
attempt. This is not a malfunction.
●The power switch mode is memo-
rized by the vehicle. When the
12-volt battery is reconnected, the
system will return to the mode it
was in before the 12-volt battery
was discharged. Before discon-
necting the 12-volt battery, turn
the power switch off.
If you are unsure what mode the
power switch was in before the
12-volt battery discharged, be
especially careful when recon-
necting the 12-volt battery.
■When replacing t
he 12-volt bat-
tery
●Use a 12-volt battery that con-
forms to European regulations.
●Use a 12-volt battery that the case
size is same as the previous one
(LN1), 20 hour rate capacity
(20HR) is equivalent (45Ah) or
greater, and per formance rating
(CCA) is equivalent (295A) or
greater.
• If the sizes differ, the 12-volt bat-
tery cannot be properly secured.
• If the 20 hour rate capacity is low,
even if the time p eriod where the
vehicle is not used is a short time,
the 12-volt battery may discharge
and the hybrid system may not be
able to start.
●For details, cons ult your Toyota
dealer.
WARNING
■When removing the 12-volt
battery terminals
Always remove the negative (-)
terminal first. If the positive (+) ter-
minal contacts any metal in the
surrounding area when the posi-
tive (+) terminal is removed, a
spark may occur, leading to a fire
in addition to ele ctrical shocks
and death or serious injury.
Page 413 of 496
4137-2. Steps to take in an emergency
7
When trouble arises
WARNING
■Avoiding 12-volt battery fires
or explosions
Observe the following precautions
to prevent accidentally igniting the
flammable gas that may be emit-
ted from the 12-volt battery:
●Make sure each jumper cable is
connected to the correct termi-
nal and that it is not unintention-
ally in contact with any other
than the intended terminal.
●Do not allow the other end of
the jumper cable connected to
the “+” terminal to come into
contact with any other parts or
metal surfaces in the area, such
as brackets or unpainted metal.
●Do not allow the + and - clamps
of the jumper cables to come
into contact with each other.
●Do not smoke, use matches,
cigarette lighters or allow open
flame near the 12-volt battery.
■12-volt battery precautions
The 12-volt battery contains poi-
sonous and corrosi ve acidic elec-
trolyte, while related parts contain
lead and lead compounds.
Observe the following precautions
when handling the 12-volt battery:
●When working with the 12-volt
battery, always wear safety
glasses and take care not to
allow any battery fluids (acid) to
come into contact with skin,
clothing or the vehicle body.
●Do not lean over the 12-volt bat-
tery.
●In the event that battery fluid
comes into contact with the skin
or eyes, immediately wash the
affected area with water and
seek medical attention. Place a
wet sponge or cloth over the
affected area until medical
attention can be received.
●Always wash your hands after
handling the 12-volt battery sup-
port, terminals, and other bat-
tery-related parts.
●Do not allow children near the
12-volt battery.
NOTICE
■When handling jumper cables
When connecting the jumper
cables, ensure that they do not
become entangled in the cooling
fans, etc.
Page 416 of 496
4167-2. Steps to take in an emergency
Toyota dealer as soon as possible.
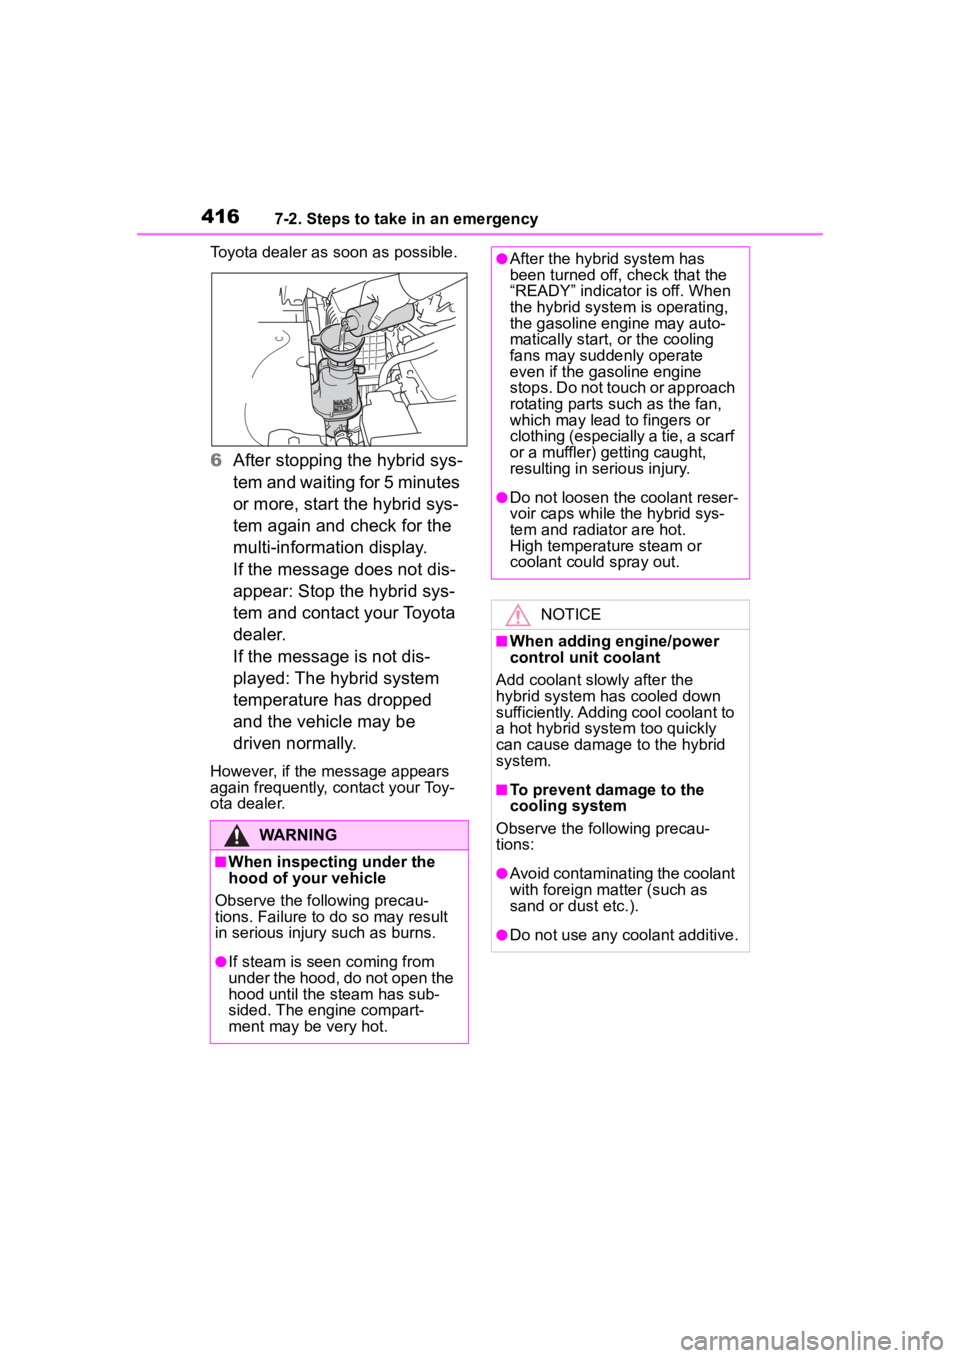
6After stopping the hybrid sys-
tem and waiting for 5 minutes
or more, start the hybrid sys-
tem again and check for the
multi-information display.
If the message does not dis-
appear: Stop the hybrid sys-
tem and contact your Toyota
dealer.
If the message is not dis-
played: The hybrid system
temperature has dropped
and the vehicle may be
driven normally.
However, if the message appears
again frequently, contact your Toy-
ota dealer.
WARNING
■When inspecting under the
hood of your vehicle
Observe the following precau-
tions. Failure to do so may result
in serious injury such as burns.
●If steam is seen coming from
under the hood, do not open the
hood until the steam has sub-
sided. The engine compart-
ment may be very hot.
●After the hybrid system has
been turned off , check that the
“READY” indicator is off. When
the hybrid system is operating,
the gasoline engine may auto-
matically start, or the cooling
fans may suddenly operate
even if the gasoline engine
stops. Do not touch or approach
rotating parts such as the fan,
which may lead to fingers or
clothing (especially a tie, a scarf
or a muffler) getting caught,
resulting in serious injury.
●Do not loosen the coolant reser-
voir caps while the hybrid sys-
tem and radiator are hot.
High temperature steam or
coolant could spray out.
NOTICE
■When adding engine/power
control unit coolant
Add coolant slowly after the
hybrid system has cooled down
sufficiently. Adding cool coolant to
a hot hybrid system too quickly
can cause damage to the hybrid
system.
■To prevent damage to the
cooling system
Observe the following precau-
tions:
●Avoid contaminating the coolant
with foreign matter (such as
sand or dust etc.).
●Do not use any coolant additive.
Page 417 of 496
4177-2. Steps to take in an emergency
7
When trouble arises
1Stop the hybrid system. Set
the parking brake and shift
the shift lever to P.
2 Remove the mud, snow or
sand from around the front
wheels.
3 Place wood, stones or some
other material under the front
wheels to help provide trac-
tion.
4 Restart the hybrid system.
5 Shift the shift lever to D or R
and release the parking
brake. Then, while exercising
caution, depress the acceler-
ator pedal.
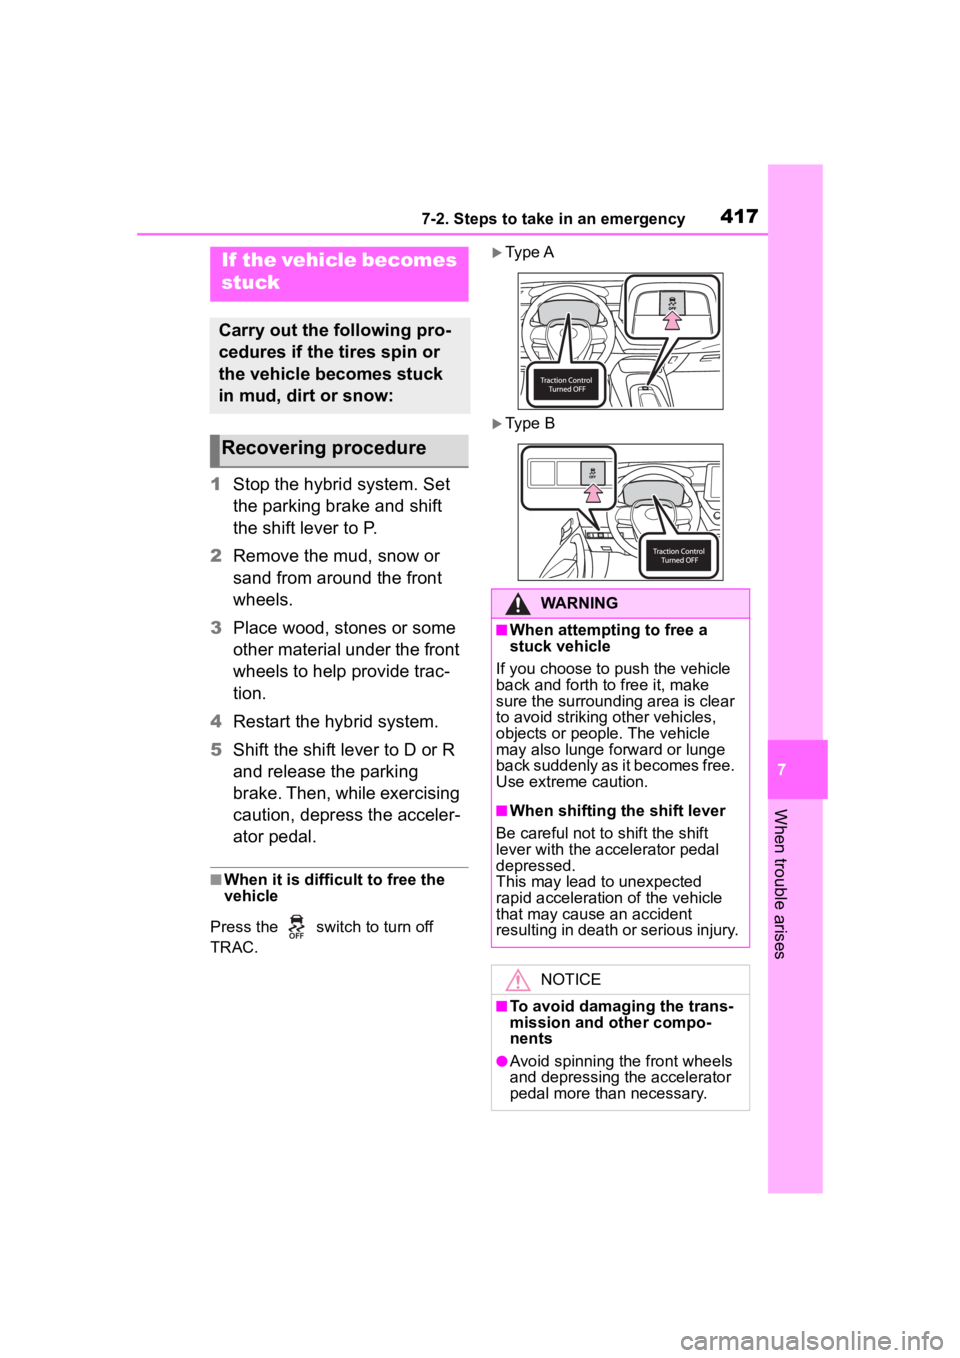
■When it is difficult to free the
vehicle
Press the switch to turn off
TRAC.
Ty p e A
Ty p e B
If the vehicle becomes
stuck
Carry out the following pro-
cedures if the tires spin or
the vehicle becomes stuck
in mud, dirt or snow:
Recovering procedure
WARNING
■When attempting to free a
stuck vehicle
If you choose to push the vehicle
back and forth to free it, make
sure the surrounding area is clear
to avoid striking other vehicles,
objects or people. The vehicle
may also lunge forward or lunge
back suddenly as it becomes free.
Use extreme caution.
■When shifting the shift lever
Be careful not to shift the shift
lever with the accelerator pedal
depressed.
This may lead to unexpected
rapid acceleration of the vehicle
that may cause an accident
resulting in death o r serious injury.
NOTICE
■To avoid damaging the trans-
mission and other compo-
nents
●Avoid spinning the front wheels
and depressing the accelerator
pedal more than necessary.
Page 425 of 496
4258-1. Specifications
8
Vehicle specifications
*1: Minimum pedal clearance when depressed with a force of 67.4 lbf (300
N, 30.6 kgf) while the hyb rid system is operating.
*2: Make sure to confirm that the brake system warning light (yellow) does
not illuminate. (If the brake system warning light illuminates, refer to
P.372.)
NOTICE
■Transmission fluid type
Using transmission fluid other than the above type may cause ab normal
noise or vibration, or ultimately damage the transmission of yo ur vehicle.
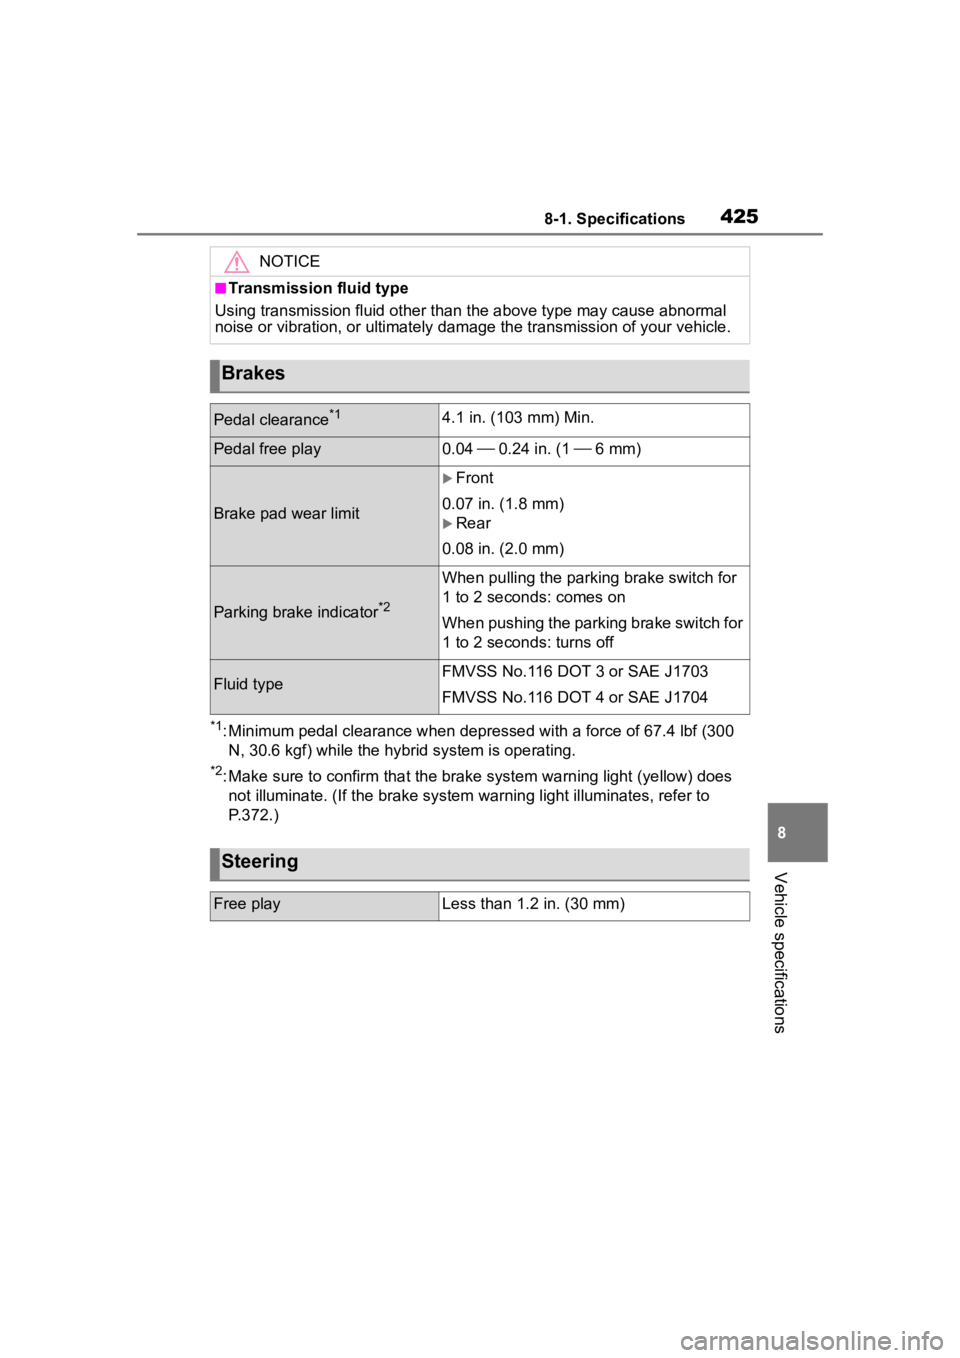
Brakes
Pedal clearance*14.1 in. (103 mm) Min.
Pedal free play0.04 0.24 in. (1 6 mm)
Brake pad wear limit
Front
0.07 in. (1.8 mm)
Rear
0.08 in. (2.0 mm)
Parking brake indicator*2
When pulling th e parking brake switch for
1 to 2 seconds: comes on
When pushing the parking brake switch for
1 to 2 seconds: turns off
Fluid typeFMVSS No.116 DOT 3 or SAE J1703
FMVSS No.116 DOT 4 or SAE J1704
Steering
Free playLess than 1.2 in. (30 mm)
Page 435 of 496
4358-1. Specifications
8
Vehicle specifications
would wear one and a half (1 - 1/2)
times as well on the government
course as a tire graded 100.
The relative performance of tires
depends upon the actual conditions
of their use. Performance may differ
significantly from the norm due to
variations in driving habits, service
practices and differences in road
characteristics and climate.
■Traction AA, A, B, C
The traction grades, from high-
est to lowest, are AA, A, B and
C, and they represent the tire’s
ability to stop on wet pavement
as measured under controlled
conditions on specified govern-
ment test surfaces of asphalt
and concrete.
A tire marked C may have poor
traction performance.
Warning: The traction grade
assigned to this tire is based on
braking (straight ahead) traction
tests and does not include corner-
ing (turning) traction.
■Temperature A, B, C
The temperature grades are A (the highest), B, and C, repre-
senting the tire’s resistance to
the generation of heat and its
ability to dissipate heat when
tested under controlled condi-
tions on a specified indoor labo-
ratory test wheel.
Sustained high temperature can
cause the material
of the tire to
degenerate and reduce tire life, and
excessive temperature can lead to
sudden tire failure.
Grade C corresponds to a level of
performance which all passenger
car tires must meet under the Fed-
eral Motor Vehicle Safety Standard
No. 109.
Grades B and A represent higher
levels of performance on the labo-
ratory test wheel than the minimum
required by law.
Warning: The temperature grades
of a tire assume tha t it is properly
inflated and not overloaded.
Excessive speed, underinflation, or
excessive loading, either sepa-
rately or in combination, can cause
heat buildup and possible tire fail-
ure.
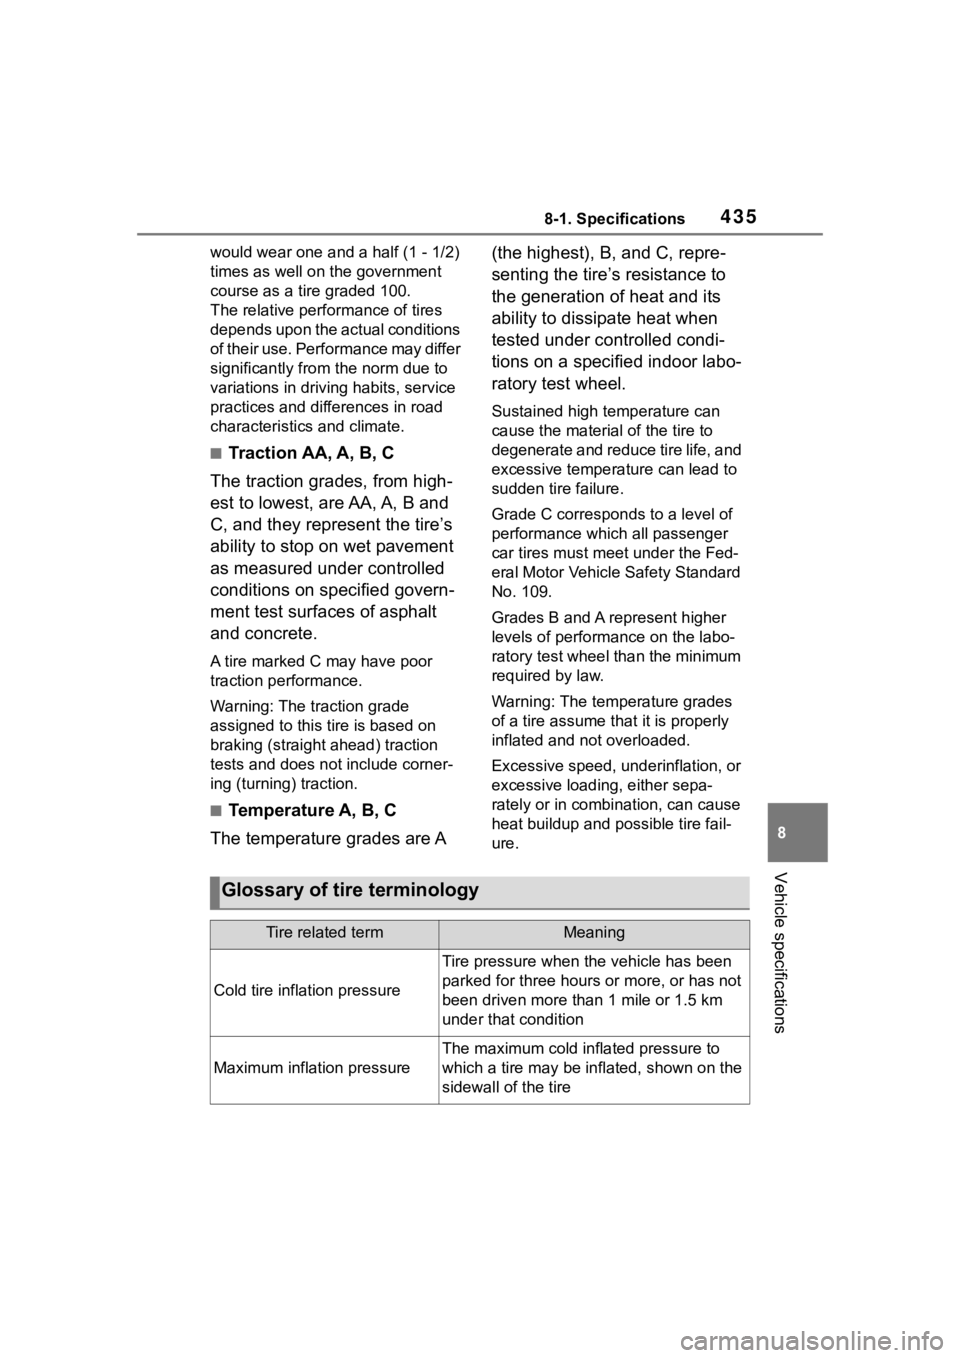
Glossary of tire terminology
Tire related termMeaning
Cold tire infl ation pressure
Tire pressure when the vehicle has been
parked for three hours or more, or has not
been driven more than 1 mile or 1.5 km
under that condition
Maximum inflation pressure
The maximum cold inf lated pressure to
which a tire may be inflated, shown on the
sidewall of the tire
Page 442 of 496
4428-2. Customization
8-2.Customization
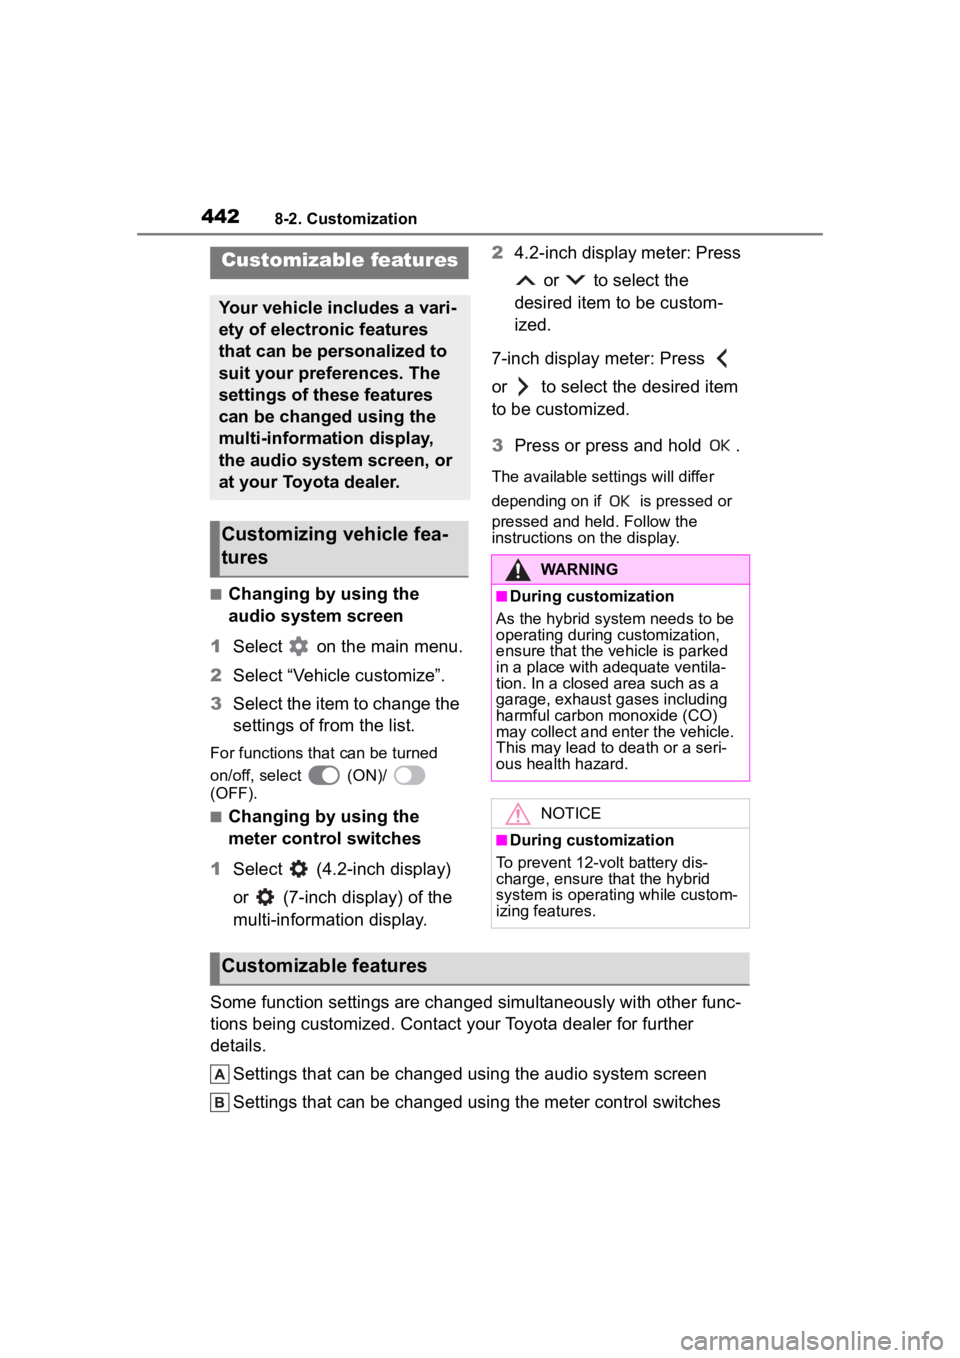
■Changing by using the
audio system screen
1 Select on the main menu.
2 Select “Vehicle customize”.
3 Select the item to change the
settings of from the list.
For functions that can be turned
on/off, select (ON)/
(OFF).
■Changing by using the
meter control switches
1 Select (4.2-inch display)
or (7-inch display) of the
multi-information display. 2
4.2-inch display meter: Press
or to select the
desired item to be custom-
ized.
7-inch display meter: Press
or to select the desired item
to be customized.
3 Press or press and hold .
The available settings will differ
depending on if is pressed or
pressed and held. Follow the
instructions on the display.
Some function settings are changed simultaneously with other fu nc-
tions being customized. Contact y our Toyota dealer for further
details.
Settings that can be changed using the audio system screen
Settings that can be changed using the meter control switches
Customizable features
Your vehicle includes a vari-
ety of electronic features
that can be personalized to
suit your preferences. The
settings of these features
can be changed using the
multi-information display,
the audio system screen, or
at your Toyota dealer.
Customizing vehicle fea-
tures
WARNING
■During customization
As the hybrid system needs to be
operating during customization,
ensure that the vehicle is parked
in a place with adequate ventila-
tion. In a closed area such as a
garage, exhaust gases including
harmful carbon monoxide (CO)
may collect and enter the vehicle.
This may lead to death or a seri-
ous health hazard.
NOTICE
■During customization
To prevent 12-volt battery dis-
charge, ensure that the hybrid
system is operating while custom-
izing features.
Customizable features