2023 TOYOTA COROLLA CROSS headlights
[x] Cancel search: headlightsPage 181 of 500
1814-3. Operating the lights and wipers
4
Driving
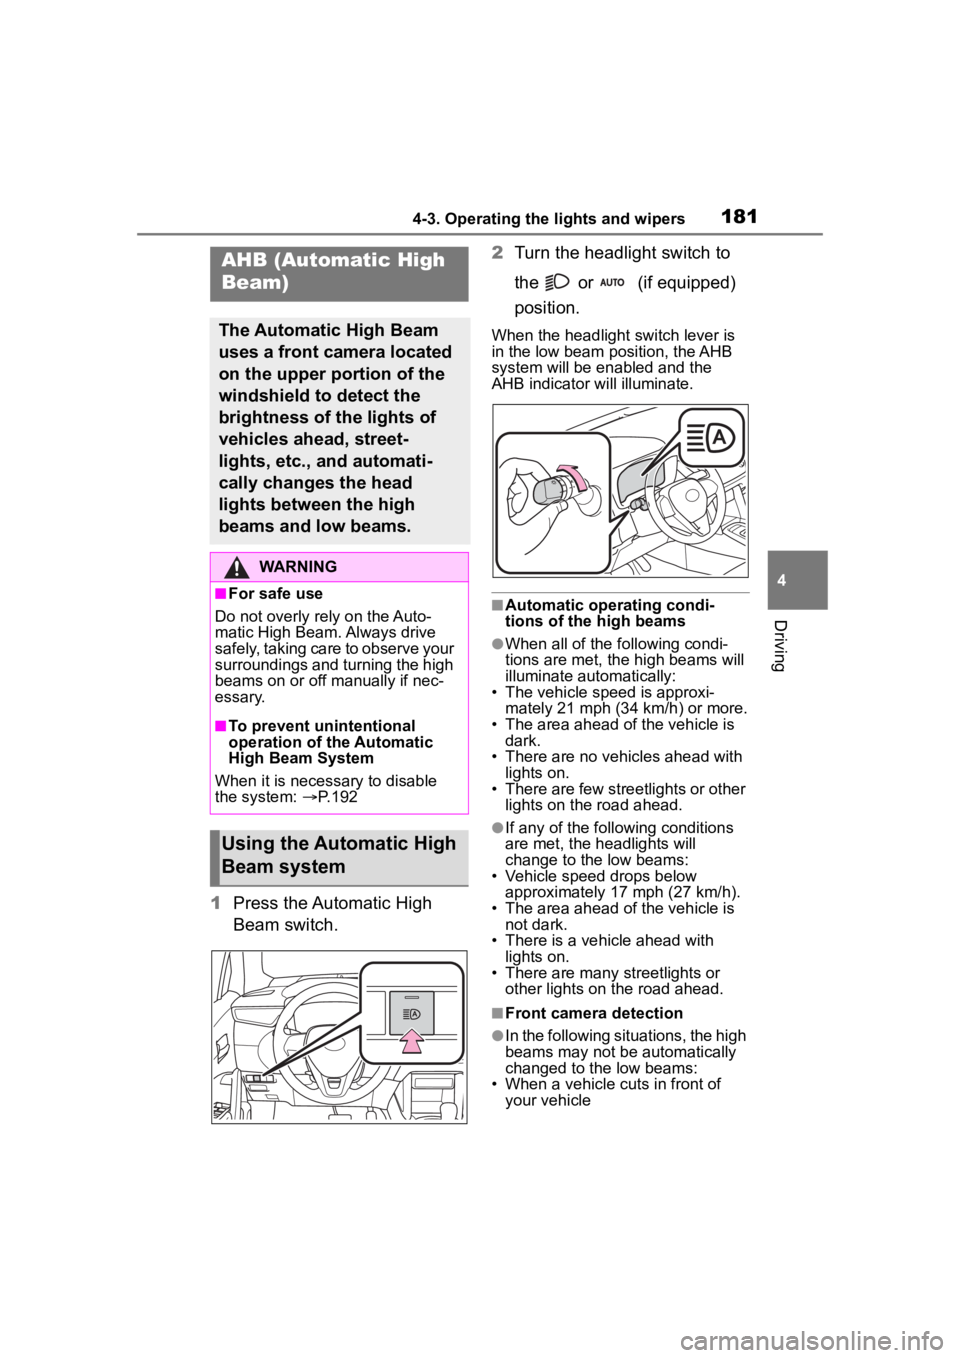
1Press the Automatic High
Beam switch. 2
Turn the headlight switch to
the or (if equipped)
position.
When the headlight switch lever is
in the low beam position, the AHB
system will be en abled and the
AHB indicator will illuminate.
■Automatic operating condi-
tions of the high beams
●When all of the following condi-
tions are met, the high beams will
illuminate automatically:
• The vehicle speed is approxi-
mately 21 mph (34 km/h) or more.
• The area ahead of the vehicle is dark.
• There are no vehicles ahead with lights on.
• There are few streetlights or other
lights on the road ahead.
●If any of the following conditions
are met, the headlights will
change to the low beams:
• Vehicle speed drops below
approximately 17 mph (27 km/h).
• The area ahead of the vehicle is not dark.
• There is a vehicle ahead with lights on.
• There are many streetlights or other lights on the road ahead.
■Front camera detection
●In the following situations, the high
beams may not be automatically
changed to the low beams:
• When a vehicle cuts in front of your vehicle
AHB (Automatic High
Beam)
The Automatic High Beam
uses a front camera located
on the upper portion of the
windshield to detect the
brightness of the lights of
vehicles ahead, street-
lights, etc., and automati-
cally changes the head
lights between the high
beams and low beams.
WARNING
■For safe use
Do not overly rely on the Auto-
matic High Beam. Always drive
safely, taking care to observe your
surroundings and turning the high
beams on or off manually if nec-
essary.
■To prevent unintentional
operation of the Automatic
High Beam System
When it is necessary to disable
the system: P. 1 9 2
Using the Automatic High
Beam system
Page 182 of 500

1824-3. Operating the lights and wipers
• When another vehicle crosses in front of the vehicle
• When vehicles ahead are repeat-
edly detected and then hidden
due to repeated curves, road
dividers or roadside trees
• When a vehicle ahead approaches from a far lane
• When a vehicle ahead is far away
• When a vehicle ahead has no
lights
• When the lights of a vehicle ahead
are dim
• When a vehicle ahead is reflecting strong light, such as own head-
lights
• Situations in which the sensors may not operate properly: P. 1 9 6
●The headlights may change to the
low beams if a vehi cle ahead that
is using fog lights without its head-
lights turned on is detected.
●House lights, street lights, traffic
signals, and illumi nated billboards
or signs may cause the high
beams to change to the low
beams, or the low beams to
remain on.
●The following may change the tim-
ing at which the headlights
change to the low beams:
• The brightness of lights of vehi- cles ahead
• The movement and direction of vehicles ahead
• The distance betw een the vehicle
and a vehicle ahead
• When a vehicle ahead only has lights illuminate d on one side
• When a vehicle ahead is a two-wheeled vehicle
• The condition of the road (gradi-
ent, curve, condi tion of the road
surface, etc.)
• The number of passengers and amount of luggage
●The headlights may change
between the high beams and low
beams unexpectedly.
●Bicycles and other small vehicles
may not be detected.
●In the following situations, the sys- tem may not be able to correctly
detect the brightness of the sur-
roundings. This may cause the
low beams to remain on or the
high beams to flash or dazzle
pedestrians or vehicles ahead. In
such a case, it
is necessary to
manually change between the
high beams and low beams.
• When there are lights similar to headlights or tail lights in the sur-
rounding area
• When headlights or tail lights of vehicles ahead are turned off,
dirty, changing color, or not aimed
properly
• When the headlights are repeat- edly changing between the high
beams and low beams.
• When use of the high beams is inappropriate or when the high
beams may be flashing or daz-
zling pedestrians or other drivers.
• When the vehicl e is used in an
area in which vehicles travel on
the opposite side of the road of
the country for which the vehicle
was designed, for example using
a vehicle designed for right-hand
traffic in a left-ha nd traffic area, or
vice versa
• When it is necessary to disable the system: P. 1 9 2
• Situations in which the sensors may not operate properly: P. 1 9 6
■Temporarily reducing front
camera sensitivity
The sensitivity of the front camera
can be temporarily reduced.
1 Turn the engine switch off while
the following conditions are met.
●The headlight switch is in or
.
●The headlight switch lever is in the
low beam position.
●The Automatic High Beam switch
is on.
2 Turn the engine switch to ON.
3 Within 60 seconds after perform-
ing step 2, push the headlight
Page 184 of 500
1844-3. Operating the lights and wipers
*: If equipped
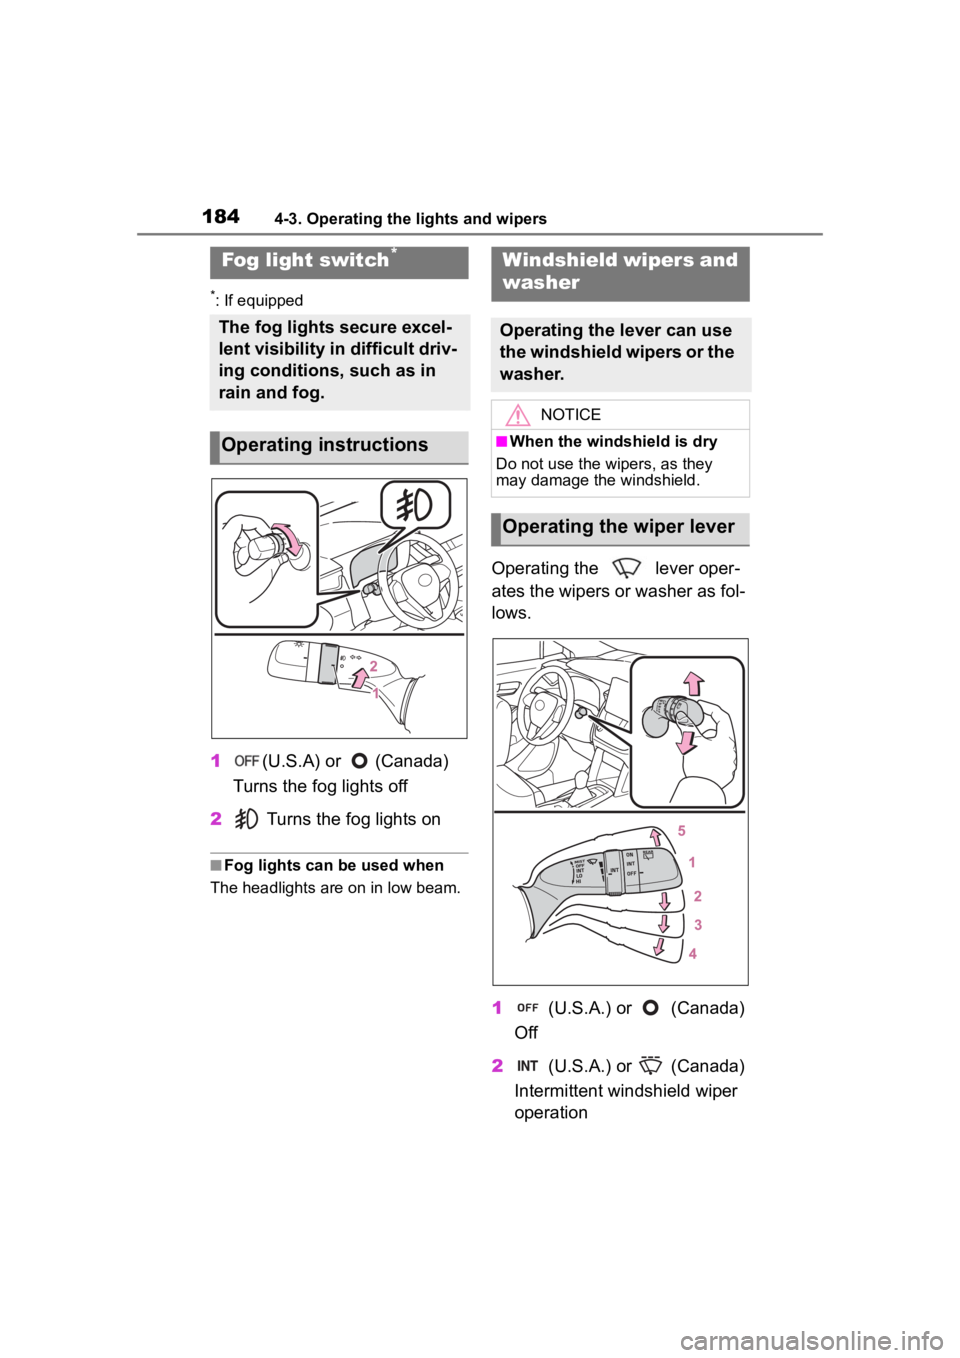
1(U.S.A) or (Canada)
Turns the fog lights off
2 Turns the fog lights on
■Fog lights can be used when
The headlights are on in low beam.
Operating the lever oper-
ates the wipers or washer as fol-
lows.
1 (U.S.A.) or (Canada)
Off
2 (U.S.A.) or (Canada)
Intermittent windshield wiper
operation
Fog light switch*
The fog lights secure excel-
lent visibility in difficult driv-
ing conditions, such as in
rain and fog.
Operating instructions
Windshield wipers and
washer
Operating the lever can use
the windshield wipers or the
washer.
NOTICE
■When the windshield is dry
Do not use the wipers, as they
may damage the windshield.
Operating the wiper lever
Page 195 of 500
1954-5. Using the driving support systems
4
Driving
WARNING
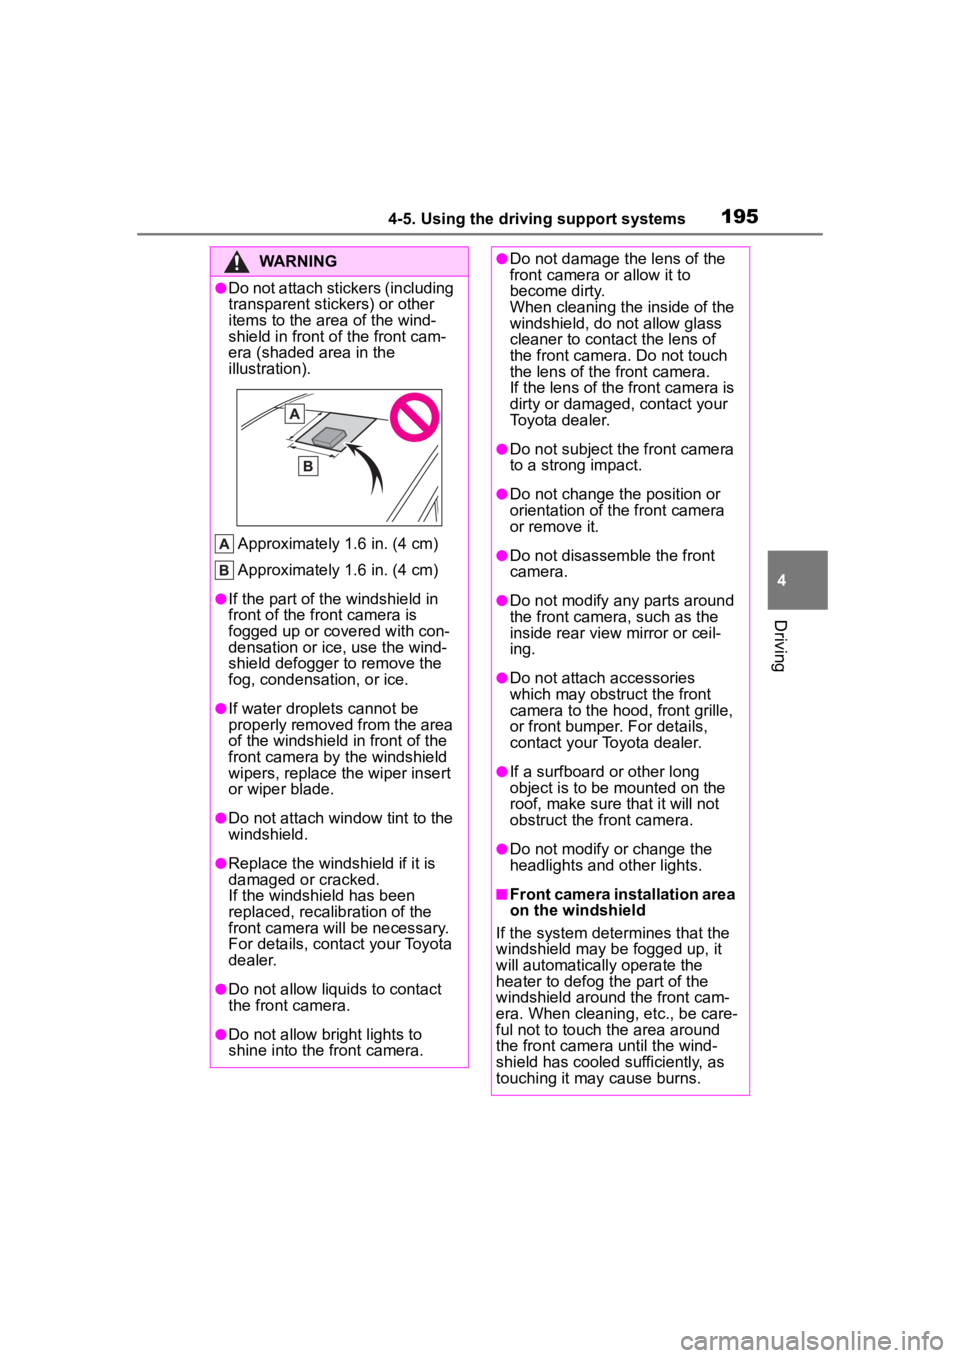
●Do not attach stickers (including
transparent stickers) or other
items to the area of the wind-
shield in front of the front cam-
era (shaded area in the
illustration).
Approximately 1.6 in. (4 cm)
Approximately 1.6 in. (4 cm)
●If the part of the windshield in
front of the front camera is
fogged up or covered with con-
densation or ice, use the wind-
shield defogger to remove the
fog, condensation, or ice.
●If water droplets cannot be
properly removed from the area
of the windshield in front of the
front camera by the windshield
wipers, replace the wiper insert
or wiper blade.
●Do not attach win dow tint to the
windshield.
●Replace the windshield if it is
damaged or cracked.
If the windshield has been
replaced, recalib ration of the
front camera will be necessary.
For details, contact your Toyota
dealer.
●Do not allow liquids to contact
the front camera.
●Do not allow bright lights to
shine into the front camera.
●Do not damage th e lens of the
front camera o r allow it to
become dirty.
When cleaning the inside of the
windshield, do not allow glass
cleaner to contact the lens of
the front camera. Do not touch
the lens of the front camera.
If the lens of the front camera is
dirty or damaged, contact your
Toyota dealer.
●Do not subject the front camera
to a strong impact.
●Do not change the position or
orientation of the front camera
or remove it.
●Do not disassemble the front
camera.
●Do not modify any parts around
the front camera , such as the
inside rear view mirror or ceil-
ing.
●Do not attach accessories
which may obstruct the front
camera to the hood, front grille,
or front bumper. For details,
contact your Toyota dealer.
●If a surfboard or other long
object is to be mounted on the
roof, make sure that it will not
obstruct the front camera.
●Do not modify or change the
headlights and other lights.
■Front camera installation area
on the windshield
If the system determines that the
windshield may be fogged up, it
will automatically operate the
heater to defog t he part of the
windshield aroun d the front cam-
era. When cleaning, etc., be care-
ful not to touch the area around
the front camera until the wind-
shield has cooled sufficiently, as
touching it may cause burns.
Page 196 of 500
1964-5. Using the driving support systems
■Situations in which the sensors
may not operate properly
●When the height or inclination of
the vehicle has been changed due
to modifications
●When the windshield is dirty,
fogged up, cracked or damaged
●When the ambient temperature is
high or low
●When mud, water, snow, dead
insects, foreign matter, etc., is
attached to the front of the sensor
●When in inclement weather such
as heavy rain, fog, snow, or a
sandstorm
●When water, snow, dust, etc. is
t h r o w n u p i n f r o n t o f t h e v e h i c l e , o r
when driving through mist or
smoke
●When the headlig hts are not illu-
minated while driving in the dark,
such as at night o r when in a tun-
nel
●When the lens of a headlight is
dirty and illumination is weak
●When the headlights are mis-
aligned
●When a headlight is malfunction-
ing
●When the headlights of another
vehicle, sunlight, or reflected light
shines directly into the front cam-
era
●When the brightn ess of the sur-
rounding area changes suddenly
●When driving near a TV tower,
broadcasting station, electric
power plant, radar equipped vehi-
cles, etc., or other location where
strong radio waves or electrical
noise may be present
●When a wiper blade is blocking
the front camera
●When in a location or near objects
which strongly reflect radio waves,
such as the following:
• Tunnels • Truss bridges
• Gravel roads
• Rutted, snow-covered roads
•Walls
• Large trucks
• Manhole covers
• Guardrail
• Metal plates
●When near a step or protrusion
●When a detectable vehicle is nar-
row, such as a sma
ll mobility vehi-
cle
●When a detectable vehicle has a
small front or rear end, such as an
unloaded truck
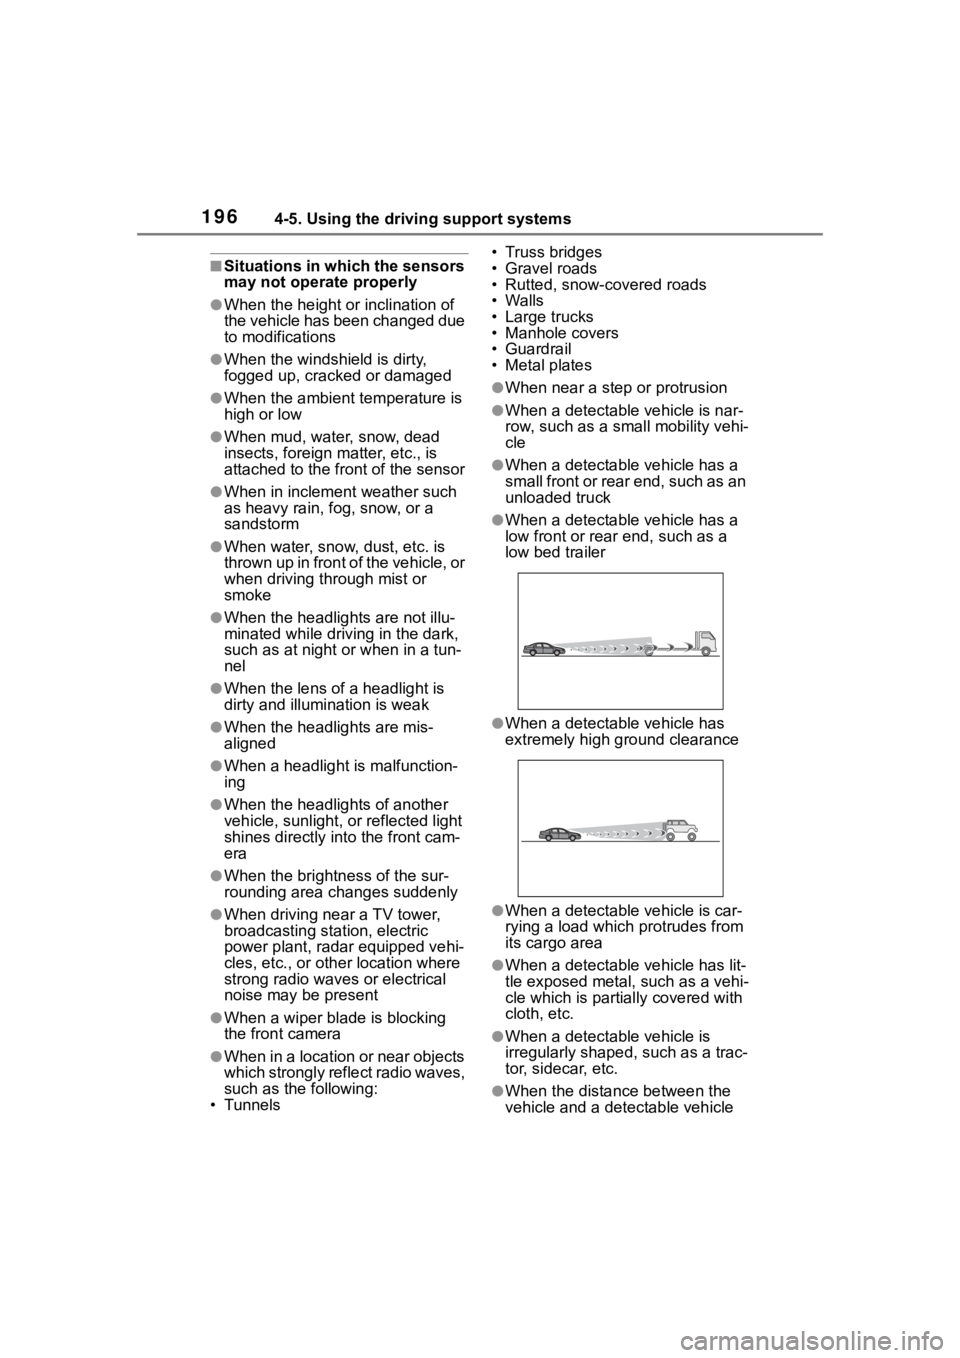
●When a detectable vehicle has a
low front or rear end, such as a
low bed trailer
●When a detectable vehicle has
extremely high ground clearance
●When a detectable vehicle is car-
rying a load which protrudes from
its cargo area
●When a detectable vehicle has lit-
tle exposed metal, such as a vehi-
cle which is parti ally covered with
cloth, etc.
●When a detectable vehicle is
irregularly shaped, such as a trac-
tor, sidecar, etc.
●When the distance between the
vehicle and a detectable vehicle
Page 374 of 500
3746-3. Do-it-yourself maintenance
Check the wattage of the light
bulb to be replaced. ( P.435)
P. 1 1 6
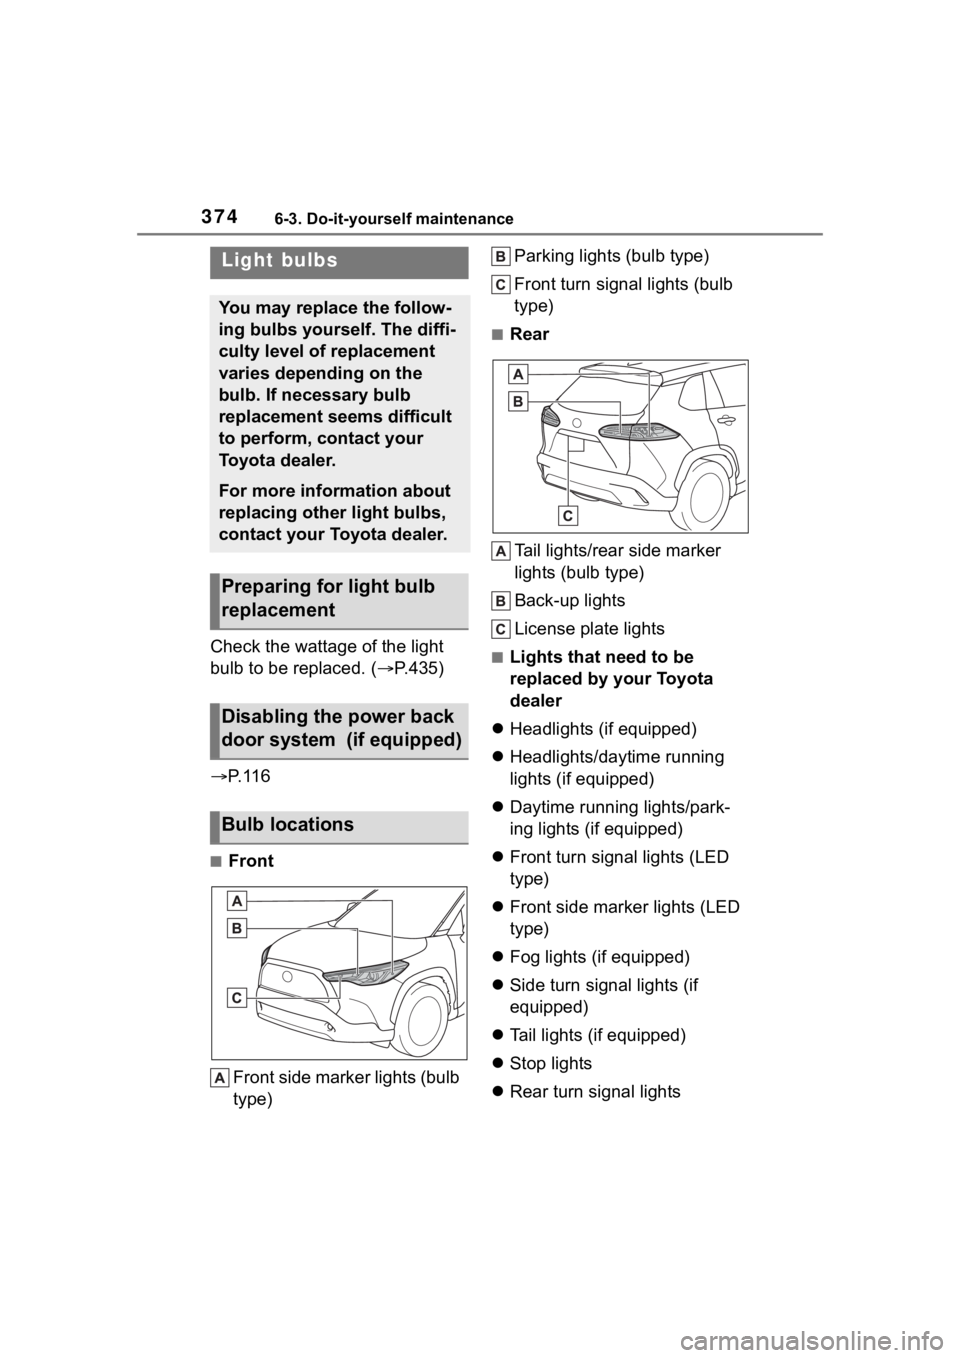
■Front
Front side marker lights (bulb
type) Parking lights (bulb type)
Front turn signal lights (bulb
type)
■Rear
Tail lights/rear side marker
lights (bulb type)
Back-up lights
License plate lights
■Lights that need to be
replaced by your Toyota
dealer
Headlights (if equipped)
Headlights/daytime running
lights (if equipped)
Daytime running lights/park-
ing lights (if equipped)
Front turn signal lights (LED
type)
Front side marker lights (LED
type)
Fog lights (if equipped)
Side turn signal lights (if
equipped)
Tail lights (if equipped)
Stop lights
Rear turn signal lights
Light bulbs
You may replace the follow-
ing bulbs yourself. The diffi-
culty level of replacement
varies depending on the
bulb. If necessary bulb
replacement seems difficult
to perform, contact your
Toyota dealer.
For more information about
replacing other light bulbs,
contact your Toyota dealer.
Preparing for light bulb
replacement
Disabling the power back
door system (if equipped)
Bulb locations
Page 415 of 500
4157-2. Steps to take in an emergency
7
When trouble arises
One of the following may be the
cause of the problem:
There may not be sufficient
fuel in the vehicle’s tank.
Refuel the vehicle.
The engine may be flooded.
Try to restart the engine again
following correct starting pro-
cedures. ( P.162, 163)
There may be a malfunction
in the engine immobilizer sys-
tem. ( P.68)
One of the following may be the
cause of the problem:
The battery may be dis-
charged. ( P.419)
NOTICE
■When replacing the tires
When removing or fitting the
wheels, tires or the tire pressure
warning valve and transmitter,
contact your Toyota dealer as the
tire pressure warning valve and
transmitter may be damaged if not
handled correctly.
■To avoid damage to the tire
pressure warning valves and
transmitters
When a tire is repaired with liquid
sealants, the tire pressure warn-
ing valve and transmitter may not
operate properly. If a liquid seal-
ant is used, contact your Toyota
dealer or other qualified service
shop as soon as possible. Make
sure to replace the tire pressure
warning valve and transmitter
when replacing the tire.
If the engine will not
star t
If the engine will not start
even though correct starting
procedures are being fol-
lowed ( P.162, 163), con-
sider each of the following
points:
The engine will not start
even though the starter
motor operates normally.
The starter motor turns
over slowly, the interior
lights and headlights are
dim, or the horn does not
sound or sounds at a low
volume.
Page 416 of 500

4167-2. Steps to take in an emergency
The battery terminal connec-
tions may be loose or cor-
roded. ( P.348)
The engine starting system may
be malfunctioning due to an
electrical problem such as elec-
tronic key battery depletion or a
blown fuse. However, an interim
measure is available to start the
engine. ( P.416)
One of the following may be the
cause of the problem:
The battery may be dis-
charged. ( P.419)
One or both of the battery ter-
minals may be disconnected.
( P.348)
Contact your Toyot a dealer if the
problem cannot be repaired, or if
repair procedures are unknown.
When the engine does not start,
the following steps can be used as an interim measure to start
the engine if the engine switch is
functioning normally.
Do not use this starting proce-
dure except in case of emer-
gency.
1
Set the parking brake.
( P.172)
2 Check that the shift lever is in
P.
3 Turn the engine switch to
ACC
*.
4 Press and hold the engine
switch for about 15 seconds
while depressing the brake
pedal firmly.
Even if the engi ne can be started
using the above steps, the system
may be malfunctioning. Have the
vehicle inspected by your Toyota
dealer.
*: ACC mode can be enabled/dis- abled on the customize menu.
( P.449)
The starter motor does
not turn over (vehicles
with a smart key system)
The starter motor does
not turn over, the interior
lights and headlights do
not turn on, or the horn
does not sound.
Emergency start function
(vehicles with a smart key
system)