2023 TOYOTA 86 rear view mirror
[x] Cancel search: rear view mirrorPage 127 of 449
1273-4. Adjusting the steering wheel and mirrors
3
Before driving
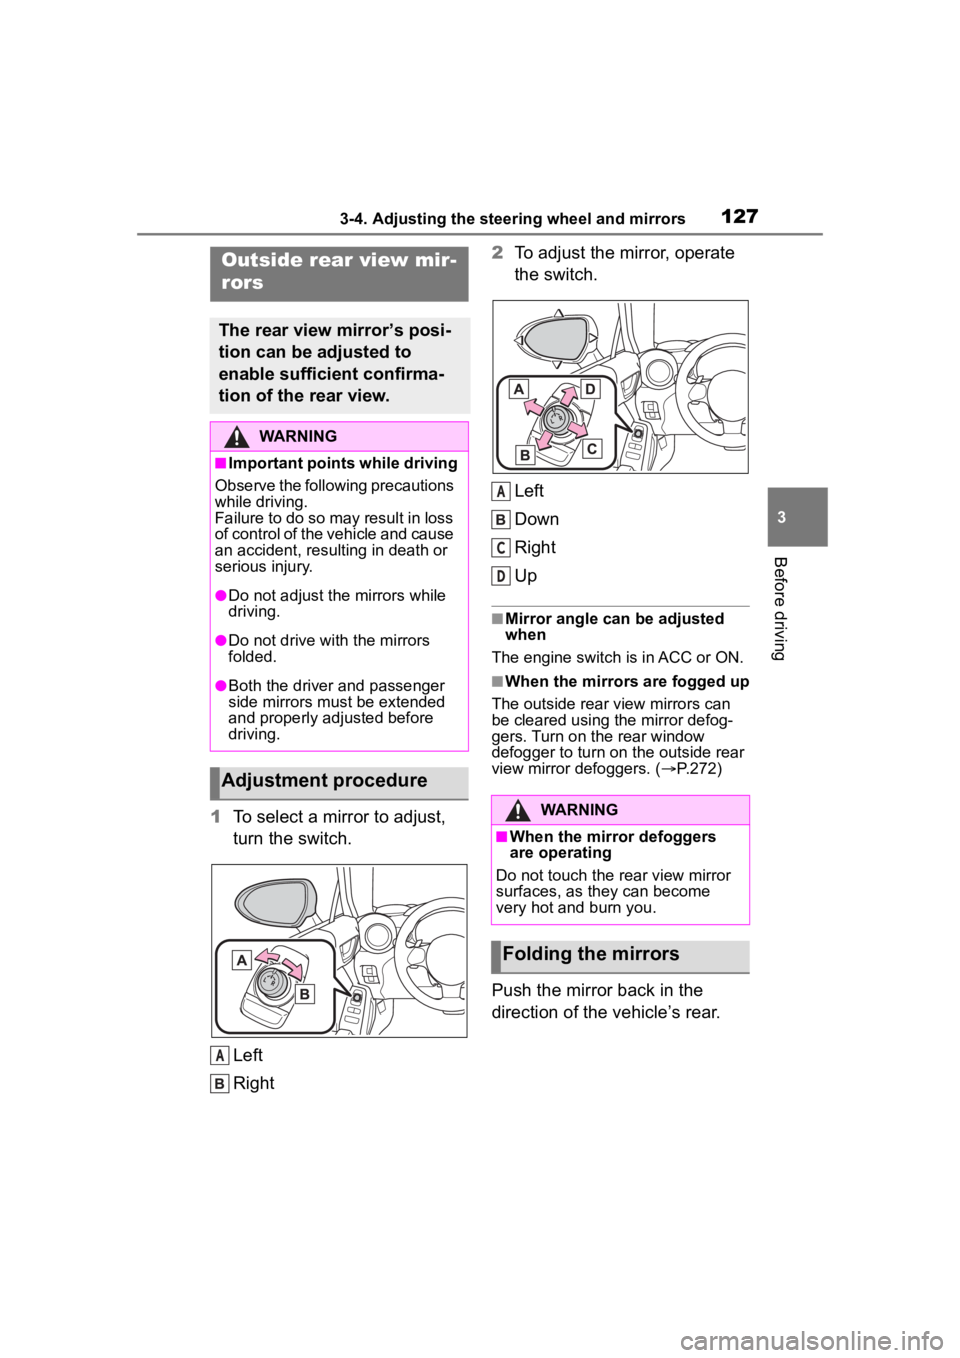
1To select a mirror to adjust,
turn the switch.
Left
Right 2
To adjust the mirror, operate
the switch.
Left
Down
Right
Up
■Mirror angle can be adjusted
when
The engine switch i s in ACC or ON.
■When the mirrors are fogged up
The outside rear view mirrors can
be cleared using the mirror defog-
gers. Turn on the rear window
defogger to turn on the outside rear
view mirror defoggers. ( P.272)
Push the mirror back in the
direction of the vehicle’s rear.
Outside rear view mir-
rors
The rear view mirror’s posi-
tion can be adjusted to
enable sufficient confirma-
tion of the rear view.
WARNING
■Important points while driving
Observe the following precautions
while driving.
Failure to do so may result in loss
of control of the vehicle and cause
an accident, resul ting in death or
serious injury.
●Do not adjust the mirrors while
driving.
●Do not drive with the mirrors
folded.
●Both the driver and passenger
side mirrors must be extended
and properly adjusted before
driving.
Adjustment procedure
A
WARNING
■When the mirror defoggers
are operating
Do not touch the rear view mirror
surfaces, as they can become
very hot and burn you.
Folding the mirrors
A
C
D
Page 135 of 449
1354-1. Before driving
4
Driving
WARNING
●Do not drive the vehicle over or
stop the vehicle near flammable
materials.
The exhaust system and
exhaust gases can be
extremely hot. These hot parts
may cause a fire if there is any
flammable material nearby.
●Vehicles with a manual trans-
mission: Do not release the
clutch pedal too quickly. Doing
so may propel the vehicle for-
ward, possibly causing an acci-
dent.
●During normal driving, do not
turn off the engine. Turning the
engine off while driving will not
cause loss of steering or brak-
ing control, but the power assist
to these systems will be lost.
This will make it more difficult to
steer and brake, so you should
pull over and stop the vehicle as
soon as it is safe to do so.
However, in the event of an
emergency, such as if it
becomes impossible to stop the
vehicle in the normal way:
P. 3 3 8
●Use engine braking (downshift)
to maintain a safe speed when
driving down a steep hill.
Using the brakes continuously
may cause the brakes to over-
heat and lose effectiveness.
(
P.149, 153)
●Do not adjust the positions of
the steering wheel, the seat, or
the inside or outside rear view
mirrors while driving.
Doing so may result in a loss of
vehicle control.
●Always check that all passen-
gers’ arms, heads or other parts
of their body are not outside the
vehicle.
●Do not drive in excess of the
speed limit. Even if the legal
speed limit permits it, do not
drive over 85 mph (140 km/h)
unless your vehicle has
high-speed capability tires. Driv-
ing over 85 mph (140 km/h)
may result in tire failure, loss of
control and possible injury. Be
sure to consult a tire dealer to
determine whether the tires on
your vehicle are high-speed
capability tires or not before
driving at such speeds.
■When driving on slippery
road surfaces
●Sudden braking, acceleration
and steering may cause tire
slippage and reduce your ability
to control the vehicle.
●Sudden acceleration, engine
braking due to shifting, or
changes in engine speed could
cause the vehicle to skid.
●After driving through a puddle,
lightly depress the brake pedal
to make sure that the brakes
are functioning properly. Wet
brake pads may prevent the
brakes from functioning prop-
erly. If the brakes on only one
side are wet and not functioning
properly, steering control may
be affected.
■When shifting the shift lever
●Vehicles with an automatic
transmission: Do not let the
vehicle roll backward while the
shift lever is in a driving posi-
tion, or roll forw ard while the
shift lever is in R.
Doing so may cause the engine
to stall or lead to poor brake and
steering performance, resulting
in an accident or damage to the
vehicle.
Page 173 of 449
1734-5. EyeSight
4
Driving
NOTICE
●Under the conditions listed
below, it will become more diffi-
cult for the system to detect the
vehicle in front, motorcycles,
bicycles, pedestrians and obsta-
cles on the road, and lane mark-
ers. Also, EyeSight may
temporarily stop operating.
However, the temporary stop
will be canceled once these
conditions have improved and
the vehicle is driven for a short
period of time.
• Bad weather (for example heavy rain, a blizzard or thick
fog). In particular, the system is
more likely to temporarily stop
operating when there is an oil
film adhering to the windshield,
a glass coating has been
applied, or poorly performing
wipers are used.
• Strong light is coming from the front (sunlight or headlight
beams of oncoming traffic, etc.).
• The windshield washer is in use.
• Raindrops, water drops, or dirt on the windshield are not wiped
off sufficiently.
• The windshield has become fogged, scratched or smeared,
or snow, dirt ,dust or frost has
adhered to it, or it is otherwise
affected. These will reduce the
stereo camera’s field of view.
Also, light is reflecting off the
dirt, etc.
• The vehicle is tilted at an extreme angle due to loaded
cargo or other factors.
• Visibility is poo r due to sand,
smoke or water vapor blowing in
the wind, or the front vision is
obscured due to water
splashes, snow, dirt or dust stir
up generated by the vehicle in
front or oncoming traffic.
• The stereo came ra’s field of
view is obstructed.
• Through the entra nce or exit of
a tunnel
• The rear aspect of the vehicle in front is low, small or irregular
(for example a low bed trailer,
etc.).
• The obstacle is a fence, a wall or a shutter, etc. with a uniform
pattern (a striped pattern, brick,
etc.) or with no pattern in front.
• The obstacle is a wall or door made of glass or a mirror in
front.
• Driving at night or in a tunnel when there is a ve hicle in front
that does not ha ve its taillights
on
• Driving through a banner or flag, low branches on a tree or
thick/tall vegetation
• On steep uphill or downhill grades
• The stereo camera is obstructed by a hand, etc. (If
even one of the lenses is
obstructed, the system does not
operate properly.)
• It is completel y dark and no
objects are detected.
• The area around the vehicle has a uniform color (such as when
completely covered in snow,
etc.).
Page 175 of 449
1754-5. EyeSight
4
Driving
NOTICE
●The stereo camera monitors
and detects smears or blurs on
the front of the camera. How-
ever, detection is not 100%
accurate.
Under certain conditions, the
function may fail to detect
smears or blurs on the front of
the stereo camera accurately. In
addition, this function may not
detect that there is snow or ice
on the windshield close to the
stereo camera. In such condi-
tions, be sure to keep the wind-
shield clean at all times
(indicated by ). Otherwise
the system may not operate cor-
rectly. When this function
detects that the front of the ste-
reo camera is smeared or
blurred, no EyeSight functions
can be activated except for
Conventional Cruise Control.
●The stereo camera lenses are
precision components. Always
observe the following precau-
tions especially when handling
them.
• Never touch the stereo camera lenses, and do not attempt to
wipe or clean the lenses. Doing
so could damage or soil the
lens, and lead to improper sys-
tem performance. If you ever
touch a lens for any reason, be
sure to contact your Toyota
dealer.
• When cleaning the windshield, cover the front of the camera
casing with paper that does not
collect dust, such as copy
paper. Affix the paper to prevent
glass cleaner from getting on
the camera lenses. At this point,
make sure that the tape’s adhe-
sive surface does not come in
contact with the windshield or
the lens. Be sure to remove the
paper after cleaning.
• When having the inside of wind- shield cleaned at a service sta-
tion, etc., be sure to request that
the attendant covers the cam-
era covers before washing the
vehicle.
• Do not subject the stereo cam- era to a strong impact.
• Do not remove or disassemble the stereo camera.
• Do not change the positions where the stereo camera is
installed or mod ify any of the
surrounding structures.
●Do not install an interior rear-
view mirror other than a genuine
Toyota rearview mirror (such as
a wide-type mirror) and the sun
visor. Also, use the rearview
mirror so that it does not
obstruct the stereo camera.
Failure to do so may affect the
stereo camera’s field of view
and could prevent the EyeSight
system from functioning prop-
erly.
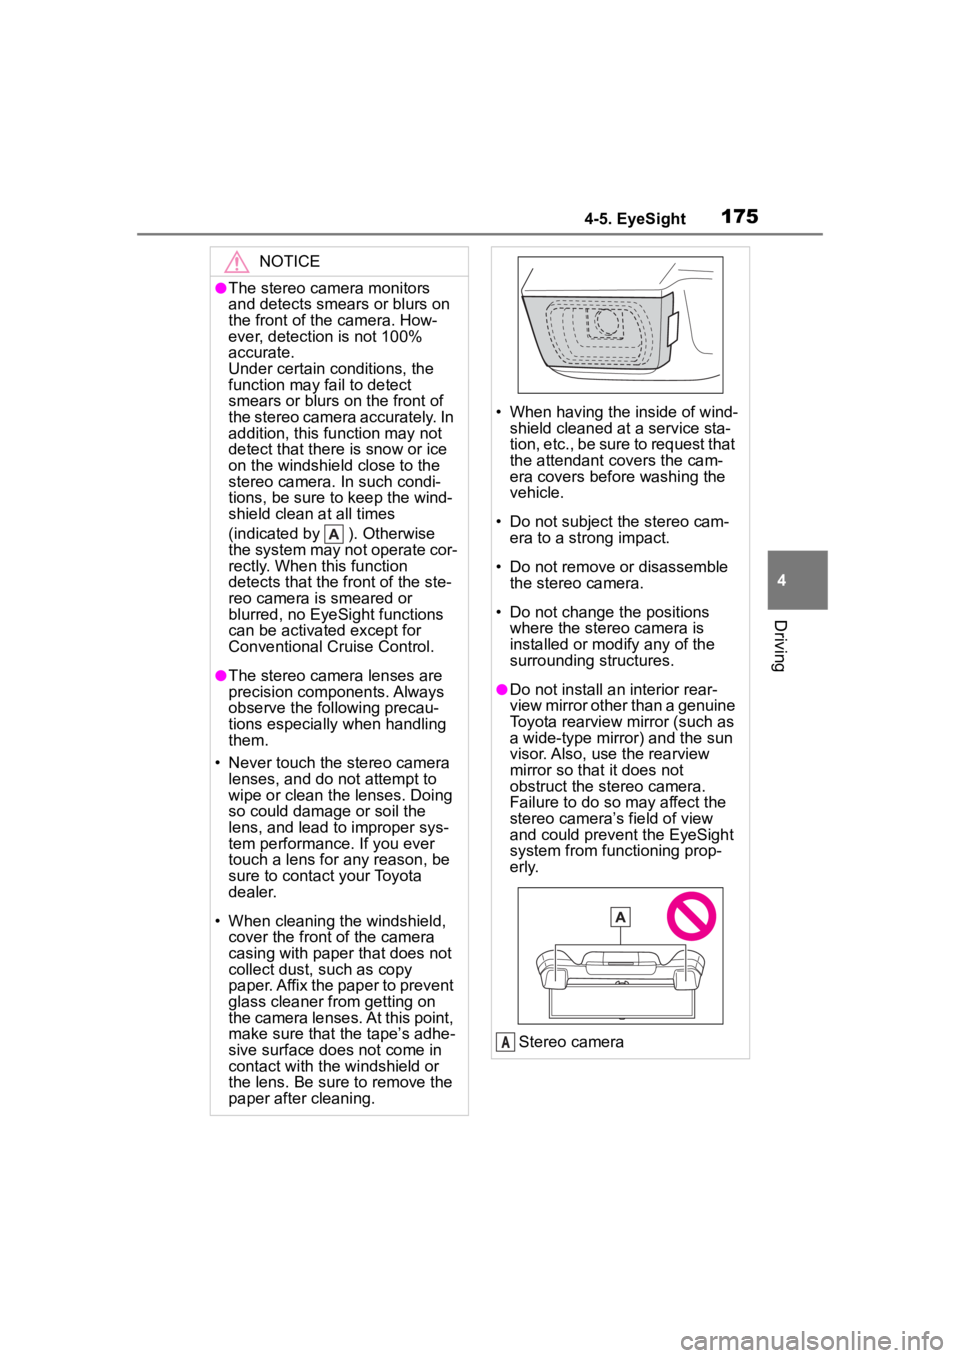
Stereo camera
A
Page 182 of 449
1824-5. EyeSight
WARNING
Fluid has not been fully wiped
off the windshield during or after
washer use.
The target cannot be correctly
recognized because the stereo
camera’s view is obstructed by
water droplets from rain or the
window washer, or by the wiper
blades.
The stereo camera’s field of
view is obstructed.
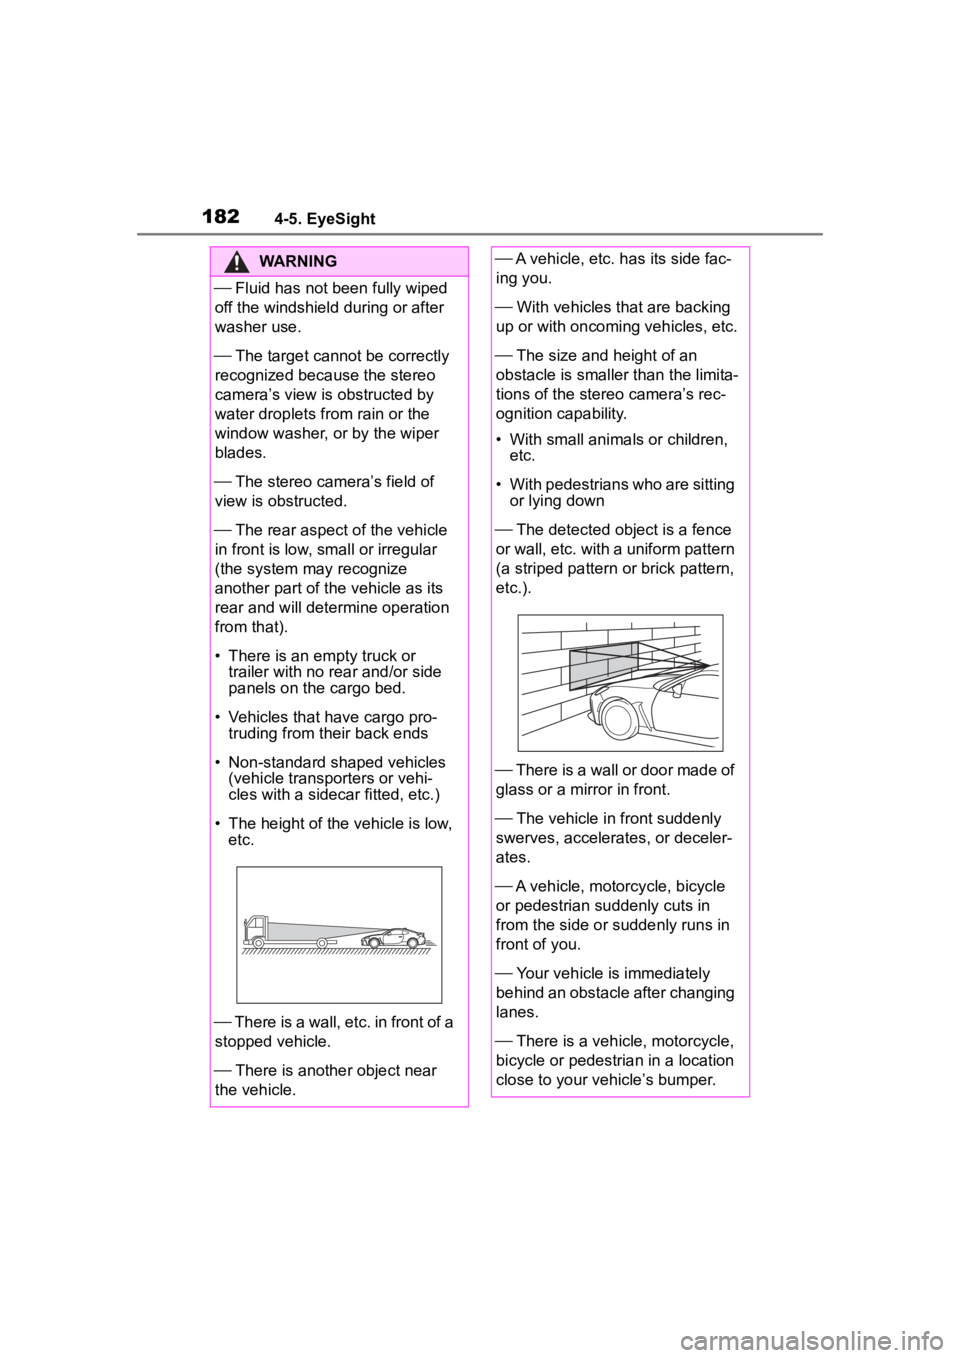
The rear aspect of the vehicle
in front is low, s mall or irregular
(the system may recognize
another part of the vehicle as its
rear and will determine operation
from that).
• There is an empty truck or trailer with no r ear and/or side
panels on the cargo bed.
• Vehicles that have cargo pro- truding from their back ends
• Non-standard shaped vehicles (vehicle transporters or vehi-
cles with a sidecar fitted, etc.)
• The height of the vehicle is low, etc.
There is a wall, etc. in front of a
stopped vehicle.
There is another object near
the vehicle.
A vehicle, etc. has its side fac-
ing you.
With vehicles that are backing
up or with oncoming vehicles, etc.
The size and height of an
obstacle is smaller than the limita-
tions of the stereo camera’s rec-
ognition capability.
• With small animals or children, etc.
• With pedestrians who are sitting or lying down
The detected ob ject is a fence
or wall, etc. with a uniform pattern
(a striped pattern or brick pattern,
etc.).
There is a wall or door made of
glass or a mirror in front.
The vehicle in front suddenly
swerves, accelerates, or deceler-
ates.
A vehicle, motorcycle, bicycle
or pedestrian suddenly cuts in
from the side or suddenly runs in
front of you.
Your vehicle is immediately
behind an obstacle after changing
lanes.
There is a vehicle, motorcycle,
bicycle or pedestrian in a location
close to your vehicle’s bumper.
Page 250 of 449
2504-6. Using other driving systems
●Do not wipe the camera with alco-
hol, benzine or paint thinner.
Otherwise, discoloration may
occur. To remove contamination,
wipe the camera with a cloth
moistened with a diluted neutral
detergent. Then wipe it with a soft,
dry cloth.
●When waxing the vehicle, be care-
ful not to apply the wax to the
camera. If it comes in contact with
the camera, moisten a clean cloth
with a diluted neutral detergent to
remove the wax.
●The camera lens has a hard coat-
ing to help prevent scratches.
However, when washing the vehi-
cle or cleaning the camera lens,
be careful not to scratch the cam-
era lens. Do not use a washing
brush directly on the camera lens.
The image quality of the rear view
camera may deteriorate.
●Strong light shined on the camera lens may develop vertical lines
around the light source. This is not
a malfunction.
●Under the fluore
scent light, the
display may flicker. However, this
is not a malfunction.
●The image of the rear view cam-
era may be slightly different from
the actual color of the objects.
●If there is a mal function on the
multimedia system screen, refer to
“MULTIMEDIA OWNER'S MAN-
UAL”.
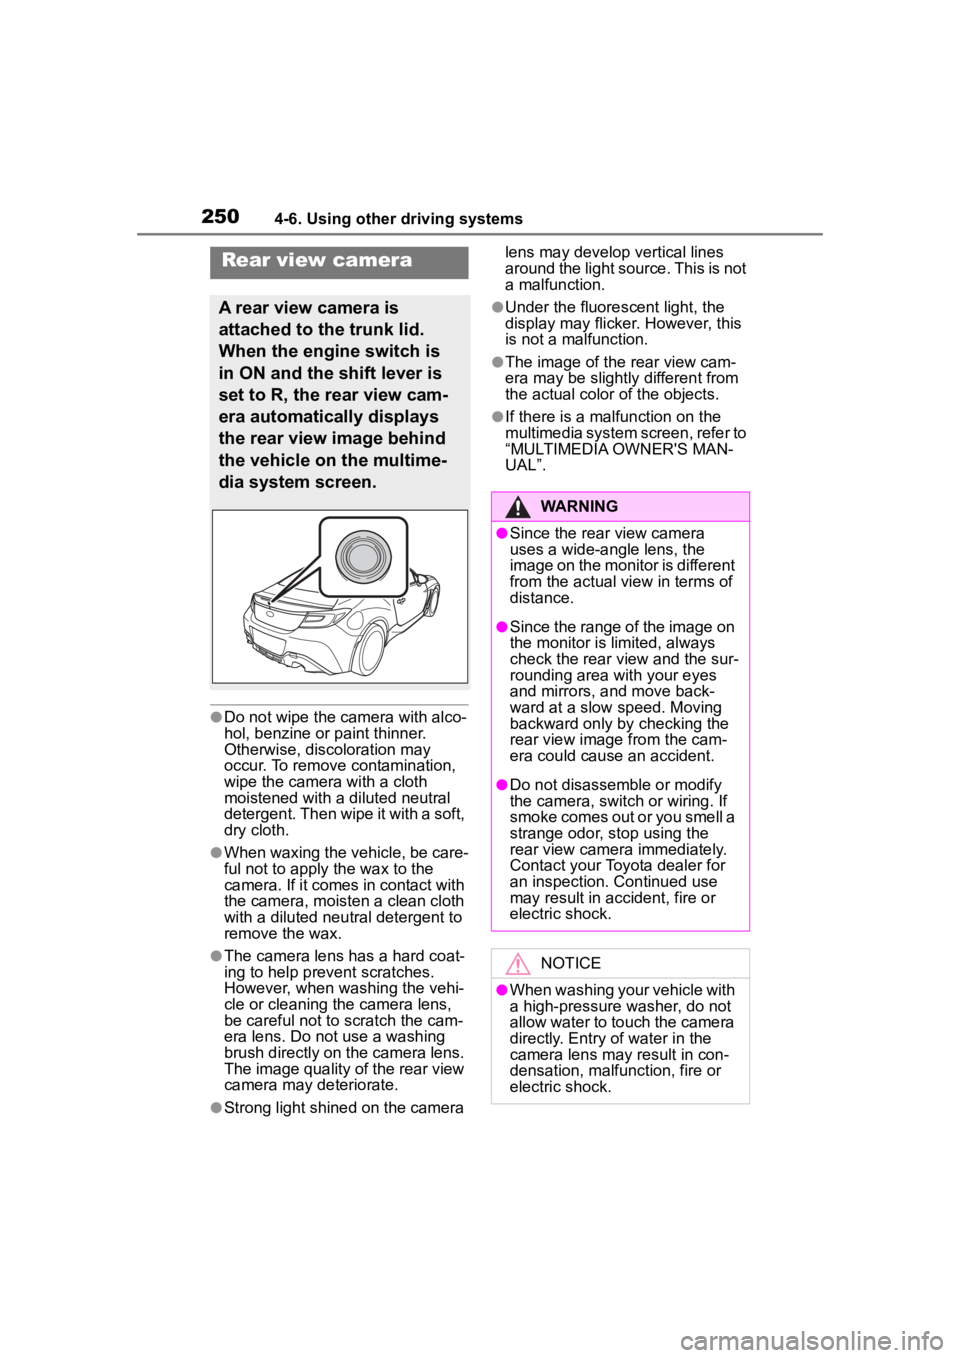
Rear view camera
A rear view camera is
attached to the trunk lid.
When the engine switch is
in ON and the shift lever is
set to R, the rear view cam-
era automatically displays
the rear view image behind
the vehicle on the multime-
dia system screen.
WARNING
●Since the rear view camera
uses a wide-angle lens, the
image on the monitor is different
from the actual view in terms of
distance.
●Since the range of the image on
the monitor is limited, always
check the rear view and the sur-
rounding area with your eyes
and mirrors, and move back-
ward at a slow speed. Moving
backward only by checking the
rear view image from the cam-
era could cause an accident.
●Do not disassemble or modify
the camera, switch or wiring. If
smoke comes out or you smell a
strange odor, stop using the
rear view camera immediately.
Contact your Toyota dealer for
an inspection. Continued use
may result in accident, fire or
electric shock.
NOTICE
●When washing your vehicle with
a high-pressure washer, do not
allow water to touch the camera
directly. Entry of water in the
camera lens may result in con-
densation, malfunction, fire or
electric shock.
Page 251 of 449
2514-6. Using other driving systems
4
Driving
When the shift lever is set to R,
the rear view camera automati-
cally displays the rear view
image from the vehicle. When
the lever is set to other posi-
tions, the image before setting
to R is displayed.
1Set the engine switch to ON.
2 Set the shift lever to R.
●The image of the rear view cam-
era is horizontally reversed as is
the case with the vehicle inside mirror or the outside mirror.
●When “Rear Camera Delay Con-
trol” is on, the r
ear view image
from the r ear view camera will be
displayed on the multimedia sys-
tem screen for a certain amount of
time after the shift lever is shifted
from R to another position. When
any of the following conditions are
met, the rear view image will be
canceled:
• The shift lever is shifted to P (vehi- cles with an automatic transmis-
sion)
• The vehicle speed becomes approximately 5 mph (8 km/h) or
more
• The parking brake is engaged
• 9 seconds have elapsed since the shift lever was shifted from R to
another position
To turn the function on and off, refer
to “MULTIMEDIA OWNER’S MAN-
UAL”.
●It may be difficult to see the image
of the rear view camera in the fol-
lowing cases. This is not a mal-
function of the camera.
• The vehicle is in a dark place (at night, in a tunnel, etc.).
• The vehicle is in an extremely hot or cold place.
• An object (such as raindrops,
snow, dirt, etc.) that disturbs the
view of the rear view camera
sticks to the lens of the camera.
• Strong light is shining directly on the camera lens ( occasionally,
there are vertical lines on the
screen).
The area from the rear end of
the bumper can be viewed.
Areas at both ends of the
bumper and areas just under the
bumper cannot be viewed.
NOTICE
●Since the camera is a precision
device, do not subject it to
strong impacts. Otherwise, mal-
function, fire or electric shock
may occur.
●If mud or snow sticks to or is fro-
zen on the camera, you must be
very careful when removing it.
Otherwise, damage to the cam-
era may cause a fire or electric
shock. Pour water or lukewarm
water over the camera to
remove mud and ice, and wipe
it with a soft, dry cloth.
●Do not put a flame close to the
camera or wirin g. Otherwise,
damage or fire may occur.
●When replacing the fuse, be
sure to use a fuse with the spec-
ified rating. Use of a fuse with a
different rating may result in a
malfunction.
●If you use the rear view camera
for a long time while the engine
is not operated, the battery may
become completely discharged.
How to use the rear view
camera
Viewing range on the
screen
Page 270 of 449

2705-1. Using the air conditioning system
5-1.Using the air conditioning system
Left-hand side temperature setting display
Left-hand side temperature control switch
Climate control mode display
Fan speed control switch
Right-hand side temperature control switch
Right-hand side temperature setting display
“MAX A/C” switch
“SYNC” switch
Outside/recirculated air mode switch
“A/C” switch
Airflow mode control switch
Rear window defogger and outside rear view mirror defoggers
switch
“ON/OFF” switch
Windshield defogger switch
Automatic mode switch
Automatic air conditioning system
Air outlets are automatically selected and fan speed is auto-
matically adjusted according to the set temperature setting.
Air conditioning controls
A
C
D