Page 319 of 449
3196-3. Do-it-yourself maintenance
6
Maintenance and care
When 2 sets of ID codes have been
registered, either ID code set can be
selected.
1Park the vehicle in a safe
place and turn the engine
switch to ON.
2 Press the tire pressure warn-
ing reset switch 3 times
within 3 seconds.
3 The tire pressure warning
light will illuminate for 3 sec-
onds and then blink 3 times.
4 The tire pressure warning
light will blink for 1 minute
and then illuminate.
5 When the ID code change
has completed, the tire pres-
sure warning light will turn off.
Check that tire pressures are dis-
played on the multi-information dis-
play.
Stop the vehicle in a safe
place on a hard, flat surface.
Set the parking brake.
Shift the shift lever to P (auto-
matic transmission) or R
(manual transmission).
Stop the engine.
■Jack and Jack handle
As your vehicle is equipped with an
emergency tire puncture repair kit, a
jack and jack handle for replacing a
tire are not include d with your vehi-
cle. To purchase a jack and jack
handle, contact your Toyota dealer.
●Jack
●Jack handle
Changing the ID code set
Replacing the tire
When raising your vehicle
with a jack, position the jack
correctly.
Improper placement may
damage your vehicle or
cause injury.
If necessary tire replace-
ment seems difficult to per-
form, contact your Toyota
dealer.
Before jacking up the
vehicle
Page 320 of 449
3206-3. Do-it-yourself maintenance
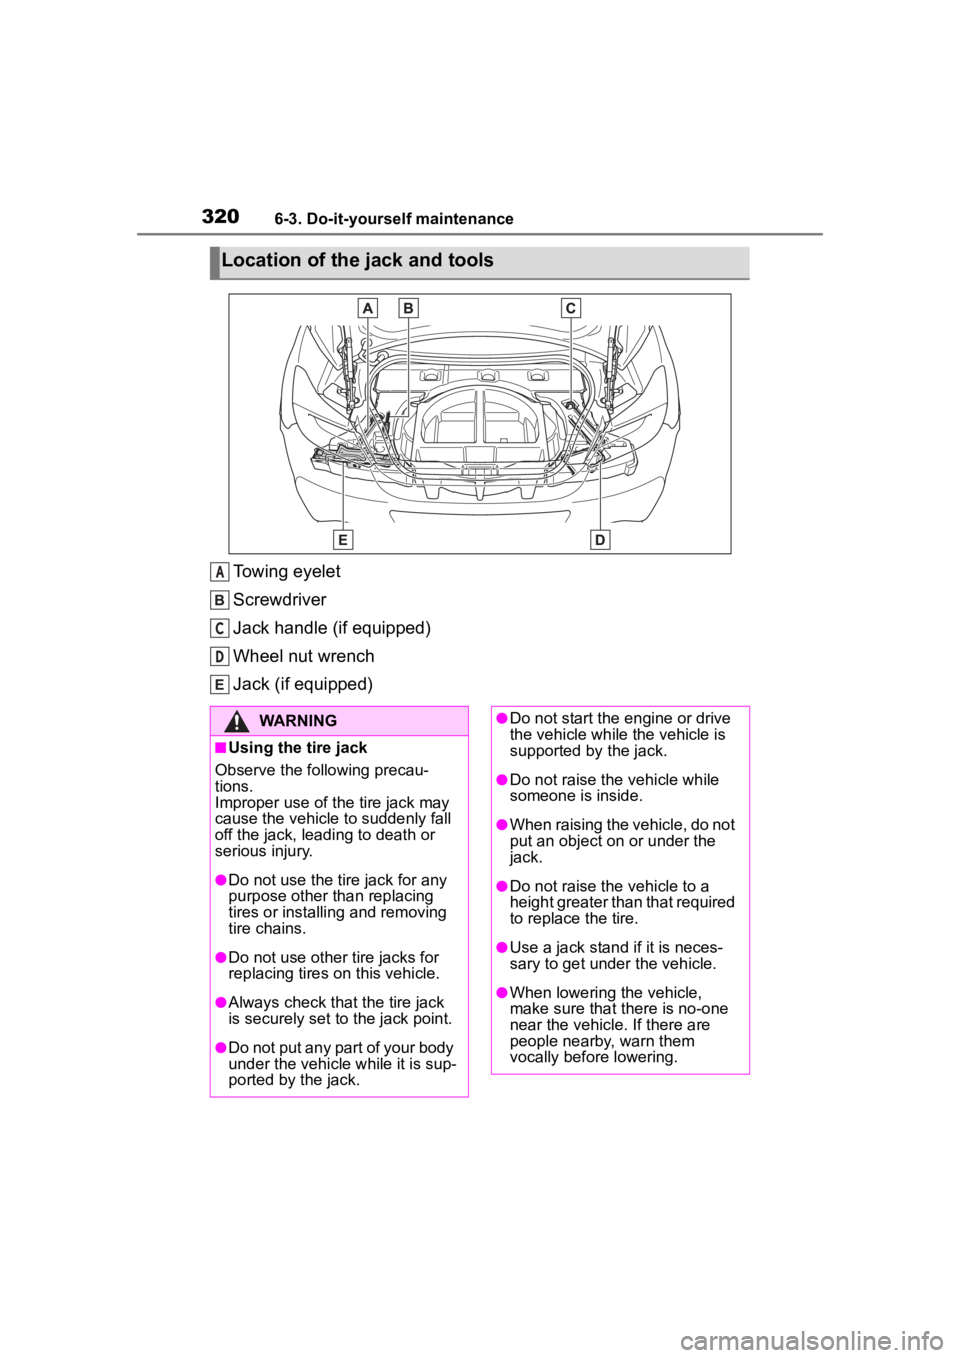
Towing eyelet
Screwdriver
Jack handle (if equipped)
Wheel nut wrench
Jack (if equipped)
Location of the jack and tools
A
C
D
WARNING
■Using the tire jack
Observe the following precau-
tions.
Improper use of the tire jack may
cause the vehicle to suddenly fall
off the jack, leading to death or
serious injury.
●Do not use the tire jack for any
purpose other than replacing
tires or installing and removing
tire chains.
●Do not use other tire jacks for
replacing tires on this vehicle.
●Always check that the tire jack
is securely set to the jack point.
●Do not put any part of your body
under the vehicle while it is sup-
ported by the jack.
●Do not start the engine or drive
the vehicle while the vehicle is
supported by the jack.
●Do not raise the vehicle while
someone is inside.
●When raising the vehicle, do not
put an object on or under the
jack.
●Do not raise the vehicle to a
height greater than that required
to replace the tire.
●Use a jack stand if it is neces-
sary to get under the vehicle.
●When lowering the vehicle,
make sure that there is no-one
near the vehicle. If there are
people nearby, warn them
vocally before lowering.
Page 327 of 449
3276-3. Do-it-yourself maintenance
6
Maintenance and care
1Turn the engine switch off.
2 Open the glove box. Slide off
the damper.
3 Push in each side of the
glove box and pull the glove
box toward you to disconnect
the claws.
4 Lower the glove box slowly
until surface ( ) is horizontal
with the floor, then pull it out.
(Simply pulling with gentle force will disengage the lower
claws.)
Do not forcibly pull the glove box.
Otherwise, the lower claws ( ) or
the lower claw engagement points
( ) may be deformed, making it
difficult to reinstall or close the
glove box.
5
Remove the filter cover.
6 Remove the air conditioning
filter and replace it with a new
one.
The “ UP” marks shown on the
filter and the filter case should be
pointing up.
Air condition ing filter
The air conditioning filter
must be changed regularly
to maintain air conditioning
efficiency.
Removing the air condi-
tioning filter
A
B
C
Page 330 of 449
3306-3. Do-it-yourself maintenance
1Turn the engine switch off.
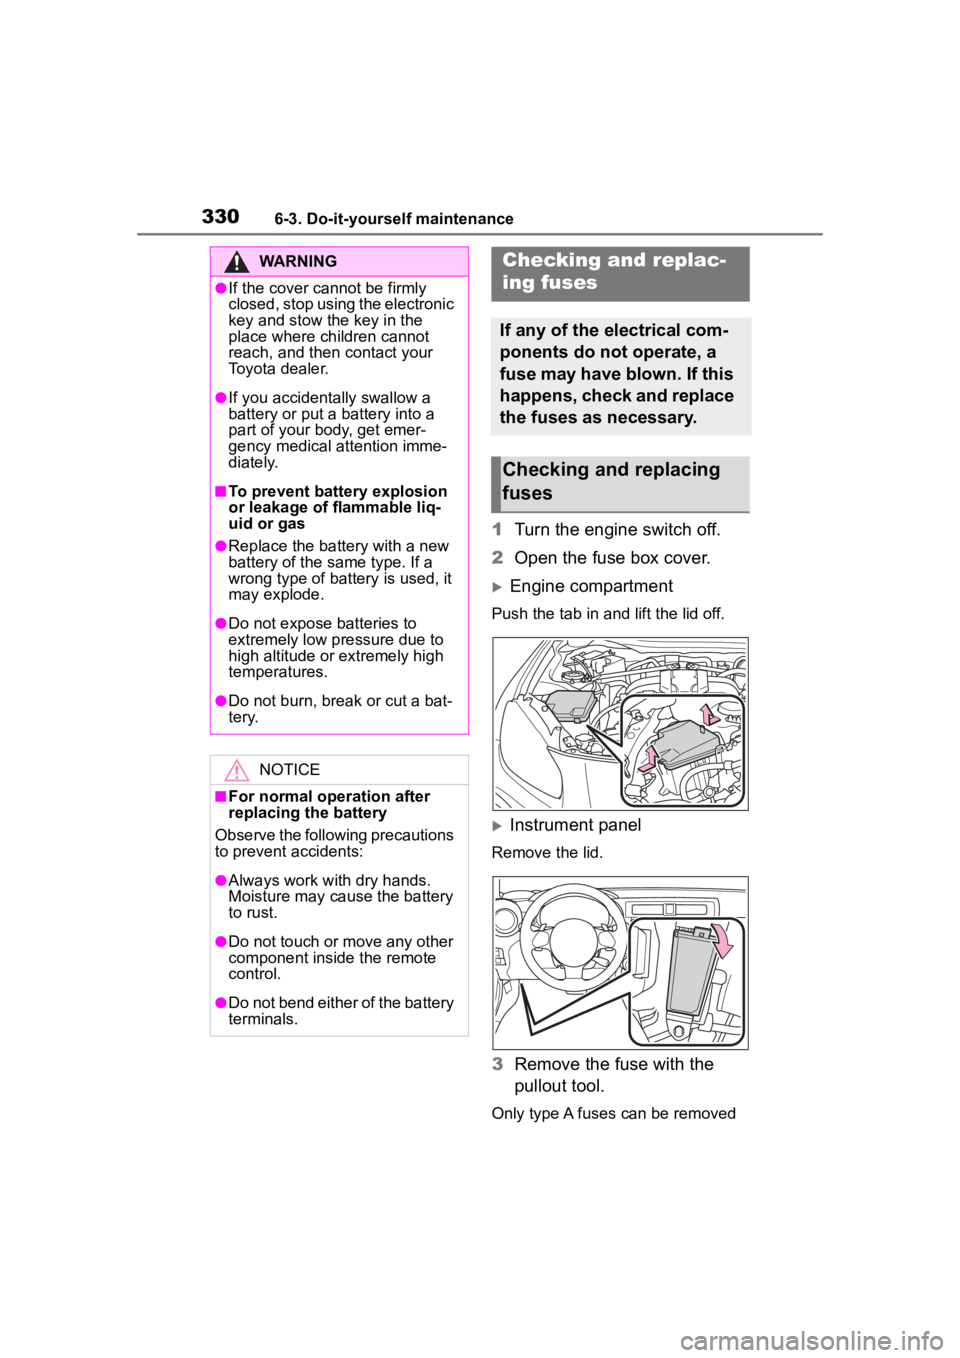
2 Open the fuse box cover.
Engine compartment
Push the tab in and lift the lid off.
Instrument panel
Remove the lid.
3Remove the fuse with the
pullout tool.
Only type A fuses can be removed
WARNING
●If the cover cannot be firmly
closed, stop using the electronic
key and stow the key in the
place where children cannot
reach, and then contact your
Toyota dealer.
●If you accidentally swallow a
battery or put a b attery into a
part of your body, get emer-
gency medical attention imme-
diately.
■To prevent battery explosion
or leakage of flammable liq-
uid or gas
●Replace the battery with a new
battery of the same type. If a
wrong type of battery is used, it
may explode.
●Do not expose batteries to
extremely low pressure due to
high altitude or extremely high
temperatures.
●Do not burn, bre ak or cut a bat-
tery.
NOTICE
■For normal operation after
replacing the battery
Observe the following precautions
to prevent accidents:
●Always work with dry hands.
Moisture may cau se the battery
to rust.
●Do not touch or move any other
component inside the remote
control.
●Do not bend either of the battery
terminals.
Checking a nd replac-
ing fuses
If any of the electrical com-
ponents do not operate, a
fuse may have blown. If this
happens, check and replace
the fuses as necessary.
Checking and replacing
fuses
Page 335 of 449
3356-3. Do-it-yourself maintenance
6
Maintenance and care
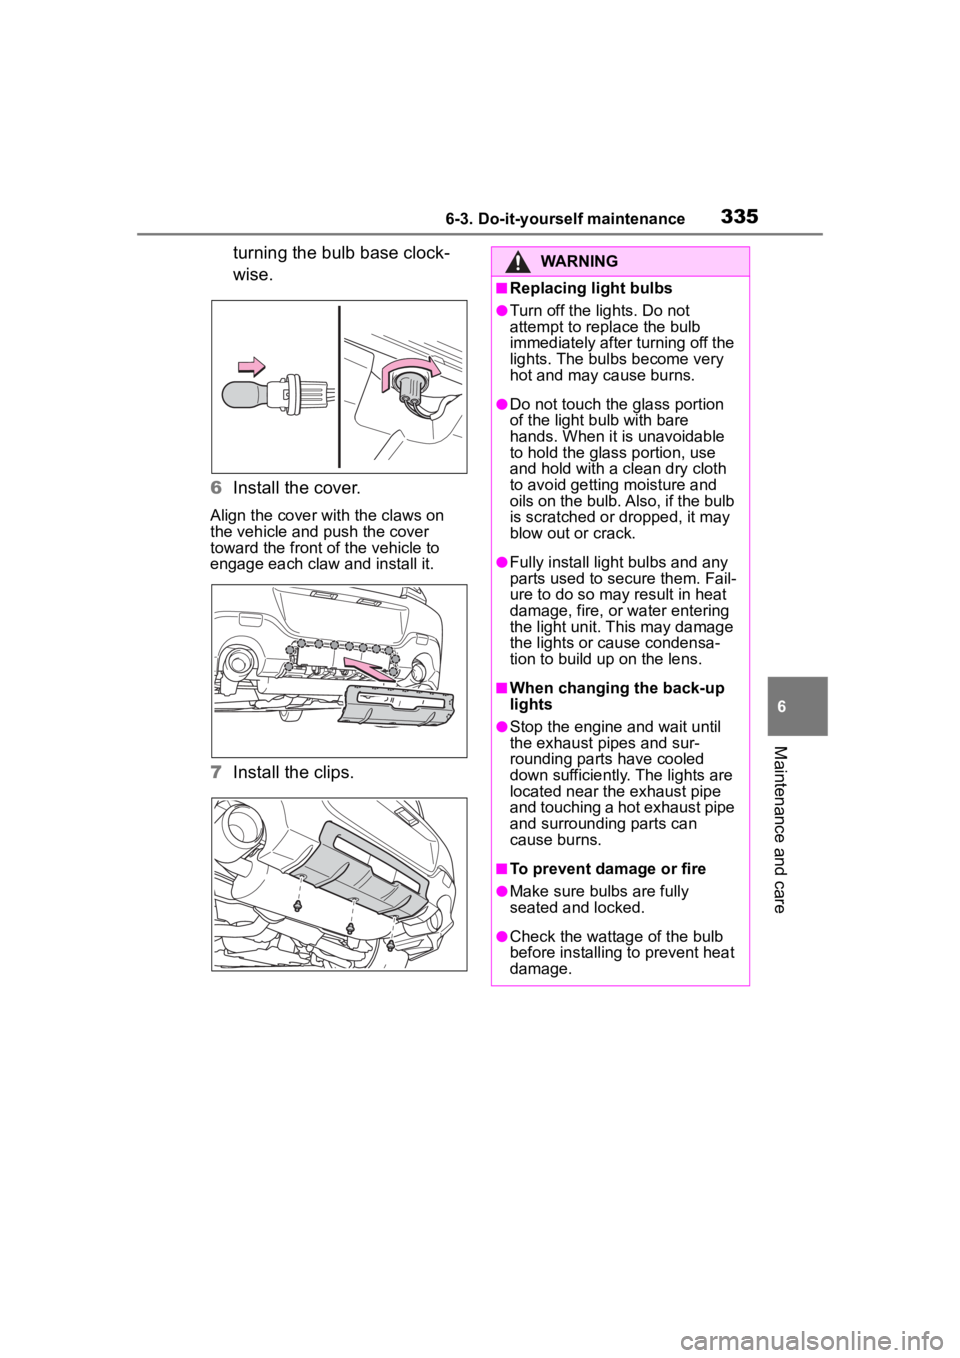
turning the bulb base clock-
wise.
6 Install the cover.
Align the cover with the claws on
the vehicle and push the cover
toward the front of the vehicle to
engage each claw and install it.
7Install the clips.
WARNING
■Replacing light bulbs
●Turn off the lights. Do not
attempt to replace the bulb
immediately after turning off the
lights. The bulbs become very
hot and may cause burns.
●Do not touch the glass portion
of the light bulb with bare
hands. When it is unavoidable
to hold the glass portion, use
and hold with a clean dry cloth
to avoid getting moisture and
oils on the bulb. Also, if the bulb
is scratched or dropped, it may
blow out or crack.
●Fully install light bulbs and any
parts used to secure them. Fail-
ure to do so may result in heat
damage, fire, or water entering
the light unit. This may damage
the lights or cause condensa-
tion to build up on the lens.
■When changing the back-up
lights
●Stop the engine and wait until
the exhaust pi pes and sur-
rounding parts have cooled
down sufficiently. The lights are
located near the exhaust pipe
and touching a hot exhaust pipe
and surrounding parts can
cause burns.
■To prevent damage or fire
●Make sure bulbs are fully
seated and locked.
●Check the wattage of the bulb
before installing to prevent heat
damage.
Page 337 of 449

337
7
7
When trouble arises
When trouble arises
.7-1. Essential informationEmergency flashers .... 338
If your vehicle has to be stopped in an emergency.................................. 338
If the vehicle is submerged or water on the road is ris-
ing ............................. 339
7-2. Steps to take in an emer- gency
If your vehicle needs to be towed......................... 341
If you think something is wrong ........................ 346
Fuel pump shut off system .................................. 347
If a warning light turns on or a warning buzzer sounds.................................. 348
If a warning message is dis- played........................ 357
If you have a flat tire.... 358
If the engine will not start .................................. 367
If you lose your keys ... 369
If the fuel filler door cannot be opened ................. 369
If the electronic key does not operate properly .. 370
If the vehicle battery is dis- charged ..................... 372
If your vehicle overheats .................................. 375If the vehicle becomes stuck
.................................. 377
Page 338 of 449
3387-1. Essential information
7-1.Essential information
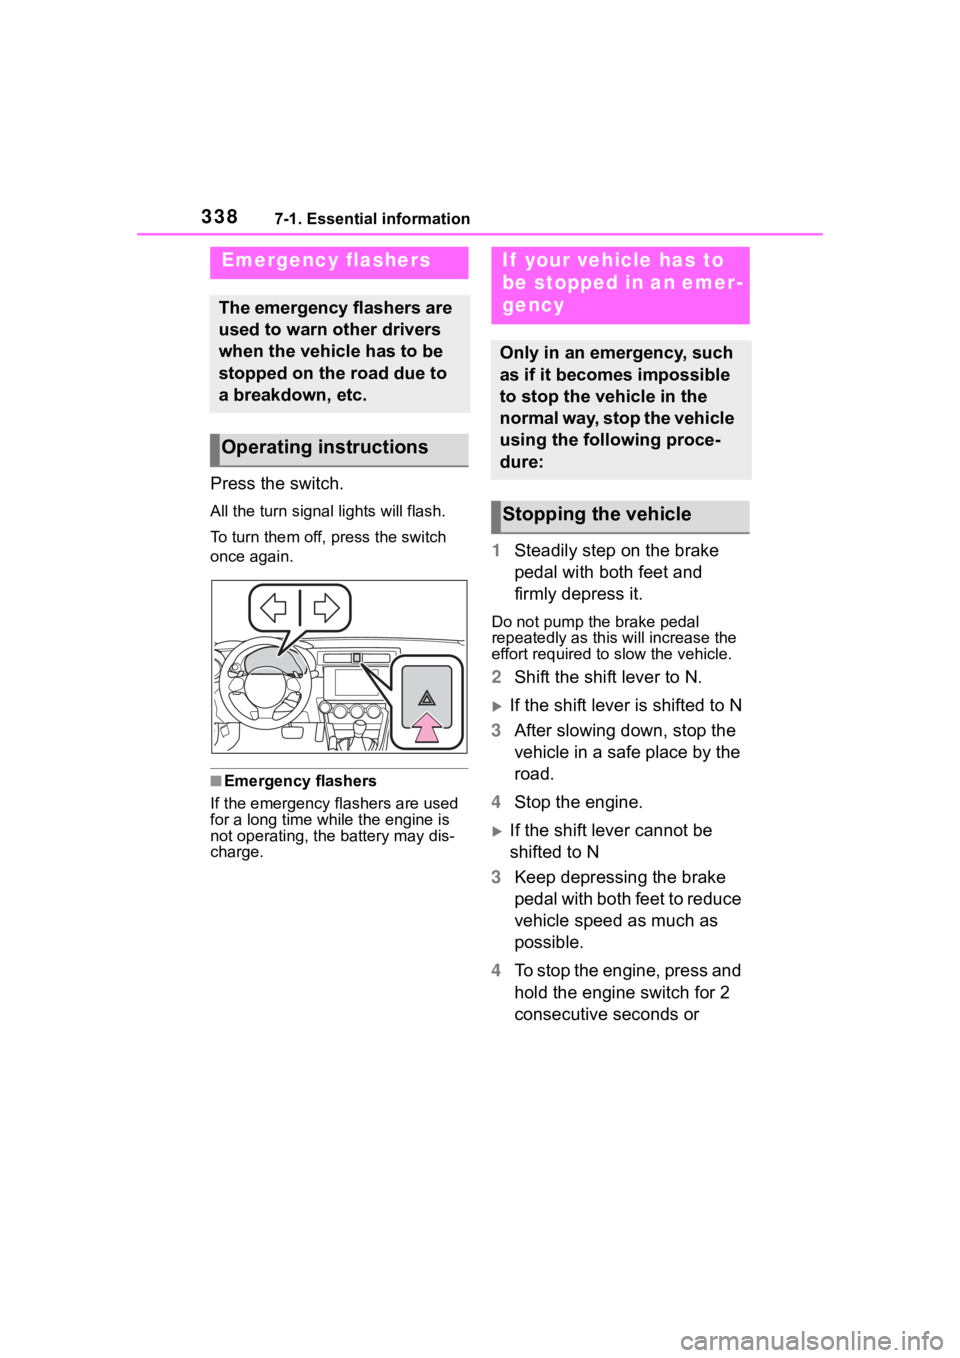
Press the switch.
All the turn signal lights will flash.
To turn them off, press the switch
once again.
■Emergency flashers
If the emergency fl ashers are used
for a long time while the engine is
not operating, the battery may dis-
charge.
1 Steadily step on the brake
pedal with both feet and
firmly depress it.
Do not pump the brake pedal
repeatedly as this will increase the
effort required to slow the vehicle.
2Shift the shift lever to N.
If the shift lever is shifted to N
3 After slowing down, stop the
vehicle in a safe place by the
road.
4 Stop the engine.
If the shift lever cannot be
shifted to N
3 Keep depressing the brake
pedal with both feet to reduce
vehicle speed as much as
possible.
4 To stop the engine, press and
hold the engine switch for 2
consecutive seconds or
Emergency flashers
The emergency flashers are
used to warn other drivers
when the vehicle has to be
stopped on the road due to
a breakdown, etc.
Operating instructions
If your vehicle has to
be stopped in an emer-
gency
Only in an emergency, such
as if it becomes impossible
to stop the vehicle in the
normal way, stop the vehicle
using the following proce-
dure:
Stopping the vehicle
Page 339 of 449
3397-1. Essential information
7
When trouble arises
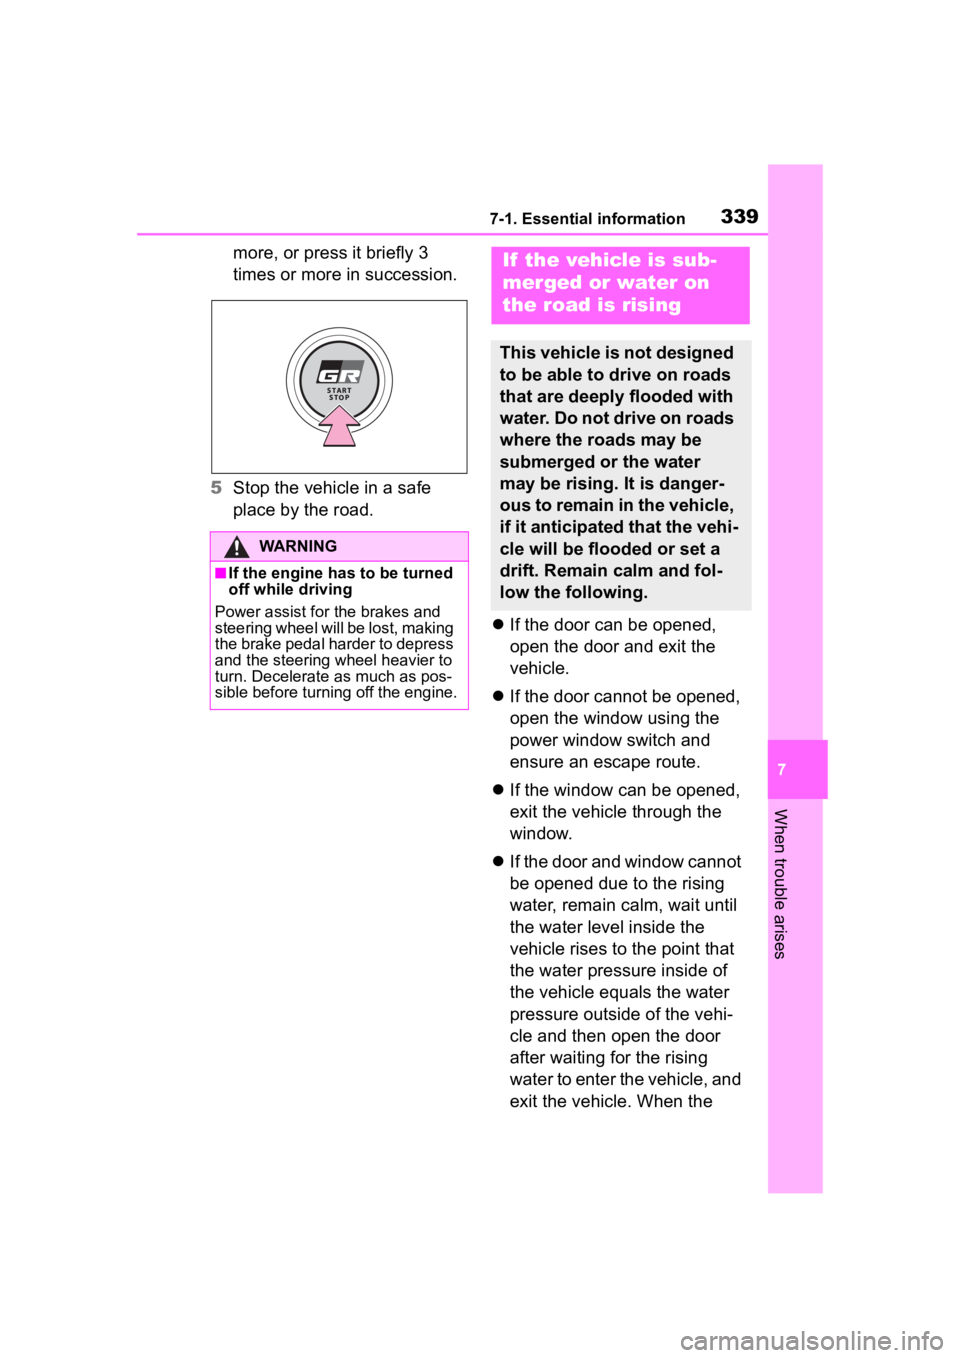
more, or press it briefly 3
times or more in succession.
5 Stop the vehicle in a safe
place by the road.
If the door can be opened,
open the door and exit the
vehicle.
If the door cannot be opened,
open the window using the
power window switch and
ensure an escape route.
If the window can be opened,
exit the vehicle through the
window.
If the door and window cannot
be opened due to the rising
water, remain calm, wait until
the water level inside the
vehicle rises to the point that
the water pressure inside of
the vehicle equals the water
pressure outside of the vehi-
cle and then open the door
after waiting for the rising
water to enter the vehicle, and
exit the vehicle. When the
WARNING
■If the engine has to be turned
off while driving
Power assist for the brakes and
steering wheel will be lost, making
the brake pedal harder to depress
and the steering wheel heavier to
turn. Decelerate as much as pos-
sible before turning off the engine.
If the vehicle is sub-
merged or water on
the road is rising
This vehicle is not designed
to be able to drive on roads
that are deeply flooded with
water. Do not drive on roads
where the roads may be
submerged or the water
may be rising. It is danger-
ous to remain in the vehicle,
if it anticipated that the vehi-
cle will be flooded or set a
drift. Remain calm and fol-
low the following.