Page 149 of 296

to display detailed information about the dampers for each wheel, including ride height, compression and
rebound values, and body accelerations.
Auto-Raising Locations
Whenever you raise the suspension to High or Very
High, the location is automatically saved. By saving the
location, you do not need to manually raise the
suspension every time you arrive at a frequently-used location where you have previously raised the
suspension. When you return to the saved location,
Model X raises the suspension and the instrument panel
displays a message indicating that the suspension is being raised.
When saving locations, Model X also saves the Keep
until XX mph setting (if specified).
NOTE: When returning to a saved location and driving
faster than the
High and Very High suspension settings
allow, the suspension does not raise until
Model X slows
down.
NOTE: After leaving a saved location, the suspension
automatically lowers. However, it may not lower until
Model X meets the speed and distance threshold at
which the suspension lowers.
NOTE: If Model X reaches a saved location and the
existing suspension setting is already higher than the level that has been saved for that location, the ride height is not adjusted.
To remove an auto-raising location
If you do not want the suspension to automatically raise at a location, touch to deselect
Always raise at this
location in the popup that appears when you arrive at a
saved location.
Or, when using the Raise Suspension
shortcut on the main Controls window, touch to deselect
Location Saved.
Self-Leveling
Model X equipped with air suspension automatically
self-levels, even when power is
off. To prevent damage
when jacking or lifting the vehicle, you must activate
Jack Mode to disable self-leveling (press the brake pedal
and touch
Controls > Service > Jack Mode). For more
details, see
Jack Mode on page 202.
Air Suspension
147Using the Touchscreen
Page 169 of 296

To add a destination to your Favorites list touch its pin on the map, then touch the star icon on the popup screen that
appears. Enter a name (or leave as-is to accept the default name), then touch
Add
to Favorites. The star becomes solid and
the destination is included on your
Favorites list.
To delete a Recent or Favorite destination, touch it on the destination list and hold it down
briefly until the X
appears. Then touch the X to delete it from the list.
Home and Work locations also display under the
navigation search bar. Touch to set an address to the corresponding location. After entering the address, touch
Save as Home or Save as Work. Then simply
touch these shortcuts whenever you want to navigate home or to work.
To change or delete the corresponding address, press
and hold the
Home or Work icon. A popup allows you to
enter a new address and
Save as Home or Save as Work.
Or touch
Clear Home or Clear Work to remove
associated addresses entirely.
NOTE: Based on your usage patterns, Model X may
prompt you to save a location as Home or Work.
NOTE: Once a Home or Work location is saved, Model X
may prompt you to navigate to your Work location in
the mornings and to your Home location in the evenings
and provide an estimated driving time based on current
traffic conditions. See Automatic Navigation on page
166.
For security reasons, if you sell Model X, it is
recommended that you delete your Home and Work
locations. You can delete these individually or you can perform a factory reset to erase all personal data (touch
Controls > Service > Factory Reset).
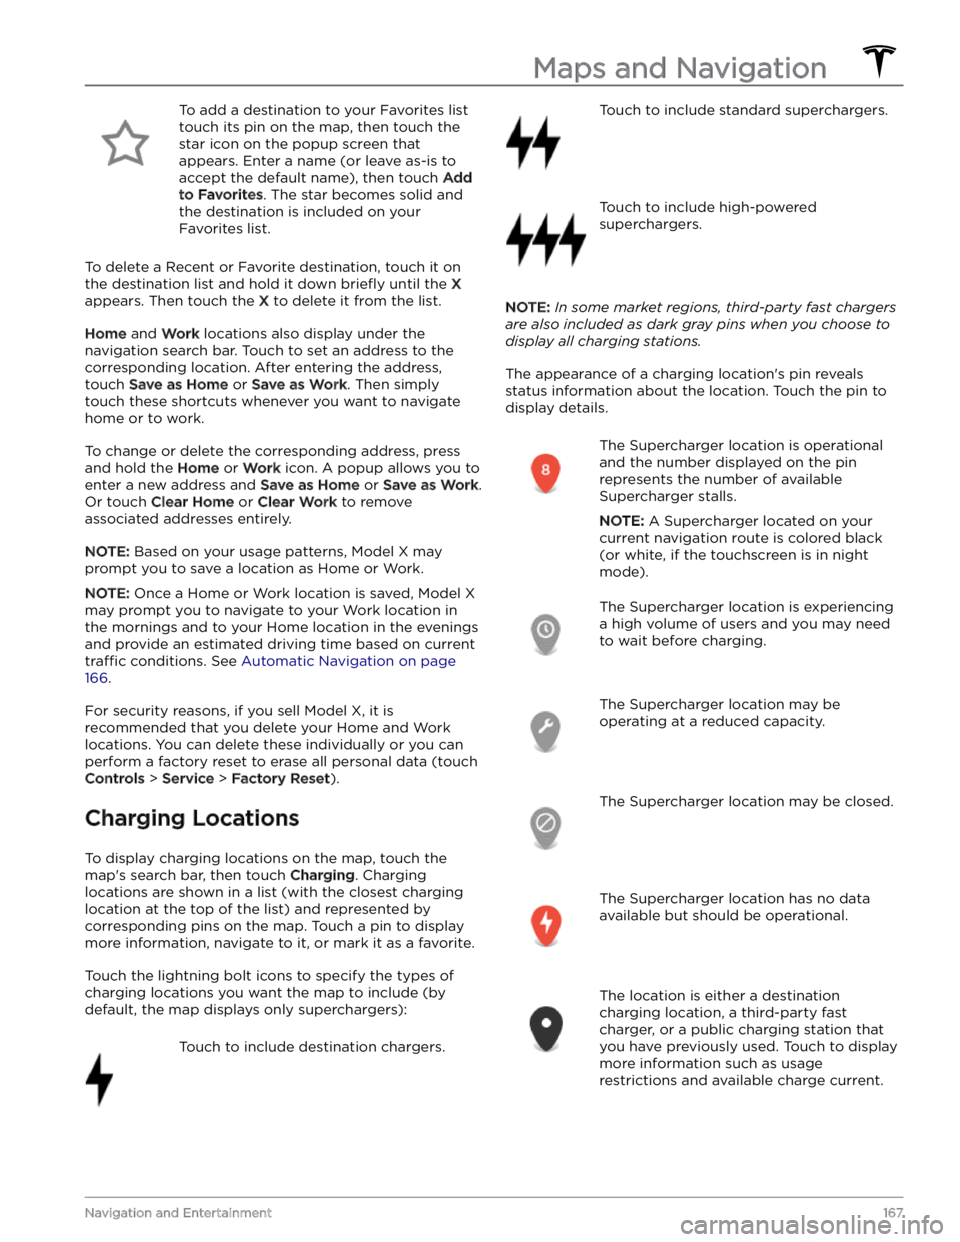
Charging Locations
To display charging locations on the map, touch the map
Page 175 of 296
Overview
NOTE: Entertainment options vary by market region.
The touchscreen displays the Entertainment screen when you choose any of the following apps:
Theater: Play various video streaming services (such as Netflix, YouTube, Hulu, etc.) while parked.
Available only if
Model X is connected to WiFi, or is equipped with premium connectivity and a cellular
signal is available.
Arcade: Want to game? Depending on the game, you may need to use the steering yoke (or steering
wheel) buttons or a Bluetooth or USB controller to play. See Gaming Controllers on page 174.
Toybox: Play in the Toybox while parked.WARNING: Use these features only when Model X is parked. Always pay attention to road and traffic
conditions when driving. Using these features while driving is illegal and very dangerous.
NOTE: You can also use voice commands to access these features (see Voice Commands on page 148).
Toybox
Your vehicle
Page 178 of 296
High Voltage Components
1.
Heat Pump Assembly
2.
Front Drive Unit
3.
Service Access Panel for High Voltage Components (Penthouse)
4.
High Voltage Battery
5.
High Voltage Busbars
6.
Rear Drive Unit
7.
Charge Port
NOTE: Plaid version not shown.
WARNING: The high voltage system has no user serviceable parts. Do not disassemble, remove or replace high
voltage components, cables or connectors. High voltage cables are typically colored orange for easy
identification.
WARNING: Read and follow all instructions provided on the labels that are attached to Model X. These labels
are there for your safety.
WARNING: In the unlikely event that a fire occurs, immediately contact your local fire emergency responders.
Electric Vehicle Components
176MODEL X Owner
Page 190 of 296
Service Intervals
Your vehicle should generally be serviced on an as-needed basis. However, Tesla recommends the following maintenance items and intervals, as applicable to your
vehicle, to ensure continued reliability and
efficiency of
your
Model X.
For more do-it-yourself maintenance procedures and information, see
https://www.tesla.com/support/do-it-
yourself-guides.
For more information on vehicle alerts, see
Troubleshooting Alerts on page 228.
Page 192 of 296
Displaying Tire Pressures
Tire pressures display on the touchscreen by touching
Controls > Service. The pressure of each tire displays in
the visualization of your
Model X, in addition to what
time your tire pressures were last measured. You can choose whether you want to display tire pressures using Bar or PSI by touching
Controls > Display > Tire
Pressure. The touchscreen also displays your vehicle
Page 194 of 296

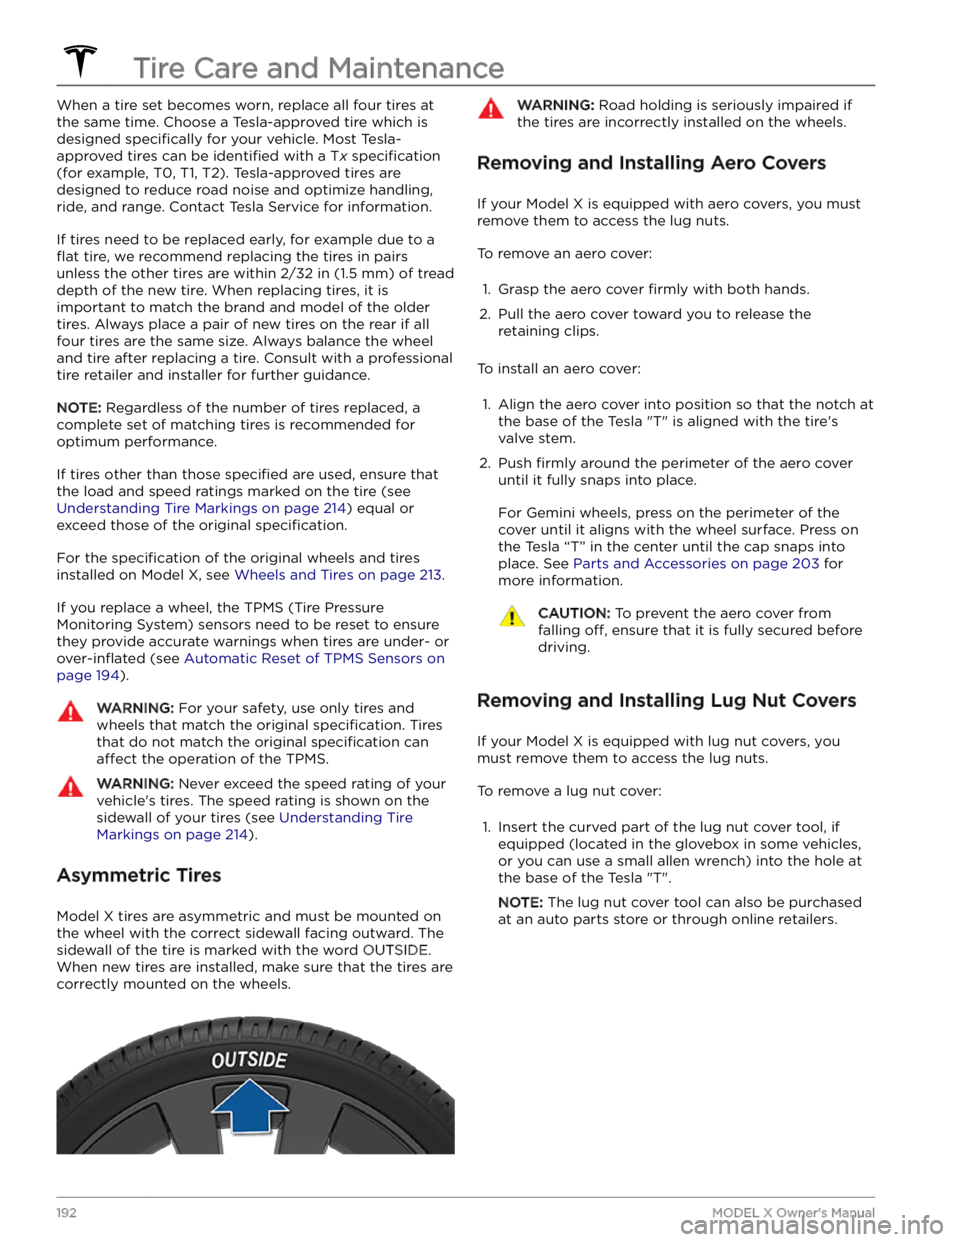
When a tire set becomes worn, replace all four tires at
the same time. Choose a Tesla-approved tire which is
designed
specifically for your vehicle. Most Tesla-
approved tires can be
identified with a Tx specification
(for example, T0, T1, T2). Tesla-approved tires are
designed to reduce road noise and optimize handling, ride, and range. Contact Tesla Service for information.
If tires need to be replaced early, for example due to a
flat tire, we recommend replacing the tires in pairs
unless the other tires are within
2/32 in (1.5 mm) of tread
depth of the new tire. When replacing tires, it is important to match the brand and model of the older
tires. Always place a pair of new tires on the rear if all four tires are the same size. Always balance the wheel and tire after replacing a tire. Consult with a professional tire retailer and installer for further guidance.
NOTE: Regardless of the number of tires replaced, a
complete set of matching tires is recommended for
optimum performance.
If tires other than those specified are used, ensure that
the load and speed ratings marked on the tire
(see
Understanding Tire Markings on page 214) equal or
exceed those of the original
specification.
For the specification of the original wheels and tires
installed on
Model X, see Wheels and Tires on page 213.
If you replace a wheel, the TPMS (Tire Pressure Monitoring System) sensors need to be reset to ensure they provide accurate warnings when tires are under-
or
over-inflated (see Automatic Reset of TPMS Sensors on
page 194).
WARNING: For your safety, use only tires and
wheels that match the original specification. Tires
that do not match the original specification can
affect the operation of the TPMS.
WARNING: Never exceed the speed rating of your
vehicle
Page 203 of 296

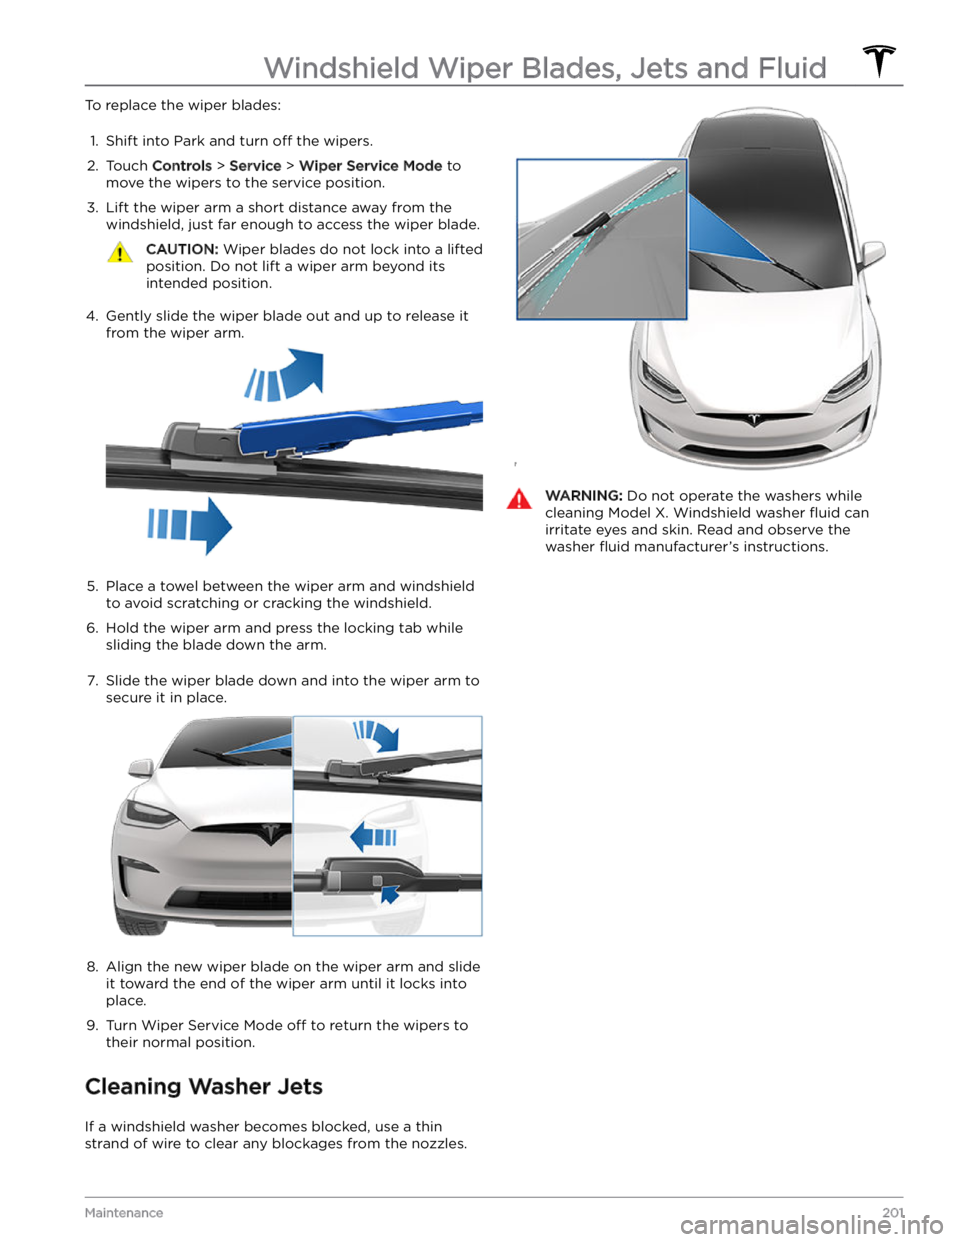
To replace the wiper blades:1.
Shift into Park and turn off the wipers.
2.
Touch Controls > Service > Wiper Service Mode to
move the wipers to the service position.
3.
Lift the wiper arm a short distance away from the windshield, just far enough to access the wiper blade.
CAUTION: Wiper blades do not lock into a lifted
position. Do not lift a wiper arm beyond its
intended position.
4.
Gently slide the wiper blade out and up to release it from the wiper arm.
5.
Place a towel between the wiper arm and windshield to avoid scratching or cracking the windshield.
6.
Hold the wiper arm and press the locking tab while sliding the blade down the arm.
7.
Slide the wiper blade down and into the wiper arm to
secure it in place.
8.
Align the new wiper blade on the wiper arm and slide
it toward the end of the wiper arm until it locks into place.
9.
Turn Wiper Service Mode off to return the wipers to
their normal position.
Cleaning Washer Jets
If a windshield washer becomes blocked, use a thin
strand of wire to clear any blockages from the nozzles.
WARNING: Do not operate the washers while
cleaning Model X. Windshield washer fluid can
irritate eyes and skin. Read and observe the
washer fluid manufacturer